

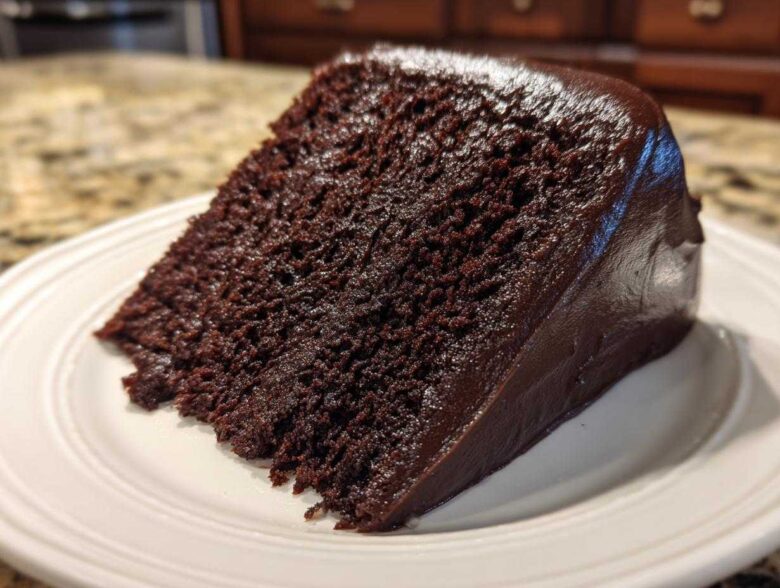
Oh, friend, I know the struggle! You want a chocolate cake that sinks your teeth into—something intensely dark and fudgy—but you don’t want to spend an entire Saturday washing bowls. For years, I tried every cookbook recipe out there, chasing that mythical bakery-style crumb. Some were too dry, some were too fussy, and frankly, most of them made me dread cleanup. Then, finally, I cracked the code. I’m telling you right now, this is the ultimate moist, one-bowl chocolate cake recipe you’ve been looking for. It’s my go-to, the one that gets called for every single birthday, last-minute dinner party, or just when I need a real chocolate fix. Trust me, after trying this chocolate cake recipe, you can officially stop searching!
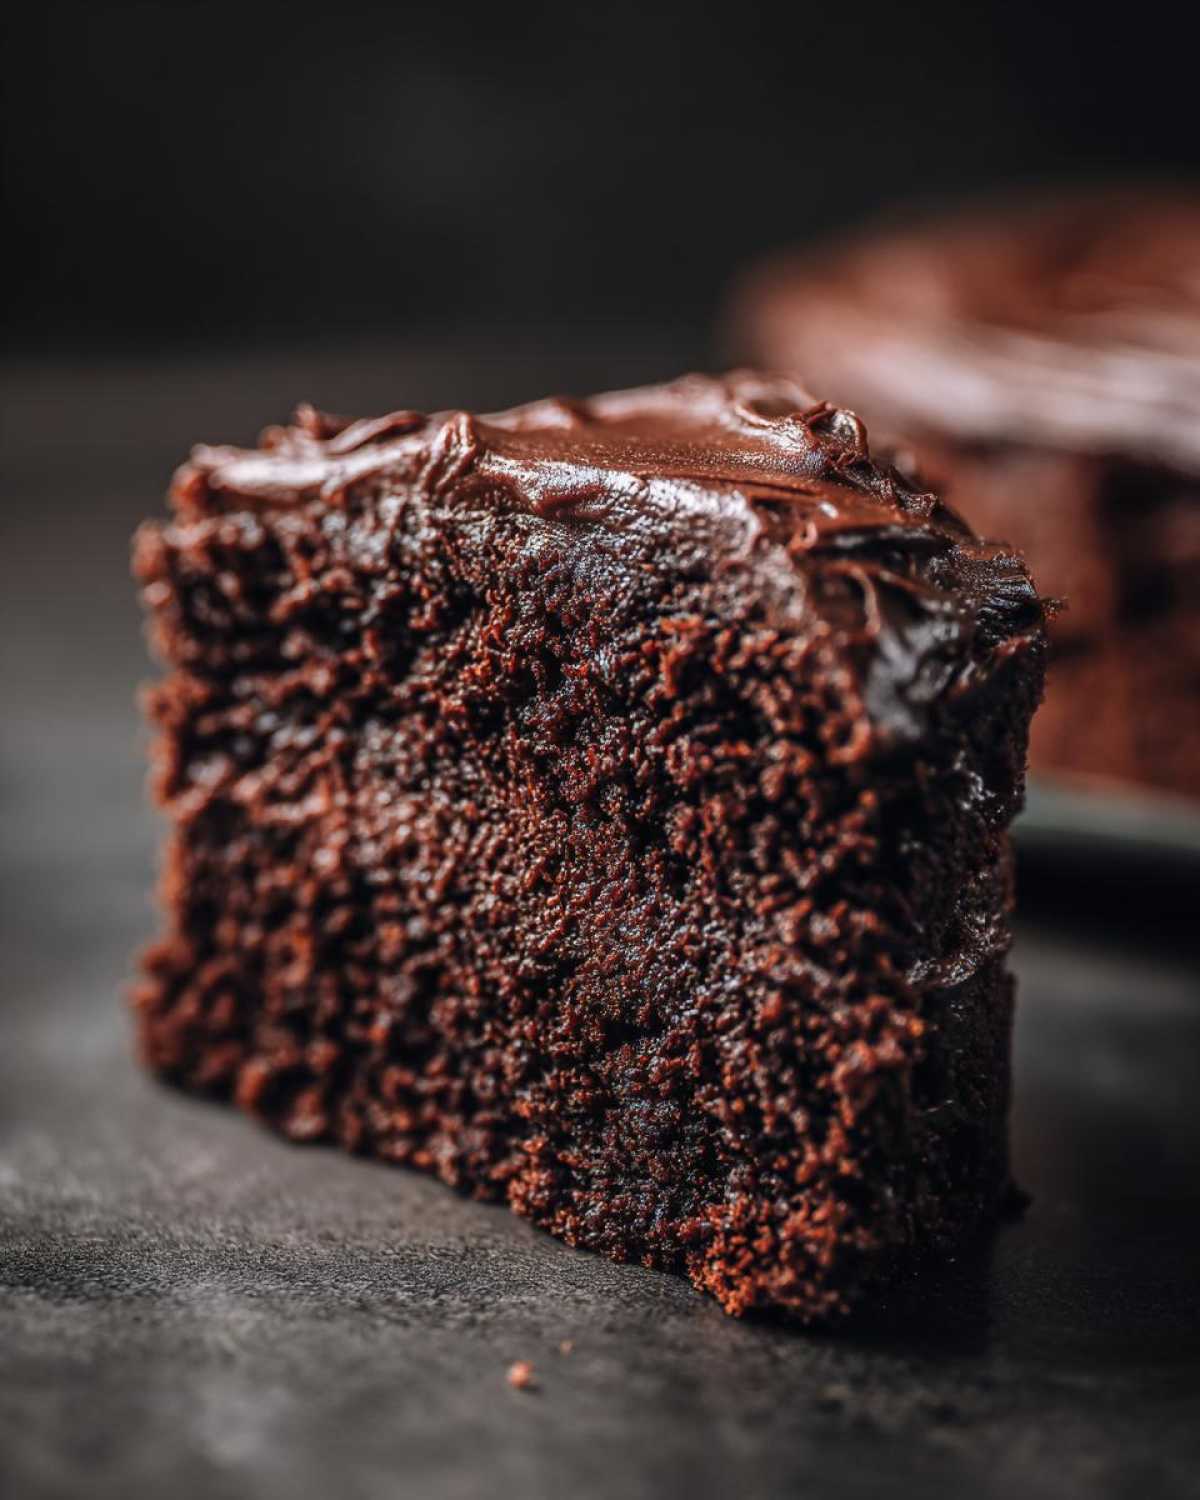
I spent a good few months tinkering with the liquids and the cocoa ratios to get this just right. I wanted something that stood up beautifully as a layer cake but stayed unbelievably tender. I finally landed on this particular combination of oil and buttermilk, plus the secret weapon: hot, strong coffee. It sounds weird, shaking hot liquid into a batter, but boy, does it bloom the cocoa! I even shared my first perfect batch with my sister, and she swore it was the best chocolate cake recipe she’d ever tasted. You’re going to love how easy this is; cleaning up is honestly five minutes, which is my favorite part!
I’m so excited for you to try this. If you need to know more about my baking journey or why I feel so strongly about sharing recipes, you can check out my little story right over here. But honestly, today is all about that rich, dark, no-stress chocolate goodness!
Why This Is the Ultimate Moist Chocolate Cake Recipe
So, what makes this cake stop the show every single time? It really comes down to three things that every great baker craves: serious moisture, incredible depth of flavor, and absolutely zero fuss. You don’t need specialty equipment, and you don’t need to wait hours for creaming butter. This recipe is designed for real life, even when you need a show-stopping dessert.
Achieving Unmatched Moisture in Your Chocolate Cake Recipe
The secret to keeping this cake lush and tender, even the next day, lies in the liquids we use. Forget butter for structure here; we’re using vegetable oil. Oil stays liquid at room temperature, which means the cake just feels wetter and softer in your mouth. Pairing that with buttermilk gives it a beautiful little tang that cuts through the richness. It truly guarantees a beautiful, soft crumb.
Simple Steps for a One-Bowl Chocolate Cake Recipe
Honestly, the best feature of this chocolate cake recipe is that it’s nearly foolproof because it’s one-bowl friendly! Everything—flour, sugar, cocoa, and then the wet stuff—goes right into one big container. You just whisk, mix, and pour. This really qualifies as an easy chocolate cake because the minimal measuring and zero transitioning between bowls cuts your prep time in half. It’s pure baking efficiency!
Essential Ingredients for Your Rich Cocoa Cake Recipe
This is the part where we get serious about flavor. You can’t fake true chocolate intensity! I’ve listed everything out below, and I really encourage you to use what you have on hand, since most of what you need is probably already in your pantry. Seriously, pull out your measuring cups! We’re starting with the dry stuff, which is so easy in this rich cocoa cake recipe because we just dump it all in one place.
- 1 3/4 cups all-purpose flour
- 1 3/4 cups granulated sugar
- 3/4 cup unsweetened cocoa powder, natural or Dutch-process
- 1 1/2 teaspoons baking soda
- 1 1/2 teaspoons baking powder
- 1 teaspoon salt
- 2 large eggs
- 1 cup buttermilk (or 1 cup milk mixed with 1 tablespoon white vinegar)
- 1/2 cup vegetable oil
- 2 teaspoons vanilla extract
- 1 cup hot strong brewed coffee
For those of you who want to see more helpful hints from my kitchen blog, you should check out the latest updates over here!
Ingredient Notes and Substitutions for this Chocolate Cake Recipe
Okay, listen up—a few things are non-negotiable if you want that deep, dark color and moisture locked in. First, the cocoa powder: I usually use Dutch-process because it gives a smoother, darker color, but natural cocoa works fine too! Just know the chemistry is slightly different, which is why we use both baking soda *and* baking powder in the main list.
Second, the eggs MUST be room temperature. Cold eggs don’t emulsify well with the oil, and that’s how you get a slightly curdled batter. And please, use the hot coffee! It doesn’t taste like a latte, I promise. The heat activates the cocoa powder, making the chocolate flavor absolutely *pop*. If you absolutely cannot, use 1 cup of boiling water, but the coffee just adds that extra dimension we are aiming for.
Step-by-Step Instructions for the Best Chocolate Cake Recipe
Alright, time to get mixing! This is where that one-bowl genius really shines because you’re going to spend more time preheating the oven than dirtying dishes. Don’t get nervous when the batter looks watery later on—that’s just part of the magic that leads to our incredible texture in this chocolate cake recipe. We move fast here, but patience during the mixing holds the key!
First things first, get that oven humming at 350°F (175°C). While it warms up, make sure you grease and flour those two 9-inch pans really well, or just put down those circles of parchment paper on the bottom. That bit of prep now saves you tears later, trust me!
Preparing Pans and Mixing the Batter for Your Chocolate Cake Recipe
Grab your biggest bowl because we’re dumping everything dry in one go: flour, sugar, cocoa, baking soda, baking powder, and salt. Take a whisk and just vigorously combine it all! You want zero lumps of leavening agent hiding in there. Once that’s looking uniform, you can add your room-temperature eggs, the buttermilk, the oil, and the vanilla extract.
Now, use your electric mixer on medium speed for exactly two minutes. It should look just combined. *Crucially*, stop the mixer and scrape down every bit of the sides and bottom of that bowl. We don’t want any unmixed pockets of flour or oil. After scraping, you add the hot coffee. Mix on low speed now, just until it’s incorporated. See how thin the batter is? That’s perfect! It should pour easily like soup. Divide it evenly between your two prepared pans.
Baking and Cooling for a Tender Crumb Chocolate Cake
Slide those pans straight into the preheated oven. I find they usually take between 30 and 35 minutes. You’re looking for that moment when a wooden skewer or toothpick slid right into the center comes back clean—no wet goo, just a few moist crumbs clinging to it. That means it’s done!
Here’s where you need a little restraint: let the cakes rest in those hot pans for a full 10 minutes. This setting time is super important! If you try to flip them out immediately, they can tear. After those 10 minutes, gently invert them onto a wire rack to finish cooling completely. You absolutely must wait until they are totally cool before you even *think* about frosting them, or you’ll end up with a melty chocolate disaster.
If you happen to be looking for frosting inspiration, especially a simple but gorgeous **chocolate ganache for frosting**, I have a few ideas floating around my site that pair perfectly with this recipe when it’s time to elevate your creation!
Frosting Ideas for Your Decadent Chocolate Dessert
Once this unbelievably moist cake cools, the only hard part left is choosing the topping! Because this cake is so rich on its own, it pairs beautifully with something intensely chocolatey or something slightly bright to cut through the richness. If you want pure, smooth decadence without the hassle, a simple chocolate ganache is perfection. Just melt good quality dark chocolate blocks with heavy cream until silky smooth. It pours beautifully and sets up just right.
But let’s be real—sometimes you need that fluffy, tall birthday presentation. In that case, you need a sturdy chocolate buttercream frosting. I’ve got a super reliable recipe that gives you that classic bakery-style texture. It’s simple to whip up while the cakes are cooling! If you want to see my current favorite way to make a luscious, easy frosting, you should definitely peek at my notes on cream cheese frosting foundations; the technique is directly transferrable to chocolate buttercream, I promise!
Expert Tips for the Perfect Homemade Chocolate Cake from Scratch
I’ve made this cake enough times now that I have a whole list of little tricks up my sleeve to make sure your homemade chocolate cake from scratch turns out absolutely flawless. These aren’t in the main instructions because they are just my personal little secrets for success! Honestly, a few degrees difference in oven temperature or the wrong state of your eggs can throw things off when you’re aiming for the best chocolate cake recipe.
My number one tip, which I harp on constantly, is ingredient temperature. Make sure those eggs aren’t icy cold from the fridge! If they are, just place them in a bowl of warm water for five minutes before you crack them in. Cold eggs cause the batter to seize up a little when you add them to the oil mix, and we lose that beautiful aeration we were hoping for.
Another thing I learned the hard way is about oven accuracy. Ovens lie! I highly recommend getting a cheap little oven thermometer. If your oven thinks it’s at 350°F but it’s actually only 325°F, you’ll end up with a dense, slightly gummy cake because it won’t rise properly in time. Calibrating your oven is a game-changer for all your baking, especially for a delicate chocolate cake recipe like this one.
Finally, stop opening the oven door before the 25-minute mark! I know it’s tempting when you smell that chocolate aroma wafting out. But moving the cake too early, or letting a blast of cool air hit it, is the fastest way to make a beautiful cake sink right in the middle. Just let it bake and trust the instructions; your patience will be rewarded with the most tender crumb!
Storage and Reheating for This Simple Chocolate Layer Cake
Now that you have this beautiful, fudgy creation, you want to make sure it tastes just as fantastic tomorrow, right? That’s the beauty of using oil instead of butter in this recipe—it keeps things moist for days! For short-term storage, meaning up to three days, keep your cake covered tightly at room temperature. A cake dome works perfectly, or if you stack layers, wrap the entire cooled cake snugly in plastic wrap before adding a layer of foil.
If you’re planning on holding onto this masterpiece for longer, like a week or so, the fridge is your friend. Just make sure it’s sealed tight! Moisture evaporates quickly in the fridge, so airtight wrapping is key to preventing it from drying out. You can keep it cool in the refrigerator up to five days, though honestly, my family rarely manages to keep it around that long!
When it’s time to enjoy a leftover slice and you want to pretend you just baked it, reheating is super simple. You don’t want to microwave the whole cake, obviously. Just take a single slice and zap it for about 10 to 15 seconds. It warms the residual internal moisture right back up, and suddenly, it’s soft, gooey, and melts in your mouth all over again. If you want to elevate that warmed slice, put just a tiny dab of butter on top right before heating, and it feels decadent!
Frequently Asked Questions About This Chocolate Cake Recipe
Can I make this a fudgy chocolate cake without coffee?
That’s a question I get all the time! Look, if you absolutely cannot have coffee in the house, you can substitute it with 1 cup of boiling hot water. Don’t sweat it too much, okay? The hot water will still bloom the cocoa powder, which is what gives the cake that incredible depth and color we are seeking for a truly fudgy chocolate cake. However, I have to be honest with you: the coffee *does* make a measurable difference. It deepens the chocolate flavor without adding any noticeable coffee taste, so if you can manage just one cup of cheap instant coffee mixed with hot water, I really think it pushes this recipe into the “wow” category.
What makes this the best chocolate cake recipe for birthdays?
For birthdays, you need reliably great results, and that’s what this cake gives you every time! Because it uses oil instead of relying on creaming butter, it’s incredibly forgiving; you can mix it slightly more or less and it nearly always comes out perfectly moist. It also holds up beautifully under heavy frosting, whether you choose my suggested ganache or a thick layer of buttercream. It’s easy enough to whip up the day before the party without stress, but rich enough that everyone instantly asks, “Where did you buy this?” That’s why I stand by calling it the best chocolate cake recipe for celebrations—it’s low-stress, high-impact!
How can I ensure my chocolate cake recipe stays moist for days?
The moisture retention in this chocolate cake recipe is already fantastic because of the oil and buttermilk combo, but to keep it absolutely perfect for days, storage is everything. The biggest enemy is air! Make sure that once the cake is completely cool—and I mean stone cold—you wrap it very tightly. If it’s unfrosted, plastic wrap followed by a layer of foil works wonders. If it’s frosted, cover the entire thing right in the pan or on the stand with a big cake dome or a large inverted bowl. Keeping it at cool room temperature (not in the fridge unless your kitchen is super hot!) is the best way to maintain that freshly baked softness.
If you’ve tried this cake and loved it, please let me know your thoughts! You can always reach out via my contact page if you have any other pressing baking questions. Happy baking!
Estimated Nutritional Data for This Chocolate Cake Recipe
Now, I’m not a nutritionist, okay? I’m just here to make sure you have an incredible dessert! But for those of you who need to keep track, I ran the numbers based on the ingredients listed here, assuming 12 servings, which is usually optimistic because everyone asks for second slices!
Please remember these figures are just good-faith estimates based on standard pantry ingredients. Your actual results might shift slightly based on the exact brands of cocoa and oil you use, so take this as a general guideline. For official health tracking, always consult a proper nutritional calculator!
- Serving Size: 1 slice
- Calories: 350
- Sugar: 45g
- Sodium: 300mg
- Fat: 16g
- Saturated Fat: 3g
- Unsaturated Fat: 13g
- Trans Fat: 0g
- Carbohydrates: 50g
- Fiber: 3g
- Protein: 5g
- Cholesterol: 45mg
I always try to keep my disclaimers handy, so if you want to read more about how these estimates are calculated, you can check out the details right here. But promise me, don’t let 45g of sugar stop you from enjoying this perfect slice of homemade chocolate heaven!
Share Your Experience with This Ultimate Chocolate Cake
Okay, I’ve spilled all my secrets for this amazing, fuss-free, ultra-moist chocolate cake recipe. Now I want to hear from YOU! Baking always feels so much better when you share the results, right?
Did you try the hot coffee trick? Did you use a simple dusting of powdered sugar or go all-out with the ganache? I absolutely love seeing this one come out of different kitchens!
Please, please leave a review below. Tell me how many stars you’re giving this one, and let me know if you made any fun variations. If you snapped a picture of your beautiful layers before you devoured them, tag me on social media! Seeing your success really makes my day. I genuinely hope this becomes the go-to dessert in your house, just like it is in mine.
Happy baking, and I can’t wait to read all about your decadent chocolate creations!
PrintThe Ultimate Moist, One-Bowl Chocolate Cake Recipe
This recipe yields an intensely chocolatey, deeply moist cake that is simple to prepare using basic pantry ingredients. It is perfect for any celebration.
- Prep Time: 15 min
- Cook Time: 35 min
- Total Time: 50 min
- Yield: 12 servings
- Category: Dessert
- Method: Baking
- Cuisine: American
- Diet: Vegetarian
Ingredients
- 1 3/4 cups all-purpose flour
- 1 3/4 cups granulated sugar
- 3/4 cup unsweetened cocoa powder, natural or Dutch-process
- 1 1/2 teaspoons baking soda
- 1 1/2 teaspoons baking powder
- 1 teaspoon salt
- 2 large eggs
- 1 cup buttermilk (or 1 cup milk mixed with 1 tablespoon white vinegar)
- 1/2 cup vegetable oil
- 2 teaspoons vanilla extract
- 1 cup hot strong brewed coffee
Instructions
- Preheat your oven to 350°F (175°C). Grease and flour two 9-inch round cake pans or line them with parchment paper circles.
- In a very large bowl, whisk together the flour, sugar, cocoa powder, baking soda, baking powder, and salt until fully combined.
- Add the eggs, buttermilk, vegetable oil, and vanilla extract to the dry ingredients. Beat with an electric mixer on medium speed for two minutes, scraping down the sides of the bowl as needed.
- Carefully pour the hot coffee into the batter and mix on low speed until just combined. The batter will be thin.
- Divide the batter evenly between the prepared cake pans.
- Bake for 30 to 35 minutes, or until a wooden skewer inserted into the center comes out clean.
- Let the cakes cool in the pans for 10 minutes before inverting them onto a wire rack to cool completely before frosting.
Notes
- For an extra rich flavor, use Dutch-process cocoa powder.
- The hot coffee deepens the chocolate flavor without making the cake taste like coffee. Do not skip this step.
- If you do not have buttermilk, let regular milk sit with one tablespoon of white vinegar or lemon juice for five minutes before using.
- This cake pairs well with a simple chocolate ganache or a classic chocolate buttercream frosting.
Nutrition
- Serving Size: 1 slice
- Calories: 350
- Sugar: 45g
- Sodium: 300mg
- Fat: 16g
- Saturated Fat: 3g
- Unsaturated Fat: 13g
- Trans Fat: 0g
- Carbohydrates: 50g
- Fiber: 3g
- Protein: 5g
- Cholesterol: 45mg