

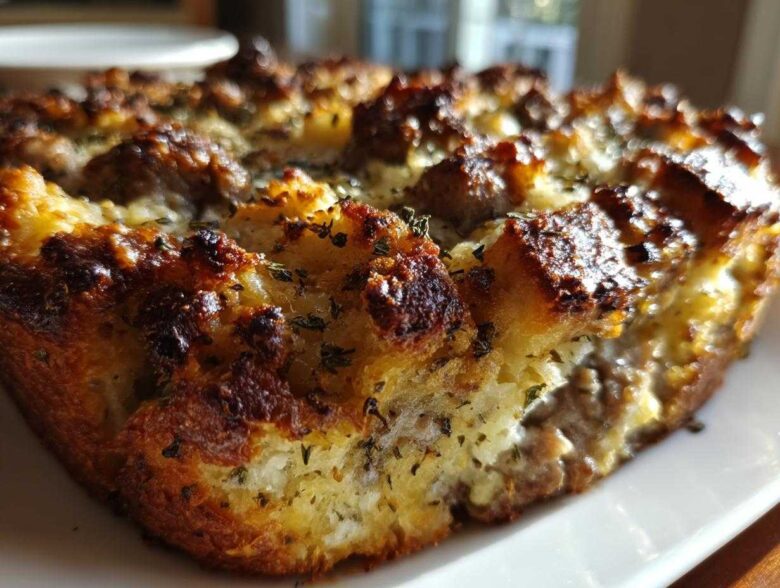
Don’t even tell me about holiday cooking stress! I used to dread the day because I never knew if my sides—especially the star side dish—would turn out right. That all changed once I perfected this ultimate make-ahead sausage stuffing recipe. Forget dry edges and soggy centers! This is the secret weapon that guarantees you get those perfectly moist interiors paired with that crucial, golden, crispy top layer. After years of trial and error, I finally cracked the code for mastering the most important of our Holiday Side Dishes, and now you get to reap the benefits. Trust me, this will be the easiest, most delicious thing you serve all season.
Why This is the Best Sausage Stuffing for Your Holiday Side Dishes
What makes this particular sausage stuffing recipe my go-to year after year? It boils down to three things that really matter when you’re short on time but high on expectations for your Turkey Dinner Sides.
- It gives you that phenomenal texture contrast: super moist inside, crunchy and golden on top.
- You can prep the entire thing the day before. Seriously!
- It just tastes like tradition—hearty, savory, and rich.
Achieving Moist and Crispy Stuffing Texture
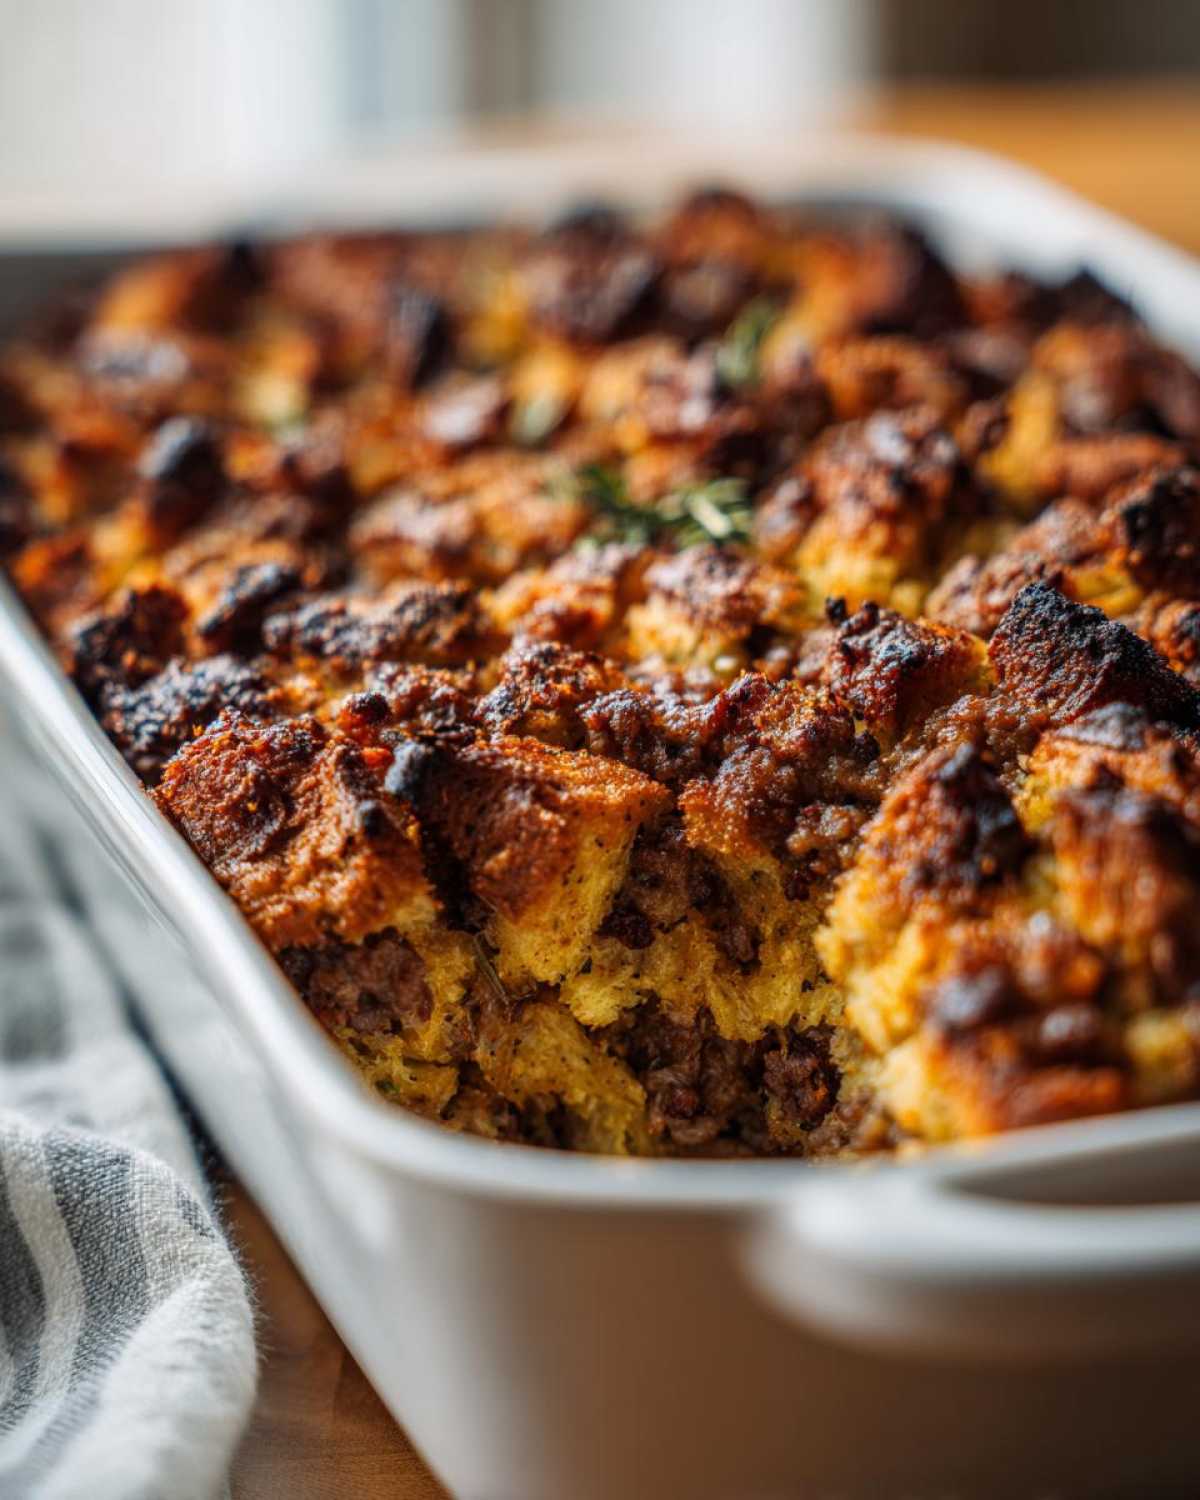
The magic happens during the bake. We use just the right amount of broth and egg mixture to soak the bread without turning it into soup. Then, we use the two-step baking approach. Covering it first steams the inside, keeping it perfectly tender. Uncovering it near the end blasts the top, giving you that famous moist and crispy stuffing texture everyone fights over!
Make Ahead Stuffing Convenience
This is my favorite feature, hands down. You mix everything right up to the final drizzle of butter, cover it tightly, and stick it in the fridge for up to 24 hours. Pull it out while the turkey rests, pop it in the oven, and you’ve instantly solved one major problem on Thanksgiving morning. It’s the ultimate Make Ahead Stuffing hack for any Crowd Pleasing Side Dish on the table!
Essential Ingredients for Perfect Sausage Stuffing
You asked for the best sausage stuffing, and the best stuffing starts here! You can’t cut corners on ingredients, especially when you are relying on this dish to carry the flavor profile of the whole meal. Remember, everything in this list has a job to do, whether it’s adding richness or structure. I’ve listed out exactly what you need below.
If you’re looking at the ingredients and wondering about substitutions, stick to the plan for the best results. This recipe relies heavily on the right foundational elements to achieve that perfect texture.
Bread Selection and Preparation for Sausage Stuffing
This is non-negotiable, people! You absolutely must use stale bread cubes. I usually use day-old sourdough or a sturdy white bread. If your bread is too fresh, it soaks up the broth like a sponge until it dissolves, and suddenly your sausage stuffing is just savory bread mush. Stale bread has pockets of air that hold their shape better, which is essential for structure. If you forgot to dry yours out, don’t panic—just cube it up and toast it in a 300°F oven for about 15 minutes until it feels dry to the touch. That will give you the volume we need!
Flavor Builders: Herbs and Aromatics
The savory backbone here is absolutely the sage. If you are using dried sage, stick to the tablespoon listed, but if you manage to get fresh sage leaves—and you should try!—you’ll need about three times that amount (around 3 tablespoons, finely minced). The thyme is a wonderful supporting actor. These herbs are what give us that classic Sage Stuffing Recipe flavor that screams ‘Holiday Baking’!
Step-by-Step Instructions for Making Sausage Stuffing
Okay, let’s talk technique. Making amazing sausage stuffing isn’t about following a recipe exactly; it’s about treating the ingredients right along the way. If you follow these steps, you get that perfect mouthfeel every single time. I’ve laid out the whole process for you, moving from the skillet to the mixing bowl, and getting it ready for its beauty sleep in the fridge.
When I’m looking at my recipe card for dinner, I want clear steps, not long paragraphs. So here is exactly how we turn those raw ingredients into the core of our incredible Homemade Stuffing.
Sautéing the Base for Your Sausage Stuffing
First up, the sausage has to go into a big skillet over medium heat. You need to cook it down and break it apart really well, and then—this is important—you drain off almost all that wonderful grease. We want flavor, not an oil spill! Once drained, toss in your chopped onion, celery, and that optional apple if you’re making the tart version. Cook those veggies until they are just starting to soften up, probably about eight minutes. When they smell sweet, take the whole pan *off* the heat source. This stops the herbs from getting bitter. Now, stir in your sage, thyme, salt, and pepper.
Moisture Control: Mixing the Broth and Egg Binder
In a separate bowl—don’t put the liquid in the hot pan!—you need to whisk your chicken broth and eggs together really well. This little mixture is the magic glue that holds everything together and keeps our sausage stuffing from crumbling apart. Pour this combined liquid slowly over your stale bread cubes and sausage mixture that are sitting in the big bowl. Now, you must resist the urge to stir hard! Use a big spoon or your hands and gently toss everything together. You are aiming for even moisture distribution. If you stir too aggressively, you crush the bread, and that’s how you end up with a very sad, dense, and Dry Stuffing disaster.
Baking the Ultimate Sausage Stuffing
This is where our patience pays off! You’ve done all the hard work prepping and chilling, and now it’s time for the oven to do its thing. Getting this baking stage right is what separates a decent sausage stuffing from the legendary kind that people talk about until next November. Because this is designed as an Easy Stuffing Recipe, we use a reliable temperature that works whether it’s straight from the fridge or already room temp.
The key here is managing the moisture. We don’t want steam escaping right away, or the top will dry out before the middle is cooked through. That means two distinct phases of baking are absolutely essential for our goal of a Moist and Crispy Stuffing.
Baking Times for Perfect Sausage Stuffing
Preheat your oven to 350 degrees F—that’s our sweet spot, folks. If you pulled the pan straight from the refrigerator, pop it in covered with foil for about 40 minutes. If you let it sit on the counter for 30 minutes first, stick to 30 minutes covered. The foil traps the heat and steam, making sure that soft, savory interior is perfectly cooked. This whole process ensures you nail the flavor of our classic Thanksgiving Stuffing Recipe.
After that initial covered period, pull off that foil! Now we bake it for another 15 to 20 minutes uncovered. This is the fun part where the magic happens and that gorgeous crust develops. You know it’s ready not just by the color, but by the sound—it should sizzle nicely. You are looking for a deep golden brown top edge that looks perfectly crunchy. If you poke it gently, it shouldn’t really wiggle much in the middle; it should feel set. That’s your sign to pull out what I guarantee will be the best sausage stuffing you’ve ever served!
Variations: Apple Sausage Stuffing and Cornbread Stuffing Options
While I stand by our traditional sausage stuffing, I know that one size doesn’t fit all when it comes to Holiday Side Dishes! People often want something sweeter or maybe closer to that old-fashioned, crumbly texture. Don’t worry, this recipe is flexible enough for a few easy swaps that keep the sausage flavor center stage but bring something new to the table. You can totally customize this for your specific family favorites.
These little twists make it fun to experiment, especially if you’re preparing multiple Thanksgiving Stuffing Recipes for a massive holiday spread. It shows everyone you put extra thought into the menu!
Making Apple Sausage Stuffing
If you want a little burst of tartness to cut through the richness of the pork sausage, you have to try the apple version. My favorite apple to use for this is Granny Smith, because they are wonderfully tart and they hold their shape perfectly when cooked. They don’t just turn into mush! You add these chopped apples right along with the onions and celery during the sautéing stage. They cook down slightly, releasing their tart juices into the savory base, which mingles beautifully with the sage and thyme.
It’s such a delicious flavor pairing; you can even find more inspiration for using apples in other sweet bites, but trust me, these tart apples in the stuffing are a game-changer.
Switching to Cornbread Stuffing Base
So many families grew up on the slightly denser, sweeter base of Cornbread Stuffing, and I totally get that! If you want to use cornbread instead of white bread or sourdough, you can absolutely do it. The main thing to remember is that cornbread is often thirstier than regular bread. You will need to substitute about half of your dried bread cubes with dried cornbread cubes.
Because cornbread soaks up liquid faster, I always recommend starting with pouring only 3/4 of the required broth and egg mixture. Gently toss, let it sit for about five minutes, and then check the moisture level. If it still looks dusty or dry, add the rest of the liquid bit by bit until you get that even dampness. If you add it all at once, you risk turning your delicious base into a casserole instead of the perfect baked stuffing!
Tips for Serving Sausage Stuffing as Turkey Dinner Sides
You’ve made the best sausage stuffing ever, now let’s make sure it looks as good as it smells on the table! When it comes to serving alongside the turkey for those big Turkey Dinner Sides decisions, presentation really matters. Nobody wants a scoop of brown mush plopped next to their perfect turkey slice, right? We want texture, height, and color!
Since this recipe bakes up so well in a 9×13 dish, you just need to make sure you scrape all those glorious crispy bits from the edges when you start serving. Those crunchy, buttery parts are what people secretly fight over! Use a solid metal spatula for this, getting right under those set edges is the secret weapon for serving.
If you are worried about the side dish competition, or maybe you just have a huge crowd, you absolutely must try turning this into little bites. They become the easiest Stuffing Balls Appetizer imaginable! Seriously, just form the unbaked mixture into one-inch little balls—wear gloves if you want to keep your hands clean—and pop them onto a parchment-lined baking sheet. They bake up wonderfully crisp on the outside, making them perfect for grabbing before the plates even come out. Nobody ever realizes it’s just your main stuffing recipe!
As for pairing, because this stuffing is so savory and rich with the pork sausage and sage, it really sings next to bright, slightly acidic dishes. Think tart cranberry sauce or maybe a simple side of sautéed green beans with lemon zest. It stands up beautifully to gravy, too. If you’re using your maple pecan treats for dessert, this savory side dish is the perfect anchor for the whole meal!
Storage and Reheating Instructions for Leftover Sausage Stuffing
Okay, let’s be real: it’s almost impossible to finish this batch in one sitting, and glorious leftovers are half the fun! Storing your leftover sausage stuffing correctly is key to making sure it’s just as good the next day, or even three days later. We want to protect that beautiful texture we worked so hard for. Nobody likes fridge-soggy crumbs!
You can safely keep this stuffing in the refrigerator for up to four days. Just make sure you store it in a shallow, airtight container once it has cooled down completely. Putting hot stuffing into a sealed container creates steam, and steam equals soggy edges on your amazing sausage stuffing. Give it time to breathe on the counter until it’s just warm, then seal it up tight.
Now, for reheating—this is where we bring back that wonderful crispy top. You absolutely cannot microwave this; it will turn into a damp sponge, and that defeats the whole purpose of making this the Best Sausage Stuffing! The best method for reheating leftovers is the oven, using a method that encourages crispiness.
Restoring Crispiness When Reheating
Take your leftover stuffing out of the main container and spread it out evenly on a baking sheet. A thin layer lets the heat circulate better, which is what you need! Pop this sheet into an oven preheated to 350 degrees F. If you are reheating a large batch, cover it loosely with foil for the first 15 minutes just to warm the center through. Then, pull that foil off for the last 10 minutes.
This uncovered blast of heat dries out the surface just enough to bring back that delightful crunch. It really revives the herbs and makes it taste freshly baked. If you only have a tiny bit left, spread it thinly on a microwave-safe plate and nuke it for 30 seconds, but for a real treat, use the oven. Honestly, reheating this sausage stuffing properly is almost as satisfying as the first time around!
Nutritional Estimates for This Homemade Stuffing
I always get questions about the nutrition facts, which is so smart! When you’re planning a huge meal full of rich Holiday Baking items and comfort food, knowing what you’re serving is half the battle. Here are the general estimates based on one serving size, which is about one standard cup of this amazing sausage stuffing.
Now, before you look too closely, I have to give you the mandatory disclaimer that I make for every single recipe here on the site. These numbers are based on the exact ingredient amounts I listed; if you use super-lean sausage or a ton more butter, those numbers are going to jump around! You can always peek at the full details here to see the full breakdown, but for general planning, this is what you can expect for one hearty scoop.
- Serving Size: 1 cup
- Calories: 320
- Fat: 18g (Be mindful of that saturated fat; it’s mostly from the pork sausage!)
- Carbohydrates: 28g
- Protein: 14g
- Sodium: 550mg (This is higher because sausage and broth have sodium, so watch the added salt!)
It’s definitely a rich Comfort Food Side Dish, designed for celebrations! But look at that protein content—it helps keep everyone full and satisfied alongside the turkey and all those other rich Holiday Side Dishes. Just remember, this is an estimate for our standard recipe; if you go heavy on the apple variation or use leaner meat, those percentages will shift slightly!
Your Questions Answered About This Classic Recipe
I always get tons of great questions once people start preparing this recipe, especially when they are tackling their big holiday menu. It’s smart to ask before you start mixing! I gathered up the most common things folks ask about when making this amazing sausage stuffing so you feel totally confident on the big day. We want this to be your favorite Comfort Food Side Dish ever!
Can I use fresh bread instead of dried cubes for this sausage stuffing?
Oh, believe me, I get it—sometimes you just have fresh bread sitting around! You *can* use fresh bread, but you have to treat it differently or your stuffing will turn into a very dense brick. Fresh bread needs to be slightly dried out first. I highly recommend slicing it up and letting it sit out on baking sheets for a few hours, or you can toast it gently in a 300°F oven for about 15 minutes until it feels dry inside, not just soft. If you skip that step, I promise you’ll need to reduce the chicken broth and egg mixture by nearly a quarter because the fresh bread will absorb way too much liquid and ruin the texture of your final sausage stuffing.
What is the best way to make this a ‘Savory Bread Pudding’ texture?
That’s a fun way to think about it! If you prefer a softer, almost casserole-like texture where the edges aren’t nearly as crispy—more like a very savory bread pudding—you need to adjust the baking. Keep the oven temp the same, but don’t skimp on the liquid! Maybe add just a tablespoon or two of extra broth for good measure. The key is to extend that *covered* baking time. Bake it covered for a full 45 minutes instead of 30, and then only uncover it for the final 10 minutes, if at all. This traps the moisture in and prevents that crust from forming.
Can I substitute pork sausage with turkey sausage in this recipe?
Absolutely you can! Turkey sausage is a very popular choice, especially for those trying to lighten up their Holiday Side Dishes a tiny bit. The main thing you need to keep in mind is that turkey sausage is much, much leaner than standard pork sausage. Because we rely on that fat to moisten the bread cubes along with the broth, if you use turkey, you must compensate.
I would recommend pouring in an extra tablespoon or two of melted butter right along with the final drizzle, or even adding an extra splash of broth when you mix the liquids. Otherwise, your sausage stuffing might end up a little drier than the moist, perfect version we are aiming for. Reach out through my contact page if you have any other cooking questions!
Share Your Holiday Baking Success
Now that you’ve got the recipe for what I truly believe is the best sausage stuffing out there, I want to hear all about it! Seriously, seeing how this dish turns out on *your* table for your Turkey Dinner Sides brings me so much joy.
Did you stick strictly to the classic savory style, or did you get adventurous and try adding those tart apples? Maybe you went full-on cornbread for a different texture? Tell me how it performed as the hero Comfort Food Side at your gathering!
Take a moment to leave a star rating and a quick comment letting me know your results. I read every single one, and your feedback helps me keep bringing you the most reliable, crowd-pleasing recipes for every holiday season!
PrintUltimate Make-Ahead Sausage and Sage Stuffing

A classic, moist sausage stuffing recipe with crispy edges, perfect for holiday meals and easy to prepare in advance.
- Prep Time: 20 min
- Cook Time: 50 min
- Total Time: 70 min
- Yield: 10 servings
- Category: Side Dish
- Method: Baking
- Cuisine: American
- Diet: Low Lactose
Ingredients
- 1 pound bulk pork sausage
- 1 large yellow onion, chopped
- 4 celery stalks, chopped
- 1 cup chopped apple (optional variation)
- 1 tablespoon dried sage
- 1 teaspoon dried thyme
- 1 teaspoon salt
- 1/2 teaspoon black pepper
- 1/2 cup chicken broth
- 2 large eggs, lightly beaten
- 10 cups dried bread cubes (stale white or sourdough)
- 1/2 cup (1 stick) unsalted butter, melted
Instructions
- Cook the sausage in a large skillet over medium heat, breaking it up as it cooks. Drain off excess grease.
- Add the onion, celery, and apple (if using) to the skillet. Cook until the vegetables soften, about 8 minutes.
- Stir in the sage, thyme, salt, and pepper. Remove the skillet from the heat.
- In a large bowl, combine the dried bread cubes and the sausage mixture.
- In a separate small bowl, whisk together the chicken broth and eggs. Pour this mixture over the bread and sausage. Toss gently until the bread is evenly moistened.
- Transfer the mixture to a buttered 9×13 inch baking dish. Drizzle the melted butter over the top.
- To make ahead: Cover the dish tightly with plastic wrap and refrigerate for up to 24 hours.
- When ready to bake, preheat your oven to 350 degrees F. Remove the plastic wrap.
- Bake covered with foil for 30 minutes. Remove the foil and bake for an additional 15-20 minutes, or until the top is golden brown and crispy.
Notes
- For extra crispy edges, bake the stuffing uncovered for the entire time.
- If baking immediately from the refrigerator, add 10 minutes to the covered baking time.
- To make stuffing balls, form 1-inch balls and bake on a sheet pan at 375 degrees F for 20 minutes.
Nutrition
- Serving Size: 1 cup
- Calories: 320
- Sugar: 3
- Sodium: 550
- Fat: 18
- Saturated Fat: 6
- Unsaturated Fat: 12
- Trans Fat: 0
- Carbohydrates: 28
- Fiber: 2
- Protein: 14
- Cholesterol: 55