

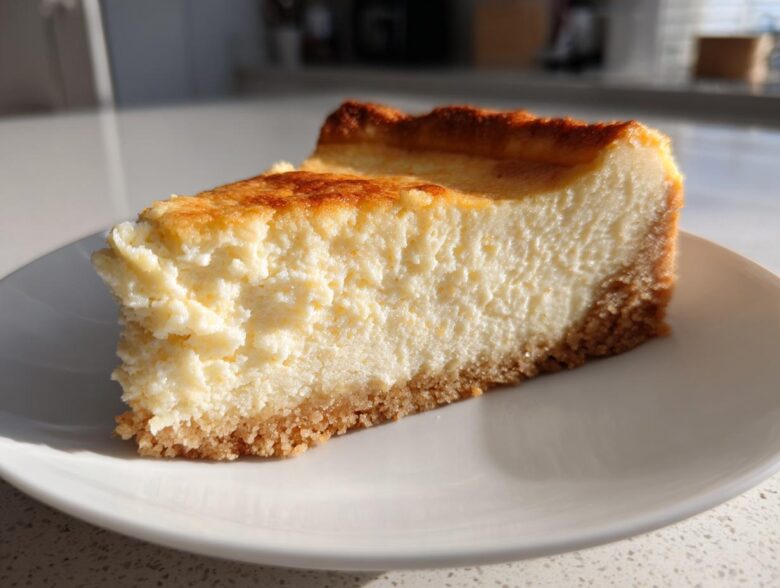
Oh my goodness, forget everything you thought you knew about holiday indulgence because we are elevating things today! Seriously, when the festive season rolls around, I need something that screams ‘special occasion sweet treat,’ and that’s exactly what we get when we merge two of the best things in life: buttery sugar cookies and rich, creamy cheesecake. This recipe for sugar cookie cheesecake isn’t just a dessert; it’s the centerpiece of every party I host! Trust me, the combination of that vanilla cheesecake filling over the crisp, sweet cookie crust just knocks everyone out every single time we bake it. I’m so excited to share exactly how I make this spectacular dessert for my family gatherings. You won’t regret trying this one! For more about my baking philosophy, check out my baking journey.
Why This Sugar Cookie Cheesecake is a Show Stopping Dessert
I mean, look at it! This isn’t just some weeknight treat; this is legitimately a show stopping dessert, the kind people ask for a copy of the recipe the second they take their first bite. It’s the perfect crossover dessert because it gives you that comforting, nostalgic feel of a sugar cookie mixed with the serious richness of a truly decadent cheesecake. It hits all the right notes for any holiday party or family gathering you can think of.
- It’s absolutely gorgeous! The contrast between the golden cookie crust and the pale, creamy filling just looks expensive, even though it’s surprisingly simple to put together.
- The texture payoff is insane. We’re talking crumbly, buttery edges meeting a filling so smooth it melts instantly—truly one of the best creamy dessert ideas out there.
- It travels well! Unlike a delicate layer cake, this baked beauty holds its structure beautifully for transporting to friends’ houses.
- It satisfies everyone. You get the familiar comfort of a cookie and the indulgent richness of a classic cheesecake all in one slice. No one ever turns this down!
The Perfect Buttery Cookie Crust Base
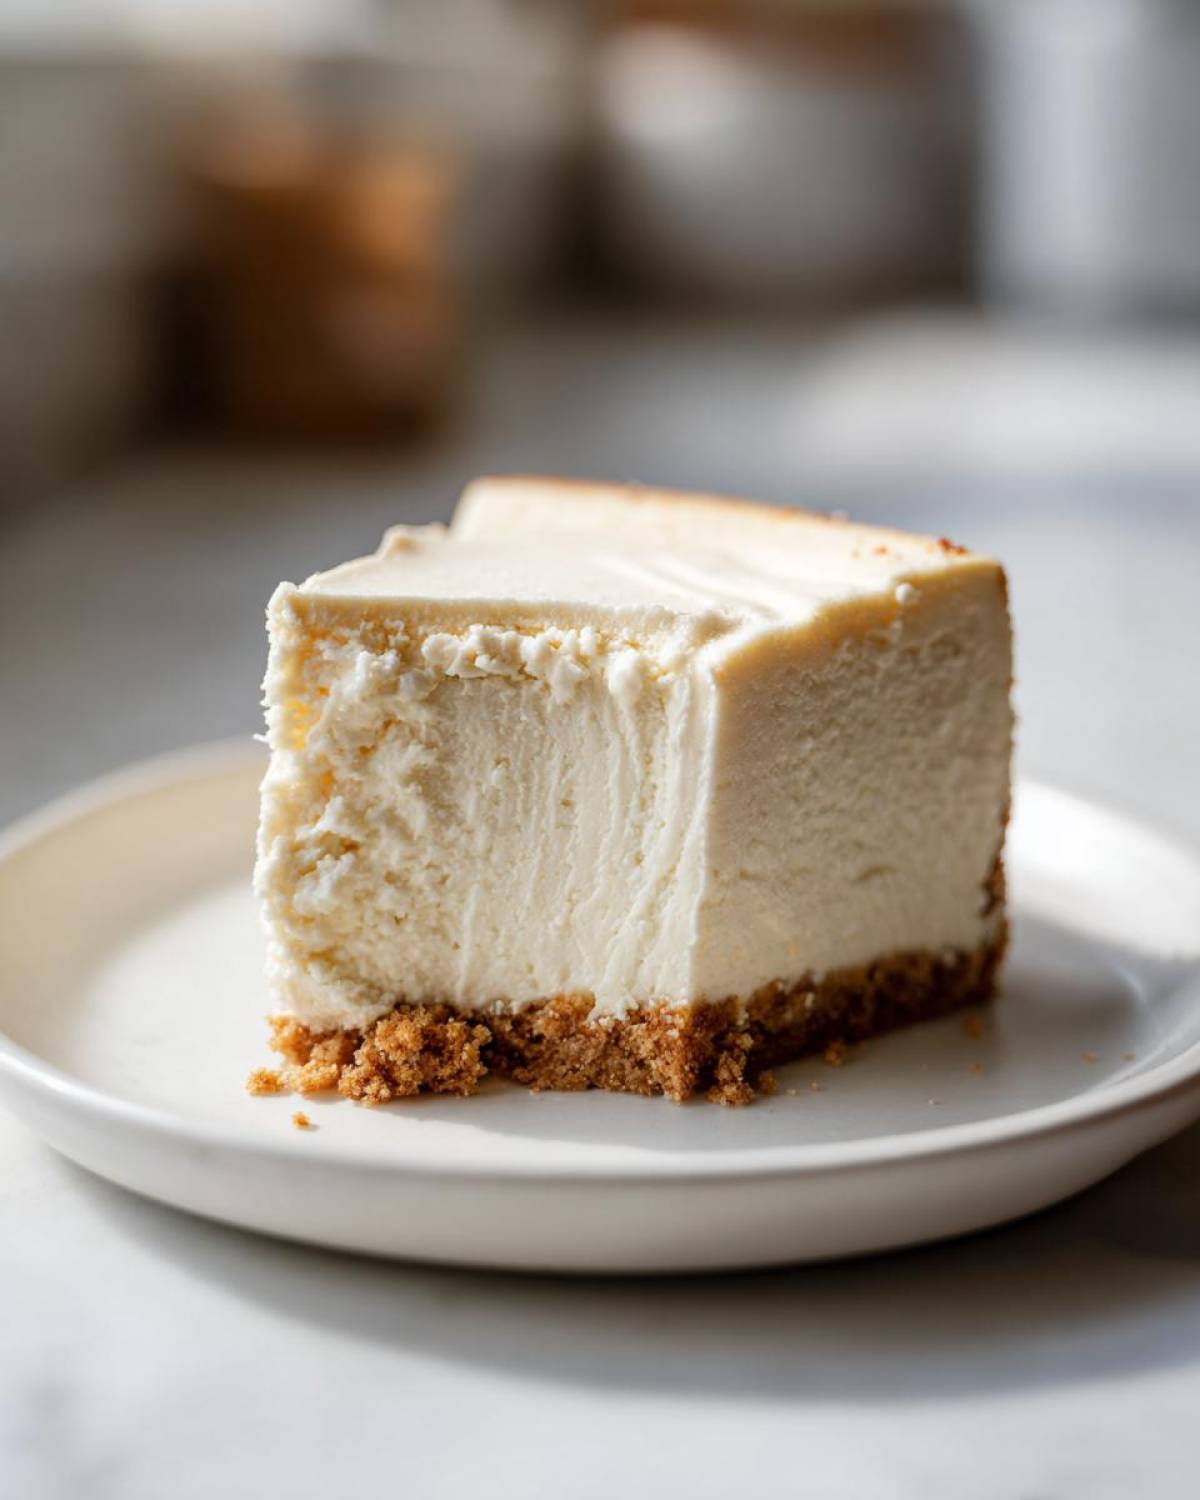
This is where our cookie crust cheesecake really earns its stripes. Using crushed sugar cookies instead of graham crackers immediately sets a different, more festive tone. The cookies bake up into this gorgeous, dense foundation that has this wonderful, sweet, buttery flavor that perfectly complements the tangy cheesecake on top.
You need that strong, stable base to hold up all that creamy goodness, and crushed cookies mixed with melted butter and a touch of sugar create just the right structure. It’s the backbone of the whole operation, and honestly, my favorite part to touch test while it’s cooling!
Creamy Vanilla Cheesecake Filling Perfection
When I talk about creamy filling, I really mean it. This isn’t your dry, crumbly cheesecake scenario; this is the real deal. We use a little trick here—the combination of sour cream and a double dose of extracts really makes the vanilla sing. It’s not just vanilla; it’s *deep, rich* vanilla.
We use both pure vanilla extract and a little splash of almond extract. Don’t skip the almond! It adds this subtle background warmth that just brightens up the entire flavor profile of the vanilla cheesecake filling—it lifts the sweetness without making it taste like cookies, if that makes sense. It helps build that trust that this recipe truly is something special.
Gathering Ingredients for Your Sugar Cookie Cheesecake
Alright, now for the fun part: getting all the goodies ready! When you’re making cheesecake, more than almost any other dessert, precision really matters. A little too much liquid or not enough fat, and you risk cracks or a soupy texture. Don’t panic, though! The recipe is straightforward, but getting your ingredients measured or set up ahead of time is key to success for this amazing sugar cookie cheesecake.
I always lay everything out on the counter five minutes before I start mixing—that way, I’m not scrambling mid-beat. Remember, this is an indulgent bake, so let’s make sure we have everything needed for that perfect cookie crust cheesecake structure. Here’s what you’ll need for the best batch!
Ingredients for the Buttery Cookie Crust
This crust is incredibly simple, but it sets the entire tone for the dessert. You want crisp edges that taste exactly like sweet, buttery shortbread. Grab your measuring cups for this part:
- 1 1/2 cups crushed sugar cookies (That’s about 25 of the average cookie size, just crush them up! You can use store-bought if you’re short on time, but homemade crushed cookies are dreamier.)
- 1/4 cup granulated sugar (Just a tiny bit extra to help it set up nicely.)
- 6 tablespoons unsalted butter, melted (Don’t try to sneak in margarine here; the flavor payoff from real butter is worth it!)
Ingredients for the Vanilla Cheesecake Filling
This is where the magic happens—the creamy, dreamy center! The most important tip here: make sure your cream cheese is actually soft. I mean, really soft. Leave it out on the counter for at least two hours before you plan to start mixing the filling.
- 3 (8 ounce) packages cream cheese, totally softened
- 1 1/2 cups granulated sugar
- 1 teaspoon vanilla extract (Go for the good stuff here!)
- 1/4 teaspoon almond extract (This is for that subtle, sophisticated note!)
- 3 large eggs (Get these out with the cream cheese so they aren’t ice-cold.)
- 1/2 cup sour cream (This keeps the texture from getting too stiff.)
- 1/2 cup prepared sugar cookie dough, cut into small pieces (This is optional, but honestly, why skip the extra cookie bits? They bake right into the filling!)
- 1/4 cup sprinkles (Only if you want that extra festive pop on top when it sets—I always do!)
Step-by-Step Instructions for the Ultimate Sugar Cookie Cheesecake
Okay, we’ve got all the components ready, now we put this amazing sugar cookie cheesecake together! Remember, for cheesecake, the sequence matters a lot, and so does temperature control. Don’t rush the cooling steps; that’s when the beautiful, crack-free top sets up perfectly. We are aiming for that perfect, luscious texture here.
Preparing the Crust and Oven Setup
First things first, let’s make sure our oven is ready and our pan is protected. We need to preheat the oven to 350 degrees Fahrenheit. Now, grab your 9-inch springform pan—this is important—and wrap the outside bottom edge completely in heavy-duty aluminum foil. I usually do two or three layers of foil because water bath leaks are the absolute worst.
We bake that crust we mixed up earlier for 10 minutes. Once it’s just set, pull it out and let it cool down a tiny bit while you get the filling ready. Then, immediately drop your oven temperature down to 325 degrees Fahrenheit. That lower temperature is essential for slow, even baking!
Mixing the Creamy Cheesecake Filling
This is where you need patience! Don’t just dump everything into the mixer at once, or you’ll end up with a stiff, overworked batter—and trust me, that leads to cracks! We need a super smooth base first.
Start by beating that softened cream cheese until it is completely smooth and silky. Then, beat in that 1 1/2 cups of sugar slowly. Next, add your vanilla and that little bit of almond extract. It’s time for the eggs. Add them in one at a time, and I mean *one at a time*. Mix just until the yolk disappears into the batter, scrape down the sides, and then add the next one. You want to incorporate air but avoid overmixing, which whips in too much air and causes big air pockets to form.
Finally, gently stir in the sour cream until everything looks uniform for this fabulous creamy dessert ideas masterpiece. Pour this gorgeous filling over your slightly cooled crust. If you’re using those extra sugar cookie pieces, gently press them into the top of the filling now.
Baking the Sugar Cookie Cheesecake with a Water Bath
The water bath, or *bain-marie*, is your secret weapon for the silkiest festive cheesecake imaginable! Take that foil-wrapped springform pan and set it inside a larger roasting pan. Carefully pour hot water into the roasting pan until it comes about halfway up the sides of the springform pan.
Carefully slide that whole setup into the 325-degree oven. Bake for about 55 to 65 minutes. You’ll know it’s done when the edges look set, but if you gently nudge the pan, the very center still has a slight wiggle to it—like firm Jell-O. That little jiggle means we haven’t baked it into rubber!
Cooling and Chilling for the Best Texture
This is arguably the most critical part of making a beautiful baked cheesecake. Never take it straight from the oven to the counter!
Once the bake time is up, turn the oven off completely. Prop the oven door open just a crack (I usually wedge a wooden spoon in there). Let the sugar cookie cheesecake cool slowly inside the closed-but-cooling oven for a full hour. This gradual temperature drop prevents that sudden contraction that causes cracking.
After that hour, take it out of the water bath, remove the foil, and let it cool on a wire rack until it reaches room temperature. Only once it’s completely cool should you cover it and move it into the fridge. You absolutely must let it chill for at least 6 hours, but I always recommend overnight. That final chill is what firms up the filling and marries all those cookie and vanilla flavors together beautifully.
Tips for Making Perfect Sugar Cookie Cheesecake Every Time
Even with a fantastic recipe, sometimes we need to make little tweaks based on what we have on hand or just how we like things done in our own kitchens. Believe me, I totally get it! This is a trusted, tried-and-true recipe, but cheesecake is forgiving if you know the rules. These little pointers below will help you adjust things without messing up the gorgeous texture we worked so hard to achieve in this sugar cookie cheesecake.
I always try to stick rigorously to the ingredients list, especially the cream cheese quantities, but feel free to adapt the method slightly. Check out my standard baking guidelines here if you have any questions about ingredient changes!
Ingredient Substitutions and Crust Alternatives
So, what if you’re completely out of the right cookies for the crust, or maybe you just wanted to speed things up that afternoon? The recipe calls for crushed sugar cookies, but one of the notes I found from the original recipe card mentions an easy shortcut!
If you happen to have a tube of pre-made sugar cookie dough sitting in the fridge, you can totally use that instead of crushing cookies and mixing them with butter. Just press that dough evenly into the bottom of your springform pan. Since it has more fat already incorporated, you need to give it a slightly longer bake time—think about 12 minutes at the initial 350 degrees. It creates a denser, slightly chewier crust, which is great if you love that! (Just remember, the flavor profile shifts slightly without that extra layer of browned butter when you crush them yourself!)
And about those extracts—feel free to drop the almond extract if you have an allergy or just really don’t like it. But know that the almond is responsible for that unique depth that sets this apart from a standard cheesecake. If you skip it, up your vanilla to an extra half teaspoon, but the flavor won’t have that little “zing” that I love.
Water Bath Alternatives for Easy Cheesecake
I preach the gospel of the water bath because it creates the most porcelain-smooth top, but sometimes, honestly, dealing with the aluminum foil wrapping and the extra roasting pan just feels like too much effort. I totally understand skipping it!
If you decide to skip the water bath for your easy cheesecake, you need to change the cooling process dramatically. Since the ambient heat in the oven cavity will be much hotter, you risk cracking when you remove it into the cool kitchen air. If you skip the water bath, bake the cheesecake for the same 60 minutes, but when it’s done, simply turn the oven off, prop the door open a little bit, and let it cool in there for a full two hours instead of just one hour.
This slower transition out of the oven helps keep that creamy filling from shrinking too fast while it sets. You might see a tiny hairline crack form—it happens—but following that extra-long slow cool down makes all the difference either way!
Storage and Serving Suggestions for Holiday Party Desserts
This sugar cookie cheesecake is one of those glorious desserts that actually tastes better the next day, which makes it an absolute lifesaver when you’re hosting big holiday parties! Store leftovers tightly wrapped, either plastic wrap pressed lightly against the surface or the springform ring left on, in the refrigerator. It keeps beautifully for about five to six days.
Honestly, I don’t recommend reheating cheesecake—it messes with that perfectly set, creamy structure we worked so hard for! It’s designed to be served chilled straight from the fridge. If you happen to be serving it during a long party buffet, just keep the extra slices covered in the fridge and bring out fresh plates as needed. That keeps everything tasting perfectly crisp and cool.
When it comes to serving, keep the décor simple because the cookie crust speaks for itself. If you didn’t add sprinkles before chilling, this is the time to do it! A beautiful sprinkle shower right before you bring it out really amps up that festive presentation. For serving, a hot cup of coffee or a rich espresso is the perfect pairing. The slight bitterness cuts through the sweetness of the vanilla cheesecake filling beautifully, making every bite feel balanced. It’s an amazing pairing for any of those big family gathering recipes at Christmas time!
Frequently Asked Questions About This Festive Cheesecake
I always get so many questions about this sugar cookie cheesecake because people are terrified of messing up a baked cheesecake! It’s natural to be a little nervous when you’re dealing with a show-stopping dessert like this, but honestly, once you’ve mastered the cooling process, you’re golden. Here are a few things folks ask me the most when they are planning their holiday baking!
Can I make this a no bake cheesecake bars version?
Oh, I wish I could tell you yes, but for this particular combination—the buttery cookie crust and the vanilla cheesecake filling—you really need to bake it. A true no-bake cheesecake filling relies on gelatin or whipped topping to set up, and that changes the texture completely. We want that dense, creamy, slightly tangy texture achieved by baking the cream cheese and eggs gently.
If you were looking for no bake cheesecake bars, you’d typically use a different filling designed to firm up when cold. For this recipe, the baking is essential for the structure, so stick to the instructions if you want that perfect cookie crust cheesecake texture we worked so hard for!
How far in advance can I prepare this Christmas baking recipe?
This is the secret to reducing stress during those hectic holiday weeks! Since this is a classic baked cheesecake, it actually benefits hugely from chilling time. While the minimum is 6 hours, I always say to make this recipe a day ahead. Yes, prepare the whole sugar cookie cheesecake the day before your big event!
The overnight chill allows the flavors to meld beautifully—the sweet cookie base permeates the filling just a tiny bit, and the whole thing firms up into the most perfect sliceable texture. It’s one of my favorite ways to handle Christmas baking chaos; just wrap it up the night before, and it’s ready to go!
What is the best way to decorate this special occasion sweet treat?
Part of the charm of this dessert is that it’s already so festive just because of the cookie elements within it. If you followed the instructions and placed those extra sugar cookie pieces on top before baking, you actually don’t need much more! They bake up and look lovely sunken slightly into the top.
If you want a little extra pizzazz for serving this special occasion sweet treat, I have two favorite ways: first, a very light dusting of powdered sugar just before you serve it looks elegant. Second, if you want more color, skip the sprinkles before baking and just sprinkle them heavily over the top *after* it has chilled completely. They stick beautifully to the cool surface, giving you that bright, happy look perfect for any gathering!
Nutritional Snapshot of Your Decadent Baked Goods
I know, I know. When you bake something as absolutely divine as this sugar cookie cheesecake, you really aren’t thinking about nutrition! And you shouldn’t be when it’s time to celebrate! But since this is such a rich and decadent bake, I always like to give you a generalized idea of what you’re getting in that glorious slice.
Remember, we’re diving into some serious indulgence here with that buttery cookie crust and the super creamy filling, so these numbers reflect a truly decadent, show stopping dessert. Please take all of this with a grain of salt, though, because the exact final nutrition depends heavily on the brand of cream cheese you use and precisely how big of a slice you cut!
Think of this data as a serving guide for one slice based on 12 total servings from the whole recipe. For all the detailed specifics, don’t forget to review my general baking policy information regarding ingredient sourcing.
- Serving Size: 1 slice
- Calories: 450
- Sugar: 35g (Yes, it’s a treat!)
- Fat: 28g
- Saturated Fat: 17g
- Carbohydrates: 45g
- Protein: 7g
- Cholesterol: 95mg
See? Pure comfort! It’s got a pretty good amount of fat for richness, but that’s what makes it so unbelievably mouth-watering. Enjoy every single bite of your decadent baked goods without worrying about the fine print!
Share Your Baking Success
Whew! If you made it this far, you are officially ready to create the most amazing sugar cookie cheesecake ever. I truly, genuinely hope this becomes your go-to recipe for those moments when you need an ultimate indulgence, whether it’s Christmas Eve or just Tuesday!
Once you have this beauty chilled and set, please, please come back here and let me know how it went! Drop a rating below—did you use the optional dough pieces? Did your water bath work perfectly? I absolutely live for reading about your triumphs in the kitchen. Seriously, every comment helps me know that this recipe is bringing joy to other homes, just like it does mine.
Also, if you snap a photo of your finished product, tag me on social media! Seeing your perfectly creamy, sprinkle-topped slices is the absolute best reward. Happy baking, friends, and enjoy every slice of this ultimate comfort dessert!
PrintFestive Sugar Cookie Cheesecake
A rich, creamy cheesecake featuring a buttery sugar cookie crust and vanilla cheesecake filling, perfect for holiday gatherings.
- Prep Time: 25 min
- Cook Time: 65 min
- Total Time: 8 hours 30 min
- Yield: 12 servings
- Category: Dessert
- Method: Baking
- Cuisine: American
- Diet: Vegetarian
Ingredients
- 1 1/2 cups crushed sugar cookies (about 25 cookies)
- 1/4 cup granulated sugar
- 6 tablespoons unsalted butter, melted
- 3 (8 ounce) packages cream cheese, softened
- 1 1/2 cups granulated sugar
- 1 teaspoon vanilla extract
- 1/4 teaspoon almond extract
- 3 large eggs
- 1/2 cup sour cream
- 1/2 cup prepared sugar cookie dough, cut into small pieces (optional)
- 1/4 cup sprinkles (optional, for topping)
Instructions
- Preheat your oven to 350 degrees Fahrenheit. Wrap the outside bottom of a 9-inch springform pan with heavy-duty aluminum foil.
- Combine the crushed sugar cookies, 1/4 cup sugar, and melted butter in a bowl. Press the mixture firmly into the bottom of the prepared springform pan.
- Bake the crust for 10 minutes. Remove from the oven and let it cool slightly. Reduce the oven temperature to 325 degrees Fahrenheit.
- In a large bowl, beat the softened cream cheese with an electric mixer until smooth. Gradually beat in the 1 1/2 cups sugar until fully combined.
- Mix in the vanilla extract and almond extract. Beat in the eggs one at a time, mixing just until incorporated after each addition. Stir in the sour cream until the filling is smooth.
- Pour the cheesecake filling over the cooled crust. If using, gently press the small pieces of sugar cookie dough into the top of the filling.
- Place the foil-wrapped springform pan into a larger roasting pan. Carefully pour hot water into the roasting pan until the water reaches halfway up the sides of the springform pan (this creates a water bath).
- Bake for 55 to 65 minutes, or until the edges are set but the center still jiggles slightly.
- Turn off the oven, crack the oven door open, and allow the cheesecake to cool inside the oven for 1 hour.
- Remove the cheesecake from the water bath and foil. Let it cool completely on a wire rack.
- Once cool, cover and refrigerate for at least 6 hours, or preferably overnight, before serving. Top with sprinkles before serving if desired.
Notes
- For a simpler crust, you can use pre-made sugar cookie dough pressed into the bottom of the pan and baked for 12 minutes before adding the filling.
- If you do not want to use a water bath, bake the cheesecake at 325 degrees Fahrenheit for 60 minutes, then turn off the oven and let it cool inside for 2 hours before removing.
- Use high-quality vanilla extract for the best flavor in the filling.
Nutrition
- Serving Size: 1 slice
- Calories: 450
- Sugar: 35g
- Sodium: 300mg
- Fat: 28g
- Saturated Fat: 17g
- Unsaturated Fat: 11g
- Trans Fat: 0.5g
- Carbohydrates: 45g
- Fiber: 1g
- Protein: 7g
- Cholesterol: 95mg