

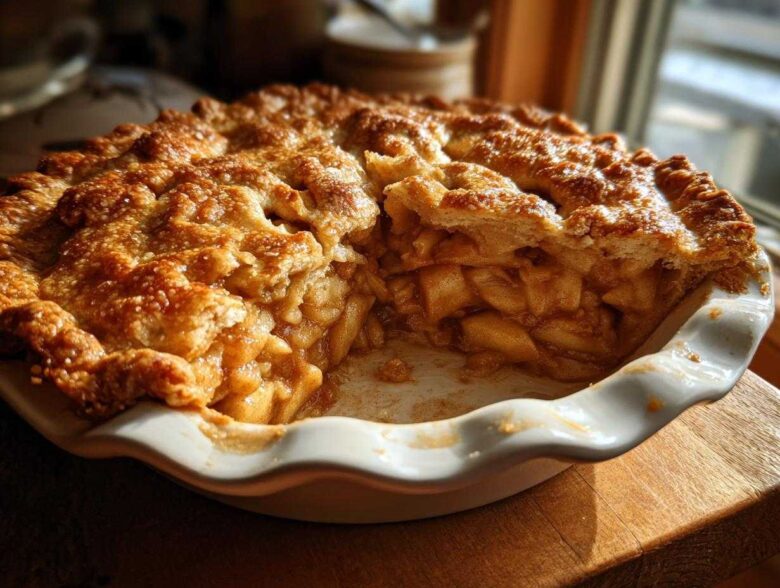
Oh my goodness, do you smell that? That warm, spicy, buttery aroma that fills every corner of the house? That, my friends, is the smell of success—it’s the unmistakable sign that you’ve just pulled the best homemade apple pie out of the oven. Forget those sad, floppy store-bought versions! This is the real deal, an apple pie from scratch that’s going to blow your socks off.
I spent years fighting with pastry dough. It was always tough, or it shrank away from the edge of the pan like it was scared of commitment! But I finally cracked the code for that perfectly crisp, ridiculously flaky pie crust recipe, thanks to a few stubborn lessons learned the hard way. This recipe combines that incredible all-butter crust with a filling that stays perfectly textured—no soupy mess here, trust me.
If you’re ready to make the ultimate classic apple pie and finally master that double crust, pull up a chair. This is the recipe that will make you the undisputed champion of holiday desserts. I’m so excited for you to try this; you can learn a little more about my journey in my baking philosophy!
Why This Classic Homemade Apple Pie Recipe Works (E-E-A-T Focus)
You need more than just good ingredients to make an amazing homemade apple pie; you need the right method, and that’s what sets this recipe apart from all the rest. I’ve tested this dozens of times, tweaking every little bit until it was simply perfect. It really delivers on the promise of a true, comforting fall baking recipe.
Trust me, this combination guarantees you’ll get rave reviews:
- The structure holds up beautifully because we rely on an all-butter crust that practically shatters when you cut into it.
- The filling tastes bright and spiced, never flat or gloopy.
- Even though it’s baking from scratch, the steps are laid out so clearly that even a cautious beginner will feel like a pro!
Achieving the Flakiest Pie Crust Recipe
The absolute core of any great pie is the crust, and for maximum flavor and flakiness, we have to use 100% cold butter. When that cold fat hits the hot oven, it creates steam pockets, giving you those lovely layers. Don’t touch the dough too much! Overmixing is the enemy here because it wakes up the gluten, turning your delicate pastry tough. Keep everything icy cold—the butter, the water, even your hands if you have to! This attention to temperature is the secret behind the best flaky pie crust recipe you’ll ever try.
The Secret to a Non-Soupy Cinnamon Apple Filling
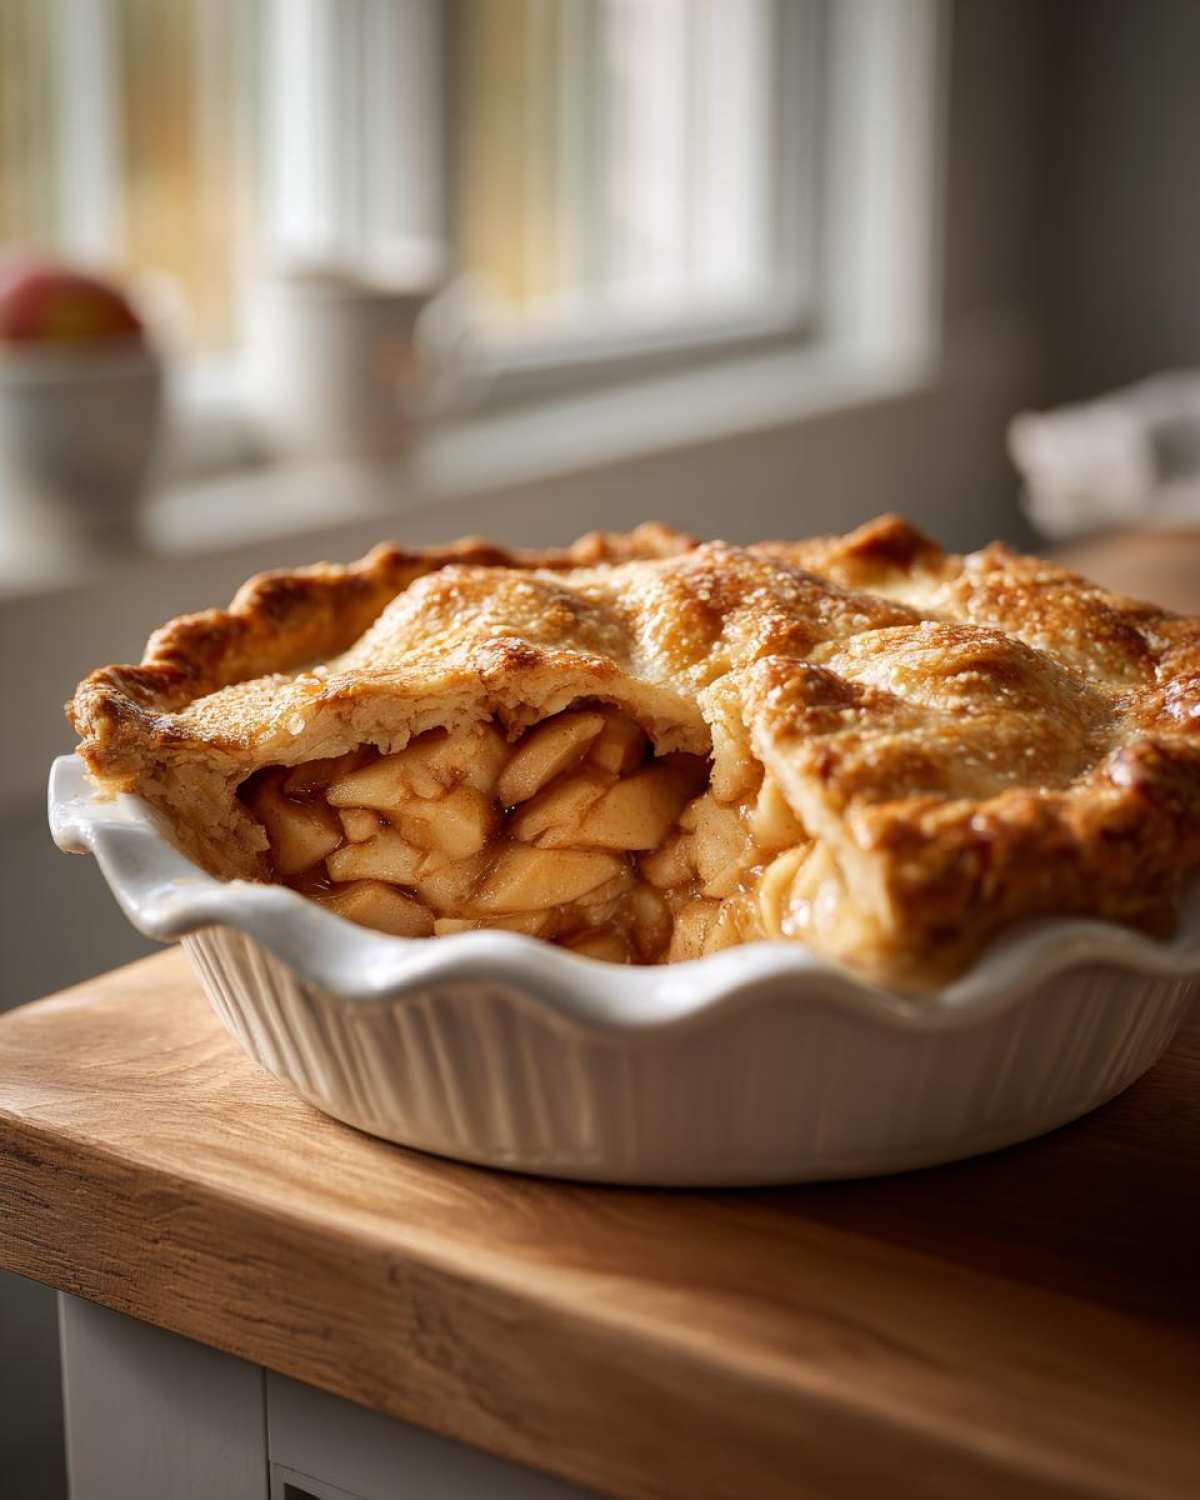
Nothing ruins a gorgeous presentation faster than a pool of syrupy liquid at the bottom of your pie tin. That’s why we use Granny Smith apples—they hold their shape so well and give us that necessary, wonderful tartness to counter the sugar. To thicken things up and avoid all that sogginess, we lightly dust the apples with a small amount of flour and sugar mixture. It absorbs the apple juices as they bake, resulting in a thick cinnamon apple filling that clings perfectly to every slice of your finished homemade apple pie.
Gathering Ingredients for Your Homemade Apple Pie From Scratch
Okay, now that we’ve established *why* this recipe is the keeper (flaky crusts for the win!), it’s time to talk about what we need. Since we are making this beauty completely apple pie from scratch, ingredient quality really matters here. Nothing store-bought is sneaking into this masterpiece!
We are breaking our shopping list into two clear sections because treating the crust ingredients differently from the filling ingredients is key to success. I’m linking out to my favorite maple candied pecan recipe if you want to add a little crunch to your topping later, but for now, let’s focus on the basics for this double crust pie.
Ingredients for the All-Butter Flaky Pie Crust
Remember, cold, cold, cold! This is for the full top and bottom layer of your pie, so make sure you have enough.
- 2 1/2 cups all-purpose flour
- 1 teaspoon salt
- 1 cup (2 sticks) unsalted butter, very cold and cubed
- 1/2 cup ice water, plus extra if needed
Ingredients for the Cinnamon Apple Filling
This is where the magic happens. We want firm apples that hold up to the heat!
- 6 medium Granny Smith apples, peeled, cored, and sliced 1/4 inch thick
- 1/2 cup granulated sugar
- 1/4 cup packed light brown sugar
- 1 teaspoon ground cinnamon
- 1/4 teaspoon ground nutmeg
- 1/8 teaspoon ground cloves
- 2 tablespoons all-purpose flour (for thickening that awesome cinnamon apple filling!)
- 1 tablespoon lemon juice
- 1 large egg, beaten (for egg wash)
- 1 tablespoon coarse sugar (for sprinkling)
Step-by-Step Instructions for the Best Homemade Apple Pie
Right, time to actually make this thing! I know looking at those ingredients can feel intimidating when you’re aiming for an apple pie from scratch, but I promise, if you follow these steps, you’ll prove how incredibly easy apple pie baking can be. We move methodically, one component at a time, so nothing gets rushed or overmixed.
Here is the exact order I follow to get that perfect, flaky result every single time. You’ll see that prepping the dough first lets it chill while you work on the filling, which is super efficient!
Making and Chilling the Flaky Pie Dough
First up is creating that dreamy dough. You’ll take your flour and salt, and then it’s time to cut in the ice-cold butter cubes. You need to work fast here. Use a pastry blender or even just your fingertips to smash that butter into the dry ingredients until you have chunks that look like peas and some flatter, lentil-sized pieces. Those bits are what make the layers!
Next, introduce the ice water one tablespoon at a time. Mix gently with a fork until the dough barely holds together—seriously, don’t knead it! Divide the shaggy mass into two equal halves, flatten each half into a nice disk (this helps it roll out later), wrap them up tight, and stick them in the fridge. This chilling step is non-negotiable, my friend. You need them in there for at least 1 hour, but honestly, two hours is even better. They have to be super cold before we roll them out for that glorious flaky pie crust recipe.
Preparing and Assembling the Apple Filling
While your dough is chilling, let’s tackle the stars of the show: the apples! Peel, core, and slice all six of your Granny Smiths about a quarter-inch thick. Toss those slices into a giant bowl. Now, sprinkle on all your sugars, spices (cinnamon, nutmeg, cloves!), the flour, and that little splash of lemon juice. Give it a very gentle toss—I mean it, don’t mash the apples! You want them evenly coated, not bruised. Set that bowl aside while the dough finishes chilling.
Preheat your oven to a whopping 425°F (220°C) and grab a baking sheet to catch any drips. Roll out your first disk of dough on a floured surface into a 12-inch circle. Carefully drape that into your 9-inch pie plate. Trim the edges, leaving about an inch hanging over. Now, pile that beautiful apple mixture high into the crust shell. If you have any tiny slivers of cold butter left? Dot them right over the filling—it adds richness!
Roll out the second dough disk. Lay it over the top, trim the excess, and crimp the edges securely to seal everything in. Before baking, this is where you give it a glorious egg wash and sprinkle it with that coarse sugar for that perfect candied finish. Don’t forget to cut a few generous slits in the top crust so the steam has somewhere to escape!
Baking and Cooling Your Homemade Apple Pie
We are using a two-temperature strategy here! Place the pie on the waiting baking sheet and pop it into that hot 425°F oven for exactly 15 minutes. This blast of heat sets the bottom crust super fast, which helps prevent sogginess. After those 15 minutes are up, you must immediately drop the temperature down to 375°F (190°C).
Keep baking for another 40 to 50 minutes. If you see the edges of your crust looking too dark while the middle is still pale, grab a strip of aluminum foil—don’t use parchment or wax paper for this!—and loosely drape it over the edges just to shield them. You know it’s done when the crust is golden brown and you can hear the filling bubbling happily through those top vents.
Now, stop yourself! Don’t be tempted to cut it right away. The worst mistake you can make with a classic apple pie is slicing it when it’s too hot. The filling hasn’t set yet. You absolutely must let this beauty cool on a wire rack for a minimum of 3 hours. I know it’s torture, but this rest time is what guarantees those sturdy, perfect slices. If you’re looking for inspiration on making pretty edges, check out my guide on decorative crust techniques!
Tips for Success with Your Homemade Apple Pie
Even with a fantastic recipe, sometimes little quirks pop up when you are baking. Since I’ve made this homemade apple pie a million times, I wanted to share my best survival tips so you don’t panic if things don’t look exactly like the photo right away.
Here are my quick fixes for common issues:
- Soggy Bottom? If you are worried about a soggy bottom, place your pie on a preheated baking stone or pizza stone when you reduce the oven temperature. That direct heat from below works wonders!
- Cracked Crust? This usually means the dough was too dry or you rolled it out too thin after it warmed up. Always check that the dough disk is supple, not brittle, before the final roll.
- Filling Too Thin? Next time, slightly increase the thickening flour in the filling mix, or try adding a tablespoon of quick-cooking tapioca instead of flour. It dissolves beautifully.
If you are looking for another amazing way to use those apples while you wait for your pie to cool, check out my recipe for apple cinnamon oatmeal! It’s perfect breakfast fuel.
Variations on the Classic Homemade Apple Pie
Look, I love tradition—this classic apple pie is exactly how my family has made it forever—but nobody wants to eat the exact same thing all the time, right? Once you’ve mastered the foundational homemade apple pie from scratch, it’s fun to play around a little bit. You don’t need a whole new recipe; just a few tweaks can make your pie feel brand new!
Don’t stress about changing anything major! The crust technique is gold, so we keep that the same. It’s the filling where you can really get creative. If you’re feeling adventurous, try swapping out just one or two of the Granny Smith apples for a sweeter variety like Honeycrisp or even a firm Gala. This totally shifts the overall flavor profile of your cinnamon apple filling, making it a little less tart, which some folks really prefer.
Another little thing I adore doing, especially when I feel like making a springtime version instead of a deep fall baking recipe, is adjusting the spice blend. If you have some cardamom sitting around, add just a half-teaspoon right along with your cinnamon and nutmeg. It adds this subtle, fragrant lift that is just heavenly. It doesn’t overpower the apple at all; it just makes the whole pie smell more sophisticated!
If you want to see another fantastic apple recipe that uses that same cozy fall flavor profile but in a completely different format—perfect for when you’re tired of rolling dough—you absolutely have to check out my apple cider cupcakes! But whether you stick to the basic spices or try cardamom, your perfect homemade apple pie base will always shine through.
Serving Suggestions for Your Comfort Food Dessert
Whew! The hardest part is over, and that glorious homemade apple pie is cooled and ready to slice. Now comes my favorite part: deciding what wonderful things to serve alongside it! This pie is definitely my go-to comfort food dessert, and how you serve it can really elevate the experience.
Honestly, a slice of this pie warms my soul all by itself, but if you want that ultimate indulgent experience, you have to go classic. You just can’t beat a scoop of high-quality vanilla bean ice cream melting slowly down the side of a warm slice. The contrast between the sharp, spiced apples and the cold creaminess? Perfection!
But let me tell you something my Midwestern relatives taught me: A slice of sharp, aged cheddar cheese placed right on top of the warm apple filling is just an amazing pairing. I know it sounds wild if you haven’t tried it, but the saltiness and tang of the cheese cut through the sweetness of the pie—it’s fantastic! It just takes a simple slice of pie into something extra memorable.
If you’ve got any leftovers, or if you just want that pie feeling in a drink form, you have to try my apple pie smoothie recipe next time. But for now, grab a fork and enjoy this slice of homemade heaven!
Storage and Reheating Instructions for Homemade Apple Pie
So, you somehow managed to have leftovers of this perfect homemade apple pie? Congratulations, you have excellent willpower, or maybe you just made a really big one! Knowing how to store your masterpiece so it stays delicious for days is just as important as knowing how to bake it.
The first big question folks always ask is whether they can just leave it on the counter. For an old fashioned apple pie that’s been baked until bubbly, a truly *fully cooled* pie can sit airtight on the counter for about 24 hours, especially if your kitchen isn’t super warm. That’s because the sugar and the low moisture content on the surface helps preserve it for a little while.
However, my strong recommendation, especially since this contains fruit and you want the absolute best result, is refrigeration. If you need it to last longer than a day (which, let’s be honest, means you need it to last past breakfast), wrap that pie tightly in plastic wrap or place it in a large sealed container and pop it in the fridge. It should stay fantastic for up to three or four days.
Now, the trickiest part: reheating! Nobody wants a cold, soggy slice of what should be a warm, flaky delight. If you’re reheating a whole pie, pop it back into a 350°F oven for about 15 minutes. But if you’re just warming up a single slice—and I am assuming you are—don’t microwave it! That will melt the butter in the crust and make it chewy.
Instead, lay that slice directly on a baking sheet and put it in a preheated 350°F oven for about 8 to 10 minutes. This lets the crust crisp back up beautifully while gently warming the spiced filling through. It tastes almost exactly like it just came out of the oven—seriously, this is the way to reheat homemade apple pie!
Frequently Asked Questions About Homemade Apple Pie
When you tackle a project like a full homemade apple pie, it’s totally normal to have a few questions pop up along the way! I’ve gathered the ones I hear most often from new bakers tackling this absolute classic. Don’t hesitate to ask if you have another one—I love hearing from you! You can also check out my recipe for spiced hot apple cider if you need a warm drink while you wait for your pie to bake!
Can I use store-bought pie dough for this homemade apple pie recipe?
Oh, this one comes up so much! Look, I’m all about celebrating when people are baking, even if you skip the crust prep. While I truly stand by this flaky pie crust recipe for the best flavor and texture, if you are in a rush, yes, you can use store-bought. The biggest trick when using pre-made dough is letting it warm up on the counter for just 10 or 15 minutes before you try to roll it out. If you try to unroll it straight from the fridge, it cracks immediately! Roll it slightly larger than necessary, and make sure you still crimp those edges together really well to seal up that gooey filling.
What are the best apples to use for a classic apple pie?
For the very best results in this recipe, you need apples that are firm and tart so they don’t turn to mush during that long bake time. I specify Granny Smith apples because they’re the gold standard for tartness and structure. If you want a deeper flavor profile for your classic apple pie, try a 50/50 mix! Maybe use half Granny Smith and swap the other half for a slightly sweeter, sturdy apple like Honeycrisp or Braeburn. That tart-sweet combination is unbeatable!
How can I make this an easy apple pie if I am a beginner baker?
That’s a fantastic question, and I absolutely want this to feel like an easy apple pie for you! The parts that can feel tricky for beginners are ingredient handling and crust decoration. First, focus completely on the chilling steps for the dough—that’s the biggest help! Second, when you get to the assembly part, ignore the fancy crimping.
Seriously, just focus on sealing the edges. Take the top and bottom overhangs, tuck them under themselves, and then just press down firmly with the tines of a fork all the way around. It seals perfectly, keeps the juices in, and still looks rustic and wonderful. You get all the flavor satisfaction without the stress of decoration!
Estimated Nutritional Data for This Homemade Apple Pie
Now, I know that after smelling all that warm cinnamon and butter, you probably aren’t thinking too hard about numbers, but for those of you who like to keep track, I wanted to include the estimated nutritional breakdown for one slice of this incredible homemade apple pie.
Please know that these figures are just an average based on standard ingredient measurements for the recipe below. Once you start using that special dark brown sugar or perhaps use a little extra butter on the crust (which, frankly, I don’t judge you for!), the numbers will shift a bit. This is your ultimate comfort food dessert, so enjoy it! If you’re looking for another autumnal treat, you can check out a different kind of sweet recipe here: pumpkin smoothie.
Here is what we’re looking at for one generous slice:
- Serving Size: 1 slice
- Calories: 420
- Sugar: 30g
- Sodium: 250mg
- Fat: 24g
- Saturated Fat: 15g
- Unsaturated Fat: 9g
- Trans Fat: 0g
- Carbohydrates: 52g
- Fiber: 3g
- Protein: 5g
- Cholesterol: 60mg
Remember, this is a traditional, old fashioned apple pie made with real butter for that flaky texture—it’s rich because it’s made with love! If you are cutting back on sugar, you can always try reducing the granulated sugar in the filling next time you make this marvelous homemade dessert idea.
Share Your Homemade Dessert Ideas
Wow, we made it! You have successfully tackled the ultimate homemade apple pie recipe, from mastering that flaky crust to getting the filling perfectly spiced. I hope your kitchen smells amazing right now! This recipe truly is my favorite way to deliver a classic, comforting bite of nostalgia. Baking from scratch takes a little effort, but seeing that finished beauty makes every second worth it.
So, what happened in your kitchen? I absolutely live for hearing about your results! Have you successfully kept the butter cold enough for the ultimate flake? Did you choose to top it with ice cream or that slightly controversial cheddar cheese?
Please, please take a moment to leave me a comment below! I love reading your feedback, and knowing that this classic apple pie worked perfectly for you makes my entire week. If you snapped a picture of your gorgeous creation—especially if you tried any fancy crimping—tag me on social media! I want to see all your beautiful homemade dessert ideas!
If you have any questions at all as you clean up, or if you want to chat more about how to adapt this for next time—maybe turning it into mini pies—head over to my contact page. Happy baking, and enjoy every single bite of that incredible homemade dessert!
PrintThe Ultimate Classic Homemade Apple Pie with Perfectly Flaky Crust
Follow this recipe to make a classic, double-crust apple pie from scratch, featuring a rich, all-butter flaky pastry and a perfectly spiced cinnamon apple filling.
- Prep Time: 45 min
- Cook Time: 65 min
- Total Time: 110 min
- Yield: 8 servings
- Category: Dessert
- Method: Baking
- Cuisine: American
- Diet: Vegetarian
Ingredients
- 2 1/2 cups all-purpose flour
- 1 teaspoon salt
- 1 cup (2 sticks) unsalted butter, very cold and cubed
- 1/2 cup ice water, plus extra if needed
- 6 medium Granny Smith apples, peeled, cored, and sliced 1/4 inch thick
- 1/2 cup granulated sugar
- 1/4 cup packed light brown sugar
- 1 teaspoon ground cinnamon
- 1/4 teaspoon ground nutmeg
- 1/8 teaspoon ground cloves
- 2 tablespoons all-purpose flour
- 1 tablespoon lemon juice
- 1 large egg, beaten (for egg wash)
- 1 tablespoon coarse sugar (for sprinkling)
Instructions
- Prepare the Crust: In a large bowl, whisk together the flour and salt. Cut in the cold butter using a pastry blender or your fingers until the mixture resembles coarse crumbs with some pea-sized pieces of butter remaining.
- Gradually add the ice water, one tablespoon at a time, mixing until the dough just comes together. Do not overmix. Divide the dough in half, form each half into a disk, wrap in plastic, and chill for at least 1 hour.
- Prepare the Filling: In a separate large bowl, gently toss the sliced apples with the granulated sugar, brown sugar, cinnamon, nutmeg, cloves, 2 tablespoons of flour, and lemon juice until the apples are evenly coated. Set aside.
- Assemble the Pie: Preheat your oven to 425°F (220°C). On a lightly floured surface, roll out one dough disk into a 12-inch circle. Carefully transfer the dough to a 9-inch pie plate. Trim the edges, leaving a 1-inch overhang.
- Pour the apple filling into the crust. Dot the top of the filling with small pieces of any remaining cold butter if desired.
- Roll out the second dough disk for the top crust. Place it over the filling. Trim the edges, leaving a 1-inch overhang. Crimp the top and bottom crust edges together to seal. Cut several slits in the top crust to allow steam to escape.
- Brush the top crust evenly with the beaten egg wash and sprinkle with coarse sugar.
- Bake: Place the pie on a baking sheet. Bake at 425°F (220°C) for 15 minutes. Reduce the oven temperature to 375°F (190°C) and continue baking for 40 to 50 minutes, or until the crust is golden brown and the filling is bubbly. If the edges brown too quickly, cover them loosely with foil.
- Cool: Let the pie cool completely on a wire rack for at least 3 hours before slicing and serving. This allows the filling to set properly.
Notes
- For the flakiest crust, keep all ingredients, especially the butter and water, as cold as possible during mixing.
- If you prefer a thinner filling, reduce the flour in the filling mixture to 1 tablespoon.
- Use a mix of tart and sweet apples for the best flavor balance.
Nutrition
- Serving Size: 1 slice
- Calories: 420
- Sugar: 30g
- Sodium: 250mg
- Fat: 24g
- Saturated Fat: 15g
- Unsaturated Fat: 9g
- Trans Fat: 0g
- Carbohydrates: 52g
- Fiber: 3g
- Protein: 5g
- Cholesterol: 60mg