

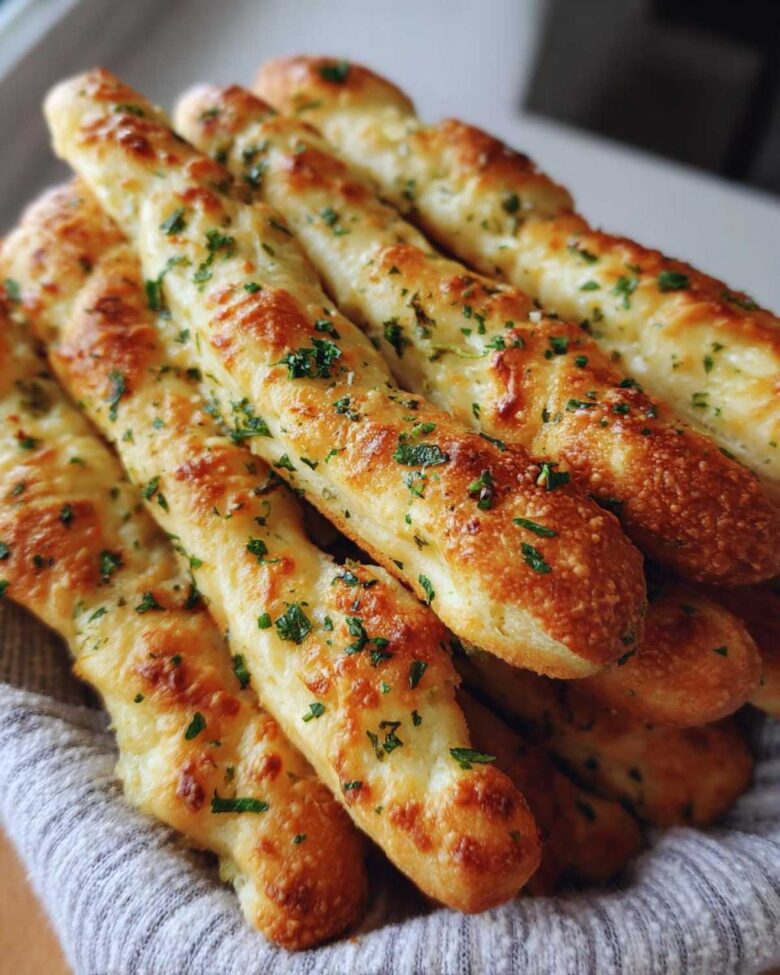
Oh my gosh, are you tired of craving those warm, pillowy, garlicky sticks you only get at your favorite Italian chain? Trust me, I’ve wasted so many trips just for a side order of their famous breadsticks. Forget going out! I spent what felt like a year testing, kneading, and tasting so you don’t have to. The quest was simple: achieve that impossibly soft, slightly chewy texture drenched in bubbling butter. This guide guarantees you are minutes away from the absolute best homemade breadsticks you’ve ever tried. Seriously, we cracked the code on texture and that signature garlic finish!
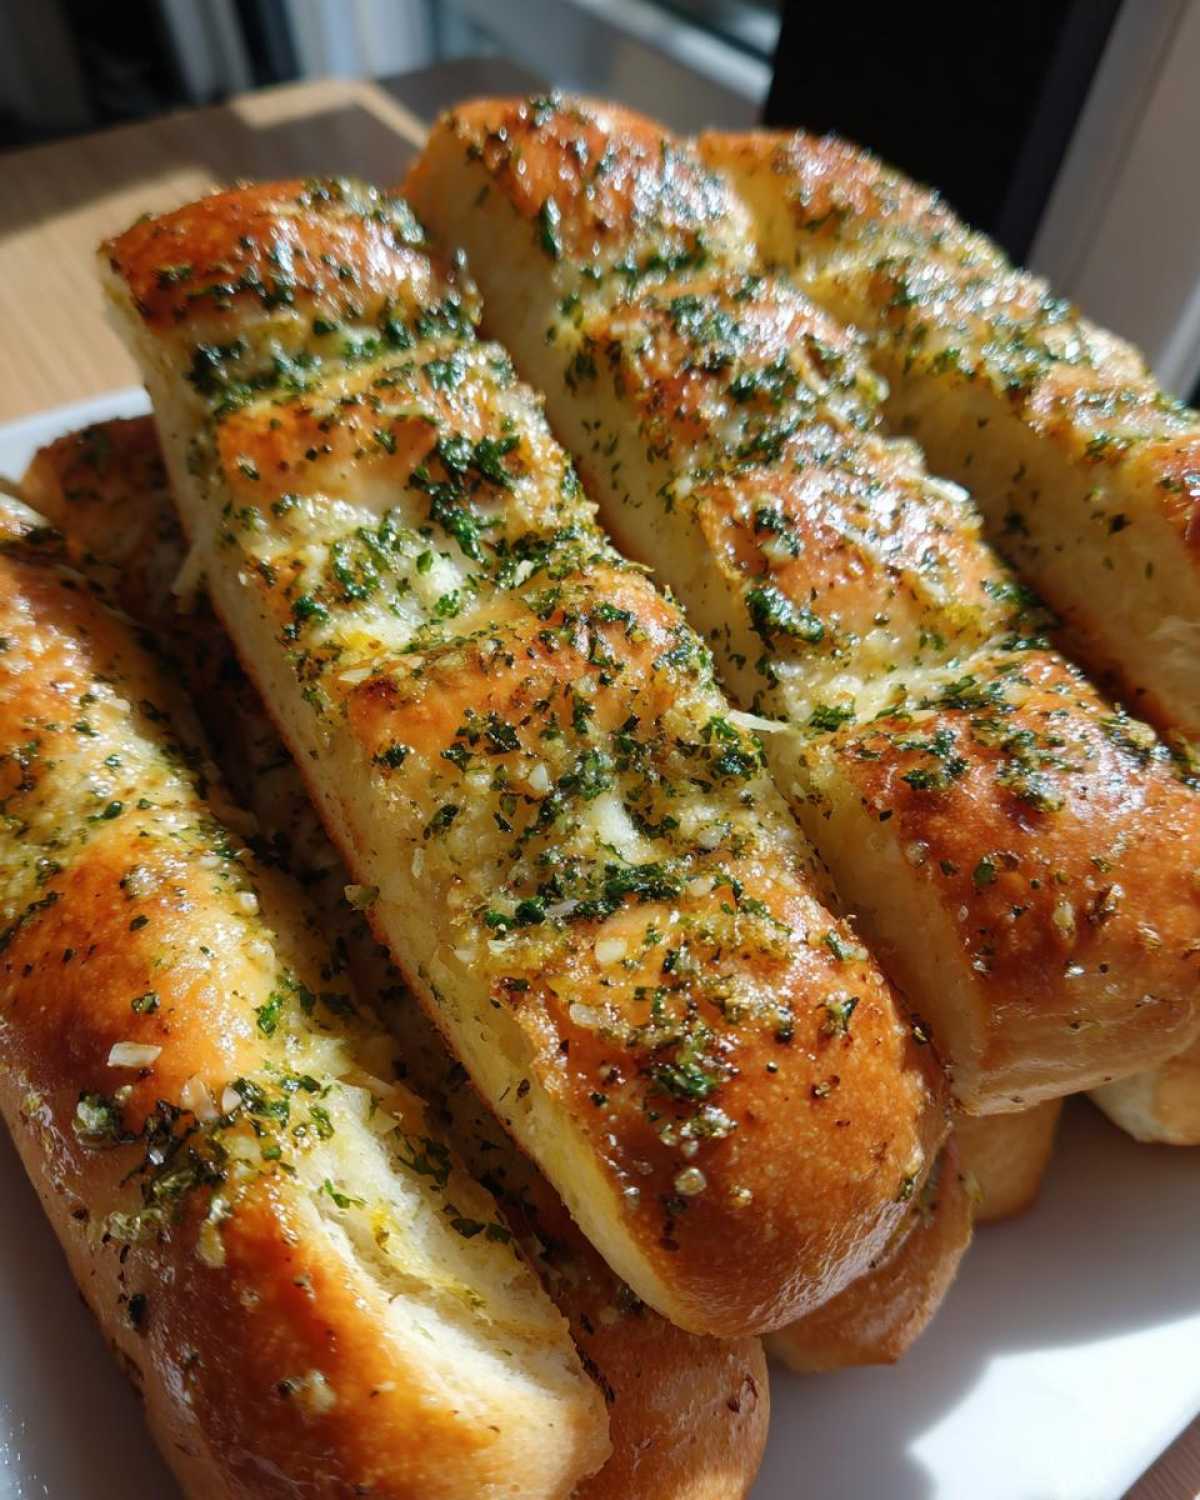
I’ve got the shortcut that keeps the rise time reasonable so you aren’t waiting around all day. If you want to impress guests or just make Tuesday dinner feel a little more special, this is the recipe you need. You can learn more about my baking philosophy over at our baking philosophy page, but right now, let’s get baking!
Why This Homemade Breadsticks Recipe Delivers Soft Garlic Breadsticks
The biggest difference between store-bought and these, honestly, is the feeling you get when you pull them out hot from the oven. We nailed the texture that keeps people coming back for more. These aren’t dry or tough; they are guaranteed soft and chewy!
- Unbeatable restaurant quality right in your kitchen.
- The rise time is fast—you’re looking at less than an hour total once the dough is mixed!
- They are perfectly coated in homemade garlic butter so you control the flavor intensity.
These easy breadsticks are guaranteed crowd-pleasers, whether they are an appetizer or a dinner side.
Quick Prep for Easy Breadsticks
You won’t be stuck in the kitchen all afternoon. With only about 20 minutes of actual hands-on prep time, you can have the dough mixing while you’re setting the table. It moves fast, I promise!
Gathering Ingredients for Perfect Soft Garlic Butter Breadsticks
Okay, let’s talk about what you need to pull this off. Don’t panic looking at the list; most of this you probably already have in your pantry. The key here is specificity, especially with the butter! We need some melted butter for the dough itself, but the topping needs very soft butter to accept all that minced garlic.
For the dough base, grab your active dry yeast—make sure it’s fresh! You’ll also need a cup of warm water, aiming for that sweet spot between 105 and 115 degrees F so the yeast wakes up happy. Then we are looking at 2 1/2 cups of all-purpose flour, a teaspoon of salt, and the first bit of butter, which is 2 tablespoons melted.
Now for the flavor bomb! The topping requires a much larger portion: a 1/4 cup of softened unsalted butter. You cannot skip softening it! Make sure you have two cloves of garlic ready to be minced super fine. Don’t forget that dried parsley and an extra 1/4 teaspoon of salt to sprinkle on top for that restaurant sparkle.
Step-by-Step Guide to Making the Best Breadsticks Recipe
This is where we turn simple flour into those amazing breadsticks! Follow these steps closely, especially regarding time and temperature, and you’ll get the perfect dough consistency. It’s super satisfying watching the yeast wake up and the dough get happy.
Activating the Yeast and Mixing the Breadsticks Dough
First things first: we need happy yeast! In your bowl, mix the warm water with the yeast and sugar. Don’t guess the temperature; you want that water sizzling hot to the touch but gentle enough not to kill the yeast, aiming for 105 to 115 degrees F. If it’s too cold, nothing happens. If it’s boiling, you’re done before you start! Wait five to ten minutes until it looks foamy and bubbly—that means your yeast is ready to work its magic.
Once it’s frothy, dump in the flour, salt, and the 2 tablespoons of melted butter. Mix it until it looks like a messy, shaggy disaster. That’s exactly what you want before you get your hands dirty!
Kneading and Rising Time for Chewy Breadsticks
Now, turn that shaggy mess out onto a lightly floured surface. Get ready to knead! You need to work this dough vigorously for a solid 5 to 7 minutes. You’ll feel the texture change halfway through; it goes from sticky and rough to smooth and elastic. That elasticity is what gives us those great chewy breadsticks!
Toss it into a lightly oiled bowl, give it a whirl to coat, and cover it up tight. Now, patience! Let it rise in a warm spot for 45 to 60 minutes until it has completely doubled in size. That rise time is crucial for the soft texture.
Shaping and Baking Your Appetizer Breadsticks
Preheat your oven right away to 400 degrees F (200 C) and line a baking sheet with parchment paper; trust me, clean-up is so much easier this way. Once the dough is puffy, punch it down gently—bye-bye, air bubbles! Roll or stretch that dough out into a big rectangle, keeping it about 1/4 inch thick. Don’t go too thin, or they’ll crisp up too much!
Use a knife or pizza cutter to slice those strips about 1 inch wide and 8 inches long. Lay them out on the tray with a little space apart. Bake them for just 10 to 12 minutes until they look perfectly golden brown—we are aiming for light, not dark!
Applying the Signature Garlic Butter Breadsticks Topping
While those beauties are baking, mix up your topping! Take that 1/4 cup of softened butter, the minced garlic, parsley, and the extra salt. Mince that garlic fine—nobody wants a huge chunk of raw garlic! The absolute most important step comes now:
As soon as those hot breadsticks come out of the oven, immediately brush them with the garlic butter mixture. Don’t wait! The heat absorbs all that glorious butter, making them shine and creating that signature restaurant finish. Immediately serve these breadsticks, or they might cool down too fast. You can check out our legal baking disclaimer if you have questions about ingredient integrity!
Expert Tips for Perfect Homemade Garlic Butter Breadsticks
So, you made your first batch of breadsticks, and they were amazing, but maybe you want to tweak them just a little? Or perhaps you’re short on time! I’ve got a few little secrets gathered over my many dough experiments to make sure every single batch of these homemade breadsticks comes out exactly how you want them.
If you want that extra chew factor—you know, that satisfying pull when you tear one apart—don’t skip the second rise! If the recipe instructions seem simple, that’s because they are, but slowing down a bit makes a big difference in the final chewiness.
Ingredient Substitutions for Your Breadsticks
Let’s talk yeast real quick. The recipe calls for active dry yeast, which is great because we let it proof first to make sure it’s alive and kicking. But sometimes life happens, right? If you’re in a rush and realize you only have instant yeast, don’t worry! You can definitely skip that whole foamy water step entirely.
Just mix the instant yeast right in with your dry ingredients—the flour and the salt—and then proceed with adding the wet stuff. It works like a charm! Also, if you want to make these even more restaurant-style, try mixing about 1/4 cup of grated Parmesan cheese directly into that softened garlic butter mixture right before you brush it on. It adds a fantastic salty bite to the buttery breadsticks!
Serving Suggestions for Dinner Side Breadsticks
Honestly, since these homemade breadsticks are so rich with garlic butter, they practically beg to be paired with something saucy! They are the perfect dinner side, obviously. Think about dunking them deep into a bowl of hearty spaghetti Bolognese or my crazy simple weeknight lasagna.
They also work perfectly alongside a big, crisp Caesar salad to dip into that extra dressing left on the plate. If you are making soup—like a creamy tomato bisque—these are a must-have. They take the place of plain old toast every single time in my house!
Storing and Reheating Buttery Breadsticks
These yummy, buttery breadsticks are best eaten fresh, of course, but they travel well! If you have leftovers—which I doubt you will—keep them in a good airtight container at room temperature. Do not refrigerate them! That just makes them hard.
When you’re ready for round two, skip the microwave; it turns them rubbery fast. Pop them straight onto a baking sheet in the oven at about 350 degrees F for just five minutes. To really bring back that garlic punch, I melt a teaspoon more butter and brush it over them halfway through reheating. That restores the shine and the flavor perfectly!
Frequently Asked Questions About Copycat Breadsticks
I always get questions about making these the day before or getting that *exact* soft texture from the restaurant. Don’t worry, these easy breadsticks are forgiving! Here are the things folks ask me most often about achieving the best homemade breadsticks.
Can I make these breadsticks ahead of time?
Oh yes, you absolutely can! If you want to get a jump start, you can mix the dough, knead it, oil the bowl, and cover it, then stick it in the fridge overnight instead of letting it rise on the counter. You might need to let it sit on the counter for about 30 minutes after taking it out of the cold before you shape it, though. If you mean after they are baked? Keep them airtight at room temperature, but try to reheat them the next day for that perfect buttery texture!
How do I get the softest possible breadsticks?
This is mostly about the rise and the butter! Number one: Don’t rush that first rise! If the dough doesn’t double in size, the gluten hasn’t relaxed enough, and you end up with harder breadsticks. Number two, and this is huge: Brush that garlic butter on the second those breadsticks hit the sheet pan after baking. The residual heat sucks up the butter, making them incredibly soft and moist!
Can I add cheese to these breadsticks?
Are you kidding? That’s a fantastic idea! If you want to turn these into cheesy breadsticks, the easiest time to add the cheese is right after you brush them with the garlic butter topping. Grab some grated Parmesan—freshly grated dissolves better—and sprinkle it generously over the hot, buttery sticks. It melts right into the garlic mixture. If you want a *lot* of cheese, you can sprinkle some right over the unbaked dough before they go into the oven, but watch carefully so it doesn’t burn before the dough cooks through. You can reach out to me about recipe modifications anytime on my contact page!
Nutritional Estimates for These Breadsticks
Look, these amazing, soft garlic butter breadsticks are definitely a treat! They are packed with flavor thanks to all that butter and dough action, so remember these numbers are just an estimate—they change based on how much butter *you* brush on at the end. Seriously, go heavy on that garlic butter, it’s worth it!
These estimates are based on serving yourself two breadsticks, as calculated from the recipe yields. If you eat four—and I won’t judge you—just double the numbers, okay? I always say, when you’re making food this delicious, we aren’t really worried about the micro-details, but it’s good to have a general idea!
Here’s the breakdown:
- Calories: Around 180 per serving (two sticks)
- Fat: About 8 grams total fat
- Saturated Fat: Roughly 4.5 grams, mostly from that great butter!
- Carbohydrates: Around 24 grams
- Protein: About 4 grams
- Sugar: Very low, just about 1 gram
Because we’re baking these at home, you control the sodium, but this approximation comes with about 250mg of salt per serving. Remember, these are just guides, and you can always check out our privacy policy if you want to know more about how we handle recipe information in general!
Share Your Experience with These Homemade Breadsticks
Okay, now that you’ve pulled that glorious pan of golden, garlic-drenched breadsticks out of your oven, I desperately need to know how it went! Did you nail that soft, pillowy texture? Did your family ask if you smuggled them home from your favorite Italian place? Tell me all about it!
This is the part where you jump into the comments below and leave a rating. Seriously, if you loved these dinner side breadsticks, hit that five-star button! It helps other people find this recipe and proves that homemade is always better than takeout.
If you snapped a picture of your perfectly shaped, buttery appetizer breadsticks, please tag me on social media! I love seeing your finished products. Seeing your success with the dough and the garlic topping is honestly the highlight of my week! If you have any final questions or want to share your own secret ways to jazz up the garlic butter, drop them down below. Don’t forget to check out our terms and conditions before posting photos, just in case!
PrintEasy Homemade Garlic Butter Breadsticks
Make soft, tender breadsticks at home that taste like your favorite restaurant version, coated in rich garlic butter.
- Prep Time: 20 min
- Cook Time: 12 min
- Total Time: 1 hour 32 min
- Yield: 12 servings
- Category: Appetizer
- Method: Baking
- Cuisine: American
- Diet: Vegetarian
Ingredients
- 1 cup warm water (105-115 degrees F)
- 2 1/4 teaspoons active dry yeast
- 1 tablespoon granulated sugar
- 2 1/2 cups all-purpose flour, plus more for dusting
- 1 teaspoon salt
- 2 tablespoons unsalted butter, melted
- 1/4 cup unsalted butter, softened (for topping)
- 2 cloves garlic, minced
- 1 teaspoon dried parsley
- 1/4 teaspoon salt (for topping)
Instructions
- Combine the warm water, yeast, and sugar in a large bowl. Let stand for 5 to 10 minutes until foamy.
- Stir in the 2 1/2 cups flour, 1 teaspoon salt, and 2 tablespoons melted butter into the yeast mixture. Mix until a shaggy dough forms.
- Knead the dough on a lightly floured surface for 5 to 7 minutes until smooth and elastic.
- Place the dough in a lightly oiled bowl, turning to coat. Cover the bowl and let the dough rise in a warm place for 45 to 60 minutes, or until doubled in size.
- Preheat your oven to 400 degrees F (200 C). Line a baking sheet with parchment paper.
- Punch down the risen dough. Roll or stretch the dough into a large rectangle, about 1/4 inch thick.
- Cut the dough into strips about 1 inch wide and 8 inches long. Place the strips on the prepared baking sheet, leaving a small space between them.
- Bake for 10 to 12 minutes, or until lightly golden brown.
- While the breadsticks bake, prepare the topping: In a small bowl, mix the 1/4 cup softened butter, minced garlic, parsley, and 1/4 teaspoon salt.
- Immediately brush the hot breadsticks generously with the garlic butter mixture as soon as they come out of the oven. Serve warm.
Notes
- For extra flavor, add 1/4 cup grated Parmesan cheese to the melted butter topping.
- If you prefer a chewier texture, let the dough rise for a second time (about 30 minutes) after shaping the sticks before baking.
- Use instant yeast if you skip the initial proofing step; mix it directly with the dry ingredients.
Nutrition
- Serving Size: 2 breadsticks
- Calories: 180
- Sugar: 1
- Sodium: 250
- Fat: 8
- Saturated Fat: 4.5
- Unsaturated Fat: 3.5
- Trans Fat: 0
- Carbohydrates: 24
- Fiber: 1
- Protein: 4
- Cholesterol: 15