

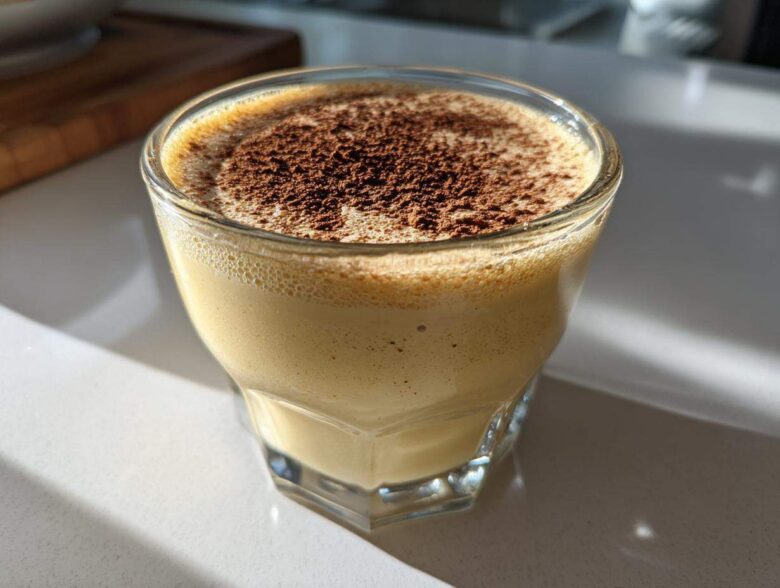
The smell of nutmeg and baking spices instantly transports me back to Christmas Eve at my Aunt Carol’s house. Nothing says ‘holiday tradition’ like a frosty mug of rich, thick eggnog, but honestly? Store-bought stuff just doesn’t cut it. I spent years tweaking my family’s old-school method until I finally nailed what I call the absolute best, creamiest homemade eggnog recipe you’ll ever taste. Forget those thin, watery imposters! This recipe guarantees you get that luxurious, velvety texture every single time, making your winter gatherings instantly memorable. Trust me, once you go scratch-made, you won’t look back.
Why This Homemade Eggnog Recipe is Superior
Look, I love store-bought solutions for easy holiday mornings, but when it comes to eggnog, you really can’t cheat the system. That stuff on the shelf is fine, I guess, if you like tasting stabilizers instead of real cream. But when you make this best homemade eggnog, the difference is shocking. It’s the very definition of a rich dairy dessert drink, but light enough to sip slowly by the fire. My secret, which I’ve refined over years of taste-testing—much to my family’s delight—is using only fresh, high-quality dairy and controlling the cooking temperature myself. That control is what gives you the real deal! If you want to learn more about how we develop these recipes, check out our story.
It’s mostly about building those layers of flavor. You control the spice ratios, so your nutmeg isn’t overwhelming everything else. Plus, you decide if it stays creamy or gets extra thick. It’s an experience, darling, not something you just grab off a truck!
Achieving Velvety Eggnog Texture
If you are chasing that perfect, almost melt-in-your-mouth feel, it all comes down to the heavy cream and the low-and-slow cook. We are cooking those yolks just enough to thicken the milk, but not so much that we cook them solid! That precise moment when the mixture gets rich and smooth, what I call that velvety eggnog texture, is heaven. Don’t rush that part, or you’ll end up with sweet, spiced custard instead of a gorgeous sipper.
Simple Ingredients for Perfect Homemade Eggnog
One of the joys of making eggnog from scratch is realizing you don’t need a pantry full of weird, esoteric items lurking around! Seriously, this list is so straightforward. It’s just the basics, elevated by careful technique. You probably have most of this right now, which means you could be sipping your own incredible homemade eggnog tomorrow.
I always make sure my dairy is fresh; you can absolutely taste the quality here. Don’t skimp on the heavy cream—that’s what delivers the richness we talked about earlier. Also, please pay attention to the little things. We aren’t using just any eggs; we need those six large yolks for structure!
Here are the exact components you’ll need. Make sure you measure everything carefully, especially that sugar, because chemistry matters when you are cooking eggs:
- 6 large egg yolks
- 1 cup granulated sugar
- 1 quart whole milk
- 1 pint heavy cream
- 1 teaspoon vanilla extract
- 1/4 teaspoon ground nutmeg
- Pinch of ground cinnamon
- Optional: 1 cup bourbon, rum, or brandy
That’s it! Six simple ingredients plus your spirit of choice if you’re making the adult version. See? Nothing complicated at all. It’s the method that turns these humble ingredients into something incredibly festive.
Easy Eggnog Instructions: Mastering the Stovetop
Okay, now for the fun part! We’ve got our beautiful ingredients gathered; it’s time to put them together. Don’t let the word “tempering” scare you; it’s the most important step, but once you see how simple it is, you’ll feel like a total culinary genius. These easy eggnog instructions are designed so you can pull this off without a hitch. If you ever need a refresher on general kitchen safety or handling hot liquids, feel free to check out some of my other kitchen guides!
The whole process moves quickly once you start heating the milk, so just make sure you have your whisk ready and your focus locked in!
The Crucial Step: How to Temper Eggs for Eggnog
This is where we stop the eggs from turning into chunky scrambled bits in your beautiful base. You’ve whisked your yolks and sugar until pale, which is great! Now, you need to introduce the hot milk very, very slowly. Take about one cup of that warm milk from the stove—not off the heat, just a cup—and pour it in a thin, steady stream into the egg mixture while you whisk like crazy. You’re essentially bringing the temperature up gently. That careful, constant whisking is the secret to getting that smooth, rich base we are aiming for.
Cooking the Homemade Eggnog Base
Once those eggs are warmed up, pour that whole tempered batch right back into the saucepan with the rest of the milk and cream. Put it back on the stove, but keep the heat low! We are cooking this low and slow. You have to stay right there stirring constantly with a wooden spoon—I mean it, don’t walk away for a second! We’re looking for the magic moment when that thick holiday drink mixture coats the back of your spoon perfectly, usually around 170 degrees F. The second it coats, yank it off the heat! If you hear it sizzle or start to bubble, you’ve gone too far, and we’ll cry together later.
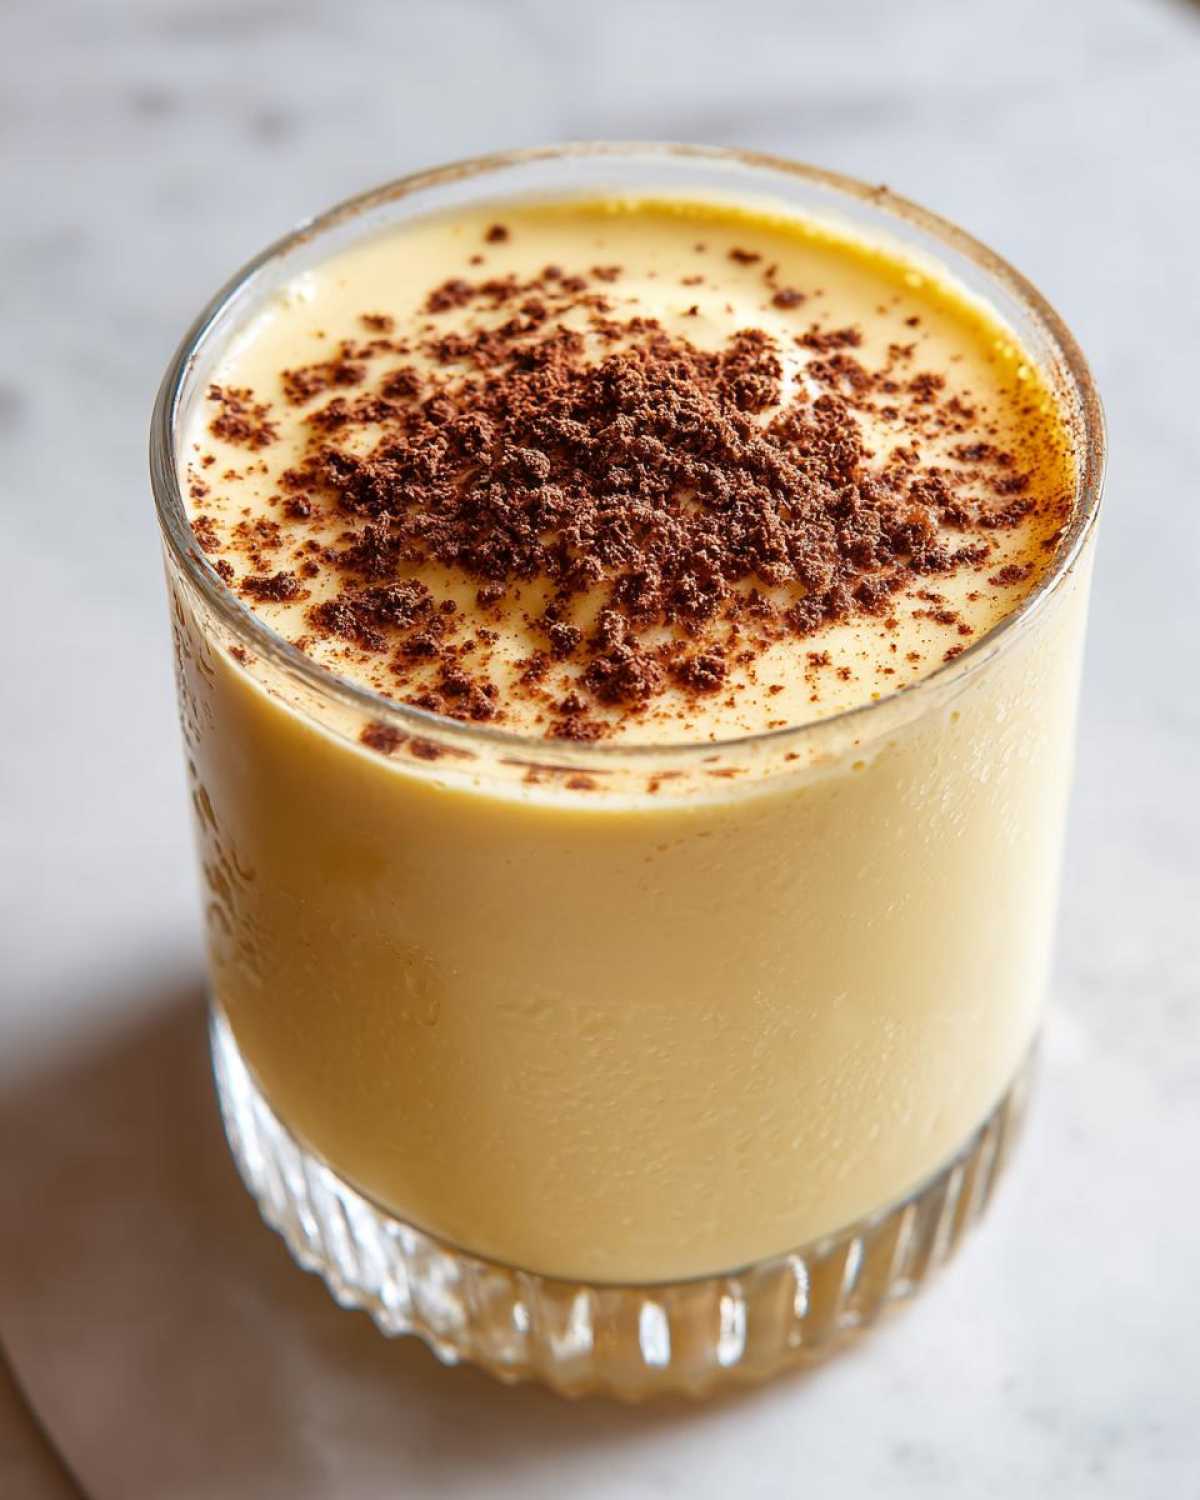
Variations: Spiked Eggnog Recipe vs. Non Alcoholic Eggnog Base
Now, you can totally make this recipe just for the kids or designated drivers—it’s delicious as a non alcoholic eggnog base too! If you skip the booze, just add a bit more milk or cream, maybe that extra quarter cup I mentioned in the notes, to get the exact same creamy consistency.
But let’s be real, for most of us, this is about that kick! My favorite way to make a spiked eggnog recipe is using bourbon. It has that little smoky depth that just sings alongside the nutmeg. You can certainly use rum for a warmer flavor or brandy if you want something a little fruitier. If you’re looking for other warm drinks to try this season, check out my spiced hot apple cider recipe—it’s perfect for transitioning between cocktails!
Choosing Spirits for Your Spiked Eggnog Recipe
A word of advice I learned the hard way: never boil your alcohol! That’s just wasteful, and you lose all that lovely flavor. You want to stir your chosen spirit—be it that bourbon, rum, or brandy—in *after* you’ve taken the saucepan completely off the heat. Stir it in well. This keeps the alcohol strong and the flavor bright in your final batch of homemade eggnog. This is when you see the drink transform into something truly special for the adults.
Tips for Success with Your Classic Eggnog Recipe
I know that stovetop cooking part can feel nerve-wracking, especially handling those hot eggs, but I promise you, following those steps will result in the most unbelievable classic eggnog recipe you’ve ever made. But the work isn’t totally done once it’s cooked! The resting period is actually just as vital as the tempering step. You need to give those spices time to really get to know the cream and the eggs.
My number one tip for anyone aiming for true excellence in their homemade eggnog is to let it chill. At a minimum, give it four hours. But, wow, if you can manage to keep your hands off it for a full 24 hours, the difference is mind-blowing. The nutmeg bloom and vanilla deepen, and the whole texture settles into that wonderfully thick consistency.
Also, ditch the pre-ground nutmeg you keep in your spice drawer! I’m begging you! If you want that last little bit of magic, you have to grate your nutmeg fresh right before serving. The flavor explosion from fresh nutmeg is incomparable; the stuff in the jar tastes dusty by comparison. It adds that final, perfect aromatic layer to your beautiful, creamy holiday drink.
If you’re looking for some other recipes that just scream comfort and holiday baking, you should peek at my cinnamon roll pancakes—they are surprisingly easy!
Storage and Make Ahead Eggnog Instructions
This is such a great recipe for holiday planning because it loves to wait! Seriously, you can—and should—make this a day or two ahead of your big party. That chilling time we talked about earlier? It’s essential for flavor melding, but it also means you aren’t scrambling around making a creamy holiday drink while guests are walking in the door. That’s a win-win, right?
If you are following the recipe, you can safely keep your beautiful, chilled homemade eggnog in the refrigerator for up to a full week. I usually use my prettiest sealed glass container for storage—it just feels more festive—but any airtight container works wonderfully.
I often whip up a batch right after Thanksgiving. That gives it almost a full week to mature in the fridge, and honestly, the flavor on day five is better than day one! Plus, it saves me precious counter space when I’m prepping other things for Christmas dinner. It’s truly the ultimate make ahead eggnog solution.
If you are prepping for a huge crowd, you can even stir in the alcohol a few days ahead to let those flavors marry even more deeply. Just keep it sealed tight and cold. For other make-ahead holiday snack ideas that save time later, you absolutely have to check out my pumpkin spice trail mix recipe!
Serving Suggestions for This Creamy Holiday Drink
Once your homemade eggnog is perfectly chilled—and I mean perfectly!<—it’s time to make it look as good as it tastes. Presentation really matters when you are serving something this special. I love using those classic, old-fashioned little punch glasses or heavy footed mugs. It just screams cozy winter evening!
The absolute essential garnish for this creamy holiday drink is freshly grated nutmeg. Don’t use the shaker can powder; please grate it fresh right over the top of each glass the moment before serving. That sharp, immediate aroma is the finishing touch.
If you want to get fancy, especially for a party, a lovely, thin cinnamon stick poking out of the glass looks beautiful. If you’re making the spiked version, a little dusting of cinnamon across the top of the serving bowl before you pour is also stunning. For frosting inspiration that carries that same holiday vibe, you might enjoy my pumpkin spice cake with cream cheese frosting!
Frequently Asked Questions About Homemade Eggnog
I always get so many questions once people try making their own batch of this recipe! It totally makes sense because working with temps and eggs can feel tricky the first time around. Here are the absolute top questions I hear about delivering that perfect homemade eggnog experience every year.
Can I make this homemade eggnog without eggs?
I have to be honest with you here, darling—for this specific version, no, you really can’t skip the eggs. They are essential because they act as the thickener when we gently cook the mixture, and they are vital for that lovely, rich body. If you are looking for something completely egg-free, you might need to pivot to a totally different type of recipe, maybe one of the other no bake holiday drinks I’ve experimented with that use cornstarch or extra cream to mimic that thickness instead. But for this classic eggnog recipe, the yolks are non-negotiable for flavor and texture!
How long does homemade eggnog last in the fridge?
This is where making it yourself really shines! Because we are cooking the mixture properly (that tempering step is safety armor!), your homemade eggnog keeps wonderfully well. If you store it in a sealed jar or container in the coldest part of your fridge, it stays delicious and safe for up to one full week. That’s why I always say make it ahead! It just gets better after a day or two, giving you plenty of time to handle that creamy holiday drink before your main holiday event.
My eggnog still seems a little thin. Did I mess up the tempering?
Oh, don’t worry one bit! Sometimes the temperature varies depending on your stovetop or how fast you whisked. If your Homemade Eggnog is slightly thinner than you hoped for, don’t panic! The solution is easy: gently reheat the entire batch on low heat, stirring constantly, until it coats the back of your spoon again. This little reheat often tightens up that structure perfectly and gives you the desired velvety eggnog texture. If you’re worried about boiling, just pull it off the heat before it even steams heavily next time.
Is it safe to use raw egg yolks if I decide not to cook it?
If you are looking into the super old fashioned eggnog methods that don’t involve any cooking, you are entering “raw egg territory,” and that requires serious care. Honestly, for peace of mind—especially when serving older relatives or kids—I really advise sticking to the stovetop tempering method outlined above. Cooking those yolks to 170°F kills any potential bacteria and gives you that fantastic, safe, thick base. If you want to make a non alcoholic eggnog base, I strongly recommend cooking it first, even without the alcohol, just to be safe!
Share Your Traditional Holiday Drinks Experience
Now that you have the keys to the kingdom of rich, velvety custard in a glass, I absolutely want to hear about it! There’s nothing I love more than knowing my favorite homemade eggnog recipe has found its way onto someone else’s table for the holidays.
Did you nail that smooth texture on the first go? Which spirit did you choose to spike yours with? Or maybe you kept it virgin as a lovely non alcoholic eggnog base? Don’t be shy—tell me everything!
Take a picture of your beautiful, frosty mugs! I’d love to see how you garnished your traditional holiday drinks. Drop your rating and your successes (and any little snags you hit along the way—we all learn together!) in the comments below. If you want to send photos or connect directly, you can always use my contact page here: Get in Touch! Happy sipping, and thanks for letting my family recipe become part of your tradition!
PrintThe Best Creamy Homemade Eggnog
Make rich, velvety eggnog from scratch. This recipe provides instructions for a classic, creamy base that you can serve spiked or non-alcoholic.
- Prep Time: 15 min
- Cook Time: 15 min
- Total Time: 30 min
- Yield: 6 servings
- Category: Dessert Drink
- Method: Stovetop Cooking
- Cuisine: American
- Diet: Vegetarian
Ingredients
- 6 large egg yolks
- 1 cup granulated sugar
- 1 quart whole milk
- 1 pint heavy cream
- 1 teaspoon vanilla extract
- 1/4 teaspoon ground nutmeg
- Pinch of ground cinnamon
- Optional: 1 cup bourbon, rum, or brandy
Instructions
- In a medium bowl, whisk the egg yolks and sugar together until the mixture is pale yellow and thick.
- In a large saucepan, combine the whole milk and heavy cream. Heat over medium heat until steam rises and small bubbles form around the edges. Do not boil.
- Temper the eggs: Slowly pour about one cup of the hot milk mixture into the egg yolk mixture while whisking constantly. This prevents the eggs from scrambling.
- Pour the tempered egg mixture back into the saucepan with the remaining milk and cream.
- Cook over low heat, stirring constantly with a wooden spoon or spatula, until the mixture thickens enough to coat the back of the spoon (about 170 degrees F). Do not let it boil.
- Remove the saucepan from the heat immediately. Stir in the vanilla extract, nutmeg, and cinnamon.
- If making the alcoholic version, stir in your choice of spirit now.
- Pour the eggnog through a fine-mesh sieve into a clean bowl to ensure a smooth texture.
- Chill the eggnog completely in the refrigerator for at least 4 hours, or preferably overnight, to allow the flavors to meld.
- Serve cold, garnished with extra grated nutmeg.
Notes
- For a non-alcoholic version, simply omit the spirits and add 1/4 cup more milk or cream.
- If you prefer a very thick texture, chill the mixture for 24 hours before serving.
- You can make this recipe ahead of time; it keeps well in the refrigerator for up to one week.
Nutrition
- Serving Size: 1 cup
- Calories: 450
- Sugar: 35g
- Sodium: 90mg
- Fat: 30g
- Saturated Fat: 18g
- Unsaturated Fat: 12g
- Trans Fat: 1g
- Carbohydrates: 38g
- Fiber: 0g
- Protein: 12g
- Cholesterol: 350mg