

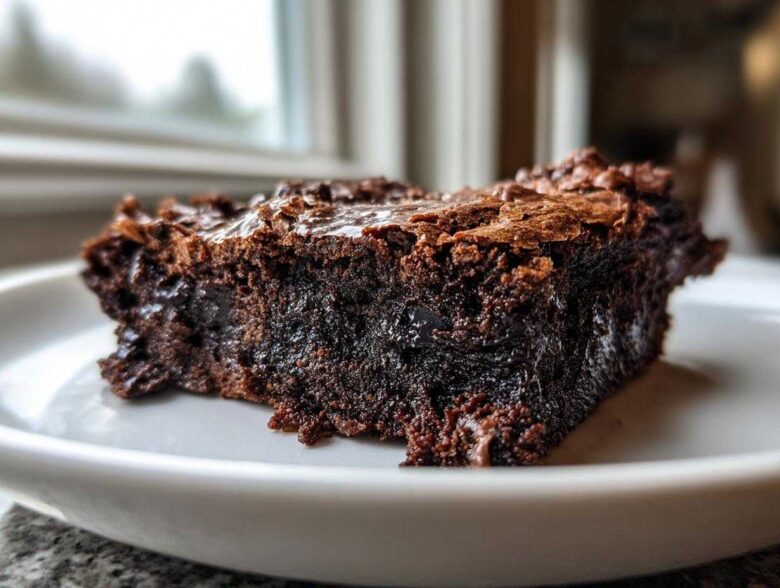
Listen, I need you to forget every disappointing, dry, crumbly brownie you’ve ever suffered through. We’re done with that! For years, I chased that mythical, perfect texture—the one that’s barely holding itself together, intensely chocolatey, and leaves a rich, gooey smear on your fingers. Well, folks, after countless batches, I finally cracked the code, and I’m handing over the keys to the kingdom. This recipe guarantees you the absolute **Fudgiest Brownies** you will ever make, period. If you hate dry edges and want a dessert that tastes like pure, melted dark chocolate fudge? Keep reading. We are actively fighting against anything that hints at being ‘cakey’ here! If you’re also looking for the moistest cakes on the planet, you should definitely check out my recipe over at moist chocolate cake recipe when you’re done with this chocolate marathon!
Why This Recipe Creates the Fudgiest Brownies Ever
Look, making a truly fudgy bar versus a fluffy, cake-like square is all about fighting gluten development and maximizing fat. If you want these to be the most **Dense Chocolate Brownies** you’ve ever touched, you have to treat this recipe differently than a standard cake recipe. We are drastically cutting down on flour—it’s the number one culprit responsible for that unwelcome ‘cakey’ texture. Trust me, you won’t miss it!
We are also relying on specific fat ratios and sugar structures to keep everything rich and moist below the surface. It’s a science experiment for your tastebuds, and it guarantees **No Cakey Brownies**!
The Role of Melted Butter in Fudgy Brownies
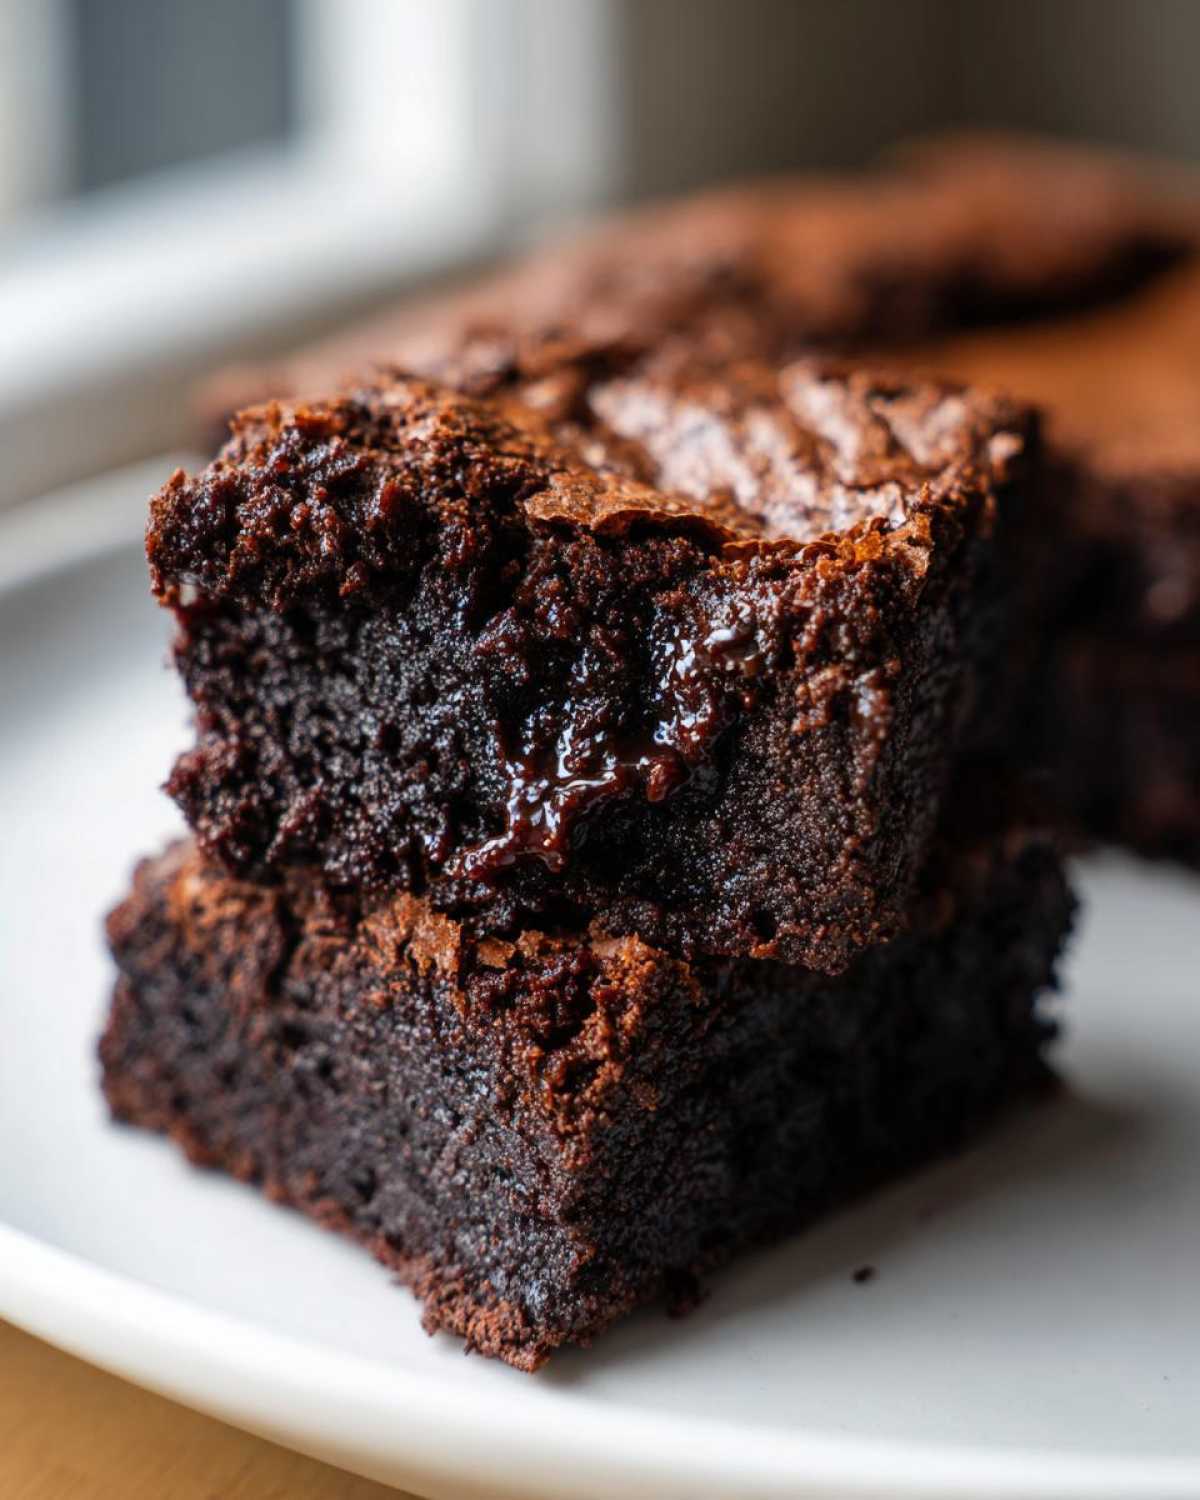
This is mission critical: we use melted butter, not softened butter that you cream with sugar. When you melt the butter and then mix it right into the sugars, you are skipping the aeration step entirely. Aeration creates air pockets, and air pockets equal lift and cakeiness. We want density, so melted butter gives us that immediate, heavy emulsion that leads directly to that glorious fudgy structure. If you want to learn about pure, simple fudge, check out my easiest 3-ingredient chocolate fudge.
Achieving Gooey Center Brownies: Don’t Overbake
This is the hardest part, I know! You need nerves of steel. When the baking time says 28 to 32 minutes, you pull them out when you see the edges set, but the middle still looks slightly too soft. The toothpick test is your guide: you are looking for *moist crumbs*, not a clean stick. If it comes out clean, you missed the mark and you’re getting cake. Keep them in the oven until you see those fudgy little crumbs clinging to the wood.
Ingredients for Your Fudgiest Brownies
Okay, now that you know *why* these work, let’s talk about the cast of characters. When you’re aiming for the *most* fudgy bar possible, every ingredient matters, especially the quality of your chocolate. Don’t skimp here! Make sure your eggs are at room temperature, please. Cold eggs deflate the melted butter mixture when you add them in, and we need that seamless blend for the best texture. If you want to explore other amazing chocolate bakes, my recipe for chocolate pudding cake is another must-try!
- 1 cup (2 sticks) unsalted butter, melted
- 1 3/4 cups granulated sugar
- 3/4 cup packed light brown sugar
- 4 large eggs, room temperature
- 1 tablespoon vanilla extract
- 3/4 cup unsweetened cocoa powder, natural or Dutch-process
- 1/2 cup all-purpose flour
- 1 teaspoon salt
- 1 cup (6 ounces) bittersweet chocolate chips or chopped chocolate
Remember, the flour is intentionally low. This is what keeps these bars dense and gloriously moist!
Step-by-Step Guide to Making the Fudgiest Brownies
Now for the fun part! This process moves fast, so have everything ready to go before you start whipping things around. We aren’t doing any complicated creaming steps here; we’re keeping it quick and heavy on the chocolate flavor.
Preparing the Pan and Preheating
First things first, get that oven warmed up to 350°F (175°C). For the easiest life later, you absolutely must line your 9×9 inch metal pan with parchment paper. Make sure you leave an overhang—you know, those little ‘handles’ sticking up on two sides? That’s your lifeline when you have to lift these delicate, decadent bars out later. Give that paper a quick spritz of non-stick spray too, just to be safe!
Mixing Wet and Dry Components for Fudgy Brownies
Grab a big bowl and whisk together your melted butter with both sugars until it looks smooth and a little lighter in color—it gets happy when you mix it! Then, toss in the eggs one by one, whisking hard after each one. Once the vanilla is in, switch gears. In a separate bowl, quickly whisk your cocoa powder, flour, and salt together. Now, add the dry stuff to the wet mixture, and here’s the main rule for **Fudgiest Brownies**: mix with a rubber spatula ONLY until *just* combined. I mean it! Stop stirring! If you keep going, you develop gluten, and gluten makes cake. Don’t forget to gently fold in those chocolate chips for an extra punch of flavor. If you’re worried about your folding technique, I have a great guide on how to stick to your recipe over at best sugar cookies hold shape recipe if you want to practice gentle mixing on another project!
Baking and Checking Doneness
Spread that thick batter into your prepared pan—it’s going to look very thick, which is perfect. Pop it into the preheated oven for about 28 to 32 minutes. You’re watching for the edges to look solid and set, but the middle should look slightly underdone. Stick your toothpick in about an inch from the center. If you see wet, runny batter, give it two more minutes. If you see moist, sticky crumbs clinging to the toothpick? Pull them out immediately! That’s how you guarantee those incredible **Gooey Center Brownies**.
The Essential Cooling Period for Fudgiest Brownies
If you think you’re done once you pull these babies out of the oven, you’re wrong. Seriously, this next step is non-negotiable, or you’ll end up with a chocolate soup instead of perfect bars. These **Fudgiest Brownies** need time to relax and set up. Remember how we talked about keeping the flour down and the fat high? That means they are very delicate when hot.
You have to let them cool completely in that metal pan on a wire rack. I tell people to wait at least two hours. No peeking, no impatient slicing! As they cool, the structure finally firms up. This setting process is what gives you those sharp, clean cuts and those amazing **Chewy Brownies From Scratch** instead of a warm mess. If you cannot wait, pop the whole pan into the fridge for an hour after it cools on the counter for 30 minutes—but honestly, patience tastes better. You can look at my recipe for a brownie refrigerator cake for ideas on planned chilling, but for sheer fudginess, room temperature cooling is king.
Tips for Perfect Perfectly Chewy Brownie Edges
Even though our main goal is that intensely fudgy interior, who doesn’t love fighting over that slightly firmer, wonderfully chewy edge piece? It’s the textural contrast that makes these **Incredibly Rich Brownies** so addictive! The edges are the first place moisture evaporates, so they naturally bake up a little bit firmer than the gooey middle, giving you that perfect chew.
My absolute must-have tip here, though, is about your pan. For the absolute crispiest, chewiest edges, you must use a metal pan—like aluminum or steel. Metal transfers heat quickly and evenly, which sets those outside corners perfectly while the center stays lush. Glass pans just don’t get those edges crisp enough for my liking. If you want that perfect bite that starts chewy and melts fudgy? Metal is the way to go!
Ingredient Notes and Substitutions for Rich Dark Chocolate Brownies
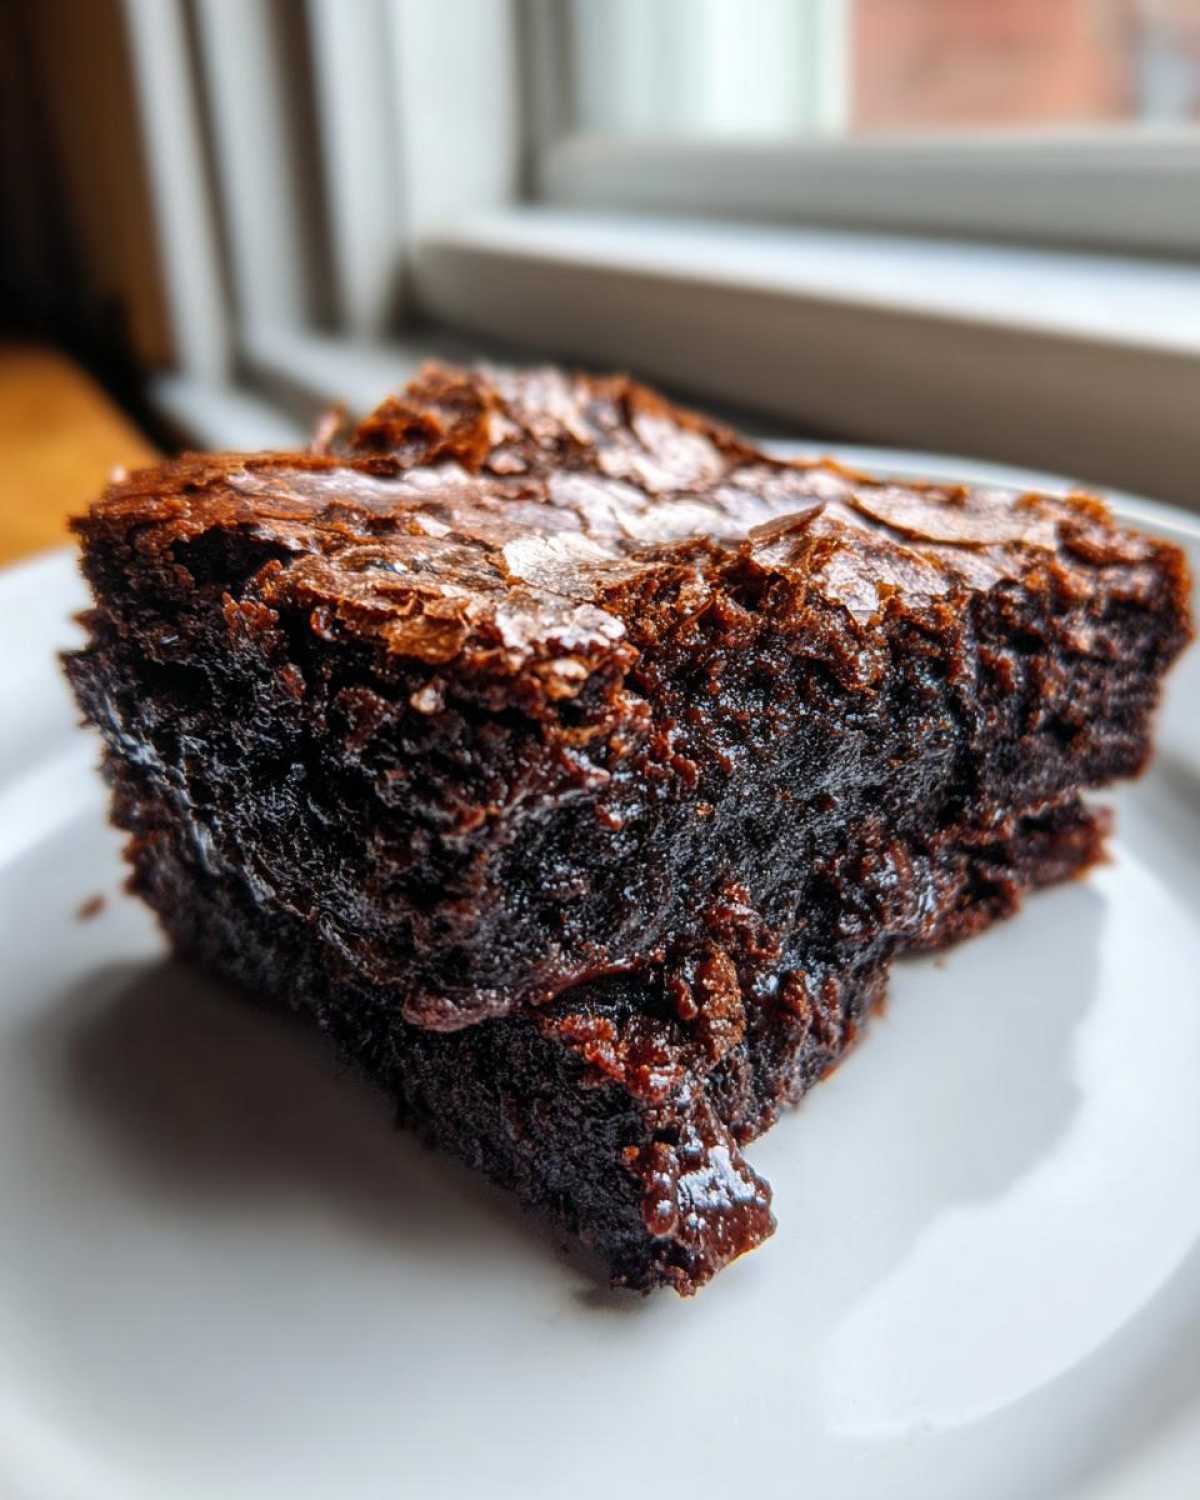
When you’re trying to nail that ultimate dense texture, you can’t just swap ingredients loosely. The entire structure of these **Rich Dark Chocolate Brownies** relies on a specific balance. I need to tell you right now: do not add baking powder or baking soda! Seriously, don’t even look at them. Any leavening agent immediately starts fighting against our fudgy goal by trying to introduce air. We want zero lift, just density!
As for the chocolate, use the best bittersweet chocolate or chips you can afford. That higher cocoa content translates directly into a darker, more intense flavor, which is exactly what you want in a decadent bar. If you want to explore other intense chocolate bakes, you have to try my best chocolate babka recipe!
Also, feel free to play with your cocoa powder! If you use Dutch-processed cocoa, you’ll get a darker color and a smoother, less acidic chocolate taste. Natural cocoa gives a slightly sharper, more traditional chocolate tang. Either way, you’re winning!
Serving Suggestions for Your Fudgiest Brownies
Once you’ve waited the requisite two hours (I know, it’s torture!), you’re holding the richest chocolate bars known to mankind. You might think they need complicated toppings, but honestly? I find that the more you dress up these **Fudgiest Brownies**, the more you mask that incredible dense chocolate flavor we worked so hard for.
If you must serve them warm—maybe you couldn’t resist eating one slightly gooey slice right away—a single scoop of good quality French vanilla bean ice cream balances the intensity perfectly. The cold against the warm fudge? Heaven!
For something contrasting, fresh raspberries are amazing; their slight tartness cuts through all that richness. Or, if you want to keep it simple and elegant, just dust the cooled, cut bars with a tiny bit of extra cocoa powder using a fine-mesh sieve. It looks professional without adding unnecessary sugar. If you are looking for another amazing chocolate dessert that is lighter, my easy chocolate mousse recipe is perfect for contrast!
Storing and Reheating Incredibly Rich Brownies
These **Incredibly Rich Brownies** are so dense that they actually last quite well, provided you keep them sealed up tight! The absolute best way to store them, in my opinion, is right on the counter, kept in an airtight container layered between pieces of parchment or wax paper. That way, they stay at room temperature, which just preserves that soft, gooey texture we love.
I know people always ask about the fridge, but please, try to avoid it if you can. Cold temperatures, especially in the fridge, solidify all that rich butter we worked so hard to put in there, and they can dry out faster than you think! If you *must* store them longer than, say, four days, then wrap individual squares tightly in plastic wrap—like little chocolate presents—and then put them in a freezer bag. They stay perfect for a month that way!
Now, what if you just HAVE to eat one warm? I never judge! If you’ve refrigerated or frozen them and want that just-baked gooeyness back, don’t microwave the whole batch! Take one fudgy square and give it about 10 to 15 seconds in the microwave until it’s just soft again. If you want to be really fancy, pop it in a tiny oven-safe dish at 300°F for about five minutes. That little blast of heat brings that dense chocolate right back to life! For future incredible treats, check out my recipe for easy maple fudge recipe which is also amazing slightly warmed.
Frequently Asked Questions About Fudgy Brownies
I get asked about these brownies constantly, especially when people are nervous about achieving that perfect center. It’s totally normal to have questions when chasing the *best* possible version of something, right? Don’t stress; I’ve got the authoritative answers so you can feel totally confident delivering these perfect, dense chocolate bars.
Can I use baking powder to make these brownies rise slightly?
Oh goodness, no! If you reach for the baking powder, you are officially aiming for cake, and we are strictly avoiding that outcome here. Baking powder is designed to create lift and air pockets, which will turn our beautiful, dense mixture into something light and fluffy—the exact opposite of the **Fudgiest Brownies** we are dedicated to making! Keep the leavening agents locked away for this one, okay?
What is the best way to get that shiny, crackly top?
Ah, the coveted shiny top! That gorgeous, paper-thin crust that cracks when you cut into it is pure magic, and it comes from that initial sugar and melted butter mixture. When you whisk the granulated sugar and brown sugar vigorously with the melted butter and eggs, you are actually forming a slight meringue layer right on the surface, even though you aren’t whipping egg whites separately. The high concentration of sugar that dissolves into that wet mass is what creates that beautiful, crackly shell as it bakes. No secret ingredient needed, just good whisking!
Can I make these brownies ahead of time?
Yes, and honestly, you should try it! These **Dense Chocolate Brownies** are absolutely miles better the next day. When they cool completely and sit sealed up, that intense fudgy structure perfectly settles in. They firm up beautifully without losing their gooey centers. Just make sure they are tightly wrapped in plastic wrap or aluminum foil at room temperature. They taste even richer after 24 hours. If you’re interested in other rich, dense treats, you might want to look up my recipe for the flourless chocolate torte recipe, which also benefits from chilling!
PrintThe Fudgiest Brownies You Will Ever Make
This recipe produces intensely dense, moist, and rich chocolate brownies with a gooey center and chewy edges. It avoids any cakey texture.
- Prep Time: 15 min
- Cook Time: 30 min
- Total Time: 2 hours 45 min
- Yield: 16 brownies
- Category: Dessert
- Method: Baking
- Cuisine: American
- Diet: Vegetarian
Ingredients
- 1 cup (2 sticks) unsalted butter, melted
- 1 3/4 cups granulated sugar
- 3/4 cup packed light brown sugar
- 4 large eggs, room temperature
- 1 tablespoon vanilla extract
- 3/4 cup unsweetened cocoa powder, natural or Dutch-process
- 1/2 cup all-purpose flour
- 1 teaspoon salt
- 1 cup (6 ounces) bittersweet chocolate chips or chopped chocolate
Instructions
- Preheat your oven to 350°F (175°C). Line a 9×9 inch metal baking pan with parchment paper, leaving an overhang on two sides for easy removal. Lightly grease the paper.
- In a large bowl, whisk the melted butter, granulated sugar, and brown sugar together until fully combined.
- Add the eggs one at a time, whisking well after each addition until the mixture is smooth and slightly lighter in color. Stir in the vanilla extract.
- In a separate medium bowl, whisk together the cocoa powder, flour, and salt.
- Gradually add the dry ingredients to the wet ingredients, mixing with a rubber spatula only until just combined. Do not overmix.
- Gently fold in the chocolate chips or chopped chocolate.
- Spread the batter evenly into the prepared pan.
- Bake for 28 to 32 minutes. The edges should look set, and a toothpick inserted near the center should come out with moist, fudgy crumbs attached, not wet batter.
- Remove the pan from the oven and let the brownies cool completely in the pan on a wire rack for at least 2 hours before lifting out and cutting. Cooling fully is essential for the fudgy texture.
Notes
- Using melted butter contributes significantly to the dense, fudgy texture.
- Do not substitute baking powder or soda; this recipe relies on the low flour content for fudginess.
- Cooling the brownies completely before slicing prevents them from falling apart and maximizes the gooey interior.
Nutrition
- Serving Size: 1 brownie
- Calories: 285
- Sugar: 30
- Sodium: 150
- Fat: 16
- Saturated Fat: 10
- Unsaturated Fat: 6
- Trans Fat: 0
- Carbohydrates: 34
- Fiber: 2
- Protein: 4
- Cholesterol: 85