

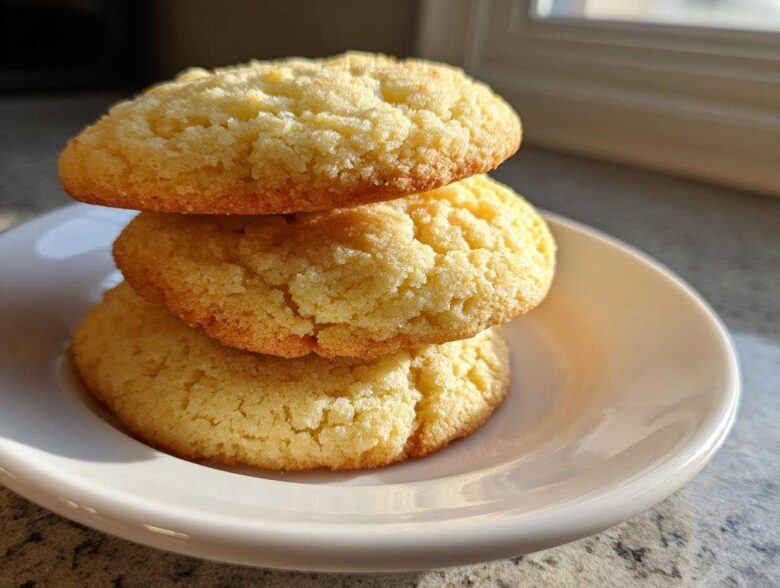
Oh my gosh, are you ready for the best cookie moment of your life? Seriously, stop scrolling through all those complicated recipes! For years, I searched high and low for the perfect sugar cookies—you know the deal: they have to be buttery and sweet, but they absolutely *must* hold their shape when you cut them out for decorating. It felt impossible!
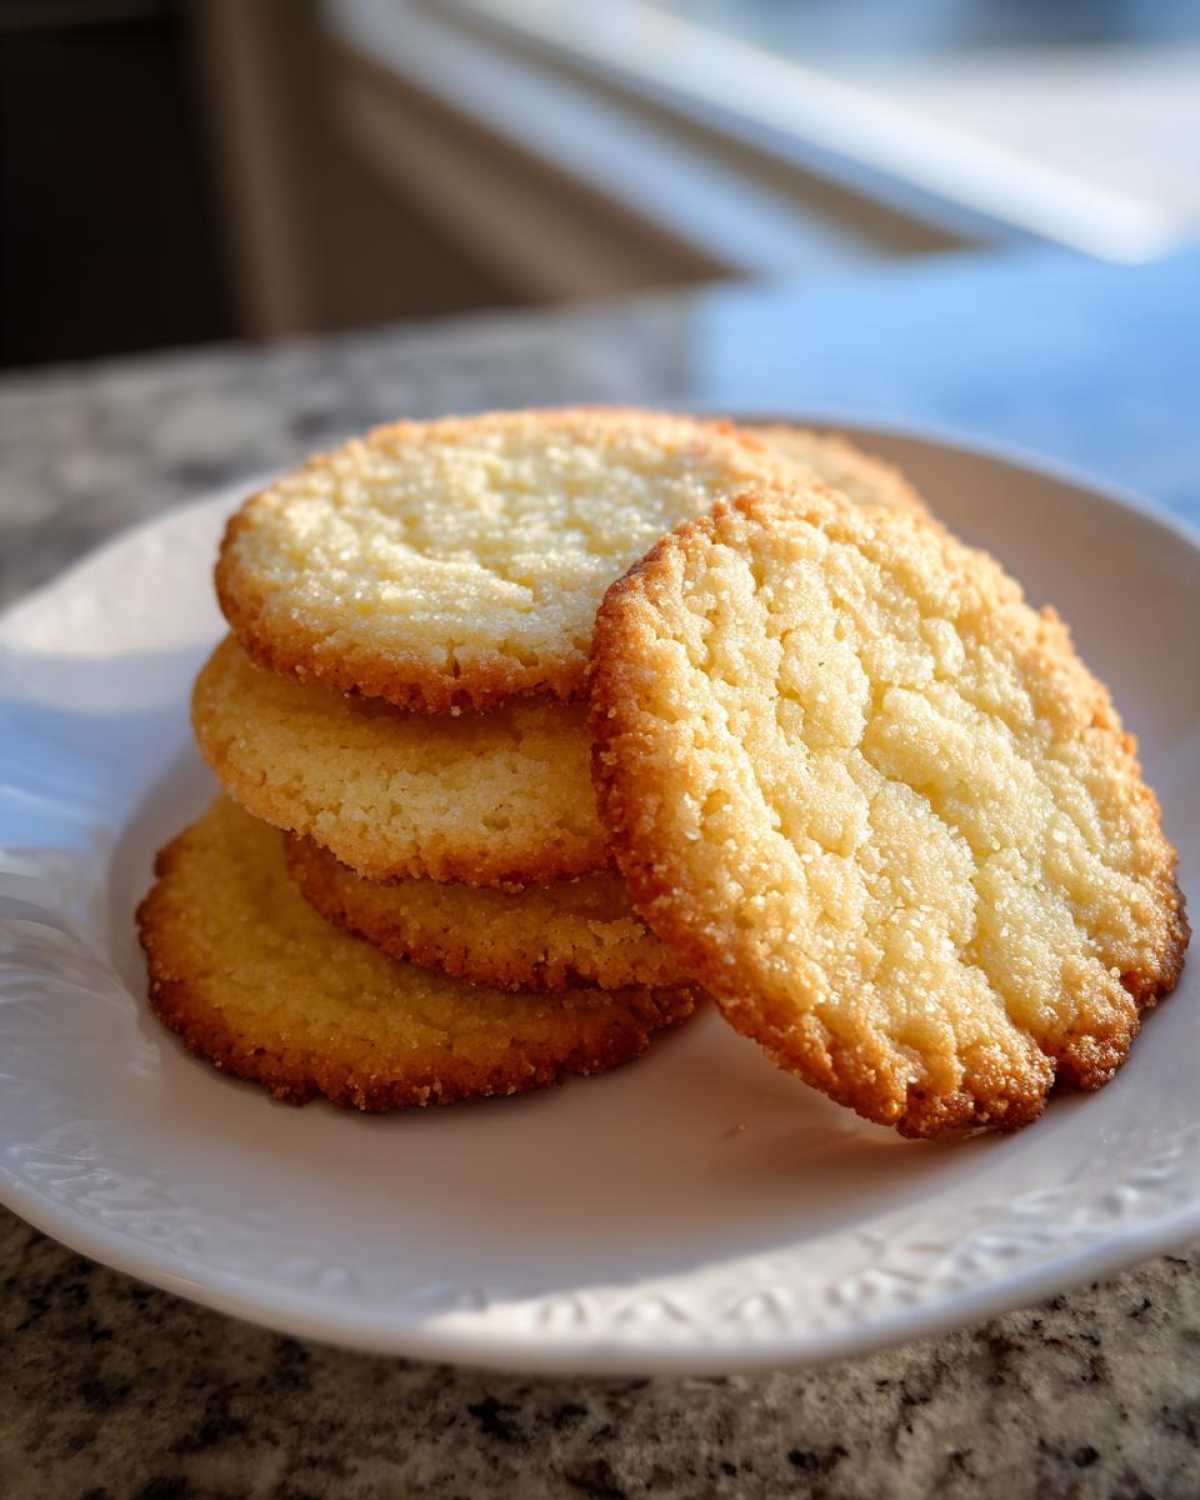
But trust me, after countless batches smeared across my kitchen counter, I finally nailed it. This isn’t just another recipe; this is my go-to, all-purpose cutout dough that brings home the blue ribbon every single time. It gives you that delightful snap on the edge while keeping the center unbelievably soft.
We’re talking about the best combination of chewy texture and sturdy structure, all wrapped up in that classic, mouth-watering vanilla flavor. If you’re gearing up for the holidays or just need a foolproof recipe, these are the roll and cut cookies you’ve been dreaming about. Prepare for your house to smell amazing!
Why This Is the Best Sugar Cookie Recipe for Cutting and Decorating
I honestly believe this recipe hits that sweet spot every baker chases. You get cookies that are sturdy enough to handle little hands cutting out festive shapes—no sad, slumped Santas here! But the second you bite into one, that sturdy exterior gives way to the softest, most buttery vanilla center you can imagine. That’s the magic combination!
You get about three dozen beautiful cookies out of this batch, which is perfect for sharing (or, let’s be honest, stockpiling for yourself!). Total time is just over an hour, though most of that is the mandatory chill time. I usually start the dough while I’m cleaning up dinner, pop it in the fridge, and then I’m rolling and cutting first thing the next morning. It just works so well!
You can check out a little more about my baking philosophy over at my philosophy page if you’re curious about how I test things!
Key Attributes of These Perfect Sugar Cookies
- Holds shape perfectly—no spreading onto other cookie shapes!
- Soft center texture that melts in your mouth.
- Easy to handle dough that’s a dream to roll out thin.
- Classic, clean buttery vanilla flavor that lets your decorations shine.
Essential Ingredients for Perfect Sugar Cookies
When you’re aiming for bakery style sugar cookies that taste incredible but behave perfectly when cut, you can’t skimp on ingredients. This recipe is simple, which means the quality of what you put in really shines through. We’re not messing around with weird shortenings here; we want real flavor!
Here’s your line-up for about three dozen perfect cookies:
- 3 cups all-purpose flour
- 1 teaspoon baking powder
- 1/2 teaspoon salt
- 1 cup unsalted butter, softened
- 1 1/2 cups granulated sugar
- 1 large egg
- 1 teaspoon vanilla extract
See? It’s basic, which is why those core ingredients, especially the butter and vanilla, need to be top-notch. A really good, high-fat unsalted butter makes all the difference in structure and flavor. You want that rich, buttery cookie experience!
Ingredient Notes and Substitutions for Your Sugar Cookies
Let’s talk details, because this is where beginners often trip up. First, the butter absolutely must be softened. Remember—softened means you can press your finger into it and leave a light dent, but it shouldn’t look shiny or greasy. If it’s melted, your dough will turn into a sad, flat puddle, guaranteed.
For the flour, please measure carefully! Scoop the flour into your measuring cup and level it off; don’t just dive the cup into the bag, or you’ll pack too much in, resulting in a dry, crumbly cookie. That said, if you want to swap out the vanilla, you can absolutely use almond extract, or even a mix of both. Almond extract really wakes up the simple flavor profile, but stick with just the pure vanilla if you prefer that classic, universally loved taste.
Step-by-Step Instructions for Making Cutout Sugar Cookies
Okay, here’s where we turn that perfect dough into dozens of festive shapes! Follow these steps exactly, especially that chilling part, and you’ll have the prettiest, tastiest cookies on the block. Mixing is quick, but patience is your secret weapon here. First, let’s get our dry ingredients sorted. Whisk together the flour, baking powder, and salt in a medium bowl. Don’t just dump it; whisking helps distribute that tiny bit of baking powder evenly so you don’t get weird bubbles in your finished cookies.
Now for the creaming stage. In a separate, large bowl, beat that softened butter and the granulated sugar until everything looks light and fluffy—like pale, sweet clouds. This should take a few solid minutes. Then, beat in your egg and that glorious vanilla extract until it’s just combined. Get ready for that amazing smell!
Next, we add the dry stuff to the wet stuff. Add the dry ingredients gradually, keeping your mixer on low speed. Stop mixing the absolute second you see the last streaks of flour disappear. If you overmix here, you start developing gluten, and suddenly your soft dough becomes tough. We do not want tough sugar cookies!
This next part is non-negotiable: Divide the soft dough into two equal disks, wrap them up tight in plastic wrap, and shove them into the fridge. They need at least one hour to chill. If you skip this, I promise you, your festive shapes will blob together into one giant cookie sheet abstract painting. Don’t do it to yourself!
When you’re ready to bake, preheat your oven to 375 degrees F (190 degrees C). Line those baking sheets with parchment paper—it makes cleanup a breeze and helps prevent sticking! You can visit the cookie policy page anytime if you need reminders on cleanup tips!
Tips for Rolling and Cutting Your Sugar Cookies
Once chilled, work with one disk at a time, keeping the other one cold. Lightly flour your work surface—use just enough so the dough doesn’t stick, but not so much that you dry out the dough itself. Roll that disk patiently until it’s about 1/4 inch thick. If you roll it too thin, it bakes up crunchy; too thick, and it won’t hold those cute details.
Use your cutters firmly and quickly. Transfer the shapes gently to the prepared sheet. And listen, if you feel the dough starting to get soft or sticky while you’re cutting, don’t panic! Just pop the cutters and the remaining dough back into the fridge for ten minutes. Chilled dough is happy dough.
Baking Times for Soft Sugar Cookies
The oven time dictates texture, so choose wisely! For those super soft, melt-in-your-mouth sugar cookies everyone fights over, bake them closer to 8 minutes. The edges should just start to turn a hint of pale gold. If you prefer a slightly crisper edge—maybe for shipping or packaging—let them go for the full 10 minutes.
Crucially, let them rest right there on the baking sheet for a full 5 minutes after they come out. They are too fragile to move right away. Those five minutes allow them to firm up just enough so you can carefully transfer them to the wire rack to cool completely. If you try to decorate them warm, guess what? Icing slides right off!
Tips for Success with Roll and Cut Sugar Cookies
Listen, the difference between a good rollout cookie and a truly great one is just a few small tricks. Always remember that chilling step is crucial for those sharp edges. If you’re making holiday shapes, be sure to gather up your scraps, gently press them into a disk, and chill it again before re-rolling. Don’t just smash your scraps together!
Another thing I learned the hard way: don’t over-flour the surface when rolling. That excess flour bakes right onto the bottom of your cookie and ruins that perfect buttery texture. Dust lightly! For cleaner decorating, always let the cookies cool completely—and I mean *completely*—before you even think about touching them with icing. You can read more baking secrets over on my baking blog.
Easy Cookie Decorating Ideas for Your Sugar Cookies
Once you have these structurally sound beauties cooling, the fun really begins! Decorating doesn’t have to mean hours spent mastering royal icing, unless that’s your jam. For quick, beautiful results, a simple glaze is your best friend. These sturdy cutout sugar cookies can handle a little weight, but you need the right consistency.
The trick to easy cookie decorating is consistency. You want an icing that flows but doesn’t run wildly off the edges of your festive cookie shapes.
Making Simple Glazes for Holiday Sugar Cookies
My favorite simple approach involves just powdered sugar, a splash of milk or water, and a drop of vanilla. Mix it until it’s thick, but when you lift your spoon, the icing should fall back into the bowl in a smooth ribbon that takes about 10 seconds to disappear back into the surface. That’s the consistency you want for flooding your cookies!
If you’re doing basic designs, outline the edge with slightly thicker icing first, let that dry for about 20 minutes, and *then* fill in the center with your thinner flooding consistency. It keeps the colors tidy and looks so professional! It’s a great technique for those beginner friendly baking sessions.
Storage and Keeping Your Sugar Cookies Fresh
These buttery vanilla cookies are pretty hardy, but freshness is key, especially when frosting is involved. If you’ve iced them with a simple powdered sugar glaze, they are fine stored in an airtight container at cool room temperature for about three to four days. Make sure they are completely dry before stacking them, or you’ll end up with a sticky mess!
If you used royal icing, they can actually last even longer, sometimes up to a week at room temp. If you aren’t planning on eating them right away (unlikely, I know!), you can freeze the plain, unfrosted cookies! Wrap the cooled rounds tightly in plastic wrap, then pop them into a large freezer bag. They’ll be great for about two months, ready to thaw and decorate whenever the mood strikes!
Frequently Asked Questions About These Easy Sugar Cookies
Can I make this a chewy sugar cookies recipe?
You absolutely can push these toward chewier sugar cookies! To encourage that softness, bake them on the shorter side—aim for 7 or 8 minutes. You actually want to pull them when they look just done, perhaps even slightly doughy in the very center, because they continue to cook slightly on the hot pan. Also, you can substitute about 1/4 cup of your granulated sugar for light brown sugar; that molasses content always adds a bit more chewiness.
What makes these cutout sugar cookies hold their shape?
It’s the chilling process! Seriously, I can’t stress this enough. Chilling the dough firms up the fat (the butter), and when the cold, firm fat hits the hot oven, it melts much slower. This slow melt means the cookie holds the shape of your cutter instead of spreading out before the dough structure sets. Make sure your butter isn’t too warm to begin with, too—we want that firm structure.
Is this a no chill sugar cookie dough?
Oh, I wish! While there are recipes out there for no chill sugar cookie dough, they typically rely on adding cornstarch or using more liquid, which often compromises the flavor or makes them terrible for cutting shapes. For cookies that taste this buttery and hold up to intricate decoration, chilling is just a necessary step. Think of chilling as part of the prep work for a perfect treat!
Estimated Nutritional Data for Classic Sugar Cookies
I always feel a little guilty looking at the numbers, because these are just too good to be considered health food, haha! But for those of you tracking things, here’s a rough estimate based on all 3 dozen cookies. Remember, these are just estimates based on the ingredients I provided, so your actual results might vary a bit depending on exact measurements and brands used.
- Calories: 130
- Sugar: 12g
- Fat: 7g
- Protein: 2g
- Carbohydrates: 16g
This assumes one cookie per serving size. If you eat three while decorating, well, you know the math!
Share Your Perfect Holiday Treats
I truly hope this recipe becomes your new standard for perfect holiday treats. They are so fun to make, especially when you involve the kids in the decorating part. Have you tried this recipe yet? I want to know how your shapes turned out! If you decorated some amazing festive cookie shapes, please drop a rating or leave a comment below letting me know what you thought.
If you’ve got questions or just want to show off your decorating skills, feel free to reach out through my contact page. Happy baking, and don’t forget to check out the site terms before you share your masterpieces!
Tips for Success with Roll and Cut Sugar Cookies
Listen, the difference between a good rollout cookie and a truly great one is just a few small tricks. Always remember that chilling process is crucial for those sharp edges! If you’re making holiday shapes, be sure to gather up your scraps, gently press them into a disk, and chill it again before re-rolling. Don’t just smash your scraps together!
Another thing I learned the hard way: don’t over-flour the surface when rolling. That excess flour bakes right onto the bottom of your cookie and ruins that perfect buttery texture. Dust lightly! For cleaner decorating, always let those sugar cookies cool completely—and I mean *completely*—before you even think about touching them with icing. For more of my hard-earned lessons, check out my tips over on my baking blog!
Easy Cookie Decorating Ideas for Your Sugar Cookies
Once you have these structurally sound beauties cooling, the fun really begins! Decorating doesn’t have to mean hours spent mastering royal icing, unless that’s your jam. For quick, beautiful results, a simple glaze is your best friend. These sturdy cutout sugar cookies can handle a little weight, but you need the right consistency.
The trick to easy cookie decorating is consistency. You want an icing that flows but doesn’t run wildly off the edges of your festive cookie shapes. These cookies, because they are soft and dense, hold up beautifully to a decent layer of icing, which is something those thin, crispy cookies just can’t handle!
If you want to see how I do some of my faster weekend bakes, check out my cinnamon roll pancakes post—it’s all about quick, satisfying results, just like this decoration tip!
Making Simple Glazes for Holiday Sugar Cookies
My favorite simple approach involves just powdered sugar, a splash of milk or water, and a drop of vanilla. Mix it until it’s thick, but when you lift your spoon, the icing should fall back into the bowl in a smooth ribbon that takes about 10 seconds to disappear back into the surface. That’s the consistency you want for flooding your cookies!
If you’re doing basic designs, outline the edge with slightly thicker icing first, let that dry for about 20 minutes, and *then* fill in the center with your thinner flooding consistency. It keeps the colors tidy and looks so professional! It’s a great technique for those beginner friendly baking sessions.
If you want something that really sets hard for stacking or packaging, you’ll need royal icing, which uses meringue powder or egg whites. But honestly, for simple, fast decorating that tastes amazing right away, stick to the powdered sugar glaze. It keeps things easy, just like this whole recipe is supposed to be!
Storage and Keeping Your Sugar Cookies Fresh
These buttery vanilla cookies are pretty hardy, but freshness is key, especially when frosting is involved. You want those little gems to stay soft and delicious for as long as possible, right? Don’t worry, these cutout sugar cookies handle storage like champs if you follow a couple of simple rules.
If you’ve iced them with a simple powdered sugar glaze, they are perfectly fine stored in an airtight container at a cool room temperature for about three to four days. Make sure they are completely dry before you stack them in that container, or you’ll end up with a sticky, sad puddle! I usually try to layer them between sheets of parchment or wax paper if they’re iced.
If you used a harder royal icing, wow, they can last even longer—sometimes up to a week at room temperature without losing much quality! People often ask me about freezing, and yes, you can absolutely freeze these! If you aren’t planning on eating them right away (which I never understand, but okay!), freeze the plain, unfrosted cookies. Wrap the cooled rounds really tightly in plastic wrap first, then pop them into a heavy-duty freezer bag. They’ll be great for about two months, ready to thaw and decorate whenever the holiday spirit hits!
Frequently Asked Questions About These Easy Sugar Cookies
I always get a flood of questions once people start making these! It’s so exciting. Since every baker has slightly different preferences, I want to make sure you know how to customize these simple cookies while keeping that perfect texture we talked about. Don’t hesitate to try these little tweaks!
Can I make this a chewy sugar cookies recipe?
Oh, yes, you absolutely can push these toward chewier sugar cookies, but you need to be careful because these are designed to hold their shape too! To encourage that softness, bake them on the shorter side—aim for 7 or 8 minutes. You actually want to pull them when they look just done, perhaps even slightly doughy in the very center, because they continue to cook slightly on the hot pan. That slight underbake is the secret to chewiness!
If you want to sneak in extra moisture for chew, try swapping out 1/4 cup of the white granulated sugar for dark brown sugar. That molasses content always helps keep things soft and gives you a richer flavor profile, making them wonderful buttery vanilla cookies!
What makes these cutout sugar cookies hold their shape?
This is all about the fat—the butter! In baking, structure comes from cold fat. The main reason these hold their shape so perfectly is that mandatory chilling process we talked about. Chilling the dough firms up the butter; when that cold, firm butter hits the hot oven, it takes longer to melt and spread out. This slow melt means the cookie keeps the crisp edge defined by your cutter instead of slumping.
It’s a balance of fat, flour, and proper chilling. If your dough isn’t firm enough when it goes into the oven, spreading is inevitable. It’s scientifically proven—well, proven by my kitchen counter experiments, anyway!
Is this a no chill sugar cookie dough?
I wish! I know how attractive that idea sounds when you need easy homemade cookies right now. But honestly, no. While there are specialty recipes out there for no chill sugar cookie dough, they usually have to add extra stabilizers or adjust the flour ratio so much that they lose that classic, soft, buttery texture we love. For cookies that taste this good and hold those beautiful festive cookie shapes, chilling is just a necessary step for structure.
Think of the chilling time as your little break! Just wrap those disks up tight, stick them in the fridge, and use that hour to get your frosting ready, clean up your bowls, or just put your feet up. If you absolutely can’t wait, try chilling just one disk while you roll out the other one, but please don’t skip the chilling entirely!
If you have any other questions about the process, feel free to drop me a line through the contact page! I love hearing from fellow bakers.
Estimated Nutritional Data for Classic Sugar Cookies
I always feel a little guilty looking at the numbers, because these are just too good to be considered health food, haha! But for those of you tracking things, here’s a rough estimate based on all 3 dozen cookies. Remember, these are just estimates based on the ingredients I provided, so your actual results might vary a bit depending on exact measurements and brands used.
- Calories: 130
- Sugar: 12g
- Fat: 7g
- Protein: 2g
- Carbohydrates: 16g
This assumes one cookie per serving size. If you eat three while decorating, well, you know the math!
Share Your Perfect Holiday Treats
I truly hope this recipe becomes your new standard for perfect holiday treats. They are so fun to make, especially when you involve the kids when it comes time for decorating. It’s messy, but oh boy, the memories are worth it!
Have you tried this recipe yet? I want to know how your shapes turned out! Did they hold their definition? Are the centers nice and soft? Please drop a rating below—it really helps other folks baking decide to try these amazing sugar cookies. And if you decorated some incredible festive cookie shapes, snap a photo and share it on social media! Tag me if you do; I love seeing your work!
If you’ve got any lingering questions or just want to show off your decorating skills, you can always reach out through my site terms page, but seriously, comments are best so everyone can see the tips and tricks!
PrintBest All-Purpose Cutout Sugar Cookies

A reliable recipe for soft, buttery sugar cookies that hold their shape well for cutting and decorating.
- Prep Time: 25 min
- Cook Time: 10 min
- Total Time: 75 min
- Yield: 3 dozen
- Category: Dessert
- Method: Baking
- Cuisine: American
- Diet: Vegetarian
Ingredients
- 3 cups all-purpose flour
- 1 teaspoon baking powder
- 1/2 teaspoon salt
- 1 cup unsalted butter, softened
- 1 1/2 cups granulated sugar
- 1 large egg
- 1 teaspoon vanilla extract
Instructions
- Whisk together the flour, baking powder, and salt in a medium bowl. Set aside.
- In a large bowl, cream the softened butter and sugar together until light and fluffy.
- Beat in the egg and vanilla extract until just combined.
- Gradually add the dry ingredients to the wet ingredients, mixing on low speed until a soft dough forms. Do not overmix.
- Divide the dough in half, flatten each half into a disk, wrap in plastic wrap, and chill for at least 1 hour.
- Preheat your oven to 375 degrees F (190 degrees C). Line baking sheets with parchment paper.
- On a lightly floured surface, roll out one disk of dough to about 1/4 inch thickness.
- Use cookie cutters to cut out shapes and place them on the prepared baking sheets.
- Bake for 8 to 10 minutes, or until the edges are lightly golden. For softer cookies, bake closer to 8 minutes.
- Let the cookies cool on the baking sheet for 5 minutes before transferring them to a wire rack to cool completely before decorating.
Notes
- For the softest cookies, slightly underbake them. They will firm up as they cool.
- If the dough becomes too soft while rolling, return it to the refrigerator for 10 minutes.
- Use high-quality vanilla extract for the best flavor.
Nutrition
- Serving Size: 1 cookie
- Calories: 130
- Sugar: 12
- Sodium: 55
- Fat: 7
- Saturated Fat: 4
- Unsaturated Fat: 3
- Trans Fat: 0
- Carbohydrates: 16
- Fiber: 0
- Protein: 2
- Cholesterol: 25