

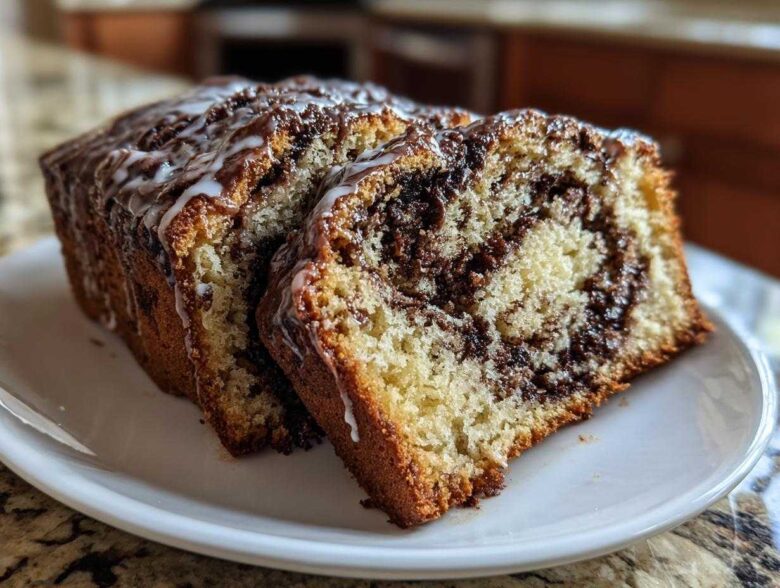
If you’ve ever stood in line at a fancy bakery, inhaling that sweet, yeasty, dark chocolate smell, you know the pull of a perfect Chocolate Babka. Well, stop dreaming about it! I was honestly intimidated by this braided beauty for years until I started treating the dough right. Trust me when I say, this **chocolate babka** recipe is the one that finally unlocked that bakery-worthy softness for me. We are using a buttery, slightly enriched dough—think brioche’s cousin—paired with a filling so rich it practically oozes when you slice it. Get ready for those incredible, thick swirls!
I spent so many weekends trying different mixing methods before I landed on this perfect technique. If you’re ready to tackle a **weekend baking project** that’s totally worth the effort, sink your teeth into this recipe. I promise, the first time you pull this golden, glistening loaf out of the oven, you’ll feel like a total baking wizard. Welcome to making the absolute **best babka bread** right in your own kitchen. You can read a little more about my kitchen philosophy over at my story page if you’re curious!
Why This Homemade Chocolate Babka Recipe Works
I know there are tons of recipes out there for this **swirled chocolate bread**, but I swear this one hits the bullseye every single time. It’s all about the relationship between the dough and the filling. When you get these two parts balanced, you get that perfect, luxurious slice that makes people ask where you bought it. We talk about this in our breakfast section a lot—it’s about building flavor from the ground up!
Here’s the short version on why you should trust this method for your next **holiday sweet bread** adventure:
Achieving the Softest Yeast Bread Recipe Texture
The dough is definitely on the richer side, getting close to a true brioche! That softness comes from patience and temperature control. You absolutely must have room temperature eggs—they emulsify way better—and incorporating that half-cup of softened butter, piece by piece, is non-negotiable. Remember, we’re kneading it until it’s smooth and elastic, usually about 8 to 10 minutes in the mixer. That kneading builds structure so the final loaf isn’t just a pile of mush, even though it’s incredibly soft.
The Secret to Decadent Chocolate Swirl Loaf Filling
Dry spots in a babka are a cardinal sin, plain and simple. Our filling is a powerhouse mix. It’s not just cocoa powder; we whip softened butter with cocoa and powdered sugar *before* folding in the melted bittersweet chocolate. This technique coats every particle. That means when you roll it up, you get a thick, fudge-like layer of flavor that stays moist and doesn’t sink or leak out too much during the bake. It’s the best **tender chocolate filling recipe** I’ve ever developed for this bread.
Gathering Ingredients for Your Best Chocolate Babka
Okay, let’s talk supplies! Baking this show-stopping **chocolate babka** means laying out everything before we start mixing, because once we get going, we need to move! Since this involves yeast and a cold-proof option, having the right temperature milk ready for the yeast is a big first step. This isn’t just a throw-together muffin; this is a serious **brunch pastry idea**, so quality matters across the board. Don’t worry, the ingredient list isn’t frighteningly long, but make sure you have your measurements precise!
Ingredients for the Buttery Brioche Babka Dough
This is what builds that structure that holds all that chocolate goodness:
- 1 cup whole milk, warmed perfectly to about 105-115°F (this wakes up the yeast!)
- 2 1/4 teaspoons active dry yeast
- 1/2 cup granulated sugar, reserved for dividing
- 3 large eggs, make sure they are at room temperature!
- 1 teaspoon vanilla extract
- 1 teaspoon salt
- 4 cups all-purpose flour, plus whatever you need for dusting the counter
- 1/2 cup (one stick) unsalted butter, softened nicely and cut into small pieces
Ingredients for the Tender Chocolate Filling Recipe
This is where we get dark and absolutely decadent. Don’t skimp on the chocolate here!
- 1 cup unsalted butter, softened completely for easy spreading
- 1 cup powdered sugar
- 1/2 cup unsweetened cocoa powder
- 8 ounces bittersweet chocolate, chopped up finely
Ingredients for the Finishing Syrup
Don’t skip this step! Even though this is considered a **Jewish baking classic**, the syrup is what keeps it tasting fresh for days. It seals in the moisture, making this an unbeatable **from scratch chocolate bread**.
- 1/4 cup water
- 1/4 cup granulated sugar
How to Make Babka Dough: The Foundation of Rich Dessert Bread
Okay, this dough is the absolute backbone of our **buttery brioche babka**. If you rush this, the whole **chocolate babka** fails to achieve that pillowy, soft texture we’re aiming for. First thing’s first: waking up the yeast! You want your milk to be warm, not hot. If it’s scalding, you’ll shock and kill the yeast—and then you’ll just have sweet milk. Aim for that perfect spot between lukewarm and painfully hot, about 105 to 115 degrees Fahrenheit. Mix that yeast with a tablespoon of sugar and let it sit until it looks foamy, like the top of a fresh cappuccino. That’s your sign of life!
Next, we mix the wet and dry stuff—everything except that final butter addition—in the stand mixer bowl or a big sturdy mixing bowl. Once it’s shaggy, here’s my secret if you want the ultimate texture: swap out your AP flour for bread flour just for this dough. Bread flour has higher protein, which helps build that extra strong gluten network needed to hold up to the heavy chocolate filling. You’ll knead it for a good 8 to 10 minutes until it feels smooth and pulls away from the sides of the bowl. Then, when it’s nearly done kneading, add that final half-cup of softened butter, one piece at a time! This creates pockets of richness. After that final mix, it needs a long, warm nap—at least an hour and a half—to double in size. You can check out everything you need to know about handling this dough over on my dedicated dough guide!
Assembling the Swirled Chocolate Bread: Rolling and Braiding Tutorial
Now for the fun (and slightly messy) part! This is where we turn that soft, fluffy dough into what looks like magic in your loaf pan. Once your dough has risen its beautiful first rise, punch it down gently—don’t overdo it, we want to keep some of those lovely air bubbles ready for the oven. You’ll want to roll it out onto a lightly floured surface into a big, manageable rectangle, aiming for about 12 by 18 inches. Try to keep the edges as even as possible; this is key for even baking later on.
Next, take your prepared chocolate filling—remember how fudgy that mixture is? Spread every bit of it evenly across the dough. I always leave a small inch border clear on just one long side. This border acts like the ‘seal’ when we start rolling. Then, starting on the opposite long side, roll that dough up extremely tightly into a log. You want to compress those layers together as you roll. Stop when you reach that empty border edge.
Tips for Perfect Chocolate Babka Shaping
This is the moment that makes or breaks the signature look of your **chocolate babka**! Take a very sharp knife or, here’s my pro tip, some unflavored dental floss, and slice that log right down the center, lengthwise. You’ll see all those gorgeous, dark layers. Place the two halves cut-side up on your counter. Now, gently twist and cross these strands over each other—this is the braid! Make sure the *cut sides* stay facing up so those chocolate layers get exposed during the bake. It looks confusing at first, but keep that cut side showing! Pinch the ends together firmly and carefully ease that braided beauty right into your greased loaf pan. For a deeper dive into this swirling technique, check out my full braided sweet bread tutorial!
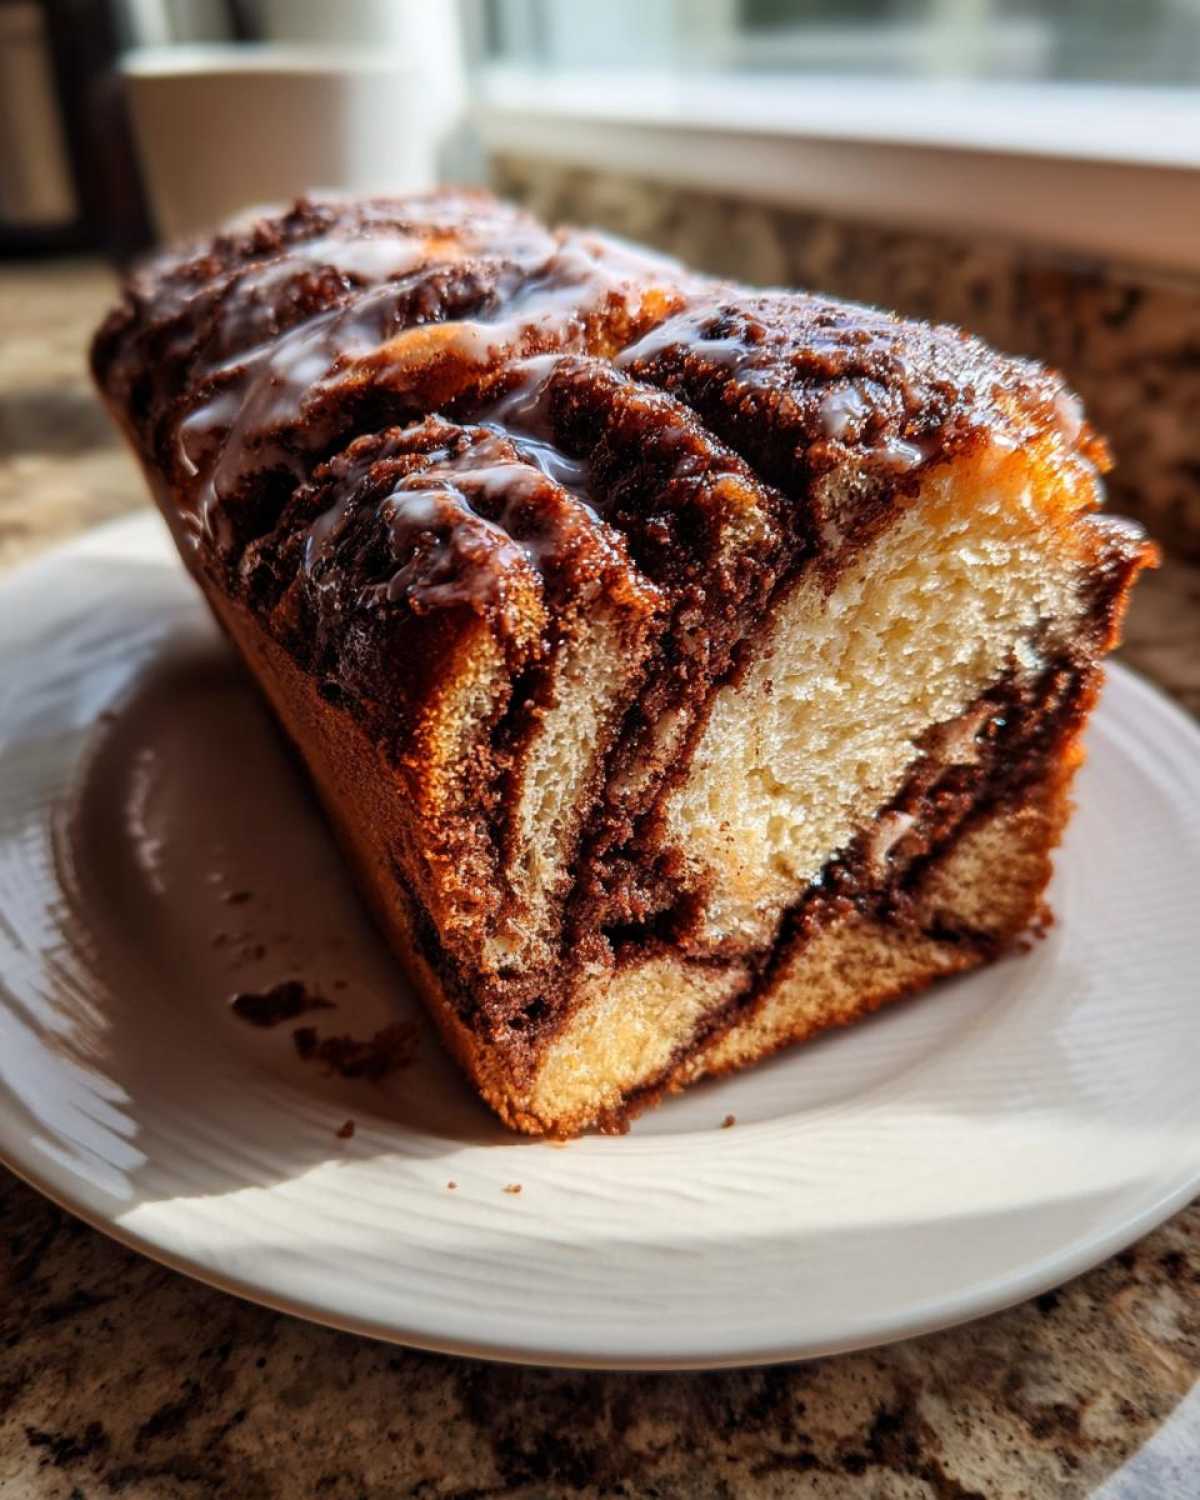
Baking the Bakery Style Babka at Home
We’ve braided our magnificent, chocolate-filled braid, and now it needs one last rest before the blast furnace! Don’t skip that second rise, sometimes called the proofing time. Forty-five minutes, covered loosely, is usually perfect, depending on how warm your kitchen is. You want the loaf to look puffy and proud, but not gigantic—if it gets too airy, it might deflate in the oven.
While it’s resting, make sure your oven is fully preheated to 350°F (175°C). We want that immediate heat for a good oven-spring! Those 35 to 45 minutes of baking time are crucial for achieving that beautiful golden-brown crust. But here’s the *real* trick that makes this a true **bakery style babka at home**: the syrup. The second you pull that loaf out, while it’s still screaming hot, you need to brush that simple sugar syrup all over the top and sides. Seriously, saturate it! This locks in moisture right away, ensuring every slice of your **rich dessert bread** stays soft. After about fifteen minutes cooling in the pan, gently ease it out onto a wire rack to finish cooling. This whole process proves that following these steps really is an easy babka baking guide!
Ingredient Notes and Substitutions for Your Chocolate Babka
So, maybe you’re missing exactly 4 cups of AP flour, or maybe you only have semi-sweet chocolate on the shelf. No panic required! Baking is adaptable, but we have to respect the structure of this beautiful **chocolate babka**. If you’re using bread flour instead of all-purpose, you might get an even airier, slightly chewier loaf, which is wonderful because it reinforces that brioche feel.
When it comes to chocolate, I strongly recommend sticking with bittersweet (around 60% or higher cocoa solids). If you use standard semi-sweet, your final loaf is going to be much sweeter, and you might want to cut back on the sugar in the dough slightly to balance it out. Remember, the filling has to work hard to carry all that rich chocolate flavor, so don’t go too mild on the dark stuff!
Storage & Reheating Instructions for Leftover Chocolate Babka
This is the part where you try not to eat the entire **rich dessert bread** in one sitting, which is hard, I know! Once the babka has cooled completely—and I mean completely, unless you want a gummy loaf—wrap it tightly. Plastic wrap, then maybe a layer of foil, works best to keep that moisture locked in. It stays wonderfully soft at room temperature for about three days.
If you have a truly massive loaf leftover, you can freeze it! Slice it first, then wrap those individual slices tightly. When you want a slice, just reheat it briefly in a toaster oven or zap it in the microwave for 10 seconds. It comes right back to life, tasting like it was just baked this morning.
Frequently Asked Questions About Making Chocolate Babka
Whenever I post a picture of this **homemade babka**, the DMs light up asking the same handful of things! It’s totally normal to have questions when you’re wrestling with a rich yeast dough like this. It’s not a quick bread, so being prepared helps so much. I’ve gathered the most common ones right here to help you nail your next bake. If you have other baking questions, don’t hesitate to reach out via my contact page!
Can I make the chocolate babka dough ahead of time?
Oh yes, and I highly recommend it! This is one of those wonderful **Jewish baking classics** that actually improves with a cold, slow rest. After you finish kneading in all that butter (Step 3), you can stop, put the dough in an oiled bowl, cover it tightly, and stick it in the fridge overnight—for up to 24 hours. This cold-proofing method slows down the yeast activity but lets those complex flavors really deepen into the dough, meaning your finished **chocolate babka** tastes far richer!
What is the best way to serve this holiday sweet bread?
Honestly, it’s perfect any time of day! For maximum comfort, I love slicing it and giving it a gentle warm-up in the oven or toaster oven for just two minutes. This softens the filling again and makes the brioche dough unbelievably tender. It’s fantastic alongside a strong cup of coffee—it makes a spectacular **coffee cake alternative**! For a truly special occasion, a tiny dollop of crème fraîche on a warm slice is heavenly.
Why are the swirls in my babka not distinct?
This is usually a shaping issue, and it happens to everyone! When you roll up the dough (Step 6), if you don’t roll it *tightly*, you end up with air pockets instead of defined layers. Also, make absolutely sure you leave that one-inch border clear of filling on the long edge—if the filling goes right to the edge, the dough won’t seal correctly when you roll, and the **swirled chocolate bread** structure collapses as it tries to bake.
Estimated Nutritional Data for This Chocolate Babka Recipe
Look, I’m a baker, not a nutritionist, okay? I focus on rich butter and deep chocolate here! This data is just a rough guide based on the ingredients listed above, calculated per slice. Because we use so much real butter and high-quality bittersweet chocolate in our **chocolate babka**, this definitely falls into the ‘decadent treat’ category! For all the deep details, you can always check out the full disclaimer policy over at my site.
- Serving Size: 1 slice
- Calories: Approximately 450
- Total Fat: 28g (a good amount of that is lovely butter!)
- Sugar: Around 35g
- Protein: 8g
Share Your Bakery Style Babka at Home Experience
I absolutely live to hear about your baking adventures! Seeing pictures of your **homemade babka** loaves, with their gorgeous swirls peeking out, honestly makes my whole week. You put in the effort with that brioche dough, and you deserve applause!
If this recipe made your kitchen smell like the best bakery in town, please, please let me know how it went! Drop a comment below telling me if you stuck to the braid exactly or if you tried a different technique. Did the syrup soak in just right? Did you share it, or did you eat the whole loaf yourself (I won’t judge!)?
Head over to my main blog page and tell me all about it, or share a picture on social media and tag me! Happy baking, my friends. I’m already dreaming up what delicious **chocolate babka** you’ll make next!
PrintThe Best Homemade Chocolate Babka
A comprehensive recipe for making a soft, tender, and rich chocolate babka featuring beautiful swirls and a buttery brioche-style dough.
- Prep Time: 45 min
- Cook Time: 45 min
- Total Time: 3 hr 30 min
- Yield: 1 loaf (about 12 servings)
- Category: Dessert
- Method: Baking
- Cuisine: Jewish/Eastern European
- Diet: Vegetarian
Ingredients
- 1 cup whole milk, warmed to 105-115°F
- 2 1/4 teaspoons active dry yeast
- 1/2 cup granulated sugar, divided
- 3 large eggs, room temperature
- 1 teaspoon vanilla extract
- 1 teaspoon salt
- 4 cups all-purpose flour, plus more for dusting
- 1/2 cup (1 stick) unsalted butter, softened and cut into pieces
- 1 cup unsalted butter, softened (for filling)
- 1 cup powdered sugar (for filling)
- 1/2 cup unsweetened cocoa powder (for filling)
- 8 ounces bittersweet chocolate, chopped (for filling)
- 1/4 cup water (for syrup)
- 1/4 cup granulated sugar (for syrup)
Instructions
- Activate the yeast: In a small bowl, combine the warm milk, yeast, and 1 tablespoon of the sugar. Let stand for 5-10 minutes until foamy.
- Mix the dough: In a large bowl or stand mixer, combine the remaining sugar, eggs, vanilla, salt, and flour. Pour in the yeast mixture. Mix on low speed until a shaggy dough forms.
- Knead: Add the softened butter pieces one at a time, mixing until fully incorporated. Increase speed to medium and knead for 8-10 minutes until the dough is smooth and elastic.
- First rise: Place the dough in a lightly oiled bowl, cover, and let rise in a warm place for 1.5 to 2 hours, or until doubled in size.
- Prepare the filling: While the dough rises, melt the 8 ounces of chopped chocolate. In a separate bowl, beat the 1 cup softened butter with the powdered sugar and cocoa powder until smooth. Mix in the melted chocolate until combined.
- Shape the dough: Punch down the risen dough. Turn it out onto a lightly floured surface and roll it into a large rectangle, about 12×18 inches.
- Spread the filling: Spread the chocolate filling evenly over the entire surface of the dough, leaving a 1-inch border on one long edge.
- Roll and slice: Starting from the long edge opposite the border, tightly roll the dough into a log. Using a sharp knife or bench scraper, slice the log lengthwise down the center, exposing the layers.
- Braid: Turn the two halves cut-side up. Cross the strands over each other, keeping the cut sides facing up as much as possible to expose the chocolate swirls. Pinch the ends together.
- Bake: Carefully transfer the braid to a greased 9×5 inch loaf pan. Cover loosely and let rise for 45 minutes. Preheat your oven to 350°F (175°C). Bake for 35-45 minutes, or until golden brown.
- Make the syrup: While the babka bakes, combine the water and 1/4 cup sugar in a small saucepan. Heat until the sugar dissolves.
- Glaze: Immediately upon removing the babka from the oven, brush the hot syrup evenly over the top and sides. Let cool in the pan for 15 minutes before transferring to a wire rack to cool completely.
Notes
- For a softer dough, use bread flour instead of all-purpose flour.
- If the dough is too sticky during rolling, chill it for 15 minutes before proceeding.
- You can make the dough a day ahead and let it cold-proof in the refrigerator overnight for better flavor development.
Nutrition
- Serving Size: 1 slice
- Calories: 450
- Sugar: 35g
- Sodium: 250mg
- Fat: 28g
- Saturated Fat: 17g
- Unsaturated Fat: 11g
- Trans Fat: 0.5g
- Carbohydrates: 45g
- Fiber: 3g
- Protein: 8g
- Cholesterol: 75mg