

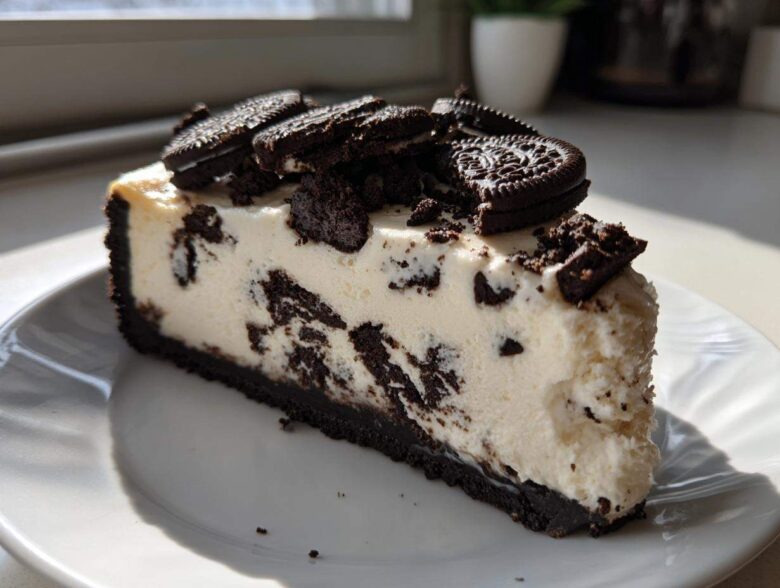
Oh my gosh, stop whatever you are doing right now, because we need to talk about truly next-level indulgence! Forget everything else; today we are making the Oreo Cookies and Cream Cheesecake, and trust me, this isn’t just *a* recipe—it’s *the* recipe. It’s that dessert that silences the room when you bring it out. I swear, the first time I served this to my family during my brother’s graduation party, people stopped mid-cheer because they were too busy savoring that creamy, chocolatey perfection! You can see how obsessed I get with these kinds of recipes—it reminds me of my fun with gooey sweet rolls around the holidays.
I spent years trying to nail that bakery-style texture that’s unbelievably rich but somehow melts in your mouth without any sneaky cracks appearing. This particular baked version—with its crunchy, buttery foundation and smooth, chunky filling—is what finally did it for me. It’s the ultimate chocolate cookie cheesecake, and I’m sharing every single secret I learned along the way.
If you’ve ever felt intimidated by cheesecake, this is the one that will make you a believer! It’s so much easier than you think once you know the little tricks—like wrapping that springform pan like you mean it. We’re talking absolute decadent bliss, baked to creamy perfection.
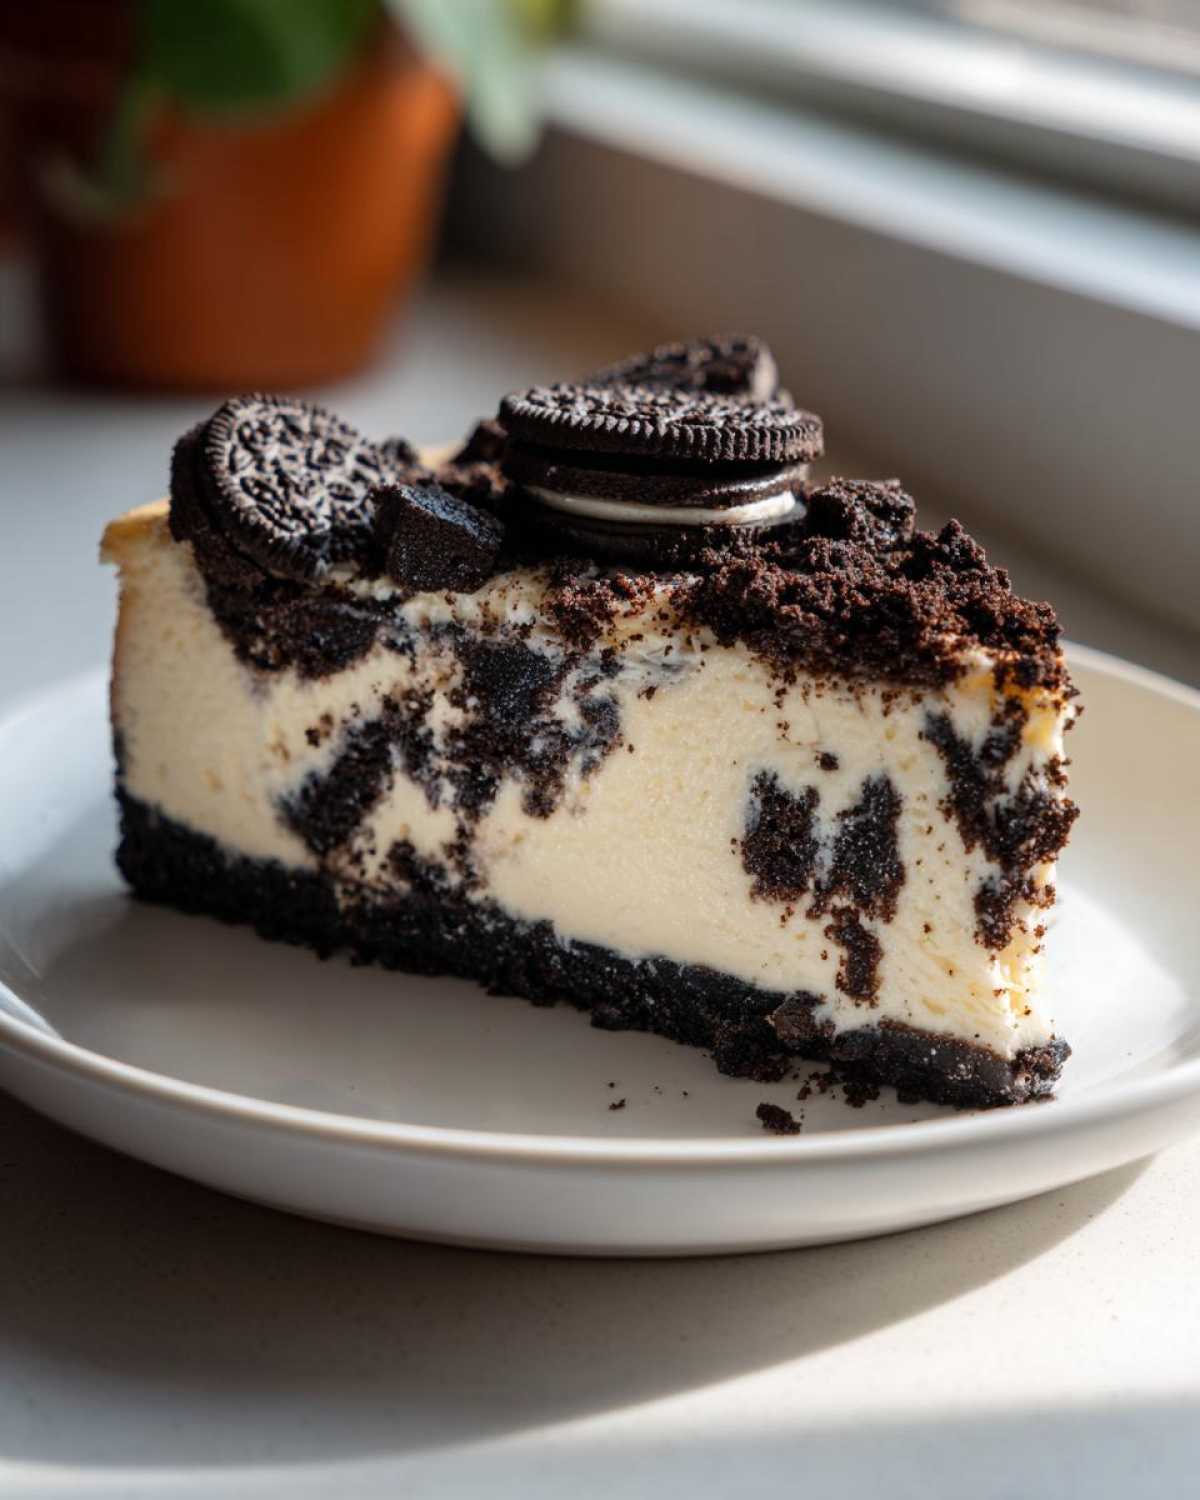
Why This Oreo Cookies and Cream Cheesecake Recipe Works
Seriously, this recipe stands out from all the homemade Oreo dessert attempts you might have made before. It’s all about reliable results, every single time. I’ve tried the quick versions, but nothing beats the deep, satisfying flavor this baked method provides.
Here’s the heart of why this specific Oreo Cheesecake Recipe is my go-to:
- It achieves unparalleled creaminess thanks to using room-temperature ingredients and the water bath technique.
- The balance is spot-on: the slight bitterness of the chocolate crust perfectly cuts through the sweetness of the filling.
- It’s incredibly reliable. Once you nail the slow cooling process, you practically guarantee a beautiful, uncracked top.
If you love that luscious texture, you should check out my tricks for getting the perfect feel in my creamy lemon pasta—it’s all about technique!
Essential Ingredients for Your Oreo Cookies and Cream Cheesecake
Okay, pulling together this Rich Cream Cheese Dessert starts with having everything ready to go. For a recipe this decadent, you can’t just throw things in willy-nilly. I keep my pantry stocked just for these moments! Having the right proportions means you skip the panic once you’re actually mixing. Since we’re aiming for that perfect, indulgent cheesecake experience, we need precise amounts of everything. This whole process is just so much faster when you have your eggs, cheese, and sour cream all sitting out until they are perfectly room temperature; trust me, that step is non-negotiable for achieving that smooth, lump-free final product. You can find more tips on why temperature matters so much when I talk about my rich cream cheese dessert!
For the Chocolate Cookie Crust
The base has to be sturdy because it’s holding up a whole lake of creamy filling! For this, you need about 1 and 3/4 cups of crushed Oreo cookies—that’s roughly 25 of those sandwich cookies, boots and all. We mix that with just a quarter cup of melted, unsalted butter. That melted butter is the glue that holds our chocolate cookie cheesecake foundation together when it comes out of that initial short bake. Press it down firmly; the firmer you pack it now, the less likely you are to have crumbs falling off when you slice it later.
For the Creamy Cheesecake Filling
Now for the star! You’ll need three full 8-ounce packages of cream cheese, and I’m stressing this: they have to be soft. I mean completely soft, almost mushy. Cold cream cheese causes lumps, and we are making a Creamy Cheesecake Recipe here, not a lumpy disappointment! You’ll also need 1 and 1/2 cups of granulated sugar, a teaspoon of vanilla extract, and just a pinch of salt to wake everything up. The moisture comes next: one cup of sour cream. And finally, you need that gorgeous texture—fold in a full cup of crushed Oreos just for the filling. Remember, you mix the eggs in carefully, one at a time, so you don’t introduce too much air!
Step-by-Step Guide: How to Make Oreo Cookies and Cream Cheesecake
Getting this perfect Oreo Cookies and Cream Cheesecake into the oven doesn’t take forever, but you do have to follow the sequence exactly. If you rush the steps, you end up fighting the batter, and nobody wants that! I find that laying out my utensils before I even turn the oven on really helps keep me on track. We move from building the foundation to mixing the delicate filling, and then it’s all about that gentle bake. If you’re looking for a simpler approach someday, I have a go-to simple cheesecake recipe, but for this indulgent version, stick with me!
Preparing the Crusted Oreo Cheesecake Base
First things first: get that oven warmed up to 350°F (175°C). Now, here’s a crucial safety step for any cheesecake you bake: you must wrap the outside bottom of your 9-inch springform pan very tightly, using heavy-duty aluminum foil. I usually do two or three layers horizontally and then a couple vertically, just to make sure zero water from the bath sneaks in. Once that’s done, mix your 1 3/4 cups of crushed Oreos with that melted 1/4 cup of butter until it looks like wet sand. Press it down firmly into the bottom of the pan—really compact it! Pop that crust in the oven for just 10 minutes. When it comes out, let’s let it cool down a little while we tackle the main event.
Mixing the Filling for a Creamy Cheesecake Recipe
Drop that oven temp to 325°F (160°C) before you start mixing the filling. Remember how I stressed everything being room temperature? It pays off here! Beat your softened cream cheese until it’s perfectly smooth and lump-free. Then, you slowly introduce the 1 1/2 cups of sugar, followed by the vanilla and salt. Now, take the four eggs and add them in *one at a time*. I pause briefly between each addition; you just want the yolk and white totally incorporated—stop mixing the second it disappears. If you overbeat the eggs, you’ll get air pockets, and that leads straight to cracking! Finally, gently fold in the sour cream and those remaining 1 cup of crushed Oreos reserved for the filling. We’re folding gently here, not beating!
Baking Your Oreo Cookies and Cream Cheesecake Using a Water Bath
This is the magic trick for that incredibly Creamy Cheesecake Recipe texture! Place your foil-wrapped springform pan inside a larger roasting pan—mine is one of those heavy aluminum ones with the handles. Pour hot water into the roasting pan until it comes about halfway up the sides of the cheesecake pan. This gentle steam cooks the cheesecake evenly and keeps it from drying out. Bake it for about 55 to 65 minutes. You’re looking for the edges to be set, but the very center should still have a tiny jiggle, like Jell-O. Don’t panic; that jiggle means moisture!
Cooling and Setting Your Indulgent Cheesecake
Okay, you survived the bake time! Congratulations! But don’t you dare pull this gorgeous Indulgent Cheesecake straight out into the cold kitchen air. That’s how you get the dreaded giant crack right across the top. We need to trick it gently into cooling down so it doesn’t seize up.
Once that 55 to 65 minutes is up, turn the oven off completely. That’s right—turn the heat off. Then, crack the oven door open just a tiny bit. Now, you leave it right there, inside that warm, steamy environment, for a full hour. This slow transition is non-negotiable if you want that smooth top that looks straight out of a fancy bakery. This whole concept of controlled cooling is something I learned works wonders for my brownie refrigerator cake too; patience pays off!
After the hour is up, carefully take the cheesecake out of the water bath and remove any foil insulation. Let it cool down completely on a wire rack at room temperature. Once it’s totally cool to the touch—and I mean *cool*—you wrap the whole thing loosely in plastic wrap. Then we chill it. You absolutely must refrigerate this dessert for at least six hours, but honestly? Overnight is the magic number. It needs that long to fully set up and for the chocolate cookie cheesecake layers to marry up properly. Don’t rush this part, or it will be soft and sad!
Tips for the Best Oreo Cheesecake
Baking this Best Oreo Cheesecake recipe is about technique more than luck, honestly. I’ve polished this method over so many tries that I know exactly where people sometimes run into little hiccups. If you follow these few pointers, you’re going to land a perfect, rich dessert every single time. It’s all about preparation!
Don’t skip these crucial little details:
- Room Temp Dairy is Not Optional: I can’t say this enough—make sure your cream cheese, eggs, and sour cream are completely at room temperature. If you try mixing cold ingredients, you get tiny, hard lumps of cream cheese that refuse to blend, leading to a grainy texture instead of that beautiful, smooth result we want.
- Crush Cookies Smartly: While you can certainly smash Oreos in a zip-top bag with a rolling pin (which is fun, by the way!), using a food processor gives you the absolute finest, most uniform crush for both the crust and the filling chunks. Uniformity helps things set evenly.
- Foil Wrapping Reinforcement: Since we are using a water bath, go overboard on that foil wrapping around the springform pan. I always use the trick of wrapping it first sideways, then wrapping it again vertically (criss-cross style). It’s twice the work, but if any water leaks in, you get a soggy crust, and that would be a tragedy for this Dessert with Oreos!
- Don’t Overmix the Eggs: Eggs are binders, and too much mixing when they are in the bowl builds up air we immediately try to get rid of during the cooling process. Mix just until they disappear. Honestly, I think my favorite cookies that hold their shape are sugar cookies, but even those need careful egg incorporation!
Variations on the Oreo Cookies and Cream Cheesecake
As much as I adore this baked classic, sometimes you just don’t want to turn on the oven, right? Or maybe you’re making this for a potluck where you know people are bringing a million things that need oven space. Good news: this recipe is surprisingly adaptable! If you’re craving that chocolate cookie cheesecake flavor but need something faster, you absolutely can convert this into a No Bake Oreo Cheesecake. The note included that you saw above is my go-to plan for that adaptation.
For the no-bake route, you skip the entire pre-bake of the crust and just chill the butter/cookie mixture so it firms up enough to hold its shape. The filling changes a bit too—you usually replace the eggs and the sour cream with something like stabilized whipped cream or perhaps cream cheese mixed with melted white chocolate for structure. It chills firm and tastes lighter, which is great on a hot day. I’ve done a similar process for my no-bake peanut butter bars, so you know the technique works!
If baking is your jam, you can always switch up the mix-ins too! If you want an even richer experience, gently fold in about a cup of coarsely chopped dark chocolate chips along with the crushed Oreos for the filling. That little hit of solid chocolate against the creamy base just sends this over the top. And if you loved my little note about the pumpkin version, you can absolutely check out my tips for a no-bake pumpkin cheesecake if you want to swap out the flavor profile completely for the holidays!
Serving Suggestions for Your Homemade Oreo Dessert
Once all that patient chilling is over and you finally slice into this masterpiece, you want it to look as good as it tastes, right? This Homemade Oreo Dessert screams for a little bit of flair, but honestly, it really doesn’t need much help because the chunks of Oreo look so gorgeous peaking out.
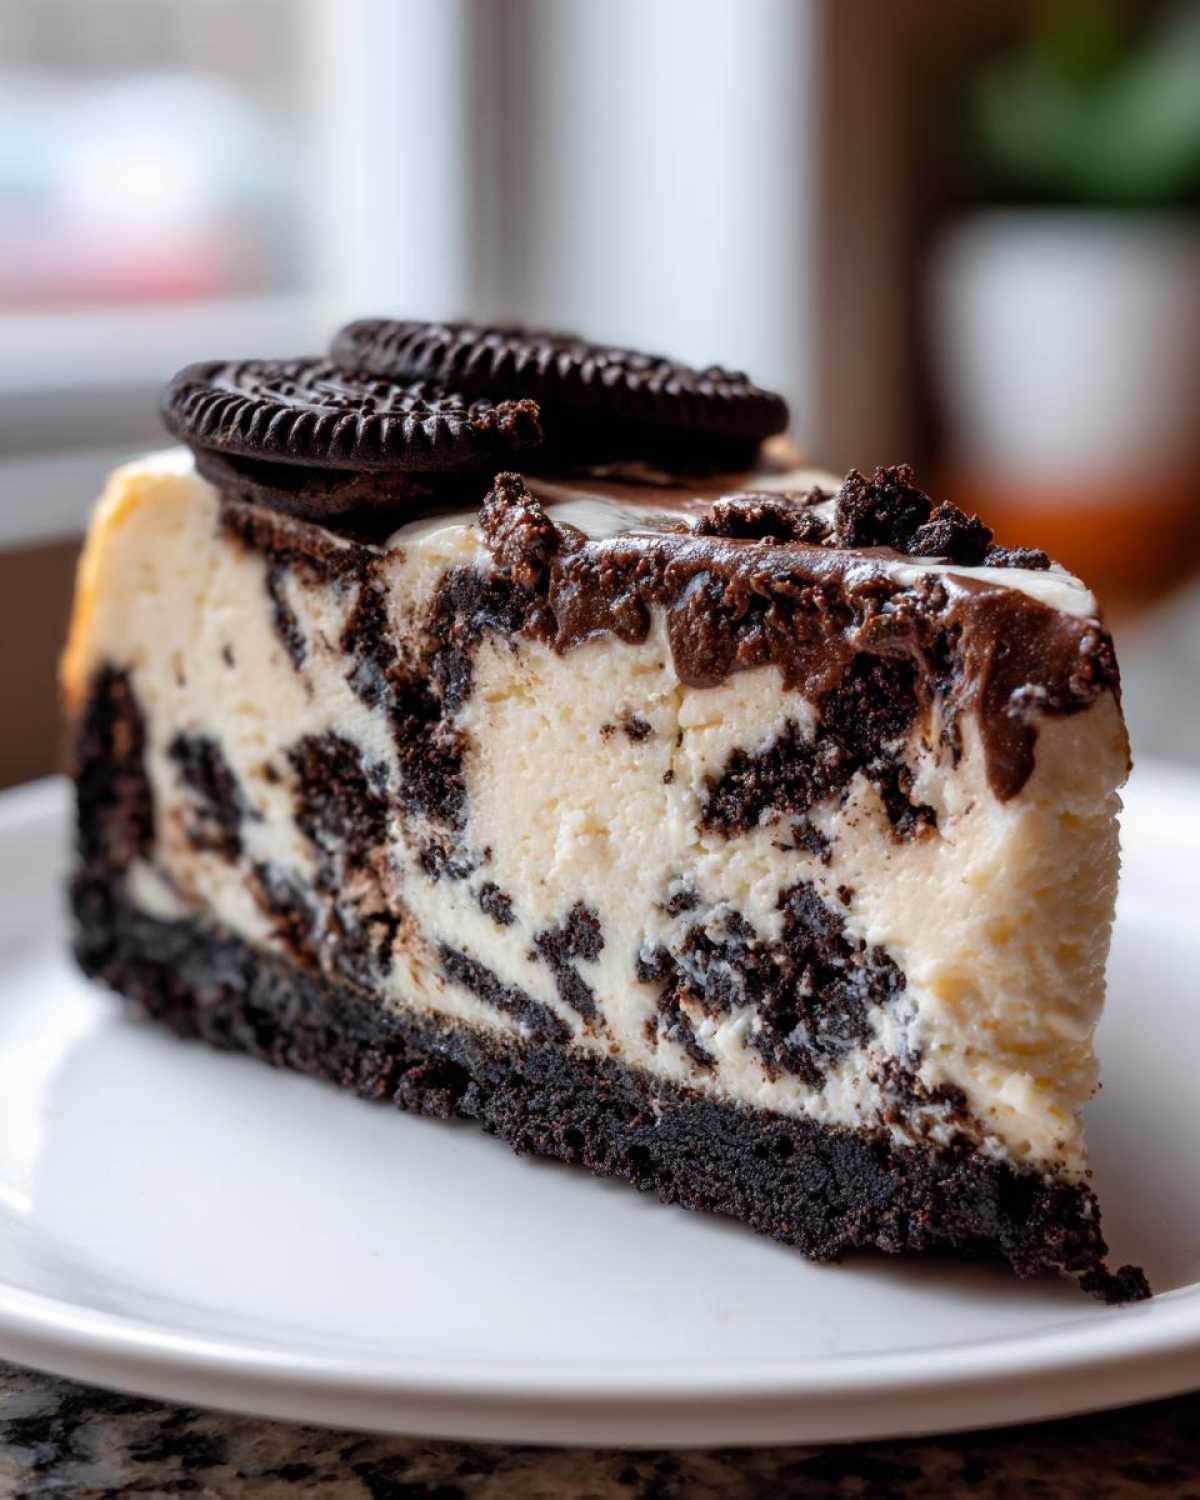
The recipe calls for a half cup of whipped topping, and I always use that! It adds a beautiful, cloud-like contrast to the dark, dense cheesecake. I just swirl it gently on top—don’t try to make perfect rosettes unless you’re feeling fancy! A simple dollop next to each slice works wonders.
If you are taking this to a party, presentation is everything. Make sure you have a very sharp, hot knife (I dip mine in hot water and wipe it dry between every cut) so those edges are clean. This pairs wonderfully with coffee, of course, or if you want to keep the chocolate theme going, a little drizzle of warm fudge sauce is heavenly. If you’re looking for great ideas for serving large crowds in general, check out my post on party dessert recipes; they help you think about making a big impression without a ton of extra work!
Storage and Reheating Instructions for Leftover Oreo Cookies and Cream Cheesecake
So, you managed to have leftovers? Wow, that means you either have a really disciplined family or you made two of these! Lucky you! Now, we need to treat this leftover Oreo Cookies and Cream Cheesecake right so it stays perfect. Since this is a cream-cheese-based dessert, refrigeration is your best friend here.
You want to store it tightly covered in the fridge. I usually use plastic wrap, making sure it doesn’t touch the cheesecake surface if possible, or I use an airtight container with a lid. If you’re lucky enough to have a slice that hasn’t been cut into yet (meaning the knife hasn’t touched it), it’ll last beautifully for about four to five days in the refrigerator. That’s a full week of morning coffee treats!
Now, let’s talk about reheating. Honestly, no, don’t do it! Cheesecake is not meant to be warmed up. Heating it will just melt that perfect, dense structure we worked so hard to achieve using the water bath and slow cooling. If you want to take the chill off just slightly—maybe you hate cold cheesecake—let an individual slice sit out on the counter for about 20 or 30 minutes before you plan on eating it. That lets the flavor bloom a bit without actually cooking it. For all the fine print on my site, you can quickly check my terms and conditions, but for leftovers, just keep it cool!
Frequently Asked Questions About This Recipe
I know sometimes you just need a quick answer before you dive in, or maybe you’re staring at your ingredients wondering if you can make a quick substitution. That’s totally normal! I get a bunch of questions about reliability and making sure this Easy Oreo Dessert comes out perfectly every time, just like the ones I share when people reach out via my contact page! Here are a few things people always ask me about making the Best Oreo Cheesecake.
Can I skip the water bath when making the Oreo Cookies and Cream Cheesecake?
Look, I get it—wrapping that pan is fussy! But my direct answer is: please don’t skip it if you want that melt-in-your-mouth texture. The reason we go through the hassle of using that hot water bath (the *bain-marie*) is that it creates a very humid, gentle cooking environment. It basically steams the edges of your cheesecake slowly so it cooks evenly from the outside in. If you bake it dry, the edges cook way faster than the center, and that temperature shock is what causes those big, ugly cracks. You want that Creamy Cheesecake Recipe texture, and the water bath is how we guarantee it!
What is the best way to crush the Oreos for the crust?
If you’re making a large batch, your food processor is going to be your absolute best friend here. Pulse those cookies—don’t just let it run—until you have fine crumbs. You want them fine enough that they pack down really tightly to form a dense base for our Crusted Oreo Cheesecake. If you don’t have a processor, the old-school method of putting them in a sturdy zip-top bag and beating them with a rolling pin works wonders, but you might get slightly larger chunks. Either way, make sure you use the entire cookie—the cream filling adds crucial fat into the crust mixture!
PrintOreo Cookies and Cream Cheesecake

A recipe for a rich, creamy baked cheesecake featuring a chocolate cookie crust and chunks of Oreo cookies mixed into the filling.
- Prep Time: 25 min
- Cook Time: 65 min
- Total Time: 8 hours 30 min
- Yield: 12 servings
- Category: Dessert
- Method: Baking
- Cuisine: American
- Diet: Vegetarian
Ingredients
- 1 3/4 cups crushed Oreo cookies (about 25 cookies)
- 1/4 cup unsalted butter, melted
- 3 (8 ounce) packages cream cheese, softened
- 1 1/2 cups granulated sugar
- 1 teaspoon vanilla extract
- 1/4 teaspoon salt
- 4 large eggs
- 1 cup sour cream
- 1 cup crushed Oreo cookies (for filling)
- 1/2 cup whipped topping, for garnish (optional)
Instructions
- Preheat your oven to 350°F (175°C). Wrap the outside bottom of a 9-inch springform pan tightly with heavy-duty aluminum foil.
- Combine the 1 3/4 cups of crushed Oreos and melted butter. Press the mixture firmly into the bottom of the prepared springform pan. Bake the crust for 10 minutes. Remove from the oven and let it cool slightly.
- Reduce the oven temperature to 325°F (160°C).
- In a large bowl, beat the softened cream cheese with an electric mixer until smooth. Gradually beat in the sugar until fully combined. Mix in the vanilla extract and salt.
- Beat in the eggs one at a time, mixing just until each egg is incorporated. Do not overmix.
- Gently fold in the sour cream and the 1 cup of crushed Oreos for the filling.
- Pour the filling over the cooled crust. Place the springform pan inside a larger roasting pan. Carefully pour hot water into the roasting pan until it reaches about halfway up the sides of the springform pan (this creates a water bath).
- Bake for 55 to 65 minutes, or until the edges are set and the center has a slight jiggle.
- Turn off the oven, crack the door open slightly, and let the cheesecake cool inside the oven for 1 hour. This slow cooling helps prevent cracking.
- Remove the cheesecake from the water bath and let it cool completely on a wire rack.
- Once cool, cover the pan loosely with plastic wrap and refrigerate for at least 6 hours, or preferably overnight, before serving.
- Before serving, remove the sides of the springform pan and top with whipped topping, if desired.
Notes
- For a no-bake version, chill the filling mixture for at least 8 hours instead of baking.
- To prevent cracks, make sure all dairy ingredients (cream cheese, eggs, sour cream) are at room temperature before mixing.
- Use a food processor to crush the cookies for a finer, more uniform crust.
Nutrition
- Serving Size: 1 slice
- Calories: 450
- Sugar: 35g
- Sodium: 350mg
- Fat: 30g
- Saturated Fat: 18g
- Unsaturated Fat: 12g
- Trans Fat: 0.5g
- Carbohydrates: 40g
- Fiber: 1g
- Protein: 7g
- Cholesterol: 110mg