

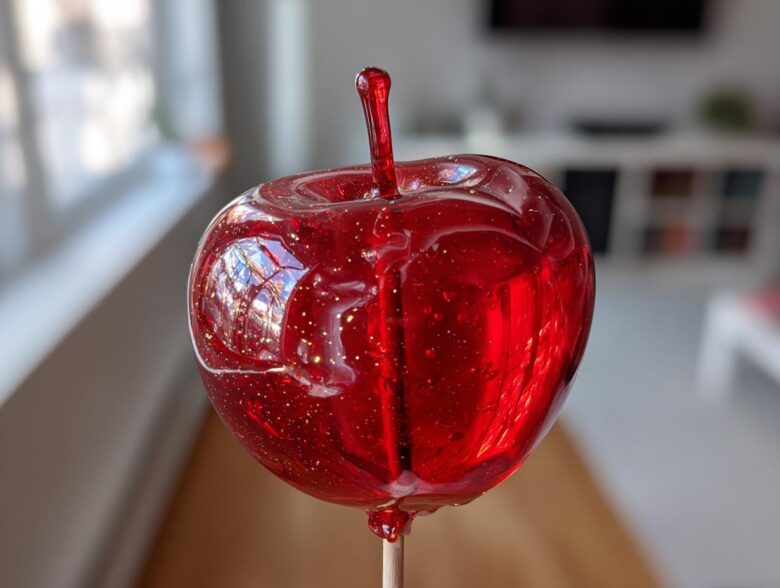
Oh my gosh, when that crisp air hits, you know exactly what I start dreaming about, right? Not pumpkin spice lattes—though I love those too—but those gorgeous, jewel-toned **candy apples** you see at every fairground! For years, mine ended up cracked or, worse, sticky after five minutes. But I finally cracked the code, trust me. This is the absolute **best classic candy apple recipe** you will ever use. We’re not messing around with caramel here; this is the vibrant, glossy, shatteringly crisp coating that makes that satisfying *thwack* sound when you bite into it! Mastering that 300-degree Hard Crack Stage took practice, but I’m going to walk you through every single second. If you loved my apple cider cupcakes, you need these apples on your autumn table!
Why You Will Love This Classic Candy Apple Recipe
- They are genuinely shatteringly crisp—no soft, sticky spots allowed! This is the secret to getting that high-gloss, mirror-like finish.
- You get perfectly crack free candy apples because we manage humidity and temperature like total pros.
- This is truly an easy homemade candy apples method once you trust your candy thermometer. No complicated emulsifiers needed!
- When you follow the steps, you achieve that vibrant, deep red hue that screams vintage fairground treat.
- The tartness of the Granny Smith apples cuts right through the pure sugar shell, creating the perfect balance.
- Follow our dipping guide, and you’ll have beautiful, shiny candy apples recipe at home that look like they came straight from a gourmet shop.
Honestly, making these at home is so much more fun than waiting in line at the fall festival. I promise you’ll feel like a candy wizard when you see how professional these turn out!
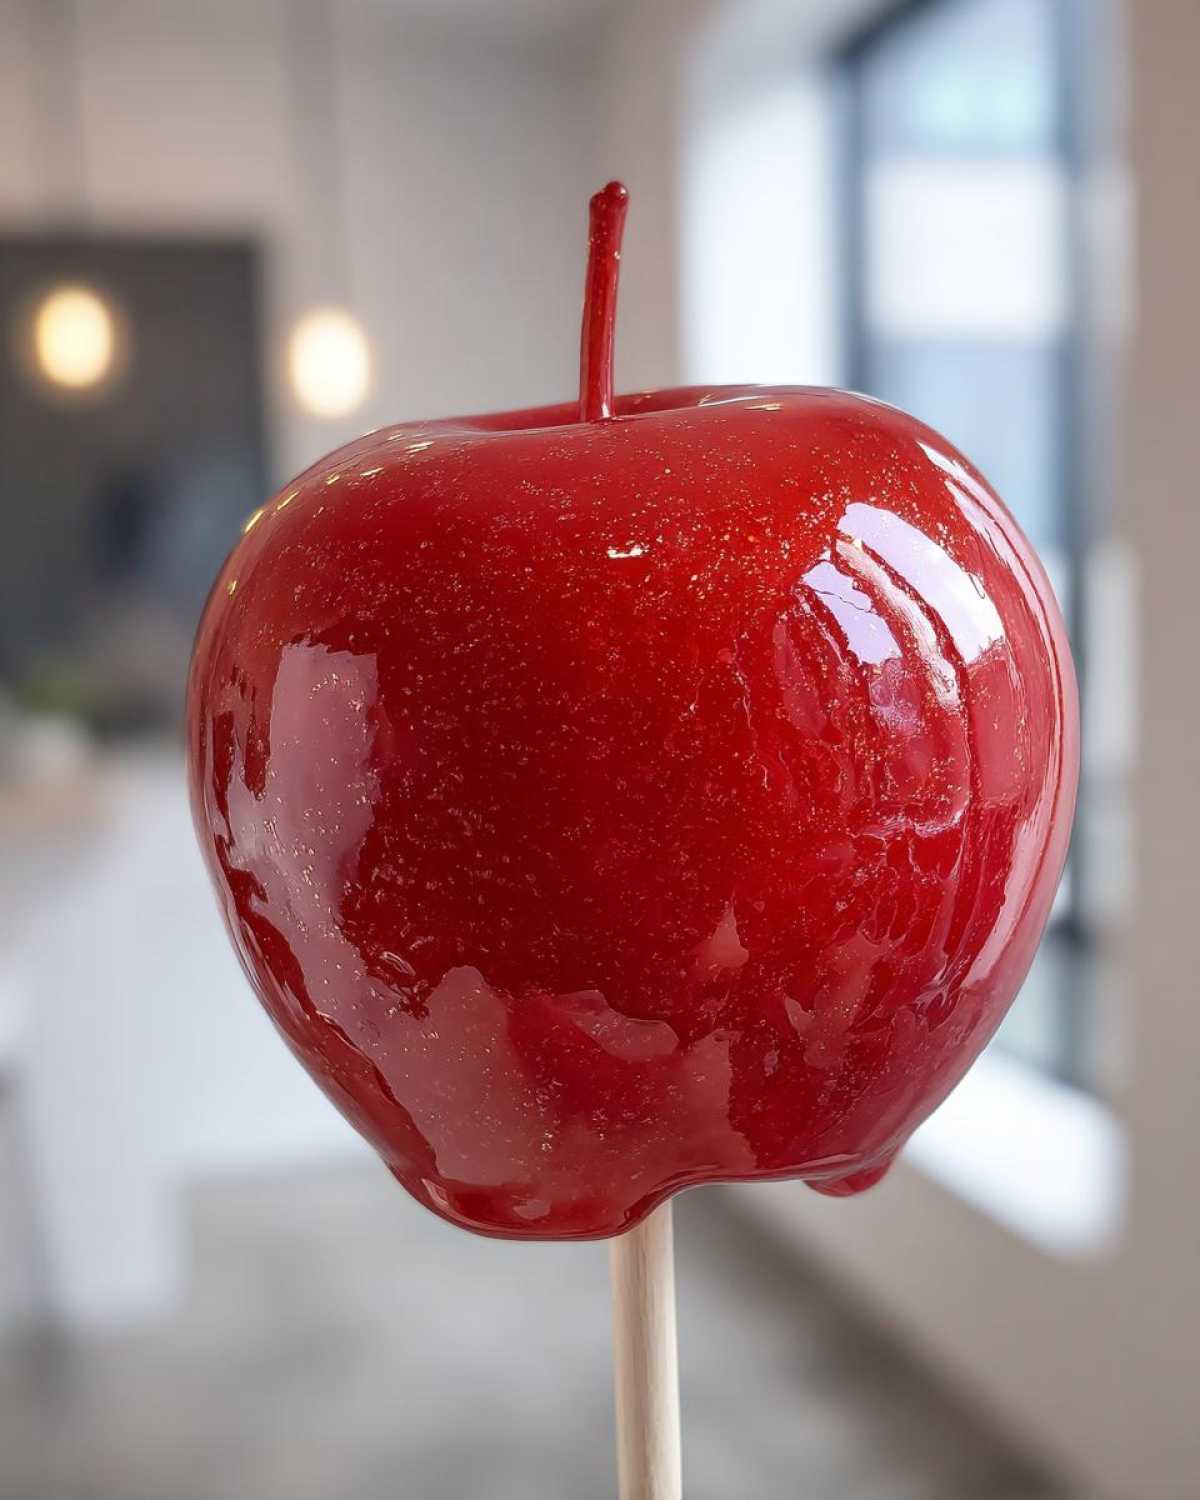
Essential Ingredients for Perfect Candy Apples
Okay, listen up, because this is where the real magic starts—and where most people mess up! Getting the perfect glossy candy coating for apples isn’t about using fancy equipment; it’s about using the right raw materials and respecting them. If you swap out the corn syrup for something else, you might end up with a crystallized mess, and we absolutely don’t want that grainy texture when we’re aiming for a vintage, shiny finish. I’ve linked my favorite candied pecan recipe if you want a crunchy topping later, but first, ingredients!
For the Apples and Sticks
You need exactly six medium apples. I insist on Granny Smith! Their tartness is crucial. It cuts right through the intense sweetness of that hard candy shell, so you don’t feel like you’re eating pure sugar. If you use a sweeter apple, the resulting flavor just tastes flat to me. And don’t forget the sticks! Use thick wooden ones or the sturdy paper lollipop styles. Wimsy is great, but a flimsy stick means your beautiful apple falls off halfway through dipping. We need six sticks for six apples.
For the Glossy Candy Coating for Apples
This coating is pure, unadulterated science disguised as a treat! The secret weapon here is the corn syrup. It’s what stops that sugar from seizing up and turning gritty later on, giving you that beautiful, shatteringly hard, glossy candy coating for apples.
- 1 1/2 cups granulated sugar (nothing fancy here, just good white sugar!)
- 3/4 cup water (tap water is totally fine)
- 1/2 cup light corn syrup (This is non-negotiable for shine and anti-crystallization!)
- 1 teaspoon red food coloring (I only use gel coloring because the water content in liquid coloring can mess with your syrup temperature. Gel gives you the deepest, brightest red.)
- 1/2 teaspoon cinnamon extract or vanilla extract (Cinnamon extract really gives it that nostalgic kick.)
- 6 wooden or paper lollipop sticks
How to Make Hard Candy Apples: Step-by-Step Tutorial
Finally, we get to the fun part—the assembly! This whole process flies by once you get past the temperature reading, so get everything ready before you even turn on the stove. This entire homemade candied apples tutorial is designed to give you flawless results every single time, especially if you pay close attention to the temperature. We’re not messing around with caramel here; this is the vibrant, glossy, shatteringly crisp coating that makes that satisfying *thwack* sound when you bite into it! Mastering that 300-degree Hard Crack Stage took practice, but I’m going to walk you through every single second. If you need a warm drink to sip while you work, check out my spiced hot apple cider recipe!
Preparing Apples for the Best Candy Apples
This step is non-negotiable, so pay close attention! You must wash those apples really well, but then—and this is crucial—you need to dry them until they are bone dry. Seriously, no moisture allowed! Why? Because any little bit of water left on the skin reacts with the scorching hot sugar and creates steam pockets, which causes your gorgeous coating to bubble or slide right off later. After they are totally dry, take a tiny bit of vegetable oil or melted butter on a paper towel and rub the surface of the apple lightly. This micro-thin layer of fat is the secret key to helping that hard candy shell adhere perfectly instead of refusing to stick. Then, push that lollipop stick firmly into the core so it’s secure!
Cooking the Syrup to Hard Crack Stage for Crack Free Candy Apples
Grab your heavy-bottomed pot—we need good heat distribution here. Combine your sugar, water, and corn syrup. Stir it gently, just enough to make sure the sugar dissolves into the water while heating over medium heat. The moment it hits a full boil, put the spoon down and DO NOT STIR IT AGAIN. Seriously, stirring causes crystallization, which means rough spots later. Insert your candy thermometer and let it cook until it hits exactly 300 degrees F. If you pull it off at 295, you get gummy apples. If you let it get to 310, it will burn fast. We want that perfect Hard Crack Stage for beautiful, crack free candy apples.
Dipping Technique for Shiny Candy Apples Recipe at Home
Once you hit 300°F, yank that pot right off the heat! Let it sit for about 60 seconds so the rolling boil settles down a bit. Now, quickly stir in your vibrant red coloring and that cinnamon extract—just fold it in gently so you don’t whip air bubbles in there. Tilt the saucepan slightly toward you and dip one apple straight down, rotating it quickly to get full coverage. Lift it straight up, holding it over the pot, and let the excess drip back down. If you leave it hanging too long, you end up with a long syrup tail. Once the drip slows to just a little bead, swing it over to your parchment-lined sheet. Place it down and don’t touch it until it’s totally cool. You’ll have the shiniest results for your shiny candy apples recipe at home!
Expert Tips for No Bubble Candy Apple Coating
Listen, I know you followed the recipe perfectly, but sometimes those tiny little traitor bubbles still show up in your beautiful red coating. We are striving for that flawless, mirror-like finish, so let’s talk about how to get that true no bubble candy apple coating!
The earliest fight against bubbles happens before you even start cooking: temperature control. Remember how I hammered home that you need room-temperature, very dry apples? That’s because if your apple is cold right out of the fridge, the hot syrup hits it and instantly creates condensation. That steam has to go somewhere, and it pops up right in your shell, causing cracks and bubbles later on. So, let those apples rest on the counter for at least an hour before you even think about washing them!
If you happen to see those little air pockets forming right when you pull the apple out of the syrup, don’t panic! That means there might be a tiny bit of trapped air. Just carefully place that same pan back on the stove over the absolute lowest heat setting—and I mean super low—for just five or ten seconds. That bit of gentle heat should encourage any trapped air to escape. Pull it off immediately! You can also check out my thoughts on building trust in your baking over on the About Us page if you want to know more about my kitchen philosophy.
Troubleshooting Common Candy Apples Issues
Even when you follow those steps for the classic candy apple recipe perfectly, cooking sugar is sneaky! It’s not like baking a cake where you can easily see if something is wrong halfway through. You usually only find out about a mistake once the coating cools and hardens. Don’t stress! Almost every single problem is fixable during the cooking process, and knowing these quick tricks keeps your dessert looking professional. This is how we build trust in our cooking—by learning how to recover from little slip-ups!
The biggest issue I used to face was the coating getting too thick mid-dip. You’ve got three apples dipped, and suddenly, the syrup is clinging like molasses and you can’t get a thin coat. If this happens, just gently put the pot back on the burner over VERY low heat for just a minute or two. You just need to warm it enough so it flows smoothly again. Never crank the heat up, or you’ll scorch the bottom!
Why Is My Coating Crystallizing (Getting Gritty)?
This happens when those sugar crystals form tiny little arms and grab onto their friends, making the whole batch turn sandy instead of smooth. 99% of the time, this is because the spoon touched the syrup while it was boiling, or maybe a tiny crystal splashed up onto the side of the pot and then fell back in. If you see crystallization starting, you can try wiping down the sides of the pot with a damp pastry brush dipped in clean water, but honestly, once that sugar seizes, it’s safer to just start over with a fresh batch. It’s only sugar, water, and corn syrup, after all!
Why Did My Candy Coating Crack After Cooling?
If your wonderful, vibrant red shell spiders out and cracks the minute it hits room temperature—or right when little Timmy tries to take a bite—it’s almost always temperature shock. We talked about making sure the apples are room temperature, but sometimes the cooling environment is too cold, too! Try to let your dipped apples cool on the counter in a relatively draft-free, room-stable area. Extreme temperature transitions make the hard candy contract too quickly, and that stress causes cracks. Remember, we want steady cooling for those beautiful, durable finishes.
What If My Coating Isn’t Sticking to the Apple?
If the coating is sliding down the apple like a candy avalanche, you missed the pre-treatment! That little rub of oil or the waxy residue from the apple’s natural coating wasn’t completely removed, or maybe you put the stick in before the apple was totally dry. The sugar has nothing to grip onto! The fix is simple: you have to dump your current batch (it’s too cool now anyway) and start fresh. Make absolutely sure the apples are clean, dry, and slightly oiled before you insert the sticks this time. It’s annoying, but it’s the only way to save your beautiful batch of syrup.
Fun Flavored Candy Apples and Gourmet Candy Apple Variations
So you’ve mastered the classic bright red, right? That’s fantastic! But the beauty of working with a simple sugar syrup base is that you can customize it a million different ways. Once you know the temperature, you are basically the master of your own miniature fairground! These fun flavored candy apples are perfect for stepping up your game at parties or just keeping things interesting when you’re craving something sweet.
The easiest change happens in the flavor extract we add right at the end. Ditch the cinnamon or vanilla for something unexpected. Imagine a deep purple apple flavored with almond extract—it’s incredibly sophisticated! Or, if you’re making these around the holidays, try a few drops of pure peppermint extract. Wow, that cooling flavor combined with the crisp apple shell is just dynamite. Don’t feel like you have to stick to red, either! You can easily make colorful candy apples for parties by adding a few drops of gel coloring to achieve brilliant blues, electric greens, or even stripes if you’re ambitious enough to manage two pots of syrup.
If you need a really fun, textural complement to these, I highly recommend rolling your freshly dipped apple in something immediately while the coating is still tacky! Think about a layer of crushed walnuts or maybe some toasted coconut flakes, or even crushing up some of my amazing spiced pumpkin seeds for a savory-sweet crunch. These gourmet candy apple variations make a simple dessert feel incredibly special, and they look amazing displayed on platters!
Serving Suggestions for Your Candy Apples
Now that you have these stunning, glossy beauties, you can’t just hide them in a plastic container! They deserve a showcase. These treats are fantastic centerpieces for any fall gathering, really. Forget an elaborate floral arrangement; a tiered stand piled high with bright red, shimmering apples is way more fun. They look fantastic against white linens, making the red just pop!
When I serve these, I always make sure there are a couple of other cozy fall desserts nearby. Because the shell is so rich and pure sugar, the palate needs something softer to follow it up. My go-to pairing is always a big, warm bowl of my apple cinnamon oatmeal, served the next morning, of course! But for the party, place some small bowls of salty nuts, popcorn, or even some soft vanilla ice cream next to the platter. The contrast between the crisp candy, the salt, and the soft dessert is heaven.
If you are serving these outside, remember they love the cool, dry air, but they absolutely despise humidity and rain! So, if you happen to have a party on a misty fall evening, maybe stick to serving these puppies indoors. But honestly, just assembling them on a beautiful wooden board makes them look like they were bought from a high-end artisan.
Storage & Reheating Instructions for Candy Apples
Alright, we’ve done the hard work, and we have six perfect, shiny sugar-coated beauties! Now comes the real test: keeping them perfect until it’s time to eat them. Look, sugar baths are tricky because they hate moisture! If you try to stick these gorgeous apples in the refrigerator, it’s basically signing their death warrant. The cold temperature and the inevitable condensation that forms when you pull them out is exactly what turns that crisp, beautiful shell into a sticky, weeping mess. I’ve learned that lesson the hard way, unfortunately!
The best way to store these is actually super simple and very old-fashioned. You want a cool, dry, dark spot. A basement pantry or even just a cool cupboard away from the stove works perfectly. If you have a place that stays below 70 degrees F, even better! Lay them out on a piece of parchment paper, just like you did when they were cooling, and make sure they aren’t touching each other. Covering them loosely with plastic wrap—not airtight, just loose—is fine, but honestly, if your house is dry, you don’t even need the wrap.
Can I Freeze These Coated Apples?
Oh, that’s a fascinating question! In theory, you could try freezing the shells, but I really, really wouldn’t recommend it for these hard candy versions. Freezing and then thawing always introduces a ton of moisture, and we’ve worked too hard to get that crack-free finish! If you absolutely had to store them for longer than, say, four days on the counter, consider wrapping each one individually tight in plastic wrap and storing them in the coldest part of your pantry, but never the fridge. These are truly best eaten within 48 hours of preparation.
How to Re-soften a Slightly Hardened Candy Coating
If for some unlikely reason your apples sat out overnight and the coating feels a little too rock-hard or just slightly dull when you go to eat them, don’t worry! You do not want to reheat the whole thing like we did when we were cooking the syrup, that’s for sure. Instead, you can gently warm the apple itself. Wrap one apple, stick and all, in aluminum foil—just enough foil to cup around it, leaving the top open. Pop that into a warm oven—think 200 degrees F—for about five minutes. The gentle heat will soften the sugar shell just enough to bring back a little bit of that fresh-from-the-pot texture without melting it completely. Take it out, let it sit for just one minute to cool down the surface temptation, and enjoy!
Frequently Asked Questions About Making Candy Apples
I totally get it; making this glossy confectionery can feel a little intimidating at first, especially because the temperature is so precise! But once you conquer that 300-degree mark, you’re golden. I’ve gathered up the questions I get asked the most, so we can clear up any last-minute confusion about achieving those perfect, vibrant treats. If you want to learn about the crust science behind the apple pie, check out my post on decorative pie crusts, but for now, let’s stick to these shiny apples!
What is the difference between caramel apple vs candy apple?
This is the eternal question, isn’t it? It’s easy to mix them up, but they are fundamentally different things! A caramel apple uses cooked dairy—usually butter, cream, and brown sugar—which results in a soft, chewy, gooey coating that stays relatively pliable. A hard candy apple? That’s pure sugar cooked way past the soft-ball stage, all the way to Hard Crack (300°F). This means when you bite into it, you get that clean, satisfying *snap* and shatter, rather than a sweet, soft pull. It’s the difference between a chewy Tootsie Roll and hard peppermint candy!
Can I make these perfect candy apples ahead of time?
You absolutely can, but you have to be smart about storage! As I mentioned, refrigeration is the enemy because of condensation buildup leading to sticky, weeping shells. These are definitely best enjoyed the day you make them, but they hold up beautifully for about three days stored loosely covered in a cool, dry pantry. If you’re prepping for a huge Halloween party, aim to make them no more than 24 hours in advance for the absolute best, crispest texture. Humidity is your main foe here, so keep them away from steamy kitchens!
How do I get a vibrant red color for my candy apples?
If you want that traditional, deep, almost stained-glass red, you have to use gel food coloring, not the standard liquid dropper bottles! The liquid colors have far too much water mixed in. When you introduce extra water into a very hot sugar syrup, it throws off the temperature equilibrium, meaning you risk crystallization or you might have to cook it longer, risking scorching. Gel colors are concentrated pigment suspended in a thicker base, so you use less, and they incorporate beautifully once stirred in gently right before dipping. Trust me, the color payoff is worth chasing down a good gel!
Estimated Nutritional Information for Homemade Candy Apples
Now, don’t spend too much time dwelling on this part, because let’s be real—you’re eating pure, blissful sugar! But for those who like to keep a rough track of things, here is an estimation based on the ingredients for one serving (one apple). Remember, since we’re using a Granny Smith apple, you do get a tiny bit of nutritional benefit, but mostly, you are getting a fantastic blast of energy from the sugar shell!
- Serving Size: 1 apple
- Calories: 350
- Sugar: 85g
- Sodium: 1mg
- Fat: 0g
- Carbohydrates: 90g
- Protein: 0g
This is, of course, an estimate. If you decide to roll your finished apples in nuts (which I highly recommend!), those numbers will certainly change! But for the plain, beautiful, shiny red coating, this is what you can generally expect. I won’t lie, they are a treat, not a daily staple!
Share Your Best Red Candy Apple Creations
I am so excited for you to try this recipe! Making your own gorgeous, shatteringly crisp apples seriously feels like cheating because they look so professional. Once you’ve used your thermometer and achieved that perfect Hard Crack stage, you have to let me know how it went! Did you stick with cinnamon extract, or did you try a different flavor? I want to see all those shiny creations you whip up!
Please, leave me a rating below—give this recipe five stars if it helped you make beautiful, best red candy apple recipe treats! And if you had any hiccups, drop a comment down below so we can troubleshoot together. I always head over to my contact page if I need to look up specific reader reports! Happy candy making, everyone!
Estimated Nutritional Information for Homemade Candy Apples
Now, don’t spend too much time dwelling on this part, because let’s be real—you’re eating pure, blissful sugar! But for those who like to keep a rough track of things, here is an estimation based on the ingredients for one serving (one apple). Remember, since we’re using a Granny Smith apple, you do get a tiny bit of nutritional benefit, but mostly, you are getting a fantastic blast of energy from the sugar shell!
- Serving Size: 1 apple
- Calories: 350
- Sugar: 85g
- Sodium: 1mg
- Fat: 0g
- Carbohydrates: 90g
- Protein: 0g
This is, of course, an estimate. If you decide to roll your finished apples in nuts (which I highly recommend!), those numbers will certainly change! But for the plain, beautiful, shiny red coating, this is what you can generally expect. I won’t lie, they are a treat, not a daily staple!
Share Your Best Red Candy Apple Creations
I am so excited for you to try this recipe! Making your own gorgeous, shatteringly crisp apples seriously feels like cheating because they look so professional. Once you’ve used your thermometer and achieved that perfect Hard Crack stage, you have to let me know how it went! Did you stick with cinnamon extract, or did you try a different flavor? I want to see all those shiny creations you whip up!
Please, leave me a rating below—give this recipe five stars if it helped you make beautiful, **best red candy apple recipe** treats! And if you had any hiccups, drop a comment down below so we can troubleshoot together. I always head over to my contact page if I need to look up specific reader reports! Happy candy making, everyone!
PrintThe Best Classic Hard Candy Apple Recipe

Follow this guide to make traditional, glossy, vibrant red hard candy apples with a crack-free coating.
- Prep Time: 15 min
- Cook Time: 20 min
- Total Time: 35 min
- Yield: 6 servings
- Category: Dessert
- Method: Stovetop Cooking
- Cuisine: American
- Diet: Vegetarian
Ingredients
- 6 medium apples (Granny Smith recommended)
- 1 1/2 cups granulated sugar
- 3/4 cup water
- 1/2 cup light corn syrup
- 1 teaspoon red food coloring (gel preferred)
- 1/2 teaspoon cinnamon extract or vanilla extract
- 6 wooden or paper lollipop sticks
Instructions
- Wash and thoroughly dry the apples. Remove the stems. Dip the bottom of each apple into a small amount of vegetable oil or melted butter, then insert the stick firmly into the core. This step helps the coating adhere.
- Combine the sugar, water, and corn syrup in a heavy-bottomed saucepan. Stir gently over medium heat until the sugar dissolves completely.
- Stop stirring once the mixture boils. Insert a candy thermometer. Cook the syrup without stirring until it reaches 300 degrees Fahrenheit (Hard Crack Stage). This usually takes 15 to 20 minutes.
- Remove the pan from the heat immediately when it reaches 300 degrees F. Wait about one minute for the bubbling to subside slightly.
- Stir in the red food coloring and the extract quickly but gently. Do not overmix, as this can cause bubbles.
- Tilt the saucepan slightly. Dip each apple into the hot syrup, rotating it to coat evenly. Lift the apple out and allow excess syrup to drip back into the pan.
- Place the coated apples on a baking sheet lined with parchment paper or a silicone mat. Let them cool completely and harden, about 30 minutes, before serving.
Notes
- For a crack-free coating, ensure the apples are completely dry and at room temperature before dipping. Cold apples cause condensation which leads to cracking.
- If you see small bubbles forming in the syrup while dipping, briefly return the pan to very low heat for a few seconds to release trapped air, then remove immediately.
- To achieve a very shiny finish, avoid stirring the syrup once it begins boiling.
- If the coating becomes too thick to dip, reheat it gently over low heat until it returns to a dippable consistency.
Nutrition
- Serving Size: 1 apple
- Calories: 350
- Sugar: 85g
- Sodium: 1mg
- Fat: 0g
- Saturated Fat: 0g
- Unsaturated Fat: 0g
- Trans Fat: 0g
- Carbohydrates: 90g
- Fiber: 0g
- Protein: 0g
- Cholesterol: 0mg