

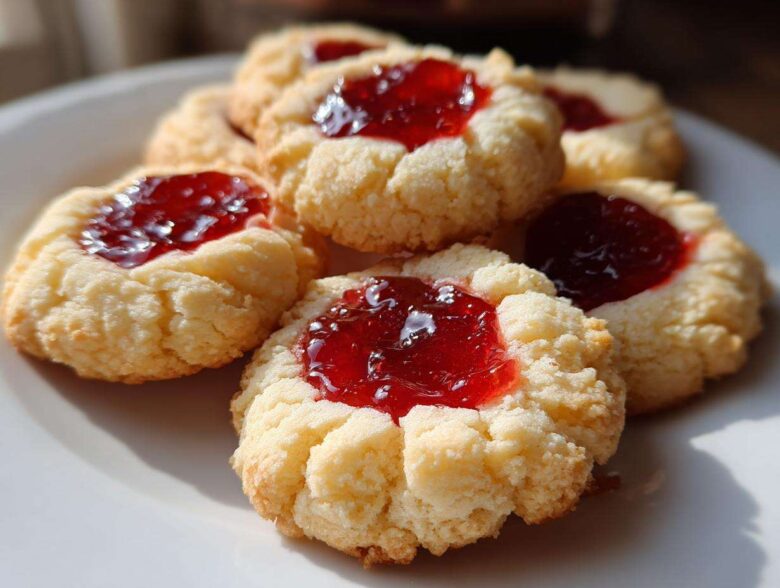
Oh, my gosh, if you smell butter and sugar in my kitchen right now, it means I’m deep into my holiday baking rotation! There is just something about those first few batches of Christmas cookies that makes everything feel right in the world. Forget those complicated layered desserts for a minute; we’re going back to beautiful, simple classics today.
I’m sharing what I call the absolute **Best Raspberry Thumbprint Cookies** you will ever make. These aren’t just good; they are melt-in-your-mouth tender, rich with butter, and that bright pop of raspberry jam in the center? Perfection! This recipe has been my absolute rock for years, especially when I need to bake a guaranteed winner for a big cookie exchange. Seriously, if you are looking for a foolproof, traditional jam filled cookie, you’ve landed in the right place!
I’ve got a few tricks up my sleeve to make sure that buttery dough is never tough. You’ll see when we get to the mixing section how crucial temperature is. When you’re ready to bake these beauties, you can check out my tips for Pumpkin Snickerdoodle Cookies for even more holiday inspiration!
Why You Will Love These Buttery Thumbprint Cookies
I know there are a million different cookie swap recipes floating around, but trust me when I tell you this batch stands out. These aren’t just any cookies; they are buttery cookies that taste like they came straight out of a Scandinavian bakery, only easier!
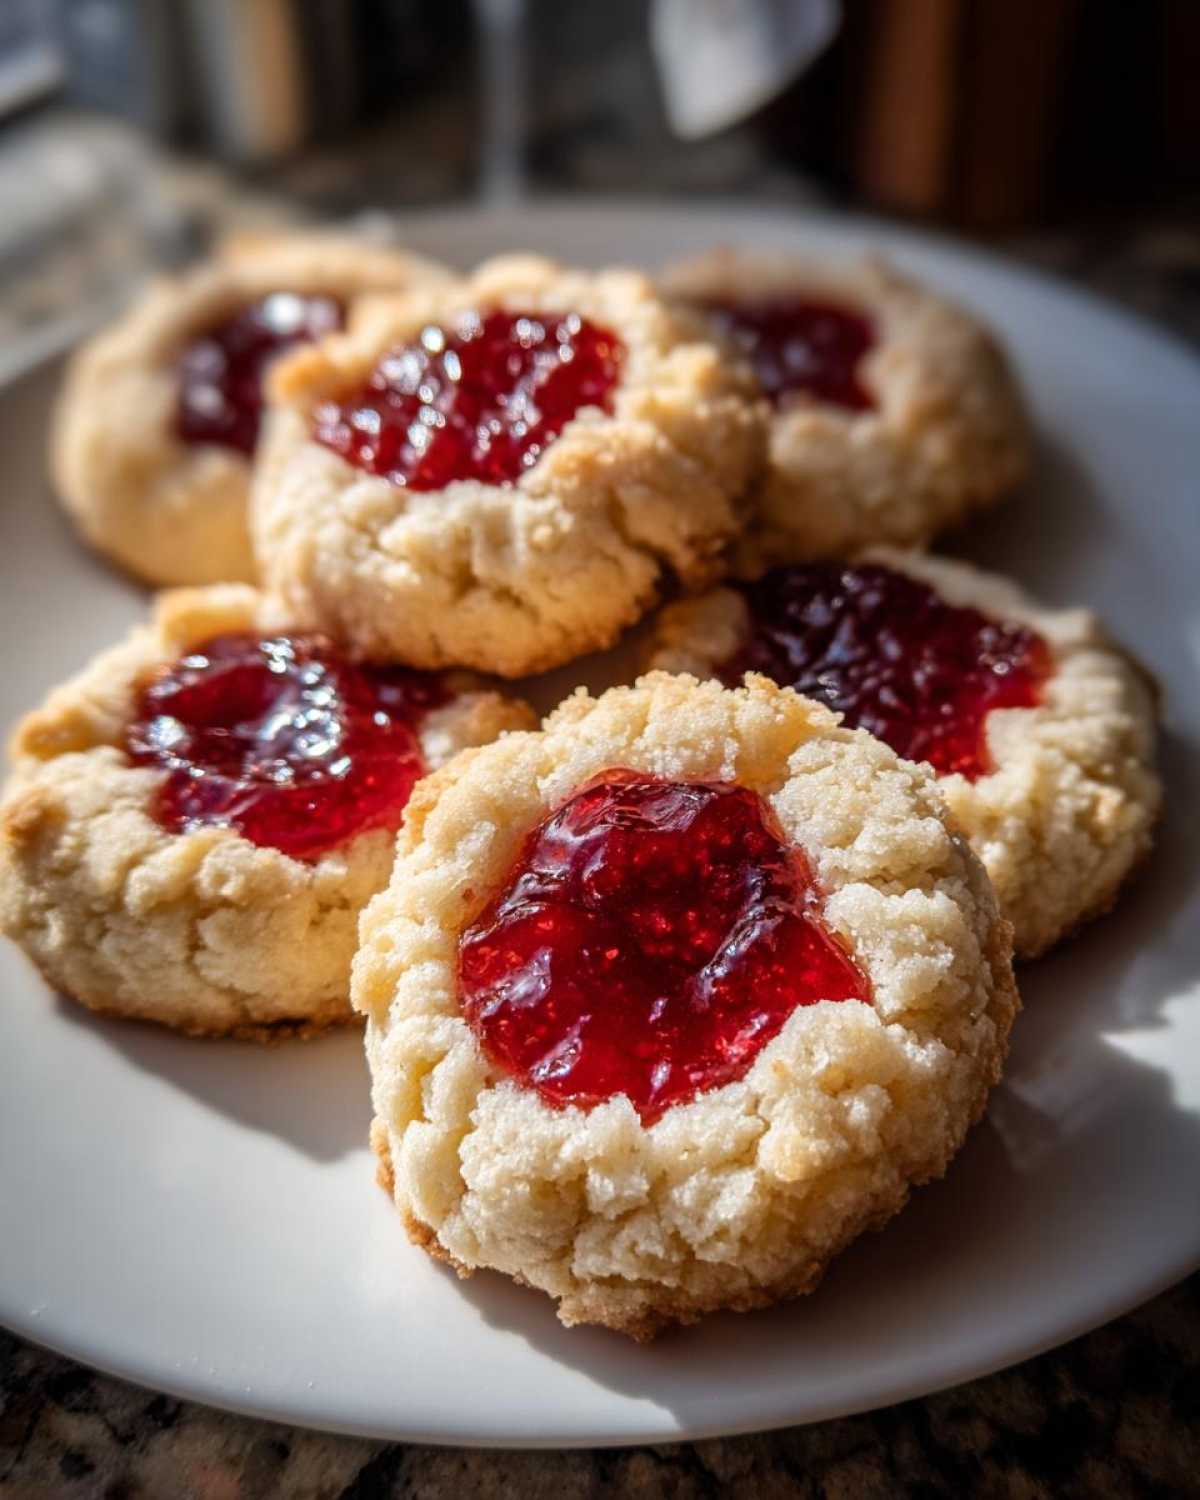
- They bake up perfectly tender every single time—no hard edges here!
- The dough comes together super fast, which is important when you are trying to fill a dozen tins for holiday gifting.
- They look incredibly festive with that bright red jam center sitting perfectly in the baked well.
Achieving Perfect Tender Center Cookies
The secret to that incredible, almost shortbread feel is definitely in the base ingredients. We use a lot of softened butter, obviously, because we want them to be rich. But the real trick? It’s that single egg yolk instead of a whole egg! That extra fat without the extra liquid keeps the structure delicate and tender, guaranteeing a soft center even after they cool completely.
Ideal for Baking for Cookie Exchange
These are the ultimate workhorses for any holiday gathering or cookie exchange. They look fancy because they take a little time to shape, but they are so simple to make! Plus, they travel like a dream. Unlike a soft sugar cookie that might smash flat, these hold their beautiful thumbprint shape even after sitting in a container for a few days. They are truly the best for sharing!
Ingredients for Classic Raspberry Thumbprint Cookies
Okay, let’s talk about what you need to pull off these amazing **Buttery Thumbprint Cookies**. The beauty of this recipe is that it sticks to simple, quality ingredients. You don’t need a million things in your pantry to get a result that knocks everyone’s socks off. Remember, we are aiming for that shortbread texture, so quality really matters here!
Here’s the list. Make sure everything is measured correctly, especially the flour, so we don’t end up with tough cookies!
- 1 cup unsalted butter, softened (And I mean truly softened, pliable butter!)
- 1/2 cup granulated sugar
- 1 large egg yolk
- 1 teaspoon vanilla extract
- 2 1/2 cups all-purpose flour
- 1/4 teaspoon salt
- 1/2 cup raspberry jam (Don’t skimp on the jam—it’s the star!)
If you want to check out how I prepare other tasty mix-ins, I have a killer recipe for Maple Candied Pecans, but for these cookies, stick to the jam for now!
Ingredient Notes and Substitutions for Thumbprint Cookies
Listen, the butter needs to be room temperature. If it’s cold, it won’t cream right with the sugar, and your dough will taste heavy instead of beautifully tender. If you forget to take it out early, just cut it into a few cubes and let it sit on the counter for about 15 minutes; it’ll soften fast enough.
While raspberry is the classic for a reason—that tartness cuts through the richness so perfectly—don’t feel locked in! Apricot jam makes these delicious too, giving them a sunnier, brighter flavor. If you’re feeling adventurous and want to skip the jam entirely, you can definitely go for a little dollop of melted chocolate filling later on. That turns it into one of those fancy Chocolate Filled Fingerprint Cookies!
The No-Fail Technique for Perfect Thumbprint Dough
Okay, this is where we separate the great cookies from the *amazing* ones. We already prepped our powerhouse ingredients, but the method is everything for achieving that incredible shortbread texture. My number one warning, which I shout from my kitchen island every time I bake, is this: Do not overmix the flour! Once you add the flour and salt, you are building structure, and too much mixing equals tough, chewy cookies. We want tender, melt-in-your-mouth results, not hockey pucks!
Mix until that flour just disappears. I mean it! A few wisps of dry flour peeking out are fine because the dough will come together once you start handling it. If you find your dough is just too soft to handle at room temperature—which happens when my kitchen gets warm—you absolutely must chill it. Just wrap the dough disc up and pop it in the fridge for about 30 minutes. This makes handling so much cleaner. You can read more about our general site rules regarding data handling over at our cookie policy, but right now, let’s talk about shaping!
Making the Indentation for Your Thumbprint Cookies
This is the fun part, but you have to be gentle so you don’t introduce cracks that will make your jam weep out everywhere during baking. When you roll those dough balls—about one inch is perfect—set them on that parchment-lined tray, and then go in with your thumb. I always lightly flour my thumb first, just a tiny dusting helps prevent sticking.
Press down firmly, but don’t crush the edges. You need a decent little crater—a deep well—to hold that half teaspoon of jam without it overflowing when it melts. If pressing with your thumb feels awkward, try this trick: use the back handle end of a small measuring spoon, like a 1/2 teaspoon measure. It creates a very uniform, lovely little divot every time! Be patient; a good indentation is key to securing that jam center.
Step-by-Step Instructions for Easy Jam Filled Cookies
Now for the best part—putting it all together! This process is so straightforward, which is why these rank high on my list of Quick Dessert Cookies. Before you even grab your first ball of dough, crank that oven up! You absolutely must preheat your oven to 350 degrees Fahrenheit—that consistent heat is essential for a tender bake. If your oven isn’t hot enough when the cookies go in, they’ll just start spreading instead of setting their shape.
Here are the steps I follow religiously to get perfect results every time. If you need to know more about who is behind these recipes, you can always read up on us over at our About Us page!
- First things first: Beat that softened butter and sugar together in your bowl until they are light and fluffy. Don’t rush this creaming step; it’s where we build air!
- Next, mix in that single egg yolk and your vanilla extract until everything looks smooth and uniform.
- In a separate little bowl, whisk together your flour and salt. Then, and this is important, add the dry stuff to the wet stuff gradually. Keep your mixer on low speed until you just don’t see any more dry flour streaks. Seriously, stop mixing right there!
- Time to roll! Shape the dough into little one-inch balls. Make sure you space them about two inches apart on your parchment-lined baking sheets. They need room to breathe and spread just a tiny bit.
- Grab your floured thumb or that small measuring spoon handle and press a nice, deep indentation right in the middle of each ball. It’s what makes these Traditional Jam Cookies recognizable!
- Spoon about 1/2 teaspoon of your bright raspberry jam right into that little well you just made.
- Bake them at 350 degrees Fahrenheit for about 12 to 15 minutes.
- Then, don’t touch them! Let those **Classic Holiday Cookies** cool right there on the baking sheet for about 5 minutes. This lets them firm up before you move them to the rack to cool completely.
Baking Tips for Golden Edges on Your Thumbprint Cookies
Figuring out when a cookie is done without checking it every 30 seconds is a skill! For these **Homemade Thumbprint Cookies**, you are looking for visual cues. The centers will still look soft and pale, which is exactly what we want for that tender result. However, look closely at the edges where the dough meets the sheet.
When those edges turn a very light, almost honey-like golden brown, they are ready to come out. Don’t leave them in longer, or you’ll lose that beautiful melt-in-your-mouth quality! The cooling step is crucial too. If you try to lift them off the pan too soon, the bottoms might stick or break off, especially if the jam is still super hot and gooey. Five minutes on the pan allows the bottom structure to set up, and then they chill nicely on the wire rack!
Variations: Chocolate Filled Fingerprint Cookies and More
While the raspberry jam version of these sweet treats is my absolute favorite—it’s a true classic for a reason—I love experimenting, especially when I’m baking ahead of time and need to jazz things up for the dessert table. If you’ve mastered the basic **thumbprint cookies** dough, you have endless possibilities waiting for you!
If you’re baking for someone who isn’t a huge fan of fruit fillings, or maybe you just want a richer flavor profile, swapping out the jam for chocolate is the way to go. We mentioned this in the substitution notes earlier, but it’s worth talking about how easy it is to make **Chocolate Filled Fingerprint Cookies**.
For these, you just need your filling to be smooth enough that it nestles nicely into that thumbprint well. I usually take about a cup of semi-sweet chocolate chips and mix them with just a tiny drizzle of coconut oil or even heavy cream—just enough liquid to help them melt down smoothly! You fill the baked shells right after they come out of the oven while they are still warm, and the chocolate sets up perfectly as it cools.
Another fun thing you can do, especially if you want to elevate these into something more festive and gift-worthy, is to create a simple glaze topping. This takes you directly into the realm of an **Iced Thumbprint Cookies Tutorial**!
For a vanilla glaze, you just whisk together powdered sugar with a splash of milk or heavy cream and a drop of vanilla extract until it’s drizzly but not watery. If I want something a little zingy to balance the buttery shortbread, I use lemon juice instead of milk. Once your cookies are completely cool—and I mean totally cool, otherwise the glaze melts right off—drizzle the glaze back and forth over the tops. It looks so elegant!
If you like pairing flavors, this glaze goes wonderfully with my recipe for Pumpkin Spice Cake Cream Cheese Frosting, though you’d want to thin that frosting out quite a bit to make it truly drizzly for this application. Honestly, whether you stick to raspberry, go chocolate, or add a sweet icing, the tender texture of this no-fail dough stays the same!
Storage and Make Ahead Holiday Cookies
One of the best things about having a recipe like this is that it truly lets you get ahead of the holiday chaos! I am famous for making massive batches of cookies weeks before I actually need them, and these wonderful **thumbprint cookies** are perfect for that kind of planning.
When it comes to keeping things fresh, you have options depending on how much time you have. We definitely want to secure that buttery taste and tender texture, so airtight containers are non-negotiable for both baked cookies and raw dough!
If you’re making the raw dough ahead of time—which I highly recommend for those hectic mornings when you just need cookies ready to go—you have a few paths. You can wrap the entire finished dough ball tightly in plastic wrap and keep it in the fridge for up to three days. If you’re planning further out, you can honestly freeze the dough balls! Roll them, place them on a parchment-lined baking sheet, freeze until solid, and then toss the frozen balls into a good, heavy-duty zip-top freezer bag. They can stay frozen for almost two months!
When it’s time to bake those **Make Ahead Holiday Cookies** from frozen, just pop them straight onto the baking sheet—no need to thaw! You will need to add about 5 or 6 extra minutes to the baking time. Keep an eye on those edges so they don’t get too dark.
For the already baked ones, just make sure they are completely cool before sealing the container. If you have jam-filled cookies, condensation can make the tops sticky if you seal them while slightly warm. Stored at room temperature in a cool, dry place, baked **Easy Jam Filled Cookies** like these will stay perfectly soft and delicious for about a week. If you need them to last longer, the fridge works well, but let them sit out on the counter for 30 minutes before serving so the butter texture softens up again. If you’re looking for another great make-ahead treat, you should really look at my post on Cinnamon Sugar Donut Holes—those are fantastic to freeze too!
Frequently Asked Questions About Thumbprint Cookies
It’s funny how many questions pop up once you start baking something classic like this! I get asked about technique and substitutions all the time, so I figured I’d tackle the most common ones right here. Getting an answer straight from someone who bakes these weekly really helps, right? If you have other burning questions, you can always reach out to me via the contact page!
Can I use a different jam in my thumbprint cookies?
Oh, absolutely! While I think the raspberry version is the quintessential **Best Raspberry Thumbprint Cookies** experience because you get that perfect sweet-tart balance, you shouldn’t feel limited at all! Apricot jam is heavenly in this buttery dough—it gives the cookies a beautiful, slightly tangy brightness. Strawberry jam works wonderfully too, especially if you love a sweeter cookie. Just make sure whatever jam you choose isn’t super thin or runny before you spoon it in. If it’s very loose, it might thin out too much when baking!
How do I stop the jam from sinking too low in my Shortbread Thumbprint Recipe?
This is such a common issue, and nobody likes a flat cookie center! If your jam keeps disappearing into the cookie, there are two easy fixes, and they both relate back to handling that dough correctly. First, if you chilled your dough properly (like I recommended!), and you made a nice deep well with your thumb, the dough walls should be sturdy enough to hold the jam without collapsing.
If your dough is just a bit too soft when you fill it—maybe your kitchen is warm or you skipped the chill time—the jam can weigh it down. A great trick is to pre-bake the little cookie shells first. You bake them for about 8 to 10 minutes until they are just set and lightly golden on the bottom. Pull them out, quickly spoon in your jam, and then return them to the oven for the last 5 minutes. This little head start in the oven firms up that shortbread base so the jam stays proudly perched right on top. It guarantees plump little centers every time!
Estimated Nutritional Data for Classic Thumbprint Cookies
Okay, I always feel a little guilty looking at the numbers, but it’s good to know what we’re working with! This information is based on standard ingredient measurements for one cookie, and remember, I’m not a certified nutritionist, so take this as a good ballpark estimate for your planning.
- Calories: 130
- Fat: 8g
- Carbohydrates: 13g
- Sugar: 9g
- Protein: 2g
For the full legal rundown and more details on how we calculate these estimates, please check out our official disclaimer page. Enjoy these beautiful treats!
Share Your Homemade Thumbprint Cookies Creations
Wow, typing all this out seriously makes me want to whip up another batch of these **Simple Cookie Swap Treats** right now! I hope you feel totally inspired to get these tender, buttery cookies into your oven immediately.
Once you try this recipe, I really, really want to know what you think! Did you stick with the raspberry jam, or did you try that chocolate filling? Did you pass the taste test with your family or coworkers?
Please drop a comment below and let me know how your **thumbprint cookies** turned out. If you took a picture of your beautifully arranged platter, tag me on social media so I can see your gorgeous creations! Your feedback helps me know which recipes to share next. You can browse all my recent posts over on the main blog page!
PrintClassic Buttery Thumbprint Cookies with Raspberry Jam

Make tender, buttery thumbprint cookies filled with bright raspberry jam. This simple recipe is perfect for holiday baking or cookie exchanges.
- Prep Time: 20 min
- Cook Time: 15 min
- Total Time: 35 min
- Yield: 24 cookies
- Category: Dessert
- Method: Baking
- Cuisine: American
- Diet: Vegetarian
Ingredients
- 1 cup unsalted butter, softened
- 1/2 cup granulated sugar
- 1 large egg yolk
- 1 teaspoon vanilla extract
- 2 1/2 cups all-purpose flour
- 1/4 teaspoon salt
- 1/2 cup raspberry jam
Instructions
- Beat the softened butter and sugar together in a large bowl until light and fluffy.
- Beat in the egg yolk and vanilla extract until combined.
- In a separate bowl, whisk together the flour and salt. Gradually add the dry ingredients to the wet ingredients, mixing on low speed until just combined into a dough. Do not overmix.
- Shape the dough into 1-inch balls. Place them 2 inches apart on baking sheets lined with parchment paper.
- Use your thumb or the back of a small measuring spoon to press a deep indentation into the center of each dough ball.
- Spoon about 1/2 teaspoon of raspberry jam into each indentation.
- Bake at 350 degrees Fahrenheit for 12 to 15 minutes, or until the edges are lightly golden.
- Let the cookies cool on the baking sheet for 5 minutes before transferring them to a wire rack to cool completely.
Notes
- For a cleaner look, chill the dough for 30 minutes before shaping and making the indentations.
- If you want a slightly different flavor, substitute apricot or strawberry jam for the raspberry.
- If you prefer a chocolate filling, use melted chocolate chips mixed with a teaspoon of coconut oil instead of jam.
Nutrition
- Serving Size: 1 cookie
- Calories: 130
- Sugar: 9
- Sodium: 45
- Fat: 8
- Saturated Fat: 5
- Unsaturated Fat: 3
- Trans Fat: 0
- Carbohydrates: 13
- Fiber: 0
- Protein: 2
- Cholesterol: 30