

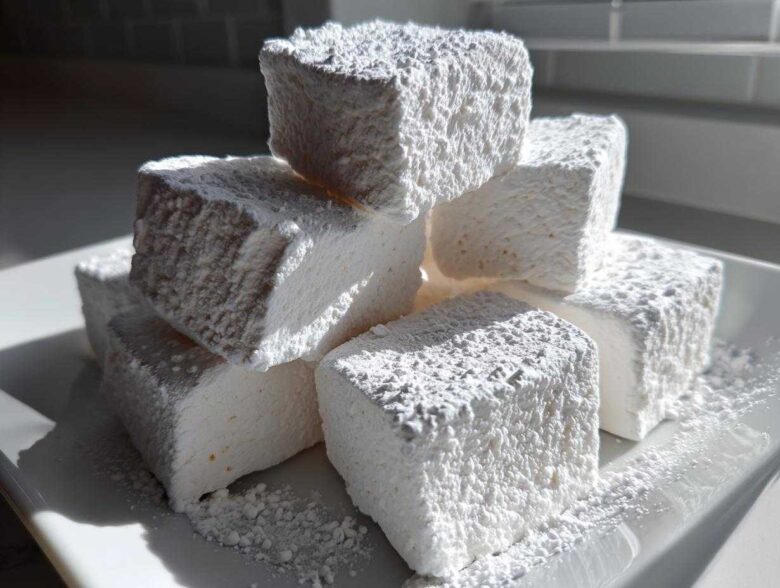
Forget those squishy, slightly waxy things floating in your grocery store bags! Seriously, once you try making homemade marshmallows, there’s no going back. It feels like stepping into the land of pure kitchen magic, but I promise you, it’s so much easier than you think. Every time I pull that big, pillowy slab out of the pan, I get a little thrill. It’s so rewarding to create something this soft and cloud-like completely from scratch. This recipe isn’t just about flavor—though the fresh vanilla is incredible—it’s about mastering a simple technique that turns sugar and gelatin into the fluffiest treats you’ve ever tasted. If you’ve ever wanted to tackle homemade candy making, this is where you start. It’s easy, it’s impressive, and frankly, it makes the best hot cocoa topper imaginable. Trust me on this one!
We built this site because we believe everyone should experience the joy of making quality food at home, and these marshmallows are the definition of that!
Why This is the Best Homemade Marshmallows Recipe Ever
Why bother making homemade marshmallows when you can buy them? Simple: texture and taste! Store-bought ones are often bouncy hockey pucks. Ours? They transform into perfect soft cloud marshmallows that melt in your mouth. They are cleaner, richer, and frankly, just heavenly.
- Superior, melt-in-your-mouth texture.
- Incredible boost from pure vanilla extract.
- You control the dust—no sticky mess!
Achieving Pillowy Treats Recipe Texture
The secret weapon here is definitely the stand mixer. Whipping that syrup and gelatin mixture on high speed for 12 full minutes is non-negotiable! That intense aeration is what traps the air, guaranteeing that signature light, pillowy treats recipe finish every single time.
Essential Ingredients for Homemade Marshmallows
Okay, gathering your supplies is almost as fun as the whipping part! For these homemade marshmallows, you need a few specific items to make sure you get that perfect, stable foam. Don’t worry, most of these are pantry staples, but the quality really matters here. We’re using a classic base to ensure we get those soft cloud marshmallows.
Here’s what you need to pull together before you even turn on the stove:
- Three packets of unflavored gelatin (about 7 grams each)
- 1 cup of cold water, kept separate
- 2 cups of nice granulated sugar
- 2/3 cup of light corn syrup—this is key for texture!
- 1/2 cup of plain water for the syrup
- A tiny pinch of salt
- 2 teaspoons of the best pure vanilla extract you can find
- And for the ultimate dust: 1/2 cup powdered sugar mixed with 1/2 cup cornstarch
Ingredient Notes and Substitutions
Let’s talk about the sticky business. That gelatin absolutely must bloom! That means sprinkling it over the first 1/2 cup of cold water and letting it sit for 10 minutes—it’ll look like thick applesauce. That step is absolutely crucial for making marshmallows with gelatin properly; don’t skip it or you’ll end up with goo!
Corn syrup might sound scary, but it stops the sugar from crystallizing, giving us that smooth texture. If you happen to have one vanilla bean, absolutely scrape those little seeds in along with the extract for amazing vanilla bean marshmallows. It really elevates the whole experience!
Step-by-Step Tutorial for Fluffy Homemade Marshmallows
Alright, put on your apron because this is where the magic really happens! Making homemade marshmallows is a process of timing, so try to have everything ready to go beforehand. Don’t panic about the syrup temperature; we’re just aiming for that perfect soft-ball stage, which guarantees we get the air whipped in just right for those beautiful soft cloud marshmallows.
If you happen to follow our latest baking tips, you know precision helps, but in this case, timing is everything!
Preparing the Pan and Blooming Gelatin
First things first: get your pan ready. You need a 9×13 inch pan, and you’re going to line it with parchment paper. Make sure you leave a good overhang on the long sides; that’s how you’ll lift this huge slab out later, trust me! Next, dust everything—the bottom and sides—generously with your pre-mixed powdered sugar and cornstarch. This dust is your best friend for preventing sticking. While that’s sitting, sprinkle your gelatin over that first 1/2 cup of cold water in your stand mixer bowl and let it sit for a full 10 minutes. We need the gelatin to get nice and soft before we introduce it to the heat!
Cooking the Syrup to the Right Temperature
Time for the heat! In a saucepan, combine your sugar, corn syrup, and the remaining 1/2 cup of water, plus the salt. Heat this over medium heat, stirring gently just until the sugar disappears. Once it starts boiling, stop stirring completely! If you stir boiling sugar syrup, it can cause crystallization, and we want smooth, not grainy, homemade candy making.
Attach that candy thermometer—don’t guess! You need to watch it carefully until it hits exactly 240 degrees Fahrenheit. That is the magic number for the soft-ball stage.
Whipping to Stiff Peaks
The second that syrup hits 240°F, take it off the heat! Turn your stand mixer (with the bloomed gelatin) on low speed, ready to receive the syrup. Now, very slowly and carefully, drizzle the hot syrup down the side of the bowl into the gelatin. If you pour it directly onto the whisk, you’ll just splatter hot sugar everywhere. Ouch! Once it’s all in, crank that speed up to high. You need to beat this mixture for a solid 12 to 15 minutes. You’ll know it’s done when the marshmallow volume has quadrupled, it looks super glossy, and the outside of that big mixing bowl feels completely cool to the touch. That’s how you know the air is perfectly incorporated for a quality easy marshmallow tutorial.
Cutting and Dusting Your Pillowy Treats Recipe
Once it’s cool and perfectly stiff, mix in your vanilla quickly, just for a few seconds. Pour that thick, glorious mixture straight into your prepared, dusted pan. Use an oiled spatula—we don’t want the sticky stuff sticking to our tools! Smooth the top and dust it again with any leftover sugar mix. Let it sit, uncovered, for at least 4 hours, but honestly, overnight is best for the cleanest cut.
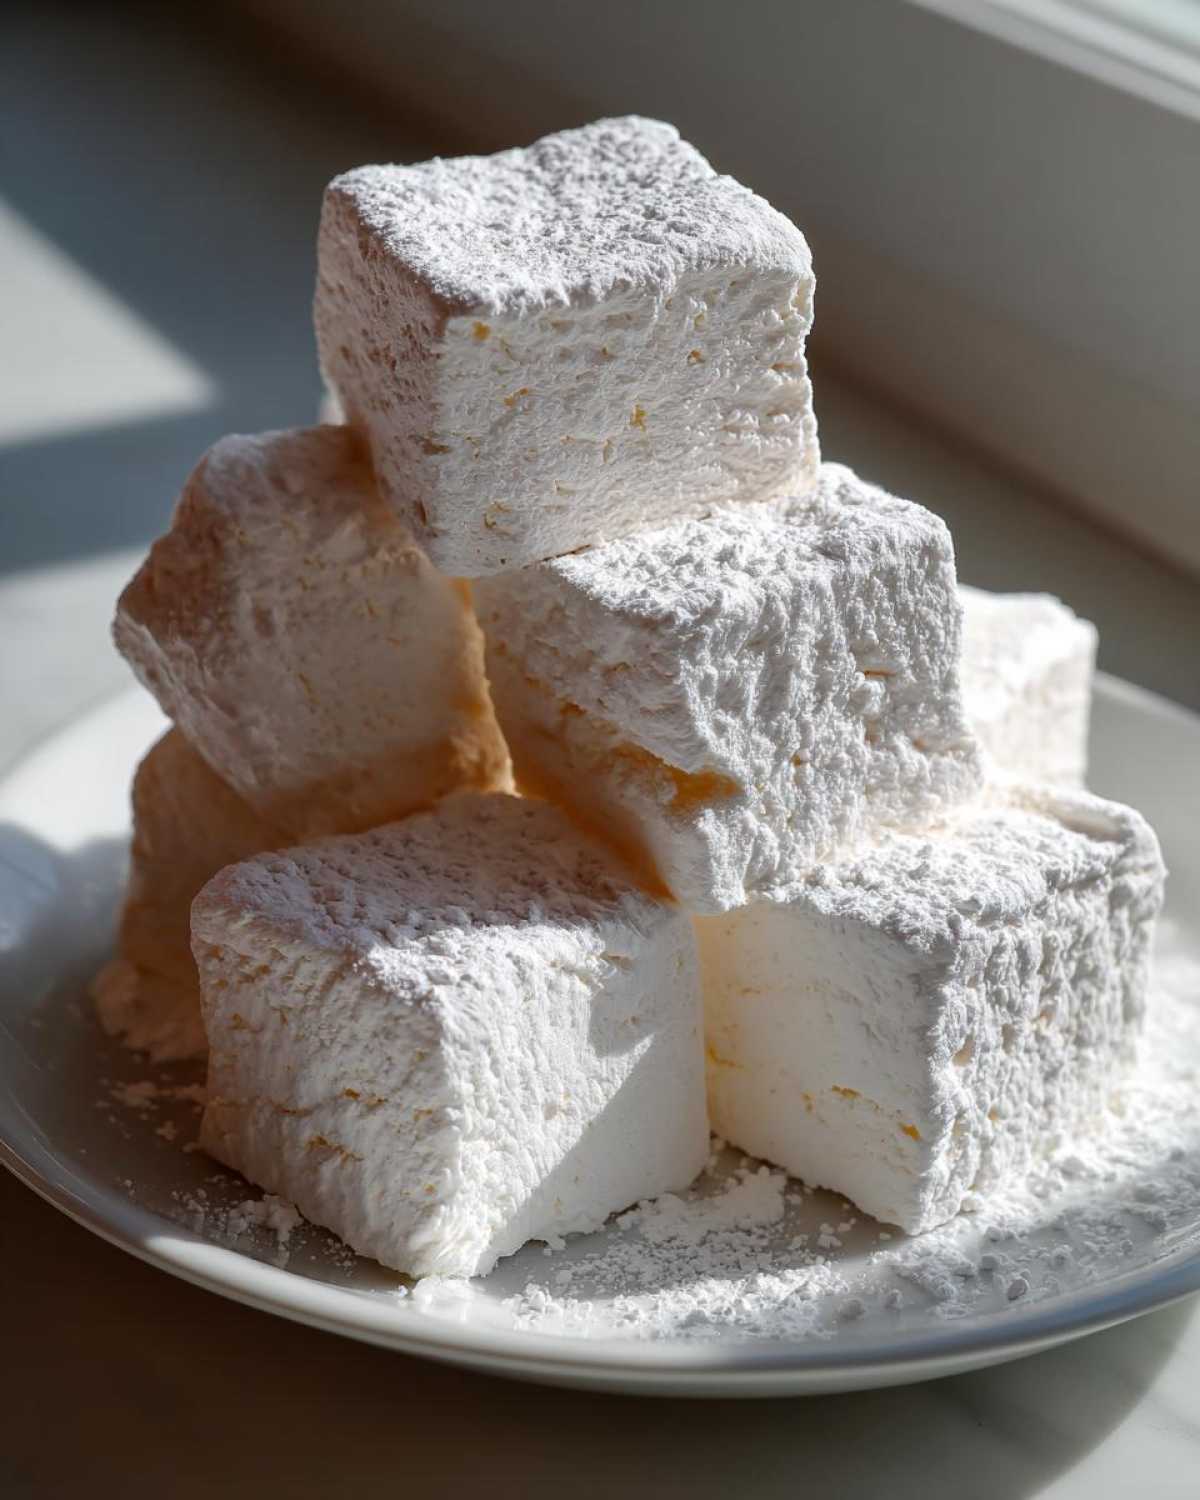
When you’re ready to cut, use the parchment overhang to lift the whole slab onto a clean, dusted cutting board. Use a large knife or pizza cutter that you’ve lightly oiled or sprayed with cooking spray. This prevents tearing those beautiful homemade marshmallows! Slice into squares and toss any sticky edges into the remaining coating dust. Now you have the *best* pillowy treats recipe!
Tips for Perfect Homemade Marshmallows Success
Making top-tier homemade marshmallows really relies on a few small things you can control right before you start whipping. First up: humidity. If it’s raining buckets or super sticky outside, the sugar syrup might have trouble setting perfectly, and your marshmallows might stay a little too tacky. It’s just science, isn’t it?
Also, I need to stress this again: if you’re using a hand mixer instead of a stand mixer, you are going to get tired! You really need that sustained, high-speed whipping for 15 minutes straight to get that spectacular fluff. Make sure your sugar syrup is absolutely transparent before it boils; any undissolved sugar crystals will ruin the smooth texture.
We want perfect, fluffy results every time! If you run into any trouble, feel free to shoot us a message; we love troubleshooting baking problems!
Flavor Variations for Gourmet Marshmallows
Once you nail the basic vanilla version of our homemade marshmallows, you’re ready to get fancy! This is where your batch of DIY marshmallows goes from great to absolutely show-stopping. If you want to move into that gourmet territory, you have loads of options, but the easiest upgrade by far is leaning into intense flavor additions at the very end of the whipping process.
For amazing vanilla bean marshmallows, just scrape the seeds from one whole vanilla bean and toss them in right when you add the extract during the last minute of mixing. You get those beautiful little black flecks swimming everywhere—instant elegance!
Another super fun idea, especially around the holidays, is making a swirl. Prepare the marshmallow as usual, then melt about four ounces of good quality semi-sweet chocolate. Drizzle the chocolate over the marshmallow while it’s still soft in the pan, then use a skewer or butter knife to gently swirl it in once or twice. Don’t overmix, or you lose the swirl effect!
Making Healthier Marshmallow Recipe Alternatives
I get asked all the time about how to do a healthier marshmallow recipe or one with no corn syrup marshmallows. Here’s my honest take: it’s tough! Corn syrup isn’t just sweet; it’s a professional binder that prevents texture collapse. If you substitute it entirely with honey or maple syrup, you are fundamentally changing the chemical structure of the whip. Those alternatives have more water content and slightly different sugar profiles.
You *can* try it, but be prepared for a squishier, stickier result that might not set up as firm as our classic recipe. You’ll need to reduce the other liquid amounts significantly and watch that syrup temperature closely. It’s definitely an advanced project for when you’re feeling bold!
How to Use Homemade Marshmallows for Hot Cocoa
Okay, you’ve made this gorgeous batch of homemade marshmallows, and now you need the best application: hot cocoa! Forget those tiny, tired cylinders floating sadly on top of your mug mix. Our fluffy marshmallow recipe changes the game entirely.
The best way to use them for your marshmallows for hot cocoa is slightly toasting them first. Just poke one onto a long skewer and hover it over a gas flame or under the broiler for just a few seconds. You want that crunchy, caramelized outside and that gooey, totally melted interior.
When you drop that toasted beauty into your hot chocolate, it melts down slowly, making the whole drink richer and sweeter. It’s an absolute treat! If you aren’t feeling toasted (or don’t have a flame), just cube them and drop them in—they’ll melt beautifully anyway. You can also check out how we spice up our cold-weather drinks with this spiced hot apple cider recipe!
Storage and Keeping Your DIY Marshmallows Fresh
Storing your amazing DIY marshmallows is simple, but you must keep them away from moisture! Pop them into an airtight container at cool room temperature. Seriously, don’t refrigerate them—they’ll get sticky and weep. They stay wonderfully fresh for about two weeks, though they will firm up a tiny bit after the first three days. That’s normal! They’re still completely edible and taste divine, just a bit less jiggly. Enjoy!
Frequently Asked Questions About Making Marshmallows
I always get asked a few things when people try this recipe for the first time, especially when they are tackling this type of homemade candy making. So, I thought I’d compile the most common worries right here so you can focus on enjoying your pillowy treats recipe!
Can I make marshmallows without a stand mixer for this easy marshmallow tutorial?
Oh, you absolutely can try! But I have to warn you, this is the one step that really benefits from the power of a stand mixer. If you use a hand mixer, make sure it’s a really heavy-duty one, and be prepared to whip for those full 15 minutes—your arm will be tired! Texture might also be slightly softer than the ones we made for this easy marshmallow tutorial, but they’ll still taste amazing!
What is the best way to make homemade s’mores ingredients?
This is my favorite question! For truly next-level homemade s’mores ingredients, you cube up your homemade marshmallows generously. We want thick pieces that hold their shape a bit longer when they heat up. Then, you toast them gently over a real flame—a campfire is ideal, but my gas stovetop works in a pinch (carefully!). You want that beautiful golden, slightly crispy exterior and the molten center.
We post a lot of fun snack recipes over in our snacks category, so check that out for more treat inspiration!
Understanding the Nutrition of These Pillowy Treats Recipe
I know, I know, when you’re making homemade marshmallows, you aren’t exactly doing it for the health benefits, right? But because we are using real sugar and real corn syrup, I always like to give everyone a little heads-up on what’s in these gorgeous, fluffy things. It’s good to know what you’re putting into your body, even when you are creating amazing, decadent pillowy treats recipe squares!
Please keep in mind that since this is truly a scratch recipe, these numbers are just an estimate based on how we portioned out the recipe. If you cut your marshmallows bigger or smaller than our standard square, the math changes instantly. Also, if you decide to try swapping out the corn syrup for something else later on—like in that advanced section—all of this will change!
For a typical 1-inch square of these DIY marshmallows, here’s a quick rundown based on the ingredient list:
- Serving Size: 1 square (approx 1 inch)
- Calories: Around 95
- Sugar: About 23 grams (That’s the main event!)
- Sodium: Very low, just about 5 milligrams
- Fat: Zero, thank goodness!
- Protein: Trace amounts from the gelatin, about 1 gram
See? No fat, which is a win, even if the sugar content is what drives that incredible melt-in-your-mouth quality. These are definitely a special occasion treat, but they are definitely worth every single sugary second!
PrintEasy Fluffy Homemade Vanilla Marshmallows
Make soft, pillowy vanilla marshmallows from scratch. This recipe details the steps for achieving superior fluffiness compared to store-bought versions.
- Prep Time: 20 min
- Cook Time: 15 min
- Total Time: 4 hr 35 min
- Yield: About 3 dozen
- Category: Dessert
- Method: Candy Making
- Cuisine: American
- Diet: Vegetarian
Ingredients
- 3 packets unflavored gelatin (about 7 grams each)
- 1 cup cold water, divided
- 2 cups granulated sugar
- 2/3 cup light corn syrup
- 1/2 cup water
- 1/4 teaspoon salt
- 2 teaspoons pure vanilla extract
- 1/2 cup powdered sugar, for dusting
- 1/2 cup cornstarch, for dusting
Instructions
- Lightly grease a 9×13 inch baking pan. Line the pan with parchment paper, leaving an overhang on the long sides for easy removal. Mix the powdered sugar and cornstarch together in a small bowl. Dust the bottom and sides of the prepared pan generously with this mixture.
- In the bowl of a stand mixer fitted with the whisk attachment, sprinkle the gelatin over 1/2 cup of the cold water. Let it bloom for 10 minutes while you prepare the syrup.
- In a medium saucepan, combine the granulated sugar, corn syrup, the remaining 1/2 cup water, and salt. Heat over medium heat, stirring until the sugar dissolves. Stop stirring once it boils.
- Attach a candy thermometer to the side of the pan. Continue to cook the syrup without stirring until it reaches 240 degrees Fahrenheit (soft-ball stage).
- Once the syrup reaches 240 degrees Fahrenheit, remove it from the heat. Turn the stand mixer on low speed. Slowly and carefully pour the hot syrup down the side of the mixing bowl into the bloomed gelatin mixture. Avoid pouring directly onto the whisk.
- Increase the mixer speed to high. Beat the mixture for 12 to 15 minutes until the marshmallow is very thick, glossy, holds stiff peaks, and the outside of the bowl feels cool to the touch.
- Stop the mixer. Add the vanilla extract and mix briefly on low speed until just combined.
- Working quickly, pour the marshmallow mixture into the prepared pan. Use a lightly oiled spatula or scraper to spread it evenly. Dust the top surface generously with some of the reserved powdered sugar and cornstarch mixture.
- Let the marshmallows set at room temperature, uncovered, for at least 4 hours, or preferably overnight.
- Once set, use the parchment paper overhang to lift the marshmallow slab out of the pan onto a cutting board dusted with more of the sugar mixture.
- Use a large, oiled knife or pizza cutter to cut the slab into desired squares. Toss the cut edges in the remaining dusting mixture to prevent sticking.
Notes
- For vanilla bean marshmallows, scrape the seeds from one vanilla bean and add them along with the extract in Step 6.
- If you do not have a stand mixer, you can use a very powerful hand mixer, but the beating time may need to be longer to reach the proper stiffness.
- To make marshmallows for s’mores, cut them into thick squares before they fully dry out, then toast them over a flame.
Nutrition
- Serving Size: 1 square (approx 1 inch)
- Calories: 95
- Sugar: 23
- Sodium: 5
- Fat: 0
- Saturated Fat: 0
- Unsaturated Fat: 0
- Trans Fat: 0
- Carbohydrates: 25
- Fiber: 0
- Protein: 1
- Cholesterol: 0