

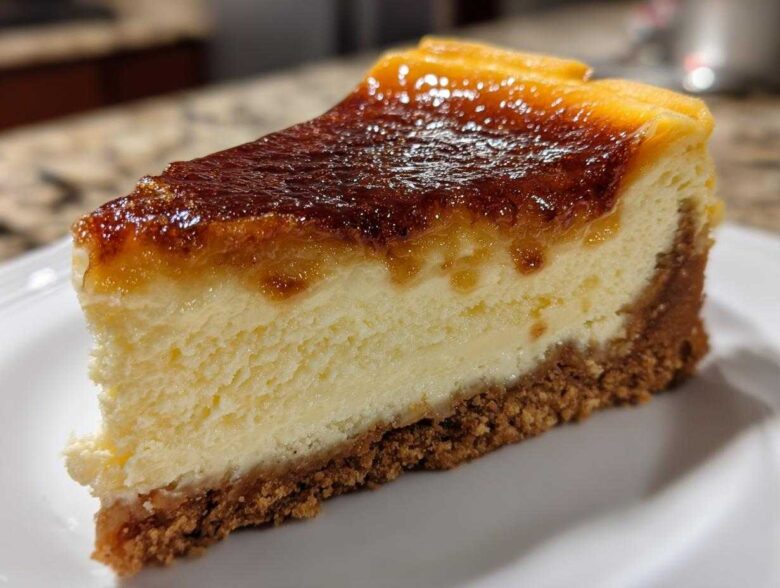
Oh my goodness, get ready, because we are about to tackle the dessert that ruins all other desserts! Seriously, what’s better than taking the smooth, tangy richness of a perfect baked cheesecake and smashing it together with that crisp, sugary crackle of a classic crème brûlée? Nothing, absolutely nothing! I spent ages figuring out the secrets to making this dream combination work without one side ruining the other, and I finally cracked the code.
This recipe for the ultimate crème brûlée cheesecake is my absolute favorite showstopper for holidays or when I just feel fancy. The contrast between the creamy, cool interior and that hot, shattering sugar top? Perfection. Trust me, once you nail this two-dessert combination, you’ll never look back. It’s intense, it’s indulgent, and it’s surprisingly straightforward if you follow my lead!
Why This Creme Brulee Cheesecake is a Showstopper Dessert (Luxury Dessert Ideas)
I truly believe this is the benchmark against which all other amazing cheesecakes should be judged. It’s not just good; it’s memorable! When you bring this to a party, people stop talking just to look at it. You deserve to serve something that feels truly gourmet, and this hits the mark every single time.
Here’s why this crème brûlée cheesecake recipe just dominates the dessert table:
- Incredible Texture Contrast: You get the velvety smooth, tangy filling meeting that razor-sharp snap of the caramelized top. It’s a textural party in your mouth, honestly.
- Visual Wow Factor: That amber, glassy top catches the light perfectly. It screams “special occasion dessert” without you having to do complicated piping or layers.
- Perfect Flavor Balance: The deep vanilla and slight caramel notes pair beautifully with the slight tang of the sour cream. It’s rich, but it never feels heavy.
- It’s Restaurant Quality at Home: You’ll get those compliments that say, “Did you really make this?!” when in fact, you used my tried-and-true method. I promise, this is genuinely one of the best cheesecake recipes out there!
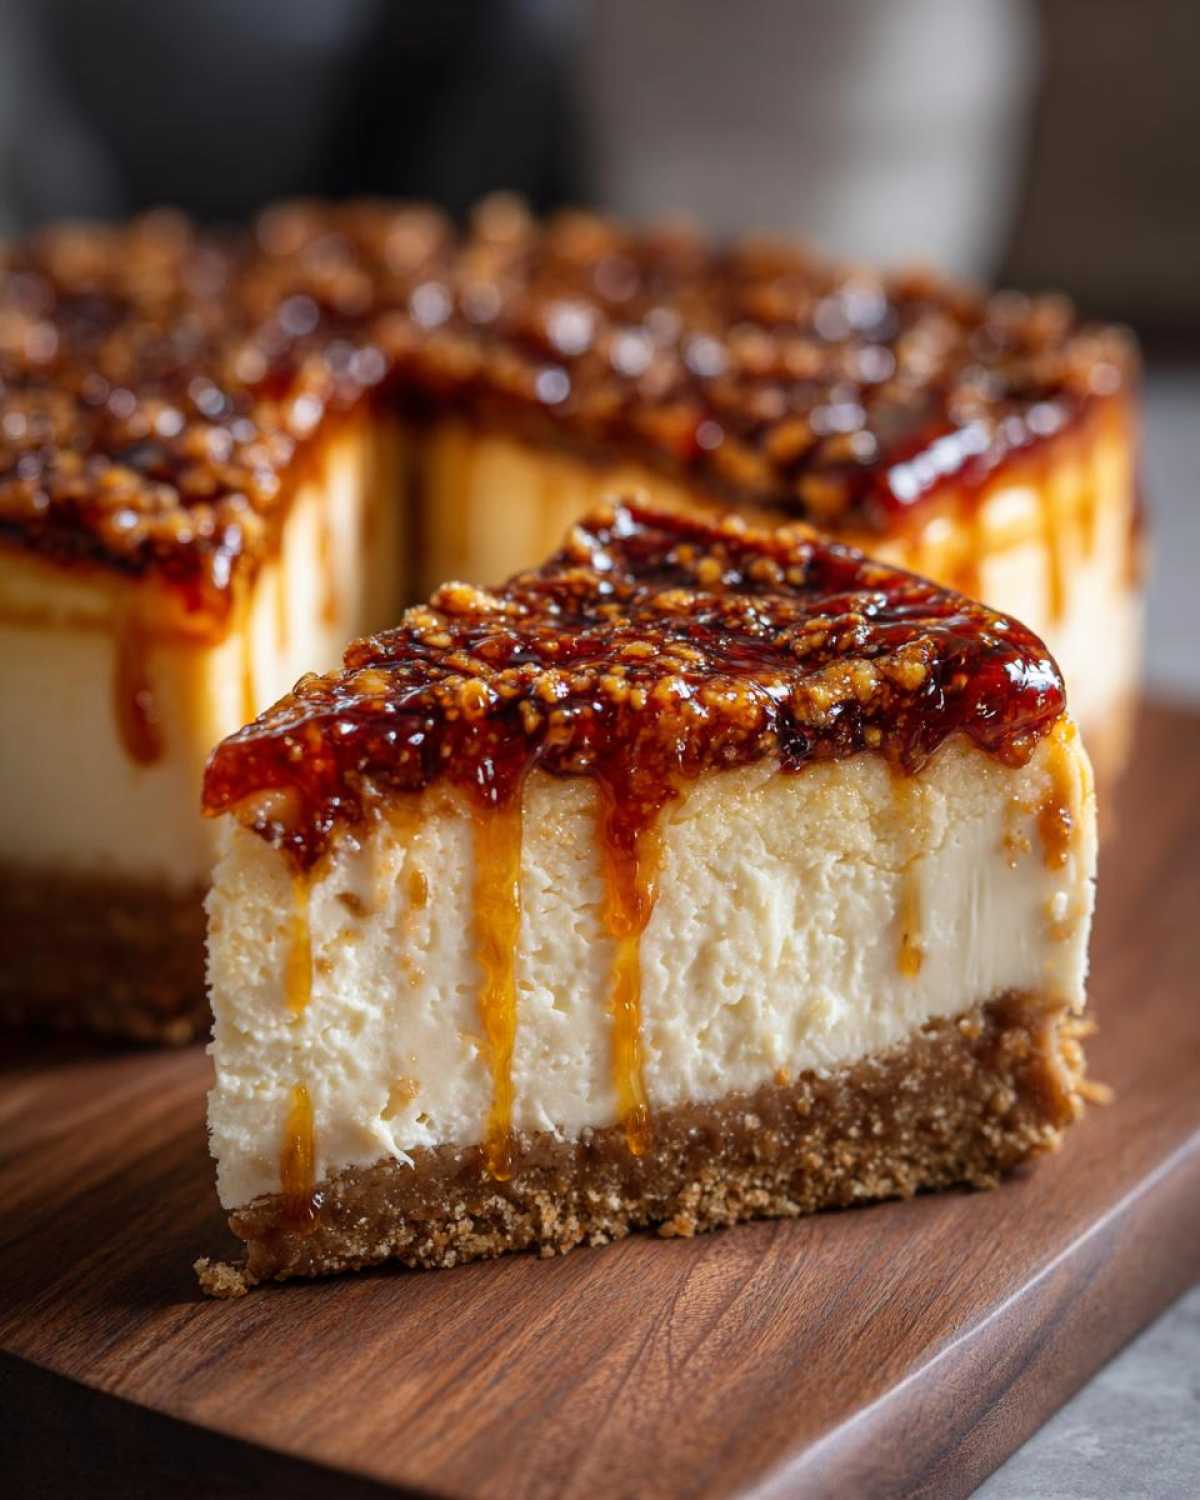
Gathering Ingredients for Your Ultimate Creme Brulee Cheesecake
Okay, let’s talk supplies! Before we even think about turning on the oven, you need to get your ingredients ready. This is my biggest expert tip for any baked cheesecake: your cream cheese and eggs absolutely, positively need to be at room temperature. If they aren’t soft, you’ll end up with lumps, and lumps are the enemy of a smooth bake! Take everything out an hour before you start mixing.
Crust Components
We’re keeping the base simple so the filling can shine. This uses classic graham cracker crumbs mixed with just a touch of sugar and butter to hold it together perfectly.
- 1 1/2 cups graham cracker crumbs
- 1/4 cup granulated sugar (for crust)
- 6 tablespoons unsalted butter, melted
Vanilla Bean Cheesecake Filling Ingredients
This is where the magic happens—the ultra-creamy filling that makes this a truly decadent homemade treat. Using three full blocks of cream cheese gives us that substantial base we need.
- 3 (8 ounce) packages cream cheese, softened
- 1 1/2 cups granulated sugar (for filling)
- 1 teaspoon vanilla extract
- 1/2 teaspoon vanilla bean paste (optional, but trust me, get it!)
- 1/4 teaspoon salt
- 4 large eggs
- 1/2 cup sour cream
- 1/4 cup heavy cream
The Crackly Sugar Topping
For that signature crackle, you must use superfine sugar. It melts quicker and creates a more uniform, thin crust than standard granulated sugar. Don’t skip this detail if you want that perfect snap!
- 1/2 cup superfine sugar (for topping)
Step-by-Step Instructions for the Creme Brulee Cheesecake
Alright, let’s get that oven roaring! We need to preheat to 325°F (160°C) right away. Listen, if you don’t want a watery mess attacking your beautiful crust later, you need to wrap that 9-inch springform pan with heavy-duty foil—and I mean wrap it tight, two or three layers up the side. The water bath is non-negotiable for achieving that restaurant-style smoothness!
Preparing the Graham Cracker Crust Desserts Base
First up is our simple base. Just mix your graham cracker crumbs, that quarter cup of sugar, and the melted butter right in your springform bottom. Press it down *firmly*. You want a solid foundation for this rich dessert! Pop that pan into the oven for just 10 minutes until it smells toasted. Pull it out and let it cool down while we focus on the filling.
Mixing the Creamy Baked Goods Filling
Take that soft cream cheese and beat it until it’s absolutely lump-free! Then, slowly add the 1 1/2 cups of sugar, vanilla, paste, and salt. Now, here’s the important part: add your eggs one at a time. Seriously, wait until the first one is totally gone before you introduce the next one. Overmixing after the eggs go in creates all those ugly air bubbles that lead to cracks later on. Finally, gently fold in the sour cream and heavy cream until it’s just smooth. Stop mixing before you think you should!
Baking the Cheesecake with a Water Bath
Pour that beautiful batter right over your crust. Now, set your springform pan inside a much larger roasting pan. Carefully pour hot water into the roasting pan—you want that water level to come about halfway up the sides of your springform. This steam bath keeps everything gentle and creamy. Bake it for 60 to 75 minutes. You’ll know it’s done when the edges look set, but the very middle still has a tiny wobble when you nudge the pan. If you love a good cinnamon-sugar donut hole, you’ll appreciate this patience!
Cooling and Chilling for Perfect Texture
Don’t rush this part, it’s how we avoid those pesky cracks! Turn the oven off completely, but leave the cheesecake inside with the oven door propped open just a crack for a whole hour. Let it slowly acclimate. After that hour, pull it out, remove the foil wrapper from the water bath sides, and let it cool on the counter completely. Then, it needs at least six hours in the fridge—overnight is always best if you can manage it—to truly set up that perfect, restaurant-style chilled density.
Achieving the Perfect Caramelized Sugar Topping for Your Creme Brulee Cheesecake
This is the moment of truth, the grand finale for our crème brûlée cheesecake! Since this flavor profile is all about that beautiful shatter, we need to treat this sugar topping with respect. You absolutely must have a kitchen torch for the best results; it gives you total control over the caramelization process. Spread your superfine sugar evenly—I mean really evenly—over the top of that chilled cheesecake. Don’t leave any clumps!
Hold the torch about three inches from the surface and move it continuously in small circles. I watch the sugar go from white to pale gold, and eventually to that deep, amber brown. As soon as it looks gorgeous, stop! Let it sit for about five minutes. That’s when the sugar hardens up into that famous crackly sugar crust you’ve been dreaming of. If you don’t have a torch (oops!), you can carefully place it under a broiler, but watch it like a hawk! It goes from perfect to burnt in one panicked blink of an eye.
Tips for Success in Gourmet Cheesecake Baking
If you’ve followed the baking instructions, you’re already set up for amazing results, but I want to give you a few of my little secrets that I learned the hard way. These aren’t in the main recipe, but they are absolute must-dos if you want truly world-class, crack-free, creamy baked goods!
I remember the first few times I tried making a fancy cheesecake, I ended up with a massive fissure right down the middle. I thought I’d ruined it! Then I learned that patience during cooling is just as important as the mixing. If you pull a hot cheesecake out of the oven and stick it straight into the fridge, the sudden temperature shock guarantees cracking every time. Slow and steady wins this race, always!
Here are my top three tips for keeping that creamy texture intact and making sure your springform pan behaves:
- The Zip Tie Trick for Leaks: Wrapping the foil around the pan for the water bath is great, but sometimes water still sneaks in, and nobody wants a soggy crust! Once you have your foil wrapped tight, I use one or two large, thick zip ties (the kind you use for garden hoses work well, or even strong rubber bands) around the very bottom edge of the pan. It cinches that foil down like a drum skin. I learned this after my first attempt that ended up with a soupy crust—since using the zip tie, zero leaks, ever. It’s a lifesaver for homemade treats!
- Room Temperature is Not Optional: I mentioned it before, but it bears repeating, especially for this incredibly decadent homemade treat. If your cream cheese is cold, it means you have to over-beat it to get it smooth, and over-beating is crack central! If your eggs are even slightly chilly, they won’t incorporate properly with the fat, leading to curdling instead of that glossy texture we want. Everything blended should look like velvet before it hits the oven.
- Flavor Boost with Maple Candied Pecans: While this recipe is perfection as is, sometimes I like to make it extra special when serving for special occasions. Instead of using just the graham cracker crust, I’ll process about a cup of maple candied pecans (or just toss whole pecans in a bit of brown sugar before baking) and use those as the base instead of graham crackers. It adds a wonderful nutty depth that plays surprisingly well with the crème brûlée topping later on. It brings a whole new level to being a showstopper dessert!
Variations: Creme Brulee Cheesecake Bars and Mini Cheesecakes Recipes
I know not everyone has the space or patience for a massive 9-inch cheesecake, and sometimes you just need perfect little single servings! The great news is that this fantastic dessert mashup recipe adapts so beautifully to different serving styles. Whether you want easy-to-grab bars or cute individual desserts, we can totally make it happen!
The key to success here is recognizing that changing the size and shape of your container changes how fast the heat moves through the batter. So, we adjust the baking time slightly!
Making Creme Brulee Cheesecake Bars
If you want those easy-to-serve squares, ditch the springform pan and grab a standard 9×13 inch baking dish. You don’t even need to wrap this one for the water bath, which saves a huge headache! Just line that pan really well with parchment paper, making sure the paper hangs over two opposite sides—that’s your sling so you can lift the whole thing out later!
Use the exact same crust recipe, but spread it thinner across the bottom of the 9×13 pan. Pour the filling right over the top. Because the layer is shallower, it doesn’t need the full 75 minutes. I find that cheesecake bars are usually perfectly set around the 45 to 55-minute mark. You still want that gentle jiggle in the middle! Bake it uncovered, skip the water bath, chill overnight, and then slice it into squares before torching. They make the easiest dessert for a crowd!
Baking Mini Cheesecakes Recipes
For these adorable little portions, we are using a standard muffin tin. Yes, you absolutely need paper liners here, otherwise, getting them out cleanly is going to be a nightmare.
Go ahead and make the standard crust, but instead of pressing it into a big pan, you’re just placing a spoonful of that mixture into the bottom of each cupcake liner. Press it gently with the back of a small spoon to compact it. Then divide the filling evenly among the 12 cups.
Since these are so small, they bake super fast! They usually only need about 20 to 25 minutes at the same 325°F temperature. You’ll notice they puff up a bit more than the big cake, but they will deflate slightly as they cool. These are fantastic if you want to try out the torching method on a smaller scale first. They are excellent for kids or just controlling portion sizes on your decadent homemade treats platter!
Storing and Serving Your Decadent Homemade Treats
Phew! The hard part is over, but now we have to correctly store this beauty. You’ve done all that work, and you don’t want the hard-earned caramelized top to get sticky or melt while it’s chilling overnight, right? That’s why we absolutely never, ever apply the sugar topping until the moment you are ready to serve it.
Once the cheesecake is completely chilled—and I mean rock solid from that overnight rest—carefully remove it from the springform pan and slide it onto your prettiest serving plate. If you’re worried about the crust getting damaged, slide a thin offset spatula under it first. Keep the entire thing covered tightly with plastic wrap and store it in the coldest part of your refrigerator. It stays wonderfully fresh like this for easily four or five days.
Timing the Sugar Topping Application
The drama of the torch needs to happen right then and there! Sugar absorbs moisture from the air and the filling itself over time, so if you torch it four hours ahead of time, you’ll end up with a chewy, sad topping instead of that fantastic crisp snap. Seriously, give yourself a 10-minute window before serving to sprinkle on that superfine sugar and torch it perfectly.
Serving Slices vs. Large Portions
If you made the big cake, wait until you have the slices sitting on individual plates before torching the sugar on top of each piece. This is the simplest way to ensure even heat and gorgeous caramelization on every bite without risking the rest of the cake sitting out. If you torch the whole top, that sugar crust can be so hard that slicing through it without cracking the cheesecake underneath becomes nearly impossible.
If you are dealing with the mini cheesecakes or bars, don’t worry about cutting them first; just sprinkle and torch each individual treat right on the serving platter. They are so much easier to handle that way!
Reheating Considerations for Creamy Baked Goods
This is a chilled dessert, so we aren’t actually reheating the cheesecake filling! But what if you prefer that vanilla bean cheesecake filling to be slightly softer than fridge-cold? Simply pull the covered cheesecake out of the refrigerator about 30 to 45 minutes before you plan to slice it. This just takes the chill off the creaminess, making it even more luxurious on the palate. Just make sure the sugar topping is *off* before you do this resting time, or it will definitely get gooey!
Frequently Asked Questions About Creme Brulee Cheesecake
I get so many questions after people see photos of this hybrid dessert—it’s understandable! It looks complicated, but trust me, once you understand the key steps, it’s a breeze. Here are the big questions I hear all the time from folks wanting to recreate this for their own special occasions.
Can I skip the water bath when making this baked cheesecake recipe?
Technically, you *can*, but oh my goodness, why would you want to risk it? That water bath is the secret sauce for achieving a truly smooth, creamy baked cheesecake texture. Skipping it usually means the edges cook way too fast while the center is lagging, and you end up with a slightly grainy texture or a huge crack right across the top. It just won’t give you that restaurant-style cheesecake result we are aiming for! I really, really urge you to just wrap that pan well and go for the steam bath method.
What is the best way to make this a ‘Two Dessert Combination Recipe’?
That’s such a fun question! While the vanilla bean cheesecake base is divine all on its own, if you want to lean harder into that gourmet cheesecake baking experience, try infusing a little bit of citrus into the filling. I like grating the zest of one small orange directly into the cream cheese mixture along with the vanilla. The brightness of the orange cuts through the richness of the cream cheese and it complements the caramelized sugar beautifully. It really ties the two dessert concepts together harmoniously!
How thick should the caramelized sugar crust be?
This is entirely up to your personal preference for shattering, but for that satisfying, loud *crack* when you tap it with your spoon, aim for about an 1/8th of an inch thick layer of hardened sugar. If you use the 1/2 cup of superfine sugar specified in the recipe, spread very thinly and evenly over the entire top, you should hit that perfect thickness. If you pile it on too thick, it burns on top before the bottom layer melts properly, and then you end up with a gooey center rather than a crisp sugar shell. A thin, even layer is the key to that incredible crackly sugar crust!
For more of my go-to kitchen advice on flavor pairings and perfecting tricky bakes, check out my spicy roasted chickpeas guide—sometimes the best tips come from completely unexpected places!
Estimated Nutritional Data for This Indulgent Cheesecake Variation
Now, I know when you’re making something this incredible—a true masterpiece in indulgent cheesecake variations—you aren’t exactly looking for a low-calorie snack! This is meant for celebration, pure and simple. But just so you have all the details, here are the rough estimates for one single slice of this ultimate crème brûlée cheesecake.
Please remember, these numbers are just guides, folks! Because we’re using real butter, full-fat cream cheese, and that glorious sugar topping, they lean towards the decadent side. If you’re watching servings, these calculations are based on dividing the whole cake into 12 nice, generous slices.
If you’re curious about how I manage to sneak flavor into every snack, check out my recipe for pumpkin spice trail mix—sometimes the best treats aren’t even baked goods!
- Serving Size: 1 slice
- Calories: 450
- Sugar: 45g (That crackly topping adds up, but wow, is it worth it!)
- Fat: 28g
- Saturated Fat: 17g
- Carbohydrates: 42g
- Protein: 9g
- Cholesterol: 110mg
For a dessert this luxurious, those numbers look pretty spot-on to me! It tells you exactly what you are eating: rich, creamy, and totally satisfying.
Share Your Experience Making This Creme Brulee Cheesecake
Seriously, I’ve shared everything I know about getting that perfect creamy base and that amazing, shattering caramelized sugar topping. Now, it’s your turn! Baking is always more fun when you can talk about it, and I’m just itching to hear how your ultimate crème brûlée cheesecake turned out.
Did the torch treat you kindly? Did you hear that satisfying *crack* when you tapped the sugar? Don’t keep your triumphs and tribulations to yourself! Drop a rating down below—five stars if this one officially became your new go-to showstopper dessert. If you had any hangups, tell me about them too, because maybe I can give you a quick tip to fix it on your next go-around.
And gosh, if you’re someone who posts pictures online, please snap a photo of your gorgeous creation! Tagging me means I get to see my favorite dessert mashup come to life in your kitchen. I love seeing how you present these decadent homemade treats. Head over to the main blog page and let me know you stopped by!
Thanks so much for trusting me with this recipe. Happy baking, and enjoy every last rich, crackly bite!
PrintUltimate Crème Brûlée Cheesecake
A rich, creamy baked cheesecake topped with a hard, crackly layer of caramelized sugar, combining two classic desserts.
- Prep Time: 30 min
- Cook Time: 75 min
- Total Time: 8 hours 45 min
- Yield: 12 servings
- Category: Dessert
- Method: Baking
- Cuisine: American
- Diet: Vegetarian
Ingredients
- 1 1/2 cups graham cracker crumbs
- 1/4 cup granulated sugar (for crust)
- 6 tablespoons unsalted butter, melted
- 3 (8 ounce) packages cream cheese, softened
- 1 1/2 cups granulated sugar (for filling)
- 1 teaspoon vanilla extract
- 1/2 teaspoon vanilla bean paste (optional)
- 1/4 teaspoon salt
- 4 large eggs
- 1/2 cup sour cream
- 1/4 cup heavy cream
- 1/2 cup superfine sugar (for topping)
Instructions
- Preheat your oven to 325°F (160°C). Wrap the outside of a 9-inch springform pan tightly with heavy-duty aluminum foil.
- Prepare the crust: Mix graham cracker crumbs, 1/4 cup sugar, and melted butter. Press the mixture firmly into the bottom of the prepared pan. Bake for 10 minutes. Let cool slightly.
- Prepare the filling: Beat the softened cream cheese in a large bowl until smooth. Gradually beat in 1 1/2 cups sugar, vanilla extract, vanilla bean paste, and salt until combined.
- Beat in the eggs one at a time, mixing just until incorporated after each addition. Mix in the sour cream and heavy cream until the batter is smooth. Do not overmix.
- Pour the filling over the cooled crust. Place the springform pan inside a larger roasting pan. Carefully pour hot water into the roasting pan until the water reaches halfway up the sides of the springform pan (water bath).
- Bake for 60 to 75 minutes, or until the edges are set and the center has a slight jiggle.
- Turn off the oven, crack the door open slightly, and let the cheesecake cool inside the oven for 1 hour.
- Remove the cheesecake from the water bath and let it cool completely on a wire rack. Refrigerate for at least 6 hours, or preferably overnight.
- Before serving, sprinkle the top evenly with the 1/2 cup superfine sugar. Use a kitchen torch to melt and caramelize the sugar until it forms a hard, amber crust. Let the topping set for 5 minutes before slicing and serving.
Notes
- For the smoothest cheesecake, ensure your cream cheese and eggs are at room temperature before mixing.
- If you do not have a kitchen torch, you can place the sugared cheesecake under a hot broiler for 1-2 minutes, watching constantly to prevent burning.
- If you prefer mini cheesecakes, use a muffin tin lined with paper liners and reduce the baking time to about 20-25 minutes.
Nutrition
- Serving Size: 1 slice
- Calories: 450
- Sugar: 45g
- Sodium: 250mg
- Fat: 28g
- Saturated Fat: 17g
- Unsaturated Fat: 11g
- Trans Fat: 0.5g
- Carbohydrates: 42g
- Fiber: 1g
- Protein: 9g
- Cholesterol: 110mg