

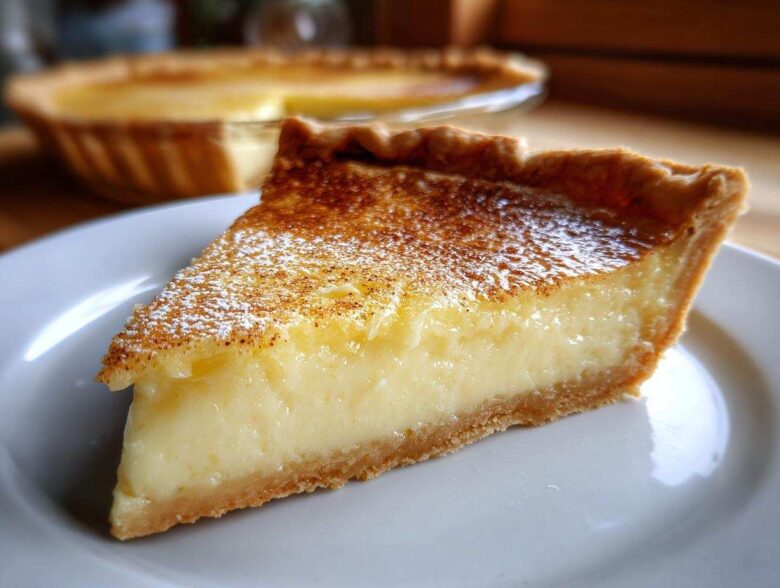
When the weather turns cool, or when you just need a hug in a dish, nothing beats a traditional, creamy dessert. Forget those fancy layered tortes! I’m telling you, this is the recipe you need: the ultimate Classic Old Fashioned Egg Custard Pie. This isn’t just any dessert; it’s the one I rely on every single Thanksgiving, and the one my mom always made when I had a rough week back in school. It’s simple, pure comfort, and it proves that the best custard pie is often the simplest one.
We’re talking about a wonderfully flaky crust holding a filling that sets up perfectly—silky smooth, never grainy. Trust me when I say that once you master this basic technique, you’ll never buy one again. I’ve spent years perfecting this ratio of eggs to milk to sugar, and I can’t wait to share what I learned with you over at our kitchen corner!
Why This Classic Custard Pie is a Traditional Dessert Staple
There’s a reason why simple recipes stick around for generations. This dessert isn’t flashy, but it’s pure magic! When you talk about real Traditional Desserts, you have to talk about egg custard. It’s the ultimate in simple, satisfying flavor—sweet, creamy, and warm all at once. Forget fussy fillings; this pie shines because of what it *doesn’t* have.
It’s exactly what I turn to whenever I need genuine Comfort Food Pies. The appeal is in its texture! It’s wonderfully soft and luscious after cooling, setting up just right so you get that satisfying, clean slice. That smooth center, contrasted with a crisp, buttery crust? That balance is unbeatable.
Key Benefits of Our Old Fashioned Pie Recipe
- The prep work is incredibly fast—seriously, you can have this mixed before your oven even hits temperature!
- It uses ingredients I always have on hand, so no last-minute grocery runs needed.
- The texture is heavenly: creamy, smooth custard that melts in your mouth.
- It smells like home—just that lovely hint of vanilla and baked egg.
Ingredients for the Best Homemade Custard Pie
I always preach that great homemade baked pie starts with knowing exactly what you need. This recipe is so straightforward, which is half the reason it works so well! You don’t need a million things—just quality basics mixed in the right order.
Here’s the shopping list for that perfectly silky creamy egg filling dessert:
- 1 pre-made 9-inch pie crust (or your favorite homemade shell)
- 3 large eggs, just lightly whisked!
- 1/2 cup granulated sugar
- 1/4 teaspoon salt
- 1 teaspoon pure vanilla extract
- 1/4 teaspoon ground nutmeg (this is for the mixing)
- 1 1/2 cups whole milk
Ingredient Notes and Substitutions for Your Custard Pie
Now, let’s talk about making these ingredients sing! The crust is where you can cheat a little by using store-bought, but if you want the true experience, you absolutely need a good, sturdy foundation. If you’re looking for help crafting that perfect shell, I wrote a whole guide on the Flaky Pie Crust Tutorial!
For the milk, whole milk is my go-to because it gives you that classic, slightly rich texture without being overly heavy. But hey, if you want to elevate this from good to spectacular, substitute half of that milk with heavy cream. It makes the final product incredibly decadent, just remember that substitution will change the baking time slightly!
How to Prepare the Creamy Egg Filling Dessert
Okay, this is where the magic happens for our creamy egg filling dessert, and trust me, patience beats speed here. The biggest disaster you can have with a homemade custard pie is ending up with a foamy, bubbly top instead of a gorgeous, smooth surface. That happens when you whip too much air into those eggs!
Grab a medium bowl—nothing fancy required, just something deep enough to handle the whisking. We are not using an electric mixer for this! You want to gently whisk the eggs until they are just broken up and uniform in color. Think of it as waking them up, not performing aerobics!
Mixing Tips for a Smooth Vanilla Custard Baking Base
Once those eggs are ready, you slowly introduce the sugar, salt, and that tiny bit of nutmeg. Whisk gently until it dissolves. After that, pour in your vanilla—make sure it’s the *pure* stuff, because in a simple recipe like this, you taste every drop! This careful order is the secret to consistent vanilla custard baking.
Finally, and this is key: slowly stream in your milk while whisking constantly but gently. We’re combining, not aerating. It needs less than a minute to incorporate fully. If you want to see my go-to mixing techniques for preventing curdling, check out all my recipe testing tips here! Once it’s smooth and you see no lumps, stop mixing immediately. That’s your perfect base!
Baking Instructions for a Perfect Custard Pie
So, you’ve got your smooth, beautiful liquid filling ready to go into that unbaked crust. Before you slide it in the oven, make sure your oven is preheated high—we start hot, which helps set the bottom crust faster so it doesn’t get soggy. That initial blast of heat is crucial for any homemade baked pie style, believe it or not!
Here is my absolute must-follow instruction set for baking this lovely dessert. I swear by this two-temperature method to get that perfect set. First, bake at 400 degrees Fahrenheit for exactly 15 minutes. Don’t peep! After that initial 15 minutes, you are going to drop that temperature way down to 350 degrees Fahrenheit.
Now, continue baking for another 30 to 35 minutes. How do you know it’s done? This is where you have to trust your instincts more than any timer! The edges should look firm, but the center—oh, the center—needs a definite, gentle jiggle left when you nudge the pan. If you insert a thin knife near the very center, it should come out clean, but the pie should still look slightly wobbly, like gelatin. If it’s completely solid when you test it, you’ve probably gone too far. Remember, it keeps cooking as it cools! If you’re looking for timing help on other quick recipes, I use these methods when I test out my 30-minute dinners too!
Achieving the Ideal Nutmeg Topping Pie Finish
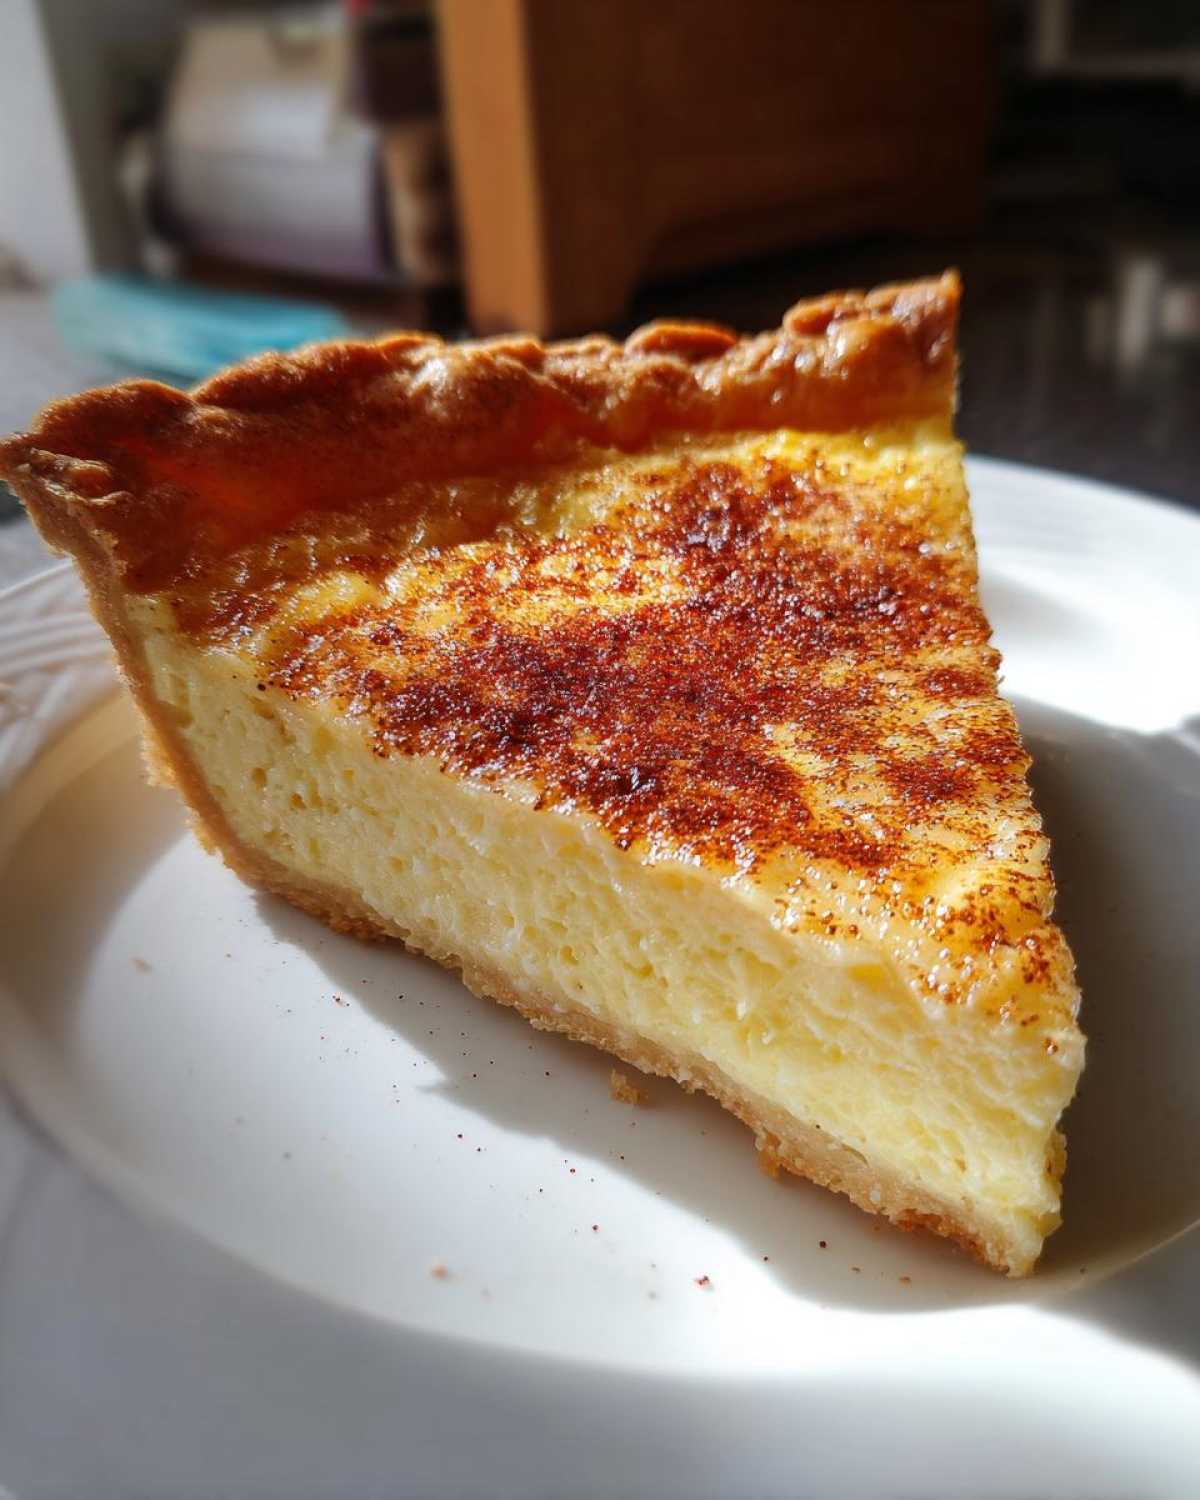
This simple step is what transforms a plain egg dish into a true Classic Old Fashioned Egg Custard Pie. Right before that pie goes into the initial hot oven, take a tiny bit of extra ground nutmeg—and I mean *tiny*—and dust it lightly over the entire top surface of the custard. You aren’t making a thick crust; you just want a beautiful, speckled tan finish.
When baked, that little bit of spice toasts beautifully! It gives you that fantastic aromatic hit when you bring the pie to the table. Don’t add it after baking, though, or you’ll just have gritty powder on top. Doing it before baking allows the spice oils to bloom right on the surface of that creamy egg filling. It completes the whole experience!
Tips for Success with Your Old Fashioned Pie Recipe
I have learned some hard lessons making this beautiful Old Fashioned Pie Recipe over the years—mostly involving a sad, soupy center or a dramatically cracked surface. My biggest disaster was probably ten years ago when I tried making two at once for a church bazaar. I was rushing the cooling process, thinking they’d be fine on the counter. I sliced one an hour later, and it just… collapsed! Total rookie mistake.
The secret to getting that incredibly dense but soft texture that screams Best Homemade Pie is all about patience at the end. If you are using a homemade, uncooked crust, you absolutely *must* pre-bake it for about ten minutes before pouring in the liquid filling. This tiny step is the difference between a perfectly crisp bottom and a soggy mess that won’t hold its shape!
Also, resist the urge to rush the cooling, even when the house smells amazing. I learned that the pie needs at least two hours on a wire rack to set up nicely outside the oven, and truthfully, it tastes infinitely better after a good chill in the fridge. You can see how I handle similar crust issues in my more decorative work over at my guide to decorating pie edges!
Storage and Make Ahead Pies Instructions
Alright, you’ve pulled off the perfect custard pie—that beautiful nutmeg top is glowing, and the center has that little wobble we talked about. Now comes the hardest part: waiting! You absolutely cannot slice into this pie straight from the oven; believe me, I’ve tried, and it ends in sad, soupy disappointment.
Cooling is non-negotiable. Let it chill out completely on a wire rack first. This lets the eggs finish setting up structure without a sudden temperature shock. Once it’s completely cooled down—and I mean *cooled*, not even warm—wrap it lightly and get it into the fridge. Chilling is crucial because it really firms up that creamy egg filling dessert, giving you those clean, beautiful slices you saw in the photos.
The great news about this recipe is that it’s fantastic for Make Ahead Pies! In fact, I think it tastes even better the next day, as the vanilla and nutmeg have time to mingle overnight. It keeps really well in the fridge, covered, for about three to four days. That makes it perfect for holidays or big gatherings because you can bake it the day before and forget about dessert duties!
If you’re prepping for a big party, this is definitely one of those Simple Dessert Ideas that saves your bacon. Just remember to pull it out of the fridge about 30 minutes before you plan to serve it. That little bit of time at room temperature takes the chill off just enough to release the flavor explosion without sacrificing that firm texture!
Frequently Asked Questions About Custard Pie
Why did my custard pie crack?
Ugh, nobody likes a cracked pie top! This usually boils down to one of two things, and they are both related to temperature shock. First, if you over-bake it—even by five minutes—the proteins in the egg seize up too much, and when they cool, they shrink and crack the surface. Second, taking it straight from a hot oven and putting it directly into the cold fridge can shock it.
My advice? Always follow that gentle jiggle test, and *please* let it cool on the counter for an hour or two before it ever sees refrigerator plastic. That slow transition is how you keep your beautiful Vanilla Custard Baking top smooth and unblemished. It makes all the difference!
Can I use evaporated milk instead of whole milk in this custard pie?
You absolutely can, but you need to know that you’re fundamentally changing the recipe from a lighter, classic style into something much richer. Evaporated milk has had a lot of its water cooked out, making it much more concentrated than regular whole milk.
If you substitute evaporated milk 1:1, your final product will be incredibly dense and perhaps a bit too firm—more like a baked flan than a tender creamy egg filling dessert. If you want to experiment, I suggest using half evaporated milk and lightening the other half with water or actual whole milk so you maintain some of that lovely softness.
Is this a Southern Custard Pie variation?
That is such a great question! This recipe is definitely the foundational blueprint for a fantastic pie, rooted in those simple, traditional American desserts. What often tips a recipe into the official Southern Custard Pie category is usually richness and spice.
Southern versions often lean heavily on heavy cream instead of all milk, or sometimes even use both, which offers an incredibly luxurious mouthfeel. They also often feature bolder spice profiles, perhaps leaning into cinnamon or even a touch of brown sugar in the filling itself. Ours is lighter and simpler, but you can easily move it into Southern territory by swapping out half the milk for heavy cream next time!
Nutritional Estimates for This Homemade Baked Pie
Okay, friends, I know some of you are curious about the numbers, even when eating pure comfort food! Since this recipe is so delightfully simple and relies on basic ingredients, the nutritional profile is pretty straightforward for a slice of homemade baked pie. Remember, these figures are estimates, based on using a standard pre-made, flaky crust, which we all know can vary wildly from brand to brand!
This is what the data gives us for one generous slice:
-
Serving Size: 1 slice
-
Calories: 250
-
Sugar: 20g
-
Sodium: 150mg
-
Fat: 12g
-
Saturated Fat: 5g
-
Unsaturated Fat: 7g
-
Trans Fat: 0g
-
Carbohydrates: 30g
-
Fiber: 1g
-
Protein: 7g
-
Cholesterol: 90mg
A quick word of warning! Please take these numbers with a grain of salt—or maybe even a dash of that lovely nutmeg! If you decide to use heavy cream instead of whole milk, or if you whip up homemade pie dough using extra butter (which I totally understand why you would!), those fat and calorie counts are going to creep up a little bit. This is why I always say: enjoy the pie! The real value is in the comfort it brings, not the spreadsheet data. Bake happy!
Share Your Experience Baking This Custard Pie
Now that you’ve successfully made this gorgeous, creamy dessert, I want to hear all about it! Seriously, did you go the classic route, or did you sneak in some brown sugar for a deeper flavor? Head down to the comments below, leave your honest star rating for this custard pie, and tell me how it tasted!
If you have any questions while you’re baking, or just want to chat about pies in general, feel free to reach out over at the contact page. Happy baking, friends!
PrintClassic Old Fashioned Egg Custard Pie

A simple recipe for a traditional, creamy egg custard pie with a flaky crust and a light nutmeg topping.
- Prep Time: 15 min
- Cook Time: 45 min
- Total Time: 60 min
- Yield: 8 servings
- Category: Dessert
- Method: Baking
- Cuisine: American
- Diet: Vegetarian
Ingredients
- 1 pre-made 9-inch pie crust (or homemade)
- 3 large eggs
- 1/2 cup granulated sugar
- 1/4 teaspoon salt
- 1 teaspoon pure vanilla extract
- 1/4 teaspoon ground nutmeg, plus extra for topping
- 1 1/2 cups whole milk
Instructions
- Preheat your oven to 400 degrees Fahrenheit. Place the pie crust in a 9-inch pie plate.
- In a medium bowl, whisk the eggs lightly.
- Add the sugar, salt, vanilla extract, and 1/4 teaspoon of ground nutmeg to the eggs. Whisk until just combined.
- Gradually whisk in the whole milk until the mixture is smooth. Do not over-beat the mixture.
- Pour the custard filling into the unbaked pie crust.
- Sprinkle a light dusting of extra ground nutmeg over the top of the filling.
- Bake at 400 degrees Fahrenheit for 15 minutes.
- Reduce the oven temperature to 350 degrees Fahrenheit and continue baking for 30 to 35 minutes, or until a knife inserted near the center comes out clean. The center should still have a slight jiggle.
- Cool the pie completely on a wire rack before slicing. Chill for at least 2 hours before serving for the best texture.
Notes
- If you use a homemade crust, partially bake it for 10 minutes before adding the filling to prevent a soggy bottom.
- For a richer flavor, substitute 1/2 cup of the whole milk with heavy cream.
- This pie tastes best when served cold or at room temperature.
Nutrition
- Serving Size: 1 slice
- Calories: 250
- Sugar: 20
- Sodium: 150
- Fat: 12
- Saturated Fat: 5
- Unsaturated Fat: 7
- Trans Fat: 0
- Carbohydrates: 30
- Fiber: 1
- Protein: 7
- Cholesterol: 90