

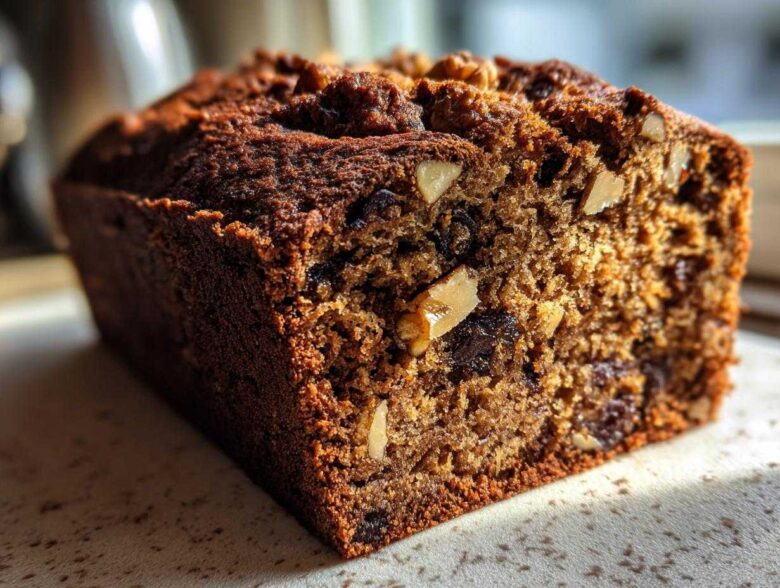
Oh my gosh, when the weather gets that crisp autumn chill, all I can think about is comfort baking! And nothing screams cozy, nostalgic baking like a loaf of homemade **date nut bread**. Seriously, forget all those fussy cakes or cookies for a minute; this is the recipe you need in your rotation. This isn’t just any loaf; this is my Classic Moist Date Nut Bread recipe. I first tried to make this years ago when I was trying to impress a new neighbor, and I completely messed up my first batch! If you want to know more about my philosophy on foolproof baking, you can check out my philosophy here.
The beautiful thing is that this recipe became my lifeline; it’s so foolproof now that it reminds me of home every single time I smell those spices warming up the kitchen. It’s perfectly sweet, wonderfully dense, and honestly, it’s amazing sliced thin on a cheese board for guests. Trust me, once you see how easy this becomes, you’ll be making this date nut bread year-round!
Why This Classic Moist Date Nut Bread Stands Out
I’ve tried a lot of quick bread recipes over the years, and some come out dry halfway through the loaf, but this one is a real keeper. It stays wonderfully soft for days—if you have any left, that is! People always ask me the secret when I bring this date nut bread over to potlucks.
- It delivers incredible, deep flavor thanks to the brown sugar and baked dates.
- This loaf is rich, moist, and never crumbly, which is huge for a quick bread!
- It makes a fantastic, thoughtful homemade food gift, especially wrapped up nice and pretty.
- It reheats beautifully, making it perfect for easy breakfast bread recipes.
- The whole process is surprisingly fast—you won’t be stuck in the kitchen all day.
- It’s the perfect sweet nut bread pairing for afternoon tea or coffee.
Perfect Texture for Your Date Nut Bread
The major game-changer here is soaking those dates in boiling water with baking soda first. Honestly, it seems like an extra fuss, but trust me! That reaction dissolves the dates just enough and activates the soda right where you need it. This ensures your final date nut bread has that signature melt-in-your-mouth moistness that just can’t be beaten. It’s essential!
Simple Steps for Easy Quick Bread
Don’t let the ingredient list scare you; this is truly an easy quick bread! We aren’t doing any complicated creaming or waiting for yeast. You mix the wet stuff, mix the dry stuff, dump the delicious date mixture in, and you are done prepping in about 15 minutes. When you factor in the 60 minutes of hands-off baking, your total time is only about 75 minutes for a show-stopping loaf of date nut bread!
Ingredients for the Best Date Nut Bread Recipe
Okay, let’s talk about what goes into this amazing date nut bread recipe. It’s a short list, which is another reason I love it so much! I always keep these things stocked because you never know when you’ll need a comforting loaf on hand. Look at these simple things that turn into something so wonderful when baked together. Seriously, it’s magic, and it’s why this becomes the best date nut bread you’ve ever made.
- 1 cup boiling water
- 1 cup packed pitted dates, chopped
- 1 teaspoon baking soda
- 1/2 cup (1 stick) unsalted butter, softened
- 1 cup packed light brown sugar
- 2 large eggs
- 1 teaspoon vanilla extract
- 1 3/4 cups all-purpose flour
- 1 teaspoon baking powder
- 1/2 teaspoon salt
- 1 cup chopped walnuts or pecans
Ingredient Preparation Notes for Your Date Nut Bread
Pay close attention here, because prep makes all the difference in our moist date loaf! First off, those dates? You absolutely have to get them pitted and chopped up before they hit that boiling water. Also, make sure your butter is actually softened, not melted—we need that creamy texture later. And for the nuts, I’m giving you the option of walnuts or pecans, but please, make sure they are chopped! Nobody wants to bite into a giant, uncrushed piece of nut in their sweet nut bread.
How to Prepare This Moist Date Loaf
Getting this delicious moist date loaf into the oven is unbelievably straightforward, I promise! We aren’t making anything that requires a fancy stand mixer or complicated folding techniques. It’s all about layering the flavors as we build the batter for this classic loaf recipe. Just follow my lead, and you’ll have the best date nut bread ever.
Preparing the Date Mixture for Your Date Nut Bread
First things first, get that oven humming! Preheat to 350 degrees F (175 degrees C) right away. While it’s warming up, grease and flour your 9×5 inch loaf pan—you want zero sticking later! Now for the real start of our magic: put those chopped dates in a little bowl and pour that full cup of rolling-boiling water right over them. Stir in your baking soda, give it a quick mix, and then you set it aside for exactly 15 minutes. Seriously, set a timer! This soak time is when all that flavor starts to release for your finished date nut bread.
Combining Wet and Dry Ingredients in the Date Nut Bread Batter
While the dates are soaking, tackle the wet ingredients in a big bowl. Cream the softened butter and brown sugar until they look fluffy, like light brown clouds. Beat in your eggs one at a time—don’t rush this part! Then, your dry elements need their own secret meeting: whisk the flour, baking powder, and salt together in a separate bowl. Alternate adding the dry mix and any remaining liquid into your wet mixture. Mix until it’s *just* combined, and please, for the love of quick bread, do not overmix! Finally, gently fold in that date mixture (don’t pour out any of that liquid!) and the nuts.
Baking and Cooling the Classic Loaf Recipe
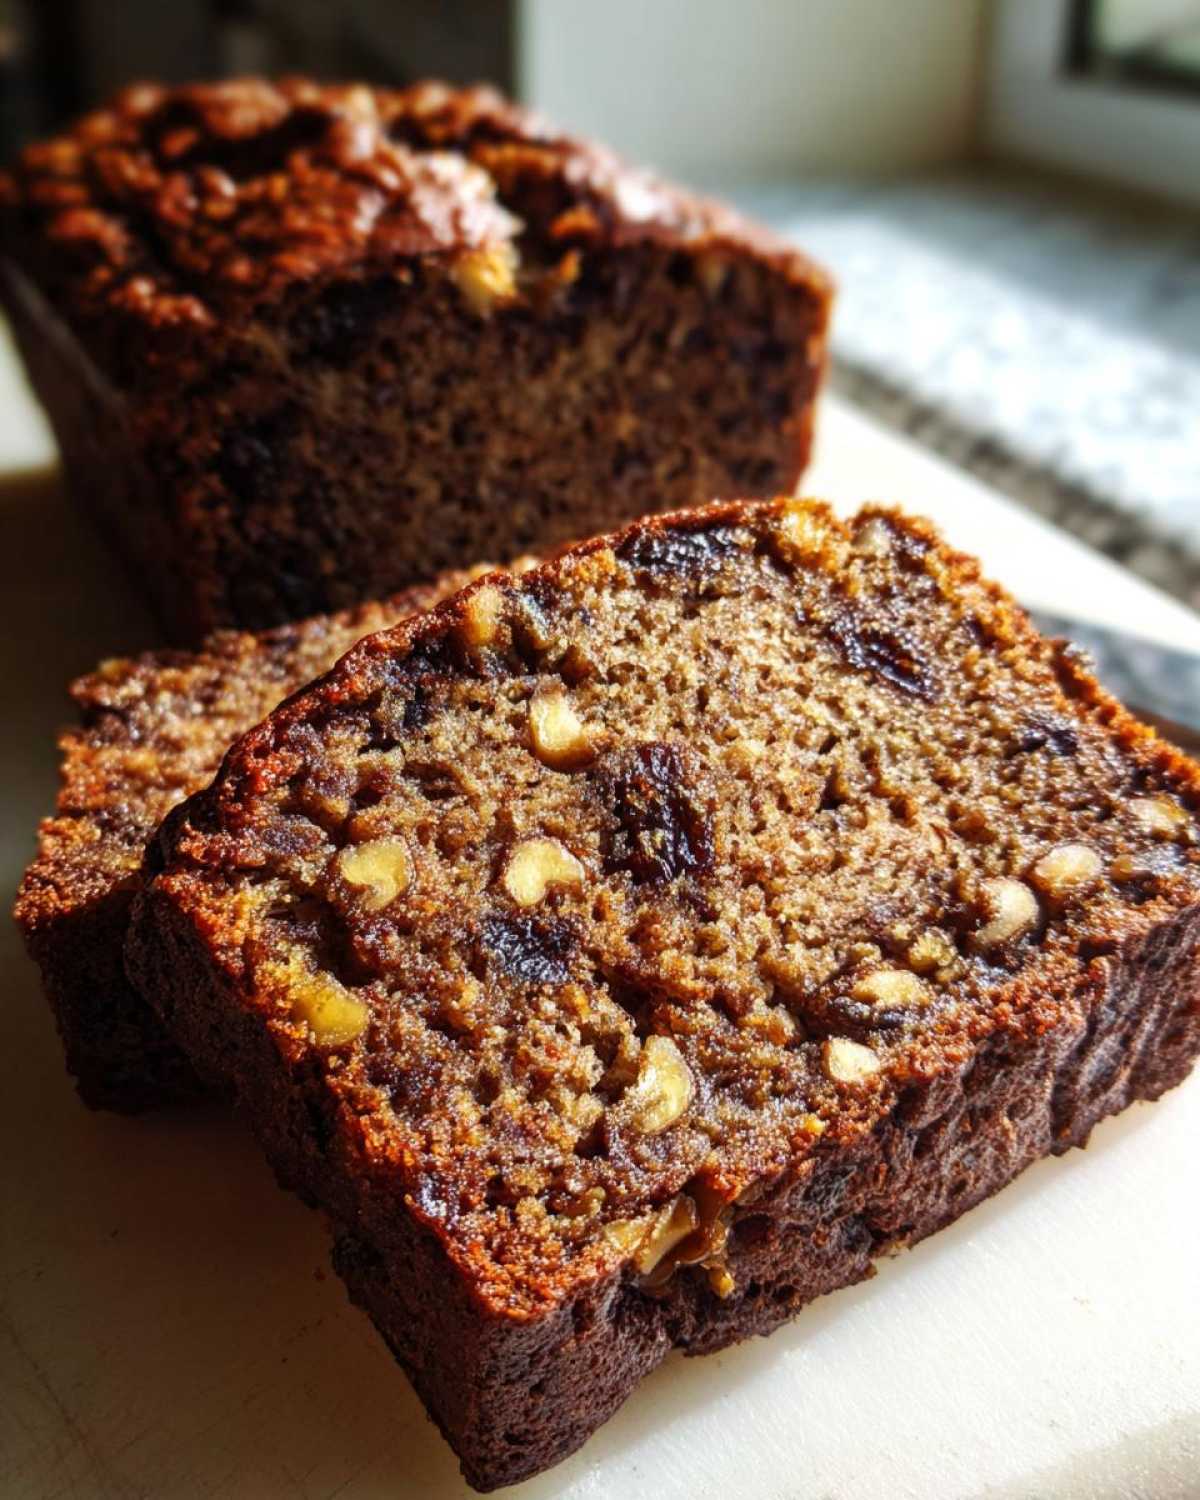
Spoon that gorgeous batter carefully into your prepared pan. It goes into the oven for about 50 to 60 minutes. To check if your date nut bread is done, use that famous wooden skewer test. If it comes out clean or with just moist crumbs clinging to it, you’re golden! Here’s a critical final step for any classic loaf recipe: let it cool in the pan for 10 minutes only. If you leave it longer, it can start sweating and getting gummy. After 10 minutes, gently turn it out onto a wire rack to cool completely before slicing. Patience pays off!
Tips for the Best Date Nut Bread Success
Even though this recipe is wonderfully straightforward, a few tiny tweaks can take your date nut bread from good—which it already is!—to absolutely legendary. I’ve learned a few things over the years of making this loaf constantly, especially since I started relying on this bread for last-minute snacks or holiday baking when things get stressful. These are small things, but they really ensure you get that perfect, moist result every single time you bake this comfort food baking classic.
Ingredient Swaps for Your Homemade Nut Bread
I mentioned walnuts or pecans earlier, and feel free to use whichever you love! Honestly, pecans give a slightly softer, richer texture to your homemade nut bread, while walnuts give a bit more of a hearty bite. Don’t stress if you have neither; you could technically leave them out, but then you’d just have a date loaf, not a date nut bread! If you skip them, I highly recommend adding an extra quarter cup of chopped dates just to maintain that dense texture.
Also, remember that note about brown sugar? If you want to dive into a really deep, almost caramel flavor profile that pairs beautifully with the nuts, swap that light brown sugar for dark brown sugar. The molasses content is higher, and it really enriches the crumb. This simple switch transforms the bread, making it feel even more ancient and traditional, which is perfect for an old fashioned date bread vibe.
And speaking of keeping freshness, this bread freezes like a dream! Once it’s completely cooled—and I mean totally cool, or it will get freezer condensation—wrap the entire loaf tightly in plastic wrap, then pop that into a layer of foil. It keeps beautifully for up to three months! When you thaw it out, it tastes almost exactly like it just came out of the oven. It’s my secret weapon when company shows up unexpectedly, and I can claim I just whipped up this amazing sweet nut bread!
Serving Suggestions for Your Date Nut Bread
Now that you’ve baked the best date nut bread, how are you going to serve this magnificent creation? Honestly, you can just eat a warm slice standing over the counter, and I wouldn’t judge you—it’s that good for a quick snack or breakfast bread recipe! But if you’re being civilized, try toasting a slice lightly. That little bit of warmth brings out the spice notes beautifully.
If you’re using this as part of your spread, this deserves a spot on the charcuterie board bread selection! Serve slices alongside strong blue cheese or a creamy brie. For gifting, package a loaf tightly wrapped with some twine and maybe a tiny jar of fruit preserves. It’s such a thoughtful and impressive homemade food gift because it feels so special and nostalgic.
Storing Your Date Nut Bread for Later
One of the best features of this date nut bread is how incredibly well it keeps. Unlike some quick breads that get stale overnight, this baby hangs onto its moisture for days, but sometimes you just bake a loaf and know you can’t eat it all right away! And trust me, you want to store it properly so that when you pull out a slice later, it tastes just as luscious as when it first came out of the oven.
For short-term storage—say, three to four days—I just wrap the cooled loaf tightly in plastic wrap. Make sure it’s completely cooled first! If you wrap it warm, all that steam condenses and makes the bottom soggy, and we definitely don’t want a soggy date nut bread foundation. Keep the wrapped loaf on the counter at room temperature, away from direct sunlight.
Now, if you’re thinking long-term, this recipe begs to be frozen, especially if you’re baking for the holidays or preparing ahead of time! If you plan on freezing your date nut bread, I always go double-wrapped. First, wrap the cooled loaf super snugly in plastic wrap—get all the air out! Then, wrap that package again in heavy-duty aluminum foil. This dual layer is your protection against freezer burn.
When you’re ready to enjoy it, just unwrap it completely, and you can either let it thaw on the counter for a few hours, or if you want it served warm, heat those slices gently! You can do it wrapped in foil in a 300-degree oven for about 10 minutes, or, if you’re impatient like me, zap it for about 15-20 seconds in the microwave. That little bit of heat brings back all the spiced aroma and that fantastic moisture we worked so hard to achieve in our homemade nut bread!
Frequently Asked Questions About Date Nut Bread
I always get so many questions once people start baking this loaf, which I love! It means you all are jumping right into making this amazing date nut bread. When you experiment with something as classic as an old fashioned date bread, you naturally have questions about substitutions or why certain steps are so important. Here are some of the things I hear most often, and I’ll try to keep the answers short and sweet, just like this bread!
Can I make this Date Nut Bread Recipe without nuts?
Oh, that’s an easy one! Yes, you absolutely can leave the nuts out if you have an allergy or just aren’t feeling them that day. But here is my honest advice: don’t leave the space blank! If you remove the nuts, you’re losing some important bulk and texture that helps break up the richness of the dates. I strongly suggest that if you skip the walnuts or pecans, you add an extra one-quarter cup of chopped dates, or maybe even try some golden raisins instead. Keep that texture working for you!
What makes this Old Fashioned Date Bread so moist?
This is the secret sauce, the real reason this is my go-to old fashioned date bread recipe! It’s all about that initial step where we pour boiling water over the chopped dates along with the baking soda. When the hot water hits the soda, it starts a fast chemical reaction. This partially steams the dates and helps them completely dissolve into the batter when they bake, releasing all their deep, sugary moisture right into the flour and butter. That little soak is non-negotiable for achieving that beautiful, moist crumb.
And remember, if you have any legal questions about ingredient usage or my recipe guidelines, you can always refer to my disclaimer page. I just want you all to bake happily and safely!
Nutritional Estimates for this Sweet Nut Bread
So, I know some of you are really tracking what goes into your body, even when you’re enjoying the best comfort food baking! I wanted to give you a general idea of what you’re looking at with a slice of this delicious sweet nut bread. Remember, because we are baking from scratch and using natural ingredients like real butter and fruit, these numbers rely on standard measuring cups and typical ingredient substitutions.
These are just estimates, but I find them helpful when planning meals, especially if I’m making this loaf for breakfast during the week. Here is what an average serving of this date nut bread looks like:
- Serving Size: 1 slice
- Calories: About 280
- Sugar: Roughly 25g (That’s why it tastes so good!)
- Fat: Around 12g, mostly healthy fats from the nuts and butter
- Carbohydrates: About 43g
- Protein: Roughly 4g
My disclaimer, because I always like to be clear—I’m a baker, not a nutritionist, folks! These figures are calculated based on the standard ingredients listed in the recipe. If you use extra butter or swap in dark brown sugar (which I highly recommend!), the figures will shift a bit. So, treat this as a very useful guideline for enjoying your classic loaf recipe guilt-free!
Share Your Classic Loaf Recipe Experience
Now that you’ve got that beautiful, aromatic date nut bread cooling on the rack, I really, really want to hear about it! Baking is such a communal thing for me, and I just love seeing how you all put your own spin on my favorite recipes. Did you use pecans instead of walnuts? Did you manage to resist eating the whole loaf in one sitting?
Please, if you loved this date nut bread as much as my family does, let me know! Leave me a rating down below—five stars if you think this is the best sweet nut bread you’ve ever tried! If you snapped a picture of your perfect loaf, please share it! You can tag me on social media or send me a note through my contact page—I check them all, and I love seeing my recipes come to life in your kitchens.
Happy baking, everyone! Enjoy that slice of comforting, spiced history!
PrintClassic Moist Date Nut Bread
A simple recipe for moist and flavorful date nut bread, perfect for breakfast, snacking, or gifting.
- Prep Time: 15 min
- Cook Time: 60 min
- Total Time: 75 min
- Yield: 1 loaf (about 10 servings)
- Category: Baking
- Method: Baking
- Cuisine: American
- Diet: Vegetarian
Ingredients
- 1 cup boiling water
- 1 cup packed pitted dates, chopped
- 1 teaspoon baking soda
- 1/2 cup (1 stick) unsalted butter, softened
- 1 cup packed light brown sugar
- 2 large eggs
- 1 teaspoon vanilla extract
- 1 3/4 cups all-purpose flour
- 1 teaspoon baking powder
- 1/2 teaspoon salt
- 1 cup chopped walnuts or pecans
Instructions
- Preheat your oven to 350 degrees F (175 degrees C). Grease and flour one 9×5 inch loaf pan.
- Place the chopped dates in a small bowl. Pour 1 cup of boiling water over the dates and stir in the baking soda. Let this mixture stand for 15 minutes.
- In a large bowl, cream together the softened butter and brown sugar until light and fluffy. Beat in the eggs one at a time, then stir in the vanilla extract.
- In a separate bowl, whisk together the flour, baking powder, and salt. Gradually add the dry ingredients to the wet ingredients, mixing until just combined.
- Stir the date mixture (including the liquid) and the chopped nuts into the batter. Mix until evenly distributed.
- Pour the batter into the prepared loaf pan.
- Bake for 50 to 60 minutes, or until a wooden skewer inserted into the center comes out clean.
- Let the bread cool in the pan for 10 minutes before turning it out onto a wire rack to cool completely.
Notes
- For a richer flavor, use dark brown sugar instead of light brown sugar.
- This bread freezes well; wrap tightly in plastic wrap and then foil before freezing.
- Serve slices plain, toasted, or with cream cheese for a charcuterie board pairing.
Nutrition
- Serving Size: 1 slice
- Calories: 280
- Sugar: 25g
- Sodium: 180mg
- Fat: 12g
- Saturated Fat: 5g
- Unsaturated Fat: 7g
- Trans Fat: 0g
- Carbohydrates: 43g
- Fiber: 2g
- Protein: 4g
- Cholesterol: 55mg