

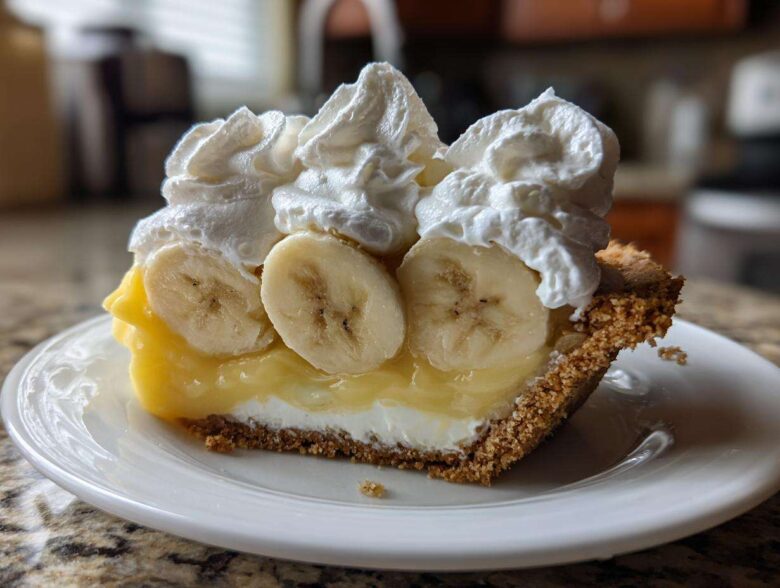
Oh, my goodness, do you ever just *crave* that rich, classic dessert but the thought of turning on the oven feels like too much work? Me too! That’s why this easy no-bake banana cream pie recipe is my total obsession during the summer months. Forget those chalky, instant-pudding versions; we’re going straight for that smooth, luxurious, creamy banana pie experience.
What makes my version stand out? It’s all about that homemade vanilla custard. It takes about ten minutes on the stovetop, but trust me, the depth of flavor you get when you chill it into that homemade banana custard pie base is unbeatable. I finally perfected this exact banana cream pie recipe last year, and now it’s expected at every single family potluck. It’s decadent, it’s shockingly simple, and it’s proof that you don’t need a hot oven to make magic. Check out our little story here if you want to know more about how we test our family favorites!
Why This Easy No-Bake Banana Cream Pie Recipe Works Best
Okay, look, I’ve tried every trick in the book for getting a perfect pie quickly, and this approach just always wins. When you’re looking for the best banana cream pie result without the fuss, this recipe ticks all the boxes. It’s definitely replacing regular desserts as our go-to family favorite pie!
Here’s why you absolutely need this banana cream pie recipe in your rotation:
- No Oven Required! Seriously, you just need the stovetop for a few minutes. This makes it the perfect quick dessert recipe when you get a last-minute craving or when your oven is already full of something else.
- The Custard is King: While you can use instant pudding if you’re in a total rush (see later tips), this homemade custard is what delivers that rich, satisfying, almost buttery flavor. It creates that signature velvety banana filling.
- Perfect Balance of Speed and Quality: It’s labeled as no bake pie recipes because the assembly is crazy fast, but because we cook the base, you get amazing thickness and flavor that shortcuts just can’t match.
- Simple Layering: The structure is straightforward. We layer the bananas right into the crust before adding the custard, which keeps everything tidy and makes slicing so much easier.
- It Holds Up: Because the custard is properly thickened with cornstarch and cooled correctly, this pie holds its shape beautifully under that mound of whipped cream. You get clean slices every single time you serve it!
Gathering Ingredients for Your Homemade Banana Custard Pie
Alright, ingredient prep is minimal because we are being smart about speed here, but don’t think for a second we’re skimping on quality! For this banana cream pie recipe, the goal is that rich, velvety banana filling, and that starts with picking the right fruit. You want bananas that are perfectly ripe—yellow with just a few little freckles—but still nice and firm. If they are super squishy, they’ll turn to mush when you layer them in.
We are totally cheating on the crust, and I am not sorry about it! Grabbing a 9-inch pre-made graham cracker crust just skips that messy first step while keeping the texture great. Now, let’s talk about what really makes this pie special: that thick, luscious custard we build from scratch. That’s where the real flavor for this classic banana cream pie comes out.
Components for the Creamy Banana Pie Filling
When you’re skimming the recipe card, these are the items that demand your attention for the homemade base. Don’t grab just any carton of liquid; quality matters here for that amazing homemade texture. You absolutely need three large egg yolks—these are the secret weapon for richness—and make sure you measure out exactly one and a half cups of cold water before you start.
Also, grab that unsalted butter! Butter adds so much more depth than margarine, and since we’re using it right at the end to smooth everything out, it needs to be pure flavor. A little cornstarch and salt are the thickening agents, but remember to keep those separated until the recipe calls for them. Precision in these small amounts ensures your custard doesn’t end up runny!
Ingredients for the Whipped Cream Topping Pie
For the crowning glory on our no bake pie recipes entry, we need the topping. You must use heavy whipping cream—the heavy stuff, not the light carton—because we need it sturdy enough to hold those stiff peaks. We’ll mix in powdered sugar here instead of granulated because the fine texture dissolves instantly and helps the cream stabilize faster.
Honestly, I love just swirling the whipped cream on top with a spoon—it looks so wonderfully rustic—but feel free to grab a piping tip if you want to make it look fancy for company. Either way, get that heavy cream nice and cold before you start whipping!
Step-by-Step Instructions for the No Bake Banana Cream Pie Recipe
Okay, this is where we put it all together! Don’t let the custard steps scare you; they are the key to having the best banana cream pie texture possible. If you remember one thing, remember this: constant motion is your best friend when that saucepan is on the heat. This entire process cooks so quickly—the work time is barely ten minutes—but it builds the structure for the whole pie.
Remember that we are chilling the custard *before* we assemble the pie. That’s crucial! If you try to layer warm custard over bananas, you’re just asking for a soggy mess, and nobody wants that.
Making the Homemade Banana Custard Pie Base
First thing we do is prep the dry stuff way before we even think about turning the gas knob. Get a medium saucepan and whisk together your sugar, cornstarch, and salt until they look like one homogenous powder. This is my trick; if you dump the water onto the dry ingredients without mixing them first, you guarantee lumps hiding in the bottom—and nobody wants a lumpy custard!
Now, whisk in that cold water slowly. Once it looks smooth, put it on medium heat. You must stir constantly here! We are waiting for it to thicken up and then boil—you’ll know when it boils because it gets thick and glossy. Let it boil for exactly one minute while stirring, then pull it off that heat immediately. This sets the starch properly.
The scariest part: tempering the eggs! Take about half a cup of that hot goo and slowly, slowly drizzle it into your lightly beaten egg yolks while you whisk those yolks like crazy. If you pour too fast, you’ll end up with scrambled eggs instead of custard. Phew! Once that’s tempered, pour that yolk mixture right back into the main pan. Return it to low heat for just one more minute—stirring the whole time—but don’t let it boil again! It will thicken up even more.
Take it completely off the heat. Stir in your vanilla and that two tablespoons of lovely butter until it’s all melted and shiny. See? That wasn’t so bad! Now, pour this beautiful base into a separate bowl. Here is the non-negotiable pro tip for a no-bake pie: grab a piece of plastic wrap and press it directly onto the surface of that custard. Don’t just set it on top; press contact! This stops that horrible skin from forming while it chills. Chill it for at least two hours until it’s ice cold.
If you’re making this ahead of time, you can stop right here and keep that covered custard bowl in the fridge until you’re ready for assembly. I often make the custard the day before so everything moves faster the next day.
Assembling Your Layered Banana Pie
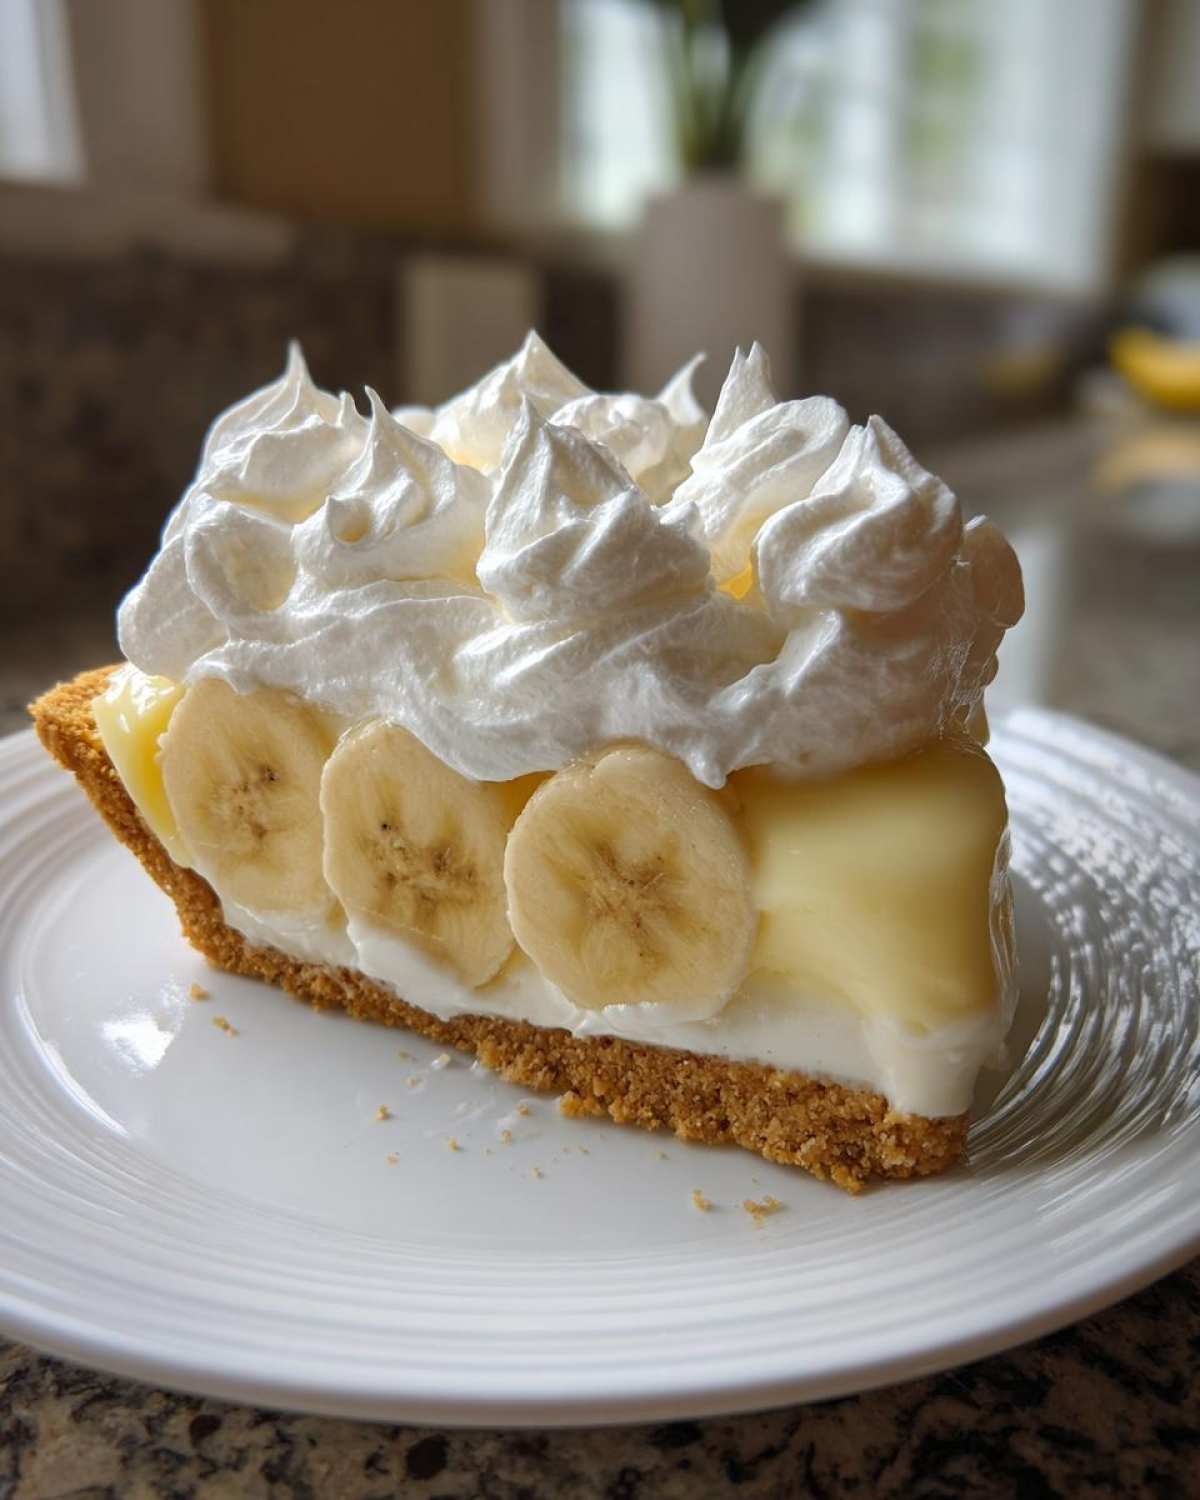
Once your custard is properly chilled—firm enough that you can spoon it without it immediately flowing everywhere—it’s time for the fun part! Grab your graham cracker crust. We’re building layers here for maximum banana impact. First, arrange half of your sliced bananas across the bottom of the crust.
Next, spread half of that chilled custard evenly over the first layer of bananas. Don’t worry about smoothing it perfectly; the next layer of bananas will help push it into place. Go ahead and layer on the rest of your sliced bananas. Top that with the rest of the cold custard, spreading it gently to cover everything completely, especially the edges.
Now, resist the urge to dig in! This entire layered structure needs to firm up again. Put the assembled pie back into the fridge to chill for at least another hour before we even think about adding the topping. It needs to be very cold!
Finishing the Whipped Cream Topping Pie
While the pie is setting up that final chill, you can make your amazing topping. I use my stand mixer for this because I like stiff peaks, but a hand mixer works just fine too! Make sure your heavy whipping cream is nice and cold. Add in your two tablespoons of powdered sugar.
Start whipping on medium speed and slowly increase it. You’re looking for stiff peaks—that means when you lift the whisk, the cream stands up straight without drooping over. Don’t overbeat it, or you’ll end up with butter, oops! Once your topping is perfect, gently spread it over the chilled, set custard filling. Use the back of a spoon to give it some lovely swoops and swirls. Then, back into the fridge one last time to set for at least four full hours. That final chill is essential for clean slices when serving this amazing banana cream pie recipe!
Tips for the Best Banana Cream Pie Recipe Texture
You know, making a great dessert is one thing, but making it have that perfect, melt-in-your-mouth texture? That takes just a few extra little secrets tucked into the process. I’ve had this banana cream pie recipe turn out perfect ninety-nine times, and that last one time taught me exactly what not to do! For this pie to deliver that truly velvety banana filling experience, it’s all about moisture management.
The single biggest texture mistake people make is rushing the chilling process, but there are a few other things you can control before you even start cooking that custard base. Follow these little pointers, and I promise, this will be the classic banana cream pie you’ve always dreamed of.
Picking Bananas That Won’t Get Mushy
I touched on this before, but I need to shout this from the rooftops: banana ripeness is everything! If you use bananas that are too green, they taste starchy, and nobody wants that. But if you use bananas that are brown and soft, they release too much water into the cold custard, and suddenly, that magnificent cream turns soupy in the middle!
You want bright yellow with those little brown speckles—you know, the ones that are perfectly sweet but still feel firm when you squeeze them gently. Also, I always slice mine right before I need to use them. Bananas oxidize (turn brown!) really fast once sliced, and while the custard helps prevent discoloration, I want maximum fresh flavor contribution to this delicious easy banana dessert.
The Non-Negotiable Plastic Wrap Rule
If you skip the step where you press plastic wrap directly onto the surface of the custard after cooking, you’re inviting skin formation. Skin on custard is the texture enemy! It’s tough, slightly rubbery, and it gums up the works when you try to spread the topping.
I swear, if you press that plastic wrap right down onto the custard surface while it’s cooling, that skin forms on the plastic, not the delicious filling underneath! You just peel that off before you re-whip the cold custard, and it’s perfectly smooth and ready to go. This simple habit elevates this whole no bake pie recipe.
Ensuring the Custard is Fully Set Before Topping
This is the final texture hurdle. You MUST chill the custard for at least two full hours before you put the first banana down. If the custard is even slightly soft in the middle, the weight of the whipped cream topping and those bananas will start to push down, making the layers slide against each other while chilling.
The filling needs to be completely cold and firm before you spread the whipped topping on. A firm base means clean presentation, and clean presentation means you look like a baking hero when you bring this banana cream pie recipe to the table!
Ingredient Notes and Simple Banana Dessert Substitutions
I get so many questions about substitutions when people are trying to master this banana cream pie recipe. Look, I’m all about making things easy, especially if this is for a last-minute party, but I have to be honest about how swaps affect the final product, especially when we’re talking about that beautiful, rich filling. This is why this particular easy banana dessert shines—the homemade base!
For example, while the homemade custard is my absolute favorite and creates that incredible, silky texture, I totally understand needing a little shortcut sometimes. If you absolutely have zero time to cook, you can pivot, but be prepared for a slightly different experience with your creamy banana pie.
Swapping Homemade Custard for Instant Pudding Mix
If you’re in a time crunch and need a true quick dessert recipe, you can skip the saucepan entirely and use two boxes of instant vanilla pudding mix. It’s faster, no kidding, but you have to adjust how you mix it.
Instead of using the water listed on the pudding box instructions, use less liquid—maybe one and three-quarter cups cold milk instead of the required amount for two boxes. This forces the instant pudding to set up much thicker, which helps it mimic the density of our cooked custard. It won’t have that baked-egg richness, but it gets you a layered banana pie fast!
The upside is that instant pudding usually sets up quicker in the fridge than a cooked base, so you might shave off a little chilling time. But honestly, when I need that authentic, classic banana cream pie flavor, I always go back to cooking those yolks and butter!
The Best Crust Alternatives for Quick Dessert Recipes
We are using a graham cracker crust because it’s the classic partner for this flavor profile, and honestly, it’s perfect for a no bake pie recipe. But what if you don’t have graham crackers? Don’t panic!
You can absolutely use a pre-made shortbread crust or even a chocolate wafer crust if you want a little contrasting flavor. If you go chocolate, it pushes this pie towards tasting a bit more like a decadent banana pudding than a traditional banana cream pie, which is still delicious, by the way!
If you really wanted to get ambitious and make an *old fashioned pie recipe* crust completely from scratch, go for it—just remember you’ll have to blind-bake it first, meaning you’re turning on the oven anyway! For the sake of keeping this an easy banana dessert, stick to pre-made wafer crusts if you skip the graham.
What If My Bananas Are Too Ripe?
This is such a common problem! You forgot to shop, or maybe the bananas just decided to age overnight—we’ve all been there. If your bananas are a little too soft for direct layering when making this banana cream pie recipe, don’t toss them! You can still save the day.
Instead of slicing them and laying them flat, you can mash about three of the softer bananas, stir them generously with a tablespoon of sugar and a quarter teaspoon of lemon juice, and fold that mixture directly into the homemade custard base right *after* it chills (step 7). It sort of turns it into a flavor-packed, slightly textured banana pudding base. You lose the distinct banana layer, but you keep that amazing texture in the homemade banana custard pie itself!
Storing and Serving Your Creamy Banana Pie
If you manage to have leftovers of this beautiful banana cream pie recipe—which is rare in my house, honestly—storage is super important because we’re dealing with fresh fruit and a cooked custard base. This needs to be refrigerated immediately. Seriously, don’t even leave it on the counter for an hour after you slice it. That creamy custard is safest and tastes best when it’s nice and cold.
Because this is a wonderfully simple banana dessert, we want to treat it right so it shines the next day. It usually keeps well in the fridge for about two days, maybe three if you tucked that topping in nicely. Any longer than that, and the fresh bananas start getting a little sad and dark, and the crust can start absorbing too much moisture.
The Best Way to Keep It Refrigerated
When you put this pie away, you need to protect that gorgeous whipped cream topping. If you cover the pie dish tightly with plastic wrap, the wrap will stick right into the cream and ruin the beautiful swirls you made. Trust me, scraping the plastic off the whipped topping is a sad moment!
The trick is to use toothpicks—four or five poked lightly into the filling around the edges of the whipped cream—to act as little stilts for the wrap. Then, gently drape the plastic wrap over those stilts, creating a little dome so nothing touches that topping. This keeps it fresh and prevents it from absorbing any funny smells from the fridge.
Serving Temperature: Cold is Key
This is not a pie that likes to warm up! Because this recipe relies on cold, stiff whipped cream and chilled custard, it needs to be served straight from the refrigerator. If you cut slices when the pie is close to room temperature, that filling starts weeping, and the whipped cream instantly deflates.
If you’ve had the pie sitting out for just a minute while you get everything else ready, chances are the edges of your cream might look a little soft. You can slip the whole pie into the freezer for about 15 minutes before you serve it. That quick blast of cold air firms everything right back up, ensuring you get the cleanest slice possible for this amazing no bake pie recipe.
Can You Freeze This Banana Cream Pie Recipe?
So, can you freeze this creamy banana pie? Here’s my straightforward advice: Don’t, if you can avoid it! Custards, especially ones made this rich with egg yolks, do not like freezing. When you thaw it out, the texture usually gets grainy, watery, or separated, which totally defeats the purpose of making that beautiful homemade base.
The whipped cream topping also changes significantly after freezing and thawing; it can become weepy and lose its airy structure. If you *must* freeze something, wrap the assembled, unsliced pie very securely in plastic wrap and then foil. Thaw it slowly in the refrigerator overnight. But honestly, just make it within 24 hours of when you plan to eat it. It’s an easy banana dessert that tastes best fresh!
Frequently Asked Questions About This Banana Cream Pie Recipe
I know you might have a few lingering questions after diving into perfecting this banana cream pie recipe. It’s a bit different than just whipping up instant pudding, but the payoff in flavor alone is worth it! Here are the questions I get asked most often about making this easy banana dessert.
Why didn’t my homemade custard thicken properly?
Oh, this is the number one panic moment! Usually, if your custard didn’t thicken, it means you didn’t let it come to a full boil for that crucial one minute after you added the water, sugar, and starch. The starch needs that hard boil to fully activate and bind the liquid. If you pull it off the heat too early, it stays loose.
Another reason could be skipping the tempering step or returning the tempered eggs to the heat for too short a time. Remember, don’t boil it once the eggs are back in, but you do need that minute on low heat to finish setting everything up. If it’s still too loose, you can try returning it to low heat again, but be super careful!
Can I use a homemade pastry crust instead of a graham cracker crust?
Absolutely, you certainly can if you want to lean into the old fashioned pie recipe vibe! But here’s the catch with this specific banana cream pie recipe: since this pie is entirely no-bake, a traditional flaky pastry crust needs to be baked blind first, meaning you have to turn on the oven, which defeats the purpose of this quick dessert recipe.
If you want a scratch crust, I highly recommend making a press-in shortbread or a sturdy cookie crust that doesn’t require baking. If you do bake it, make sure it’s completely cool before you start building the layers, or you’ll melt the bottom of your beautiful creamy banana pie filling!
How long before the party should I assemble the pie?
Because this has fresh, sliced bananas layered into the soft custard, it really does not like sitting around for days. For the freshest, firmest texture and the best-looking whipped cream topping, aim to assemble the entire pie—custard chilled, bananas layered, topping spread—no more than 8 to 12 hours before serving. If you need to make it further ahead, just chill the cooked custard base (covered tightly!) for up to two days, and only assemble everything when you’re ready to use it.
Is this recipe easier than using a box of instant pudding?
Yes and no! Making the instant pudding alternative (which I mentioned earlier) is slightly faster because you skip the 10 minutes of cooking and tempering. However, for the absolute best banana cream pie texture and depth of flavor, this cooked custard version is actually easier to manage than trying to force instant pudding to be as rich as a cooked filling. The steps in this banana cream pie recipe lead to a superior result, even if it means standing over the stove for a few minutes!
If you need help getting in touch with us about your experience making this, feel free to reach out through our contact page right here!
Nutritional Estimates for One Slice
Now, I know that when we’re making a rich, comforting dessert like this, we usually aren’t focused on counting corners, but I like to keep you all informed just in case! Since we’re using a full graham cracker crust, rich egg yolks, butter, and that delicious whipped cream topping, this is definitely a treat.
These numbers are rough estimates, mind you, based on dividing the entire recipe into eight generous slices. Every brand of crust or amount of butter you use will slightly change the final count, but this gives you a good benchmark for planning your day! We always encourage you to read our official findings on our site policies to see how we compile this data.
Here’s the general breakdown for one satisfying slice of this wonderful dessert:
- Calories: Around 380
- Sugar: Roughly 45 grams
- Total Fat: About 19 grams (with 10g being saturated fat)
- Protein: About 5 grams
- Carbohydrates: Approximately 50 grams
It’s a beautiful, rich slice of creamy goodness that’s worth every single bit! Just remember, this is a decadent homemade treat, meant for sharing and enjoying!
Share Your Experience with This Easy Banana Dessert
That’s it! You’ve conquered the banana cream pie recipe, and now you have the best banana cream pie sitting in your fridge, just waiting for perfection. I am so incredibly excited for you to try this easy banana dessert. Honestly, making this creamy pie brings me so much joy, and I truly hope it does the same for you!
Now, here’s the part where you jump in and tell me all about it! This community thrives on sharing tips and successes, especially when it comes to tricky things like tempering egg yolks. Did you try adding a sprinkle of cinnamon into the custard? Did you manage to keep your plastic wrap perfectly dome-shaped over the filling? I want to hear every detail!
Rate This Simple Banana Dessert and Leave Feedback
If this recipe helped you pull off a spectacular, no-fuss dessert that everyone absolutely devoured, please take a second to leave a rating below! Five stars means you think this is the definitive no bake pie recipe, and one star means we need to troubleshoot something together! Your feedback helps future bakers jump right into this quick dessert recipe with confidence.
And if, by chance, you made any swaps—maybe you used a chocolate crust or decided to add extra vanilla—please drop a comment detailing what you did. Sometimes the modifications you all come up with are brilliant and inspire my next batch!
Show Us Your Masterpiece!
I absolutely live for seeing photos of your finished pies! Tag me on social media when you share photos of your beautiful, towering whipped cream topping pie. There’s nothing better than seeing our work in different kitchens.
If you have any lingering questions, or if something didn’t go quite as planned, please use the comment section below—that’s the best place to start a conversation. We test our recipes rigorously, following all the essential guidelines like keeping things cold, but sometimes an odd kitchen variable pops up, and I’m here to help you fix it! We’ve got great terms and conditions listed over here if you need to review our policies, but mainly, let’s just chat about how delicious this layered banana pie turned out!
PrintEasy No-Bake Banana Cream Pie with Homemade Vanilla Custard
Make a simple, creamy banana cream pie without turning on your oven. This recipe uses a homemade vanilla custard filling for a rich, velvety texture.
- Prep Time: 25 min
- Cook Time: 10 min
- Total Time: 185 min
- Yield: 8 servings
- Category: Dessert
- Method: No Bake
- Cuisine: American
- Diet: Vegetarian
Ingredients
- 1 pre-made graham cracker crust (9 inch)
- 4 large ripe bananas, sliced
- 1 1/2 cups granulated sugar
- 1/4 cup cornstarch
- 1/4 teaspoon salt
- 1 1/2 cups cold water
- 3 large egg yolks, lightly beaten
- 2 tablespoons unsalted butter
- 1 teaspoon vanilla extract
- 1 1/2 cups heavy whipping cream
- 2 tablespoons powdered sugar
Instructions
- Prepare the custard base: In a medium saucepan, whisk together the granulated sugar, cornstarch, and salt.
- Gradually whisk in the cold water until smooth.
- Place the saucepan over medium heat. Cook, stirring constantly, until the mixture thickens and comes to a boil. Boil for 1 minute, still stirring. Remove from heat.
- Temper the egg yolks: Slowly pour about 1/2 cup of the hot custard mixture into the beaten egg yolks while whisking constantly.
- Pour the tempered egg yolk mixture back into the saucepan with the remaining custard. Return to low heat. Cook, stirring constantly, for 1 minute; do not boil.
- Remove from heat. Stir in the butter and vanilla extract until the butter melts completely.
- Pour the custard into a bowl. Press plastic wrap directly onto the surface of the custard to prevent a skin from forming. Chill in the refrigerator for at least 2 hours, or until completely cold.
- Slice the bananas and arrange half of the slices in a single layer on the bottom of the graham cracker crust.
- Spread half of the chilled custard evenly over the bananas. Layer the remaining banana slices on top of the custard. Top with the remaining cold custard, spreading it evenly.
- Make the topping: In a separate bowl, beat the heavy whipping cream and powdered sugar with an electric mixer until stiff peaks form.
- Spread or pipe the whipped cream topping over the pie filling.
- Chill the finished pie for at least 4 hours before slicing and serving.
Notes
- For the best texture, use bananas that are ripe but still firm.
- If you prefer a thicker crust flavor, you can lightly toast the graham cracker crust before filling.
- You can substitute pre-made vanilla pudding for the homemade custard if you need a faster option, but the texture will be less rich.
Nutrition
- Serving Size: 1 slice
- Calories: 380
- Sugar: 45g
- Sodium: 250mg
- Fat: 19g
- Saturated Fat: 10g
- Unsaturated Fat: 9g
- Trans Fat: 0.2g
- Carbohydrates: 50g
- Fiber: 2g
- Protein: 5g
- Cholesterol: 75mg