

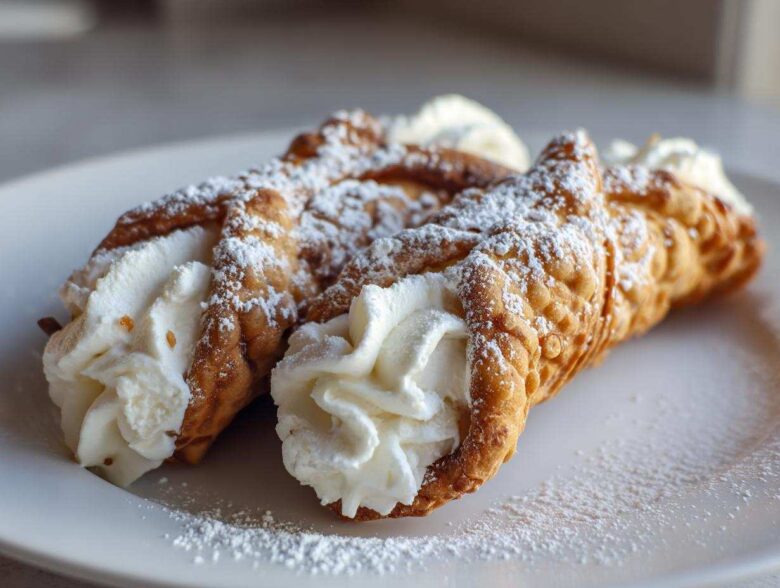
Oh my gosh, if you’ve been dreaming about that perfect, shatteringly crisp shell filled with a sweet, cloud-like ricotta filling, you’ve come to the right place! Forget those sad, soft, store-bought tubes. We are making the real deal—the kind that deserves a trip back to Sicily. I fought with this so many times, battling soggy dough and grainy centers, but trust me, this cannoli recipe is the one that finally achieved bakery-level crispness right here in my kitchen after years of trying.
Making authentic cannoli at home can feel intimidating, especially the frying part, but I promise if you follow these steps precisely, you’ll nail the texture you’re looking for on the very first try. We’re focusing on two main goals: paper-thin, wonderfully blistered shells and a filling so creamy and perfectly spiced it melts in your mouth.
Why This Cannoli Recipe Delivers Bakery-Style Results
Honestly, the difference between good cannoli and the Best Cannoli Recipe comes down to two non-negotiables that most home cooks skip! We aren’t messing around when striving for Authentic Sicilian Pastry quality. It’s all about controlling moisture and temperature, which keeps our shells light and bubbly, not dense and oily. Stick with me, and you won’t be disappointed!
I’ve linked over to my About Page if you’re curious about how much testing goes into finding these perfect methods!
Achieving Crispy Cannoli Shells
Crispness happens in the oil! You absolutely must hit that perfect 375°F frying temperature. If it’s too cool, the dough soaks up oil like a sponge, and you get a greasy chew. The little bit of wine and vinegar in the dough is magical—it reacts with the heat, creating those signature tiny blisters all over the shell, making them light and airy. That’s the key to that perfect crackle in every bite of your homemade cannoli recipe.
The Secret to a Creamy Dessert Filling
Listen, if you skip draining your ricotta cheese overnight, stop right now! That’s the number one reason home cannoli fillings turn sour or watery. We are aiming for thick, almost scoopable ricotta. After you drain it overnight in a sieve, you beat it until it’s totally smooth—no graininess allowed! This creates the pure, luxurious base for our Creamy Dessert Filling, ensuring it perfectly complements the crunchy shell.
Ingredients for the Ultimate Cannoli Recipe
Okay, getting the right components for this cannoli recipe is half the battle won. Remember what I said about that ricotta? It needs to be whole milk and drained until it practically begs for mercy. We can’t compromise on that if we want that signature creamy texture. Seeing these ingredients laid out makes me excited—you’re just a few steps away from the best Homemade Italian Treats!
For the Crispy Cannoli Shells Dough
This is a sturdy little dough that handles the heat like a champ. We use a touch of vinegar and wine to help it blister beautifully during the fry:
- 2 cups all-purpose flour
- 1/4 cup granulated sugar
- 1/4 teaspoon salt
- 1 large egg
- 1/4 cup dry white wine (or Marsala wine—Marsala gives it a lovely depth!)
- 1 tablespoon unsalted butter, melted
- 1 teaspoon white vinegar
- Vegetable oil, for frying (you’ll need about 2 inches deep)
For the Traditional Ricotta Filling Recipe
This is where the magic happens! Once the ricotta is drained overnight, the filling comes together incredibly fast. This specific Ricotta Filling Recipe is perfectly sweet and spiced.
- 15 ounces whole milk ricotta cheese, drained overnight (Don’t skip this!)
- 1/2 cup powdered sugar, sifted
- 1/2 teaspoon vanilla extract
- 1/4 teaspoon ground cinnamon
- 1/4 cup mini chocolate chips (Fold these in last, gently!)
Oh, and don’t forget a little powdered sugar reserved for that beautiful final dusting!
Step-by-Step Instructions for the Cannoli Recipe
Alright, tie on your apron, because this is the fun part! If you’ve got everything prepped—the ricotta drained overnight and your dough waiting patiently—we can move fast. This whole process is much less scary when you break it down into stages. Get your frying station set up safely first, and then we can whip up these amazing shells for our cannoli recipe.
I have a great resource on making pancake bases for other fun treats, but trust me, this dough process is unique!
Making and Resting the Shell Dough
First things first, let’s make that dough. Whisk your flour, sugar, and salt together in a big bowl. Then, make a little crater in the middle and pour in your wet elements: the egg, the white wine (or Marsala!), the melted butter, and that little splash of vinegar. Mix it until it looks rough, then dump it onto your counter. You need to knead this for a solid five to seven minutes until it’s smooth as silk. It’s important to wrap that ball tight in plastic wrap and let it just chill out on the counter for at least an hour. That resting period lets the gluten relax, which is super important for rolling it out super thin later!
Preparing the Chilled Ricotta Filling
While the dough is snoozing, we tackle the filling. Take that super-drained ricotta and slap it into a clean bowl. You have to beat it until it’s completely, wonderfully smooth before you do anything else. If you add sugar to grainy cheese? Oops! You’ll stay with grainy cheese! Once it’s silky, slowly mix in the powdered sugar, vanilla, and cinnamon. Finally, gently fold in those mini chocolate chips. Cover this up immediately and stick it in the fridge for at least two hours. It needs to be cold when it goes into those shells!
Shaping and Frying the Cannoli Shells
Time to roll! Cut your dough into four easy pieces. You want this dough ridiculously thin—if you roll through a pasta machine, go almost transparent! Cut those thin dough pieces into roughly 4-inch rounds or squares. Now, wrap each piece tightly around your metal cannoli tube, making sure the edge overlaps just a tiny bit. Brush that overlap with water or egg wash to seal it shut—if it doesn’t stick, it will unravel in the oil. Heat your oil in a deep pot to precisely 375°F. Carefully drop two or three shells in at a time—don’t crowd the pot! Use tongs to hold the metal tube submerged until the dough is golden brown and full of those crispy blisters, about 1 to 2 minutes per side. Pull them out and immediately slide them off the tubes onto paper towels. If you wait even five seconds, the shells will stick to the metal!
Filling and Finishing the Cannoli Recipe
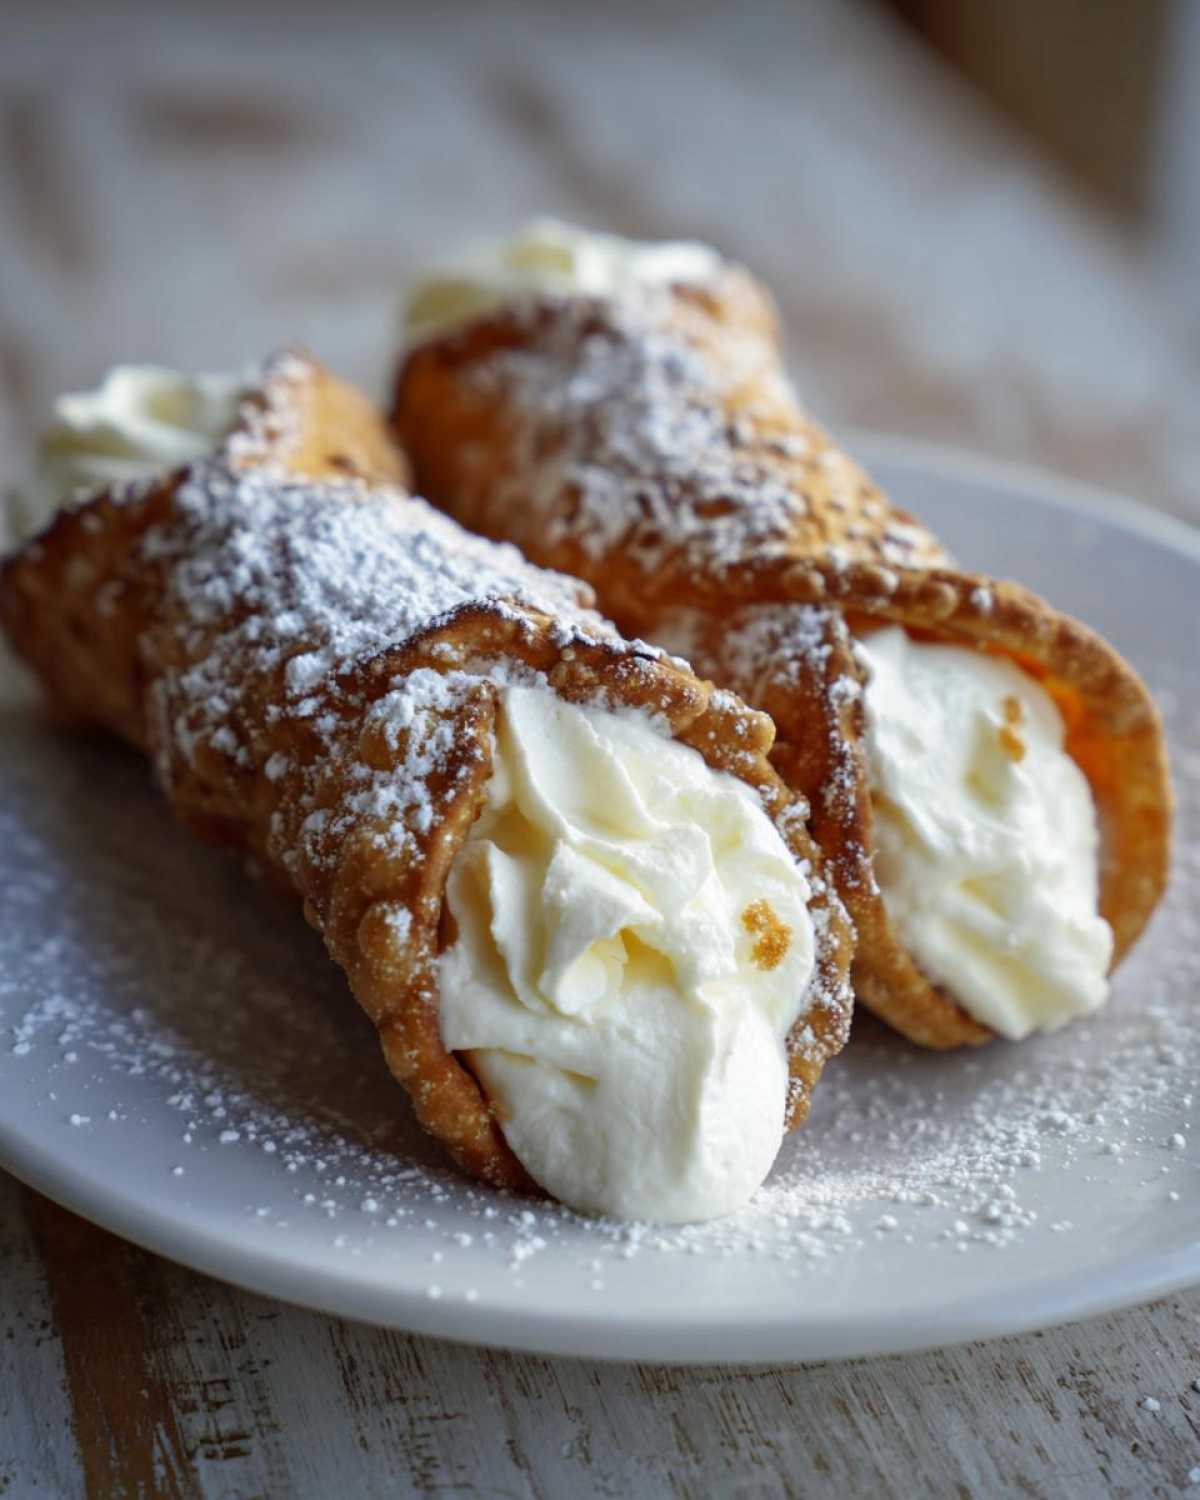
Once those shells are totally cool—we mean stone cold—it’s assembly time! Fit a pastry bag with a big star tip and pipe that chilled filling into both ends of the shell until it’s beautifully overflowing. My absolute biggest rule for any Fried Pastry Recipe of this type is this: You MUST fill the cannoli shells right before you plan on eating them. If you fill them too early, the moisture from the ricotta will sneak into the shell, and bye-bye crispness! Once they’re stuffed to perfection, give them a generous, fluffy dusting of powdered sugar, and get ready to serve!
Expert Tips for Perfect Crispy Cannoli Shells
Listen, mastering this cannoli recipe is all about being prepared for what can go wrong, right? We’ve covered the basics, but to truly move from home baker to Italian pastry legend, you need to conquer the moisture monster and the heat monster. These little things make the difference between a good snack and bakery-quality perfection.
I’ve got some fantastic ideas for using up leftover ricotta in my spicy roasted chickpeas—just kidding! Mostly. But seriously, these tips will save your shells!
Addressing Moisture: The Ricotta Drain
I have to bring up the ricotta drain one more time because it’s that crucial. If you think, “Oh, I only have 15 minutes,” please wait until tomorrow! Seriously. That little bit of residual water from the cheese is the enemy of crispness. When the hot oil hits the shell dough, the moisture has to escape rapidly, creating those beautiful bubbles. If the filling is wet, it soaks into the shell from the inside as soon as you fill it, and you get soft, sad cannoli in minutes. Overnight draining is your insurance policy!
Frying Oil Temperature Control
That 375°F mark isn’t just a suggestion; it’s the law for this cannoli recipe. If your oil temperature dips too low, say to 350°F, the dough sits there too long absorbing fat. You end up with heavy, sad, greasy shells that might be cooked through but lack the airy crunch we want. On the flip side, if you go too high, like 400°F, the outside burns black before the dough has time to puff evenly, leaving you with a blistered, but raw-tasting, interior. Keep that thermometer handy!
Storage and Make-Ahead Tips for Your Cannoli Recipe
The biggest struggle with making this fantastic cannoli recipe is that they are absolutely best eaten the minute they are filled. Seriously, give them 20 minutes and they start trying to hug the filling too tightly!
But don’t worry, we can totally prep ahead! The dough for the shells keeps beautifully wrapped tightly in the fridge for about two days. And the ricotta filling? Make that up to a solid day ahead, but it MUST stay covered and super cold. You can even prepare the fillings for my candied pecans while you wait for the dough to rest, if you’re feeling ambitious!
The rule remains: shells one day, filling another, and assembly only right before the doorbell rings. That’s the secret to that crispy crunch!
Variations on This Classic Italian Dessert
While I am a total purist when it comes to the shell—frying or bust, folks!—you have tons of wonderful freedom when it comes to customizing the flavor profile of that beautiful ricotta filling. If you want to explore other facets of Traditional Italian Baking, try adding a little brightness to balance the sweet ricotta.
For instance, I love grating a little fresh orange or lemon zest right into the filling mixture. It wakes everything up! Or you can get really fun with the ends after you fill them. Dip one end into finely chopped pistachios, or maybe some mini chocolate chips, or even dip them into the glaze from my spiced cider recipe if you want some unexpected spice flavor in the mix! These little touches make these desserts feel totally personalized.
Frequently Asked Questions About the Cannoli Recipe
Whenever I post pictures of these, people always have similar questions, so let’s knock out the most common ones right here! Hopefully, this tackles any last-minute concerns you have about tackling this cannoli recipe. If you still have questions, feel free to reach out on my Contact Page!
Can I bake the cannoli shells instead of frying for this cannoli recipe?
Oh, I know baking sounds easier on the cleanup, but honestly, no. You just won’t get that true, wonderfully bubbly, super-crispy texture that defines Authentic Sicilian Pastry if you bake them. Baking makes them flat and cracker-like. Frying causes the alcohol in the dough to flash-steam, creating those air pockets and blisters that make the shell so light and shatteringly crisp. It’s worth the few minutes of frying, I promise!
What is the best substitute for Marsala wine in the dough?
Marsala is amazing, but if you don’t have it, don’t sweat it! The alcohol is what we’re really after because it helps that steam puff up the dough fast. You can definitely use dry sherry instead, which gives a nice, similar flavor profile. If you absolutely can’t use wine, just substitute it with extra dry white wine or even a bit more white vinegar mixed with water. It won’t have that deep, fermented note, but it will still help achieve those great blisters for your Easy Cannoli Guide.
How far in advance can I make the ricotta filling?
This is great news: you can absolutely make the Creamy Dessert Filling ahead of time! Because we beat the ricotta until it’s so smooth and then chill it so thoroughly, it holds up really well. I usually make the filling up to two full days in advance. Just make sure it’s covered tightly (like, really tight!) and keep it in the coldest part of your fridge. Remember, though: filling them has to wait until the very last minute!
Estimated Nutritional Data for This Cannoli Recipe
Now, I know some of you are watching macros, and I totally get that! But let’s be real, these are special occasion Italian pastries, and we aren’t counting calories when they taste this good, right? Still, for those who like to plan, I’ve put together the estimated nutritional breakdown based on the ingredients list we used.
Keep in mind that these figures are just estimates. If you make substitutions—say, you skip the chocolate chips or use low-fat ricotta—your totals will shift. This is based on one generous serving, about one perfectly stuffed cannoli.
- Serving Size: 1 cannoli
- Calories: 350
- Fat: 18g (with 10g saturated fat)
- Carbohydrates: 40g
- Protein: 10g
- Sugar: 25g
- Sodium: 120mg
- Cholesterol: 55mg
It’s a treat, but a balanced one, full of protein from the ricotta! We’re all about enjoying Traditional Italian Baking without too much guilt over here!
Share Your Homemade Italian Treats Experience
I poured my heart into getting this Authentic Sicilian Pastry recipe just right for you, and now I’m dying to see what you create! The kitchen truly comes alive when you’re making these, doesn’t it? That smell of frying dough mixed with sweet ricotta is just incredible.
Seriously, please come back and drop me a star rating below once you’ve tried them. It helps other folks trying to gather the courage to try their first batch of Homemade Italian Treats!
When you leave a comment, tell me—did you stick to the classic cinnamon and chocolate chips, or did you venture into citrus zest territory? And which part of this Easy Cannoli Guide was the most helpful for you? Knowing that information helps me tweak my articles, like my family favorite apple cinnamon oatmeal recipe!
Happy baking (and frying!), I can’t wait to hear all about your perfectly crisp, creamy cannoli!
PrintAuthentic Homemade Cannoli Recipe

Make traditional Italian cannoli with crispy fried shells and a sweet, creamy ricotta filling.
- Prep Time: 45 min
- Cook Time: 15 min
- Total Time: 100 min
- Yield: 12 servings
- Category: Dessert
- Method: Frying
- Cuisine: Italian
- Diet: Vegetarian
Ingredients
- 2 cups all-purpose flour
- 1/4 cup granulated sugar
- 1/4 teaspoon salt
- 1 large egg
- 1/4 cup dry white wine (or Marsala wine)
- 1 tablespoon unsalted butter, melted
- 1 teaspoon white vinegar
- Vegetable oil, for frying
- 15 ounces whole milk ricotta cheese, drained overnight
- 1/2 cup powdered sugar, sifted
- 1/2 teaspoon vanilla extract
- 1/4 teaspoon ground cinnamon
- 1/4 cup mini chocolate chips
- Powdered sugar, for dusting
Instructions
- Prepare the dough: In a large bowl, whisk together the flour, granulated sugar, and salt.
- Make a well in the center and add the egg, wine, melted butter, and vinegar. Mix until a shaggy dough forms.
- Knead the dough on a lightly floured surface for 5 to 7 minutes until smooth. Wrap the dough tightly in plastic wrap and let it rest at room temperature for at least 1 hour.
- Prepare the filling: Place the well-drained ricotta cheese in a bowl. Beat with an electric mixer until smooth.
- Gradually add the sifted powdered sugar, vanilla extract, and cinnamon. Mix until just combined. Fold in the mini chocolate chips gently. Cover and chill the filling for at least 2 hours.
- Roll the shells: Divide the dough into four pieces. Working with one piece at a time, roll it out very thinly using a pasta machine or rolling pin until it is almost translucent. Cut the dough into 4-inch circles or squares.
- Shape the shells: Wrap each piece of dough around metal cannoli tubes, overlapping the edges slightly. Brush the overlapping edge with water or egg white to seal.
- Fry the shells: Heat 2 inches of vegetable oil in a deep, heavy-bottomed pot to 375°F (190°C). Carefully place 2 or 3 shells into the hot oil, using tongs to hold the tube submerged until the dough is golden brown and blistered, about 1 to 2 minutes per side.
- Remove the shells from the oil and immediately slide them off the metal tubes onto a paper towel-lined plate to drain excess oil. Let them cool completely.
- Fill and serve: Once the shells are completely cool, carefully pipe the chilled ricotta filling into both ends of each shell using a pastry bag fitted with a large star tip.
- Dust the filled cannoli generously with powdered sugar before serving.
Notes
- Drain the ricotta cheese in a fine-mesh sieve lined with cheesecloth in the refrigerator for at least 8 hours, or overnight, to remove excess moisture. This prevents soggy shells.
- If you do not have cannoli tubes, you can wrap the dough around small, heat-safe metal cylinders or even thick dowels wrapped tightly in aluminum foil.
- Fill the cannoli shells just before serving to keep the shells crispy.
Nutrition
- Serving Size: 1 cannoli
- Calories: 350
- Sugar: 25
- Sodium: 120
- Fat: 18
- Saturated Fat: 10
- Unsaturated Fat: 8
- Trans Fat: 0
- Carbohydrates: 40
- Fiber: 1
- Protein: 10
- Cholesterol: 55