

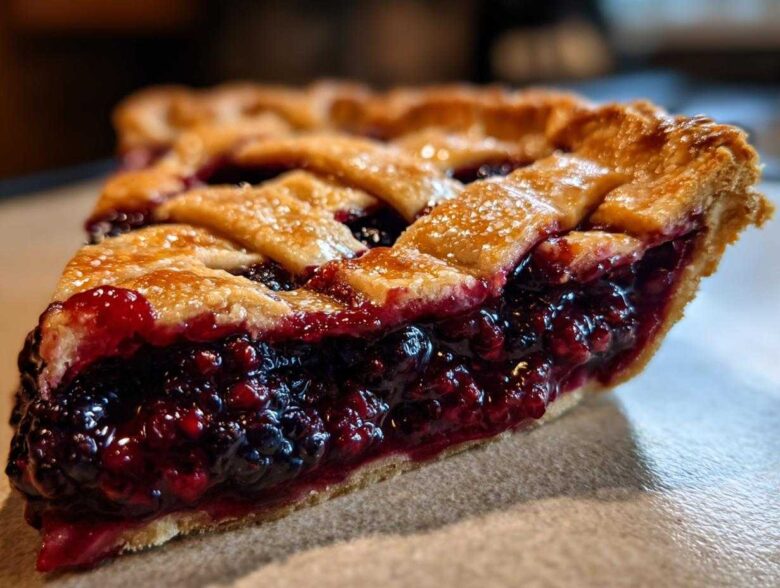
Oh, that smell! You know the one—that mix of warm, slightly caramelized sugar and burst fruit that just fills your whole house? Nothing beats it, especially when it’s coming from a fresh **blackberry pie**. Seriously, gathering berries in the summer is one of my favorite memories, and this recipe is the absolute gold standard for turning those jewels into an old-fashioned dessert. Forget dry centers or soupy bottoms; this is the best, easy-to-follow recipe for a truly homemade blackberry pie. My family practically demands it for every holiday now, and trust me, achieving that flaky pie crust success every single time is totally possible!
We started using this exact method after a disastrous Thanksgiving where another pie ended up runny. Since then, we’ve perfected the delicate balance for that thick, juicy filling. You can learn a little more about our baking philosophy over at our little corner of the kitchen, but for now, let’s get baking!
Why This is the Best Blackberry Pie Recipe (EEAT Focus)
Honestly, this version shines because we aren’t messing around with the crust. Keeping that butter icy cold guarantees you get those amazing little pockets of steam that make the pastry so flaky. Then there’s the filling; we use just enough cornstarch to keep the juices thick and luscious, but never gummy.
You get that perfect sweet-tart punch that makes a classic **blackberry pie** so addictive. It’s sturdy enough to hold its shape, yet melts in your mouth. It’s the pie that never fails me!
Ingredients for Your Classic Homemade Blackberry Pie
When it comes to this pie, precision really matters, especially with the cold elements. You can’t just toss things in; you need to measure correctly for that perfect flaky pie crust recipe to work its magic before we even talk about the sweet-tart filling.
For the Flaky Pie Crust Dough
Remember, the colder everything is for the pastry, the flakier it gets! Grab:
- 2 1/2 cups all-purpose flour
- 1 teaspoon salt
- 1 cup (2 sticks) very cold unsalted butter, cut into small cubes
- 1/2 cup ice water, plus a tiny bit more only if you absolutely need it
For the Juicy Blackberry Filling
This is where we ensure a thick, gorgeous filling that won’t run everywhere when you slice it:
- 6 cups fresh or frozen blackberries (no need to thaw those frozen guys!)
- 1 1/2 cups granulated sugar (taste your berries first, you might adjust this!)
- 1/4 cup cornstarch—this is our secret weapon for that super juicy blackberry filling!
- 1 tablespoon lemon juice for brightness
- 1/4 teaspoon ground cinnamon to warm it up
- 1 large egg, beaten up for the shiny wash
- 1 tablespoon coarse sugar for sprinkling on top
How to Make the Flaky Pie Crust Recipe
First things first: the dough for this **blackberry pie** needs time to relax. You have to treat your ingredients right here because this is the backbone of the whole dessert! Whisk your flour and salt together in a big bowl. Now, grab that cold butter—I mean *really* cold, straight from the fridge! You need to cut that butter into the flour. I like using a pastry blender, but your fingers work too, just move fast so the butter doesn’t melt.
You’re looking for pieces that look like small peas, maybe some slightly bigger almonds. That’s what creates the layers! Next, drizzle in your ice water, just a tablespoon at a time. Stop mixing the second the dough seems like it holds together when you squeeze a handful. Divide it, wrap those two discs tight, and let them chill for at least an hour. If you skip this chilling step, that flaky pie crust recipe will fight you when you try to roll it out later!
For more tips on handling delicate crusts, check out my thoughts on decorative edges over at my guide to decorative crusts.
Assembling and Baking Your Blackberry Pie
Okay, now comes the fun part: putting this beautiful **blackberry pie** together! Make sure your oven is heating up to 400°F (200°C). Take one chilled dough disc and roll it out on a lightly floured surface into about a 12-inch circle. Gently ease that into your 9-inch pie plate, letting the extra hang over the edge a little bit—don’t panic, we trim later.
Time for that gorgeous filling! Pour your mixed berries right into the crust. If you saved any little scraps of butter, dot a few teensy pieces over the top of the fruit; it just adds a quick richness. Now, that second dough disc? Roll it out. This is where you decide if you want the showstopper lattice or the simple vent top.
Once your top is on, trim both edges so they line up, fold them under neatly, and crimp them with your fingers or a fork—make it look homemade and cozy! Brush the whole top surface with that beaten egg, and don’t forget to sprinkle on that coarse sugar for crunch. Pop it on a baking sheet (trust me, something will leak!) and slide it in. Bake it hard at 400°F for 20 minutes. Then, drop the temperature down to 375°F and let it bake another 35 to 45 minutes until that filling is thick and bubbly, and the crust is deep golden brown. It’s almost done!
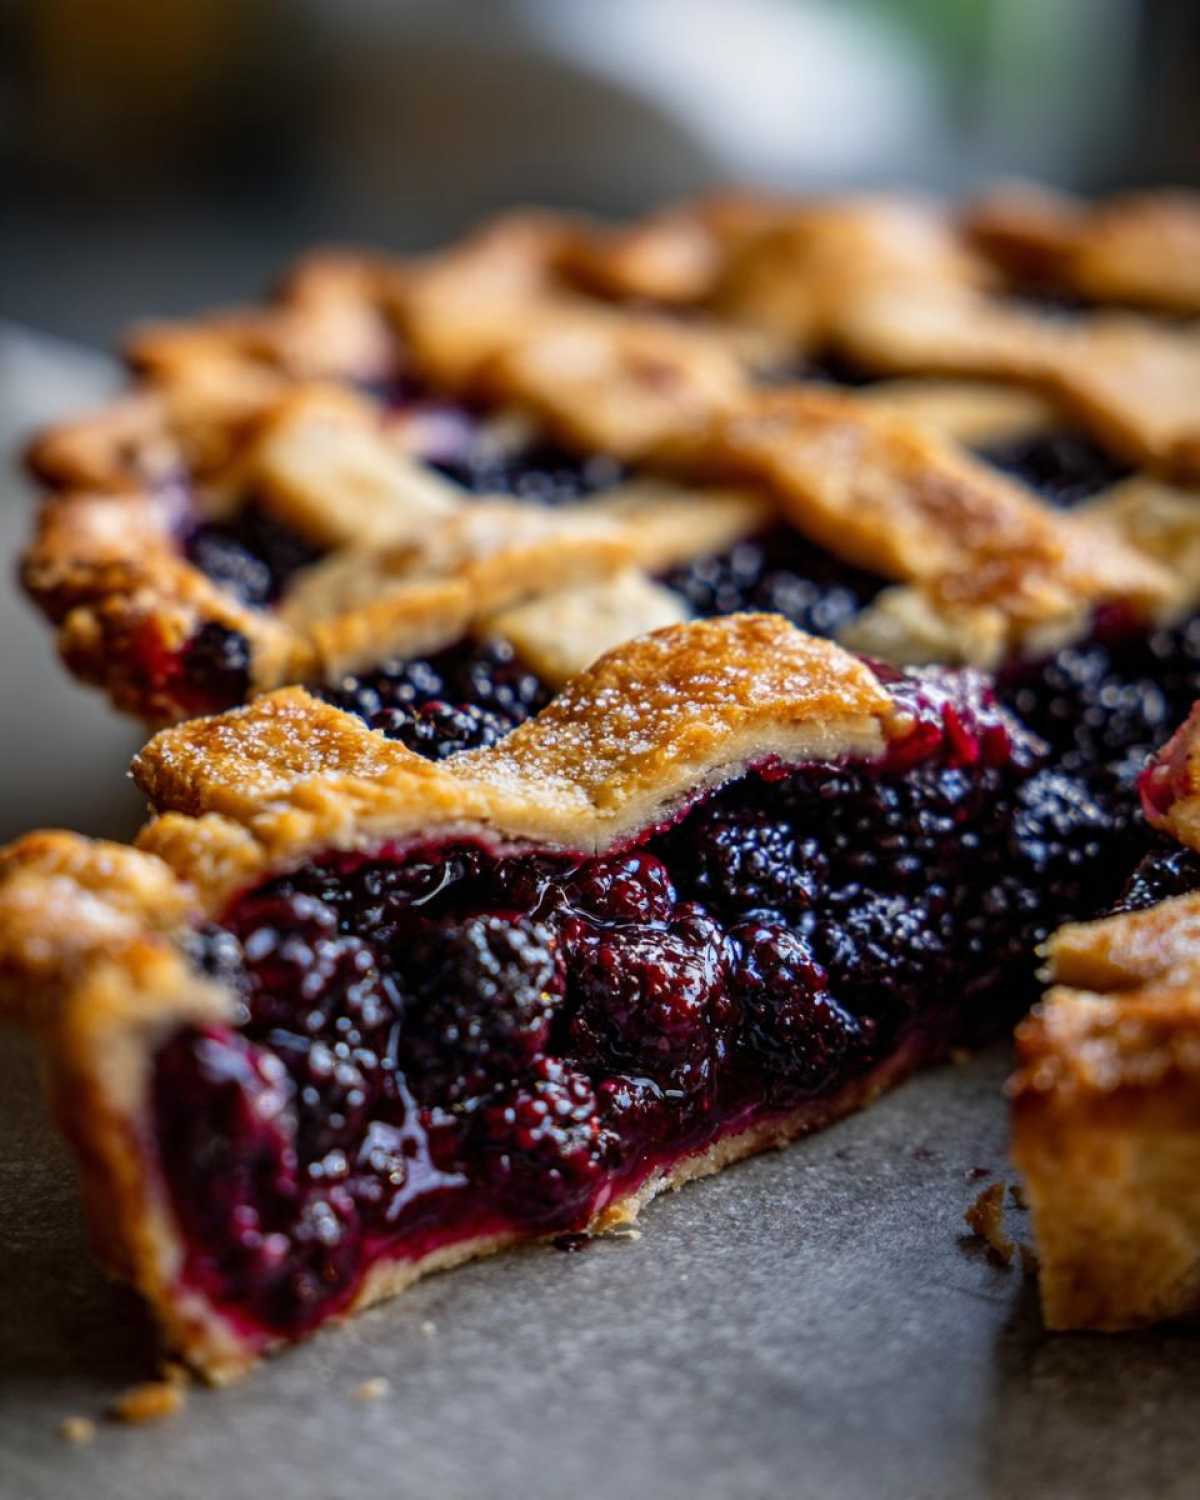
Creating the Lattice Crust Pie Tutorial
If you’re going for the fancy look, cut your top dough into even strips, say about 3/4 inch wide. Lay half of them parallel across the pie filling. Now, fold back every *other* strip halfway, lay one strip perpendicular across the middle space, and then unfold the strips you folded back. Repeat this process, alternating which strips you fold back each time, to create that classic woven effect. Just seal the ends securely when you finish your weave!
Tips for Success When Making Old Fashioned Blackberry Pie
We’ve all been burned by a runny pie, haven’t we? To make sure this **blackberry pie** is the best it can be, here are a few things I absolutely insist on doing. First, if you’re worried about the bottom crust getting soggy, try brushing the bottom crust lightly with a bit of egg white before you even pour in the fruit mixture. It acts like a little waterproof barrier!
Second, use that cornstarch mixture swiftly—don’t let the berries sit in it for hours; you want it to get working fast in the oven. My biggest instruction, though, is patience at the end. Do NOT slice into this pie when it comes out of the oven! It might look slightly wobbly, but you absolutely must let it cool for four hours. That cooling time is what lets the filling magically set up into that perfect, thick consistency.
If you need more general baking advice to keep your kitchen running smoothly, I’ve posted a few thoughts on my baking blog!
Storing and Reheating Your Perfect Blackberry Pie
Okay, so you have leftovers—yay! Since this is a fresh fruit pie, don’t leave it sitting out for days. At cool room temperature, it’s fine covered tightly for about a day, especially if you used an egg wash top. But for longer storage, cover it loosely and tuck it into the fridge for up to four days.
When you want to reheat a slice, never use the microwave unless you enjoy a sad, floppy crust! Pop that slice on a small baking sheet and warm it in a low oven—think 300°F—for about 10 minutes. It warms the filling beautifully while crisping up the edges again!
Frequently Asked Questions About Blackberry Pie Recipe
I get so many questions about this recipe because everyone wants to nail that perfect balance. Here are the three things I hear most often when people are trying to create their own stunning **blackberry pie**!
Can I use frozen berries in this easy blackberry pie recipe?
Absolutely, you can! That’s the great thing about this recipe—it works wonderfully with frozen blackberries. The main thing you have to remember is *not* to thaw them first. Just keep them frozen solid and mix them right into the sugar and cornstarch. The texture holds up beautifully, making this an excellent year-round option for fresh blackberry desserts! If you want to learn more about using frozen fruit in baking, I have some general tips over at my smoothie tips page, which surprisingly shares some baking principles!
What is the secret to a juicy blackberry filling?
It seems counterintuitive, but the secret to a *juicy* but not *runny* filling is our thickener, the cornstarch! When you mix it well with the sugar before adding it to the fruit, it ensures that when the pie heats up, the starch gels immediately, trapping the berry liquid. But honestly, the real secret weapon is the cooling time. If you slice it hot, it’s soup. Let it sit for four hours, and that cornstarch has time to set completely, giving you that perfect, thick, juicy texture.
Serving Suggestions for a Seasonal Berry Baking Treat
This **blackberry pie** is rich enough to stand on its own, but why stop there? For a true classic fruit pie experience, you just have to serve a warm slice with a scoop of really good vanilla bean ice cream—that creamy cold dissolving into the warm fruit is heaven. It’s also fantastic with a dollop of homemade whipped cream sprinkled with a tiny bit of cinnamon. Pure, simple seasonal berry baking perfection!
If you want another classic fruit dessert idea, check out this oatmeal recipe; it hits the cozy spot just right.
Estimated Nutritional Data for Blackberry Pie
I’m not a nutritionist, obviously, but for those who track things, I pulled these rough estimates based on the ingredients for one slice. Remember, because we use real butter and plenty of fruit, this is definitely a treat!
- Serving Size: 1 slice
- Calories: 420
- Fat: 22g (mostly from that flaky crust!)
- Sugar: 35g
- Carbohydrates: 58g
Please see our official disclaimer page for more information on how these estimates may vary based on ingredient brand and exact preparation.
Serving Suggestions for a Seasonal Berry Baking Treat
This **blackberry pie** is rich enough to stand on its own, but why stop there? For a true classic fruit pie experience, you just have to serve a warm slice with a scoop of really good vanilla bean ice cream—that creamy cold dissolving into the warm fruit is heaven. It’s also fantastic with a dollop of homemade whipped cream sprinkled with a tiny bit of cinnamon. Pure, simple seasonal berry baking perfection!
If you want another classic fruit dessert idea, check out this oatmeal recipe; it hits the cozy spot just right.
Estimated Nutritional Data for Blackberry Pie
I’m not a nutritionist, obviously, but for those who track things, I pulled these rough estimates based on the ingredients for one slice. Remember, because we use real butter and plenty of fruit, this is definitely a treat!
- Serving Size: 1 slice
- Calories: 420
- Fat: 22g (mostly from that flaky crust!)
- Sugar: 35g
- Carbohydrates: 58g
Please see our official disclaimer page for more information on how these estimates may vary based on ingredient brand and exact preparation.
PrintClassic Homemade Blackberry Pie
Follow this recipe to make a classic blackberry pie with a flaky crust and a juicy, sweet-tart filling.
- Prep Time: 45 min
- Cook Time: 65 min
- Total Time: 110 min
- Yield: 8 servings
- Category: Dessert
- Method: Baking
- Cuisine: American
- Diet: Vegetarian
Ingredients
- 2 1/2 cups all-purpose flour
- 1 teaspoon salt
- 1 cup (2 sticks) cold unsalted butter, cut into cubes
- 1/2 cup ice water, plus more if needed
- 6 cups fresh or frozen blackberries
- 1 1/2 cups granulated sugar (adjust based on berry tartness)
- 1/4 cup cornstarch
- 1 tablespoon lemon juice
- 1/4 teaspoon ground cinnamon
- 1 large egg, beaten (for egg wash)
- 1 tablespoon coarse sugar (for sprinkling)
Instructions
- Prepare the pie dough: In a large bowl, whisk together the flour and salt. Cut in the cold butter using a pastry blender or your fingers until the mixture resembles coarse crumbs with some pea-sized pieces of butter remaining. Gradually add ice water, one tablespoon at a time, mixing until the dough just comes together. Divide the dough in half, form two discs, wrap them in plastic, and chill for at least 1 hour.
- Prepare the filling: In a separate bowl, gently combine the blackberries, granulated sugar, cornstarch, lemon juice, and cinnamon. Set aside while you roll out the dough.
- Preheat your oven to 400°F (200°C).
- Roll out the bottom crust: On a lightly floured surface, roll one dough disc into a 12-inch circle. Carefully transfer it to a 9-inch pie plate. Trim the edges, leaving a 1-inch overhang.
- Fill the pie: Pour the blackberry filling into the crust. Dot the top of the berries with a few small pieces of leftover butter if desired for extra richness.
- Create the top crust: Roll out the second dough disc. You can either place it whole over the filling (cutting vents) or cut it into strips to create a lattice top. If using a lattice, weave the strips over the filling.
- Seal and crimp: Trim the top crust overhang to match the bottom. Fold the edges under and crimp them decoratively.
- Apply egg wash: Brush the top crust lightly with the beaten egg and sprinkle with coarse sugar.
- Bake: Place the pie on a baking sheet (to catch drips). Bake at 400°F (200°C) for 20 minutes. Reduce the oven temperature to 375°F (190°C) and continue baking for another 35 to 45 minutes, or until the crust is golden brown and the filling is bubbling thickly. If the edges brown too quickly, cover them loosely with foil.
- Cool: Let the pie cool completely on a wire rack for at least 3 to 4 hours before slicing. This allows the filling to set properly.
Notes
- If using frozen blackberries, do not thaw them first; use them directly in the filling mixture.
- For an extra flaky crust, keep all ingredients, especially the butter and water, very cold.
- If your berries are very tart, you may add up to 1/4 cup more sugar to the filling mixture.
Nutrition
- Serving Size: 1 slice
- Calories: 420
- Sugar: 35g
- Sodium: 180mg
- Fat: 22g
- Saturated Fat: 14g
- Unsaturated Fat: 8g
- Trans Fat: 0g
- Carbohydrates: 58g
- Fiber: 4g
- Protein: 5g
- Cholesterol: 55mg