

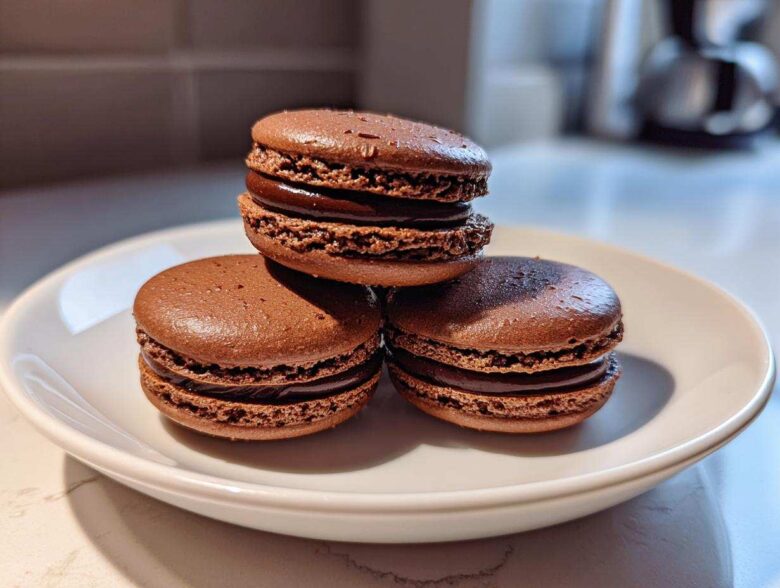
Oh my gosh, French baking! It can make you feel like a genius one minute and an absolute disaster the next, right? Everyone warns you about macarons, especially when cocoa powder gets involved because those little dark shells can be so temperamental. For years, I fought with hollow centers and flat, sad tops. It was frustrating! Trust me, though, after a ton of trial and error—and maybe a few ruined batches—I finally cracked the code for the most beautiful, chewy chocolate macarons.
This isn’t just another recipe update. This, my friends, is the foolproof guide. We are not going to have cracked shells or weird surfaces; we’re going all in for those gorgeous ruffled “feet.” I’ve documented everything I learned about aging the whites and perfecting the macaronage stage so you can skip the stress and go straight to enjoying these elegant little bombs of chocolate flavor. If you want to see the behind-the-scenes secrets of how I finally achieved this perfection, you can check out my story here: why I share my baking journey.
Why This Is Your Foolproof Guide to Chocolate Macarons
So, why are you going to trust this method over the twenty others you’ve scrolled past? Simple: We are focusing only on the steps that actually matter for bomb-proof shells. Forget guesswork! Every step here is designed to eliminate the common drama associated with these delicate French pastries.
When you follow this guide, you guarantee:
- Flawless, chewy chocolate macarons that taste like heaven when you bite in.
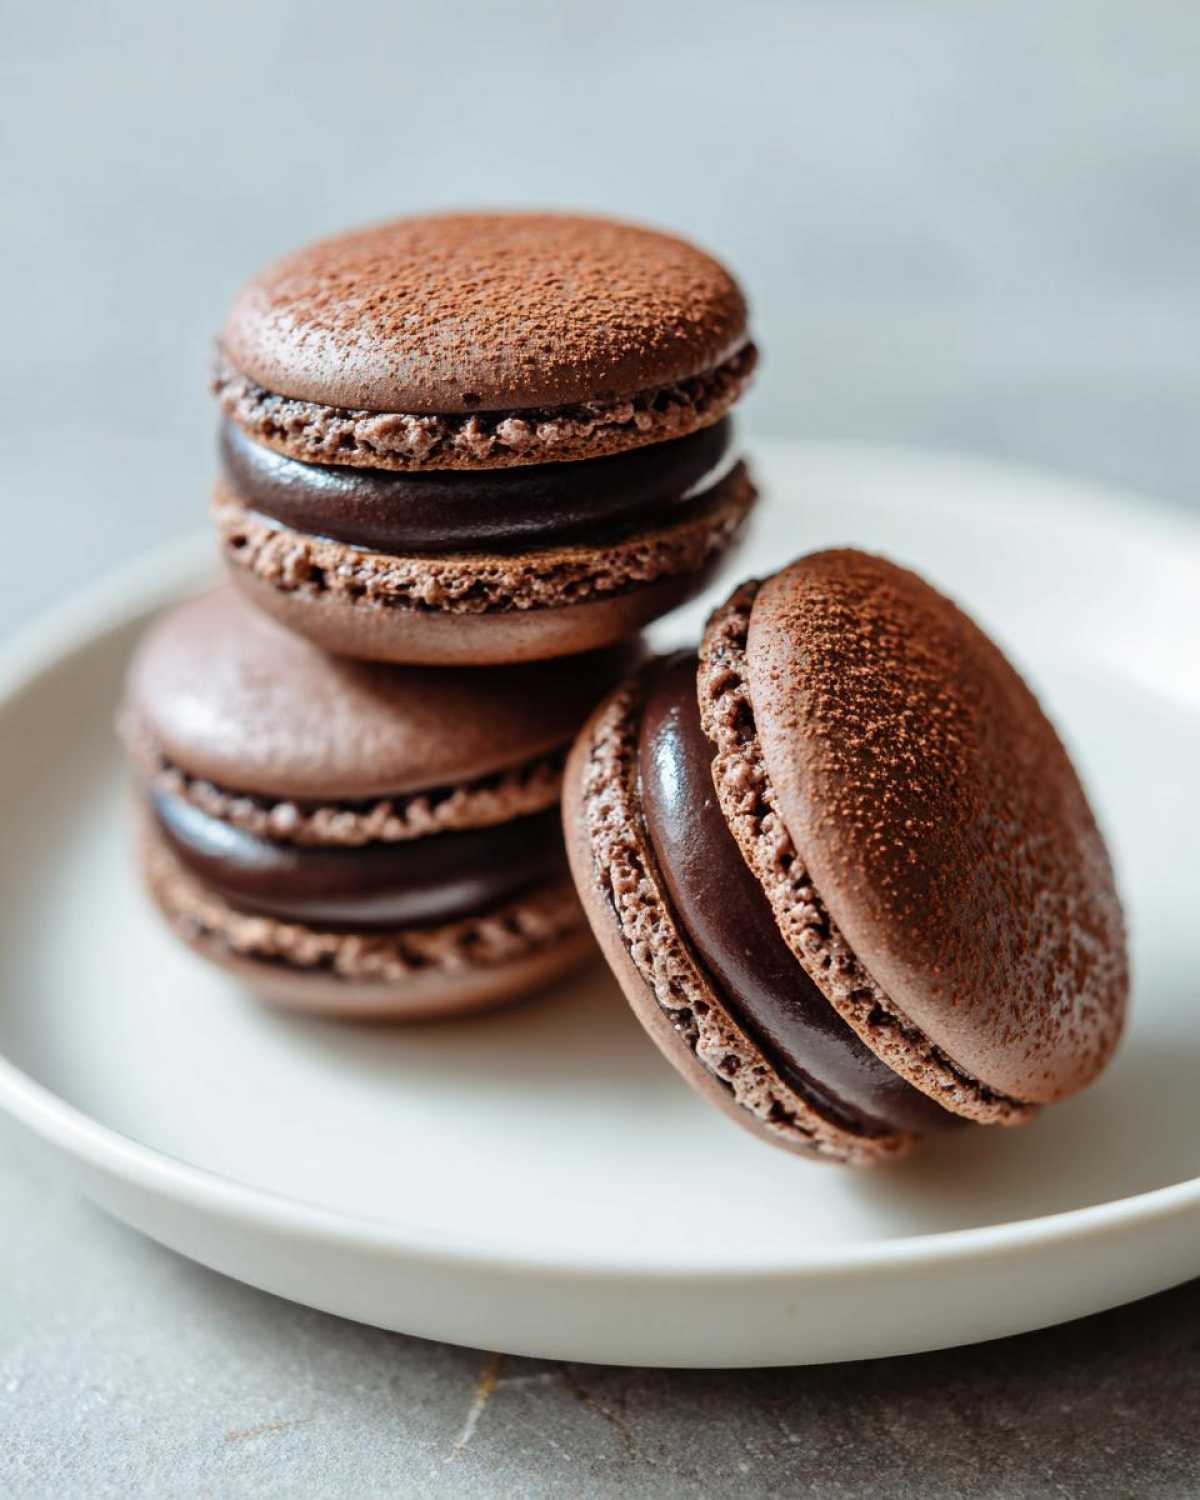
- The appearance of those oh-so-desirable ruffled edges—yes, we are talking about perfect macaron feet!
- That dreaded air bubble issue is solved before they even hit the oven.
Achieving Perfect Macaron Shells No Cracks
Cracks are the enemy, and we crush them with technique! The secret lies almost entirely in patience during the resting phase. You absolutely must let those piped circles dry out until they form a real skin. If you rush that rest time, the internal steam will push out violently during baking, causing a catastrophic crack right across the top. Also, don’t skip tapping those trays hard against the counter; we need to get those big, trapped air pockets out of there before they cause localized shattering.
Mastering the Perfect Macaron Feet
The “feet” are those adorable little ruffled bases that lift the shell up; they are the hallmark of a successful French macaron. They happen when the bottom cooks first, allowing the batter underneath to push up slightly before the top sets completely. Our specific macaronage instructions—which we dive into later—ensure the batter has just the right viscosity to achieve that lift every single time you bake these beauties.
Essential Ingredients for Gourmet Chocolate Macarons
Okay, listen up! If you take one thing away from this whole guide, it needs to be this: you MUST use a kitchen scale for these chocolate macarons. Seriously, throw out your measuring cups for this recipe. We are working with tiny margins here, and the difference between 100 grams of almond flour and 110 grams can ruin your whole day. Precision equals perfection, trust me on this one!
Ingredients for the Chocolate Macaron Shells
These are the main players for the shells. Remember, the egg whites? They need to be room temperature before we even start whisking. It makes a huge difference in the volume we get in that meringue.
- 100 g aged egg whites (room temperature)
- 100 g granulated sugar
- 100 g almond flour, finely ground
- 100 g powdered sugar
- 25 g unsweetened cocoa powder, sifted
- Pinch of cream of tartar (optional, but I like it for stability!)
Ingredients for the Chocolate Ganache Filling Recipe
This filling is so decadent and smooth. It sets up perfectly on those delicate shells. I sometimes add a tiny pinch of espresso powder here, but you can stick to the classic route if you like. If you’re looking for other filling ideas for different flavors of French macarons, I might have another post about that soon.
- 100 g dark chocolate (chopped)
- 100 ml heavy cream
Ingredient Notes and Substitutions for Chocolate Macarons
Now that you see what you need, let’s talk about *why* these specific things are non-negotiable for making truly gourmet chocolate macarons. This isn’t where you start substituting things just because you’re out of one item. Baking is chemistry, and these ingredients play specific roles in getting those perfect shells.
If you ever need to reach out with a tricky question while you’re deep in the process, don’t hesitate to get in touch via my contact page. I love hearing about your successes!
The Role of Aged Egg Whites
I know, aging egg whites sounds fancy, like something only professional pastry chefs do, but it’s super important, especially when we are dealing with the density cocoa powder adds. When you separate chicken eggs, the whites have two proteins: one that makes them sturdy and one that makes them runny. When you let them sit, uncovered loosely, in the fridge for a day or two—that’s aging!—the runny part thins out.
Why care? Because aged whites whip up to a much more voluminous, stable meringue that can hold all that sugar and cocoa powder without deflating later. If you try to make these chocolate macarons with fresh whites, you might find your meringue is sloppy and your feet never show up. Just separate them a couple of days early and cover the bowl loosely with plastic wrap with a few holes poked in it. Easy extra step!
Cocoa Powder Selection for Macarons
This is critical for the color and the rise! Most recipes call for unsweetened cocoa powder, and usually, that means natural unsweetened cocoa. Natural cocoa is acidic, which reacts really well with the baking soda (if we were using it) but more importantly here, it helps create the right structure when mixed with the meringue.
Dutch-process cocoa, which has been neutralized, is often darker and smoother, and while it tastes wonderful, it doesn’t behave the same way chemically in a delicate structure like a macaron. Stick to unsweetened natural cocoa powder for the best results unless the recipe specifically calls for Dutch-process. It might seem like a small detail, but it affects the final rise and texture of those precious shells!
Step-by-Step Instructions for Baking Perfect Chocolate Macarons
Alright, here is where the actual magic happens! We’re putting all that prep work—the aging, the sifting—to good use. Remember what I said about precision? It matters most right now. If you feel nervous, just know that you can go peek at my baking diary over at my latest blog posts for reassurance. We’re mixing things gently but thoroughly to create the best possible base for our stunning chocolate macarons.
Preparing the Dry Mix and Making the Meringue
First things first: combine all your dry ingredients—the almond flour, powdered sugar, and that glorious cocoa powder—and sift them together. You really need to sift them well, and if you have clumps that won’t go through, toss ’em. They will just ruin the smoothness of your shell! Once that’s done, grab the cleanest bowl you own for the egg whites.
Start beating those room-temperature whites until they get foamy. If you have cream of tartar, throw a tiny pinch in now for good measure. Then, add the granulated sugar slowly—and I mean slowly—while you keep whipping. You want stiff, glossy peaks. When you lift the whisk, the meringue should stand up straight and proud, like a little snowy mountain.
Executing the Macaronage Technique for Chocolate Macarons
This is the step that separates the bakers from the nervous wreckers. We call it macaronage, and it means folding. Take one third of your dry mix and gently fold it into the stiff meringue. Once that’s incorporated, dump in the rest. You aren’t stirring; you are folding in circles, scraping down the sides and bottom of the bowl every few scoops.
The goal is the ‘lava stage.’ Seriously, look up videos if you need to, but you want the batter to flow off your spatula in one thick, slow ribbon. If it breaks, you need to fold more. If it disappears instantly, you’ve gone too far and will get flat cookies. It should take about 50-70 folds total, depending on your technique. Stop mixing the second it flows smoothly!
Piping, Tapping, and Developing Skin
Get that gooey chocolate batter into your piping bag. Pipe small, uniform circles onto your silicone mat or parchment paper. If you see any weird peaks, smooth them down with a slightly wet finger. Now for the real work for achieving macaron shells no cracks: you MUST tap the trays hard against your countertop about five or six times. Try to hear that satisfying *thud*! If you see any air bubbles stubbornly hanging around the top, pop them immediately with a toothpick.
Then, we wait. This resting period develops the skin, which is non-negotiable. Let them sit out until they feel dry to the touch—no batter sticks to your finger. This could be 30 minutes or an hour, depending on the weather.
Baking and Cooling the Shells
Preheat that oven to 300°F (150°C). Bake only one tray at a time if you can help it. They need 12 to 15 minutes. You’ll see the feet start to pop up around minute 8 or 9. The only true way to know they are done is the wiggle test: gently nudge a shell. If it wiggles on top of its foot, it needs another minute or two. If it’s rock solid, they are done!
Crucially, do not try to peel them off when they are hot! You will rip the bottom right off. Let them cool completely on that hot baking sheet. Once they are totally cool, they should release from the mat easily.
Creating the Silky Chocolate Ganache Filling Recipe
While the shells are cooling down—and seriously, don’t rush that cooling, patience is key—let’s whip up the gorgeous filling for your chocolate macarons. This dark chocolate ganache is rich, super smooth, and pairs perfectly with the slightly nutty shell.
Making ganache is so easy, it almost feels like cheating for how great it tastes. You heat the cream, pour it over the chocolate, and walk away for five minutes. I always use good quality dark chocolate here, like 60% or 70% cacao, because it’s what stands up best to the filling process.
Instructions for the Silky Chocolate Ganache:
- First, chop your chocolate finely and put it in a heatproof bowl. The smaller the pieces, the faster and smoother they melt!
- Heat your heavy cream on the stovetop or in the microwave until it’s just starting to simmer around the edges—don’t let it boil furiously! If you want a little extra flavor boost, maybe check out my creamy sauce tips for inspiration, even though this is chocolate.
- Pour that hot cream right over your chopped chocolate. Now, here’s the crucial part: step away for five solid minutes. Don’t touch it! You need that heat to penetrate all the chocolate bits.
- After the wait, take a whisk and start gently stirring from the very center, making small circles that gradually get wider. It will start to emulsify into this beautiful, shiny chocolate pool. Whisk until it’s perfectly smooth and looks like dark velvet.
Now for the most important part of making the filling: cooling! You cannot fill your beautiful shells with hot ganache unless you want a melted mess. The ganache needs to cool down and thicken up until it’s pipeable—think peanut butter consistency, but creamier. If you put it in the fridge, you need to check it every 15 minutes or so, because it hardens really fast. Room temperature usually works best if your kitchen isn’t too warm. That perfect, pipeable texture is what guarantees that satisfying squeeze when you sandwich your two shells together!
Assembling and Maturing Your Homemade French Macarons
The hard work is done! You have perfect chocolate shells and beautifully set ganache. Now we put it together. This feels like the final, delicate step in creating your truly elegant baking masterpiece. Take your time matching up shells that are similar in size—like pairing shoes! You want a nice, even, beautiful sandwich.
Pipe a nice, generous dollop of that cooled ganache right onto the flat side of one shell. Don’t go too close to the edge, or it’ll squish out everywhere when you press down. Then, gently take the second shell, twist it slightly onto the filling, and press softly until the filling just reaches the edge. Wow, they look incredible!
But wait! Before you eat them all in one sitting (I know, temptation is real!), you must let your homemade french macarons “mature.” This means putting them in an airtight container in the fridge for at least 24 hours. I know, it’s torture! But trust me, this chilling period allows the moisture from the ganache to move into the crisp shell. This process changes the texture from brittle to that irresistibly chewy center we are aiming for. It’s the secret to a truly gourmet experience!
Macaron Troubleshooting Tips for Chocolate Macarons
Okay, even with the best map, sometimes things go wonky in the kitchen, right? Macarons, especially these dark, rich chocolate macarons, have a lot of places they can go wrong. Don’t panic if your first batch isn’t magazine-perfect! These macaron troubleshooting tips are based on my own baking disasters, so you know they come from experience. You can always check out my recipe for apple cinnamon oatmeal if you need a baking break that’s a little more forgiving!
Think of these notes as your field guide to fixing common issues. We’re going to focus on the big three: hollows, cracks, and missing feet. If you can conquer these, you are basically a French pastry wizard!
Why Are My Macaron Shells Developing Hollows?
Hollows—those annoying air gaps between the shell top and the underside—are the bane of every baker’s existence. This issue usually boils down to two things, both related to air management. First, if you didn’t tap your trays hard enough against the counter when piping, you left big pockets of air trapped in the batter that cooked out, leaving a void.
Second, and this is a big one for chocolate, if you over-mixed the batter during macaronage, the structure gets too weak. It can’t support itself during the bake, and the center collapses, creating that hollow space. You need that perfect lava flow, but no more! Sometimes, even improper aging of the egg whites can lead to a meringue that just can’t hold the structure.
What Causes My Chocolate Macarons to Crack?
I mentioned this before, but it’s worth repeating because it’s such a common problem: Cracking usually means the shells didn’t rest long enough. That dry skin you build up while they air-dry acts like a seal. If that seal isn’t there, the steam generated inside the cookie pushes up and bursts through the soft surface. That’s the loud, sad sound of a cracked shell!
Another reason? Your oven is too hot! If the outside cooks too fast, it sets hard before the inside has a chance to rise and form its foot. If you notice cracks even when the skin feels dry, try dropping your oven temperature by 10 degrees Fahrenheit next time. Also, make sure you are using room temperature or cool oven racks, not one sitting directly over a hot burner.
Why Aren’t My Macarons Forming Feet?
Missing feet look like sad, flat cookies resting directly on the baking sheet. This is almost always a temperature or structure issue. If your batter was too runny (over-mixed!), it spreads too thin before it sets, so there’s no base left to lift up. Remember that lava stage we obsessed over? That’s the key to the foot!
The other main culprit is the oven temperature again. If the oven isn’t hot enough, the outside of the shell doesn’t set quickly enough to trap the expanding air underneath. The air just leaks out the sides slowly instead of pushing the shell upwards. Make sure your oven gauge is accurate—I got a cheap oven thermometer, and honestly, it saved my baking life!
Storage and Serving Suggestions for Delicate French Pastries
Congratulations! You’ve successfully assembled your beautiful little towers of chocolate joy. Now comes the final, slightly agonizing test: waiting. But seriously, don’t just leave these gorgeous, delicate French pastries sitting on the counter. They need a little time to become truly perfect, chewy treats.
If you’re planning a party or just baking ahead, store them in an airtight container in the refrigerator. I know, I know, you want to eat them immediately! But remember that maturation process we talked about earlier? That 24-hour rest in the fridge is non-negotiable for achieving that ultimate texture where the shell is crisp on the outside but melts in your mouth on the inside. They’ll stay wonderful in the fridge for about five days once matured.
When you’re ready to serve them, just pull them out of the fridge about 20 to 30 minutes before you plan to eat them. Letting them warm up just slightly really brings out the deep flavor of that rich chocolate ganache filling. Honestly, there’s no better accompaniment than a strong, slightly bitter cup of coffee or a hot espresso. The bitterness cuts through the sweetness of the shell perfectly. It’s a moment of pure, elegant bliss!
Quick Answers About Making Chocolate Macarons
I know you’ve probably got a million little questions simmering in your head while you’re mixing the batter or waiting for the shells to dry. That’s totally normal when you’re trying something as specific as French baking! I’ve compiled the top things people ask me all the time. If you’re having a crisis mid-bake and need to jot down a question for later, you can shoot me a message via my contact page.
Can I make chocolate macarons without aging the egg whites?
You technically *can*, but please don’t if you’re trying to achieve those beautiful, high feet! Aging the egg whites—just leaving them loosely covered in the fridge for a day or two—helps them release some water and change their protein structure. This means you get a much stiffer, more stable meringue when you start whipping. Without that stability, especially balancing the dry cocoa powder, you risk having a weak batter that collapses, making easy chocolate macarons impossible.
What temperature should my oven be for the best results?
We are baking these delicate little guys low and slow! The instruction calls for 300°F (150°C). Keeping the temperature consistent is probably the most important factor after the macaronage step. If your oven runs hot, those shells will puff up way too fast and crack before they have a chance to set their structure. If you’re serious about baking perfect macarons at home, grab an oven thermometer just to double-check that your dial is accurate. Every degree matters!
How long do I need to rest the batter before baking my chocolate macarons?
This is probably the most common question because humidity totally messes with the timing! You need to let them rest until they develop a dry skin. This can take anywhere from 30 minutes on a dry day to over an hour if it’s humid in your kitchen. The skin test is simple: gently touch the top of a piped shell with the tip of your clean finger. If any batter sticks to you, they need more time. If it feels dry and cool, like a semi-hardened skin, they are ready for baking!
Share Your Perfect Chocolate Macarons Experience
Okay, that’s it! We’ve walked through the aging, the creaming, the macaronage, the tapping, and the aging of the filled shells. You are officially ready to create these exquisite chocolate macarons right in your own kitchen. I need to know how it went for you!
Did you conquer the macaronage on the first try? Did you get those gorgeous ruffled feet we talked so much about? Hit that comment section below and tell me everything. I want to hear about your wins, especially if you finally beat the dreaded crack battle or the hollow monster!
If you managed to take a sneaky picture of your finished batch, please tag me on social media! Seeing your successes with these delicate French pastries honestly makes my whole week. It proves that anyone can master this, even if you thought it was too technical before. If you run into any last-minute snags, don’t forget you can always drop me a line over on my contact page. Now go enjoy those beautiful, chewy treats!
PrintFoolproof Chocolate Macarons with Classic Silky Chocolate Ganache Filling
A detailed guide to making perfect French chocolate macarons with crisp shells, chewy centers, and a rich chocolate ganache filling, focusing on techniques to prevent cracks and achieve high feet.
- Prep Time: 45 min
- Cook Time: 15 min
- Total Time: 60 min
- Yield: 20 assembled macarons
- Category: Dessert
- Method: Baking
- Cuisine: French
- Diet: Vegetarian
Ingredients
- 100 g aged egg whites (room temperature)
- 100 g granulated sugar
- 100 g almond flour, finely ground
- 100 g powdered sugar
- 25 g unsweetened cocoa powder, sifted
- Pinch of cream of tartar (optional)
- For the Ganache: 100 g dark chocolate (chopped), 100 ml heavy cream
Instructions
- Prepare the Dry Ingredients: Sift the almond flour, powdered sugar, and cocoa powder together into a bowl. Discard any large pieces that do not pass through the sieve. Set aside.
- Make the Meringue (French Method): In a clean, grease-free bowl, beat the room-temperature egg whites until foamy. Add the cream of tartar, if using. Gradually add the granulated sugar while beating until stiff, glossy peaks form. The meringue should hold its shape when the whisk is lifted.
- Macaronage: Gently fold one-third of the dry ingredient mixture into the meringue using a spatula. Once mostly incorporated, add the remaining dry ingredients. Fold carefully, scraping the sides and bottom of the bowl, until the batter flows slowly off the spatula in a thick ribbon (the lava stage). Do not overmix.
- Pipe the Shells: Transfer the batter to a piping bag fitted with a round tip. Pipe 1.5-inch circles onto baking sheets lined with parchment paper or silicone mats.
- Tap Out Air: Firmly tap the baking sheets several times on the counter to release trapped air bubbles. Use a toothpick to pop any remaining visible bubbles on the surface.
- Rest (Develop Skin): Let the piped shells rest at room temperature until a dry skin forms on top. You should be able to lightly touch the surface without batter sticking to your finger. This can take 30 to 60 minutes depending on humidity.
- Bake: Preheat your oven to 300°F (150°C). Bake one sheet at a time for 12 to 15 minutes. The macarons are done when they do not wiggle on their feet when gently nudged.
- Cool: Let the shells cool completely on the baking sheet before attempting to remove them.
- Make the Ganache: Heat the heavy cream until just simmering. Pour the hot cream over the chopped dark chocolate. Let it sit for 5 minutes, then whisk until smooth and emulsified. Let the ganache cool and thicken to a pipeable consistency.
- Assemble: Pair similar-sized shells. Pipe a dollop of cooled ganache onto one shell and gently sandwich it with another.
Notes
- Age your egg whites by separating them 1-2 days ahead and storing them covered loosely in the refrigerator. Bring them to room temperature before use.
- Use a kitchen scale for accurate measurements; macaron making requires precision.
- If your shells crack, the batter was likely under-mixed, or they did not rest long enough to form a skin.
- For best texture, store filled macarons in an airtight container in the refrigerator for 24 hours before serving (maturation).
Nutrition
- Serving Size: 1 macaron
- Calories: 120
- Sugar: 12
- Sodium: 15
- Fat: 7
- Saturated Fat: 4
- Unsaturated Fat: 3
- Trans Fat: 0
- Carbohydrates: 14
- Fiber: 1
- Protein: 2
- Cholesterol: 10