

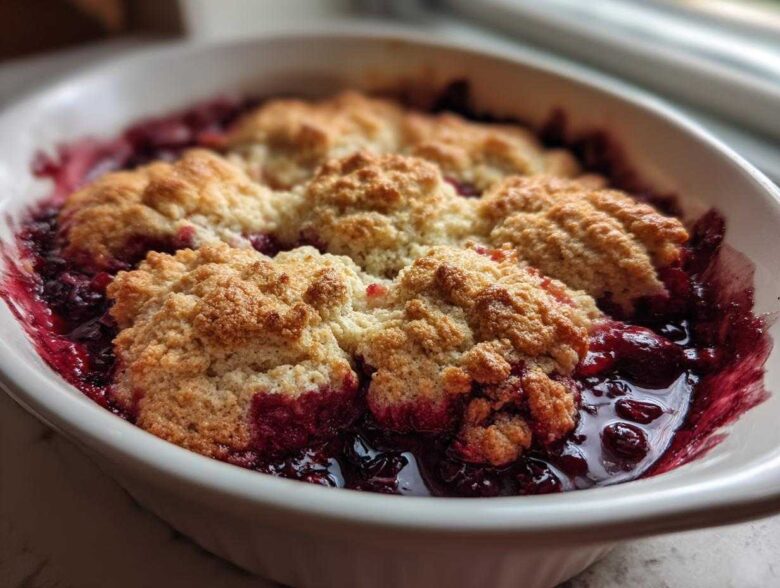
If you need a dessert that feels like a big, warm hug on a plate, forget fussy pastries—we need to talk about cobbler. Cobblers are the best for those nights when you want something rich and comforting but don’t have hours to spend fussing. Ethan and I spent years trying to merge my need for precise measurements with his desire to just toss things in until it smelled right. This recipe, our Easiest Mixed Berry Cobbler with Biscuit Topping, is where we landed. It’s tested, it’s true, and it manages to be both wonderfully simple for a weeknight and special enough for company. Seriously, this is the sweet, bubbly version of comfort food you’ve been hunting for. If you want to see all the other tips and tricks we’ve gathered in our kitchen lab, check out our main kitchen notebook here. It works perfectly with whatever berries you have on hand!
Why This Easy Berry Cobbler Recipe Is Your New Favorite Comfort Food Desserts
Look, when you need a warm berry dessert, you need it fast, right? That’s why I stand by this recipe as the best berry cobbler out there for busy nights. The real secret is that it doesn’t care if your berries are fresh or if you pulled them straight from the freezer bin—it handles both like a champ. Ethan calls it our go-to summer berry recipes backup, even in December!
Quick Fruit Dessert Ready in Under an Hour
You are looking at a 15-minute prep time, people! FIFTEEN MINUTES! That means by the time you’ve put away your measuring cups, the oven is already doing the heavy lifting. We’re looking at a total time of about 55 minutes from start to finish, which makes this a fantastic last minute dessert idea. If you’re stressed about having a simple baking recipe ready for company, this is your hero.
The Perfect Cobbler with Biscuit Topping Texture
Some people toss around the term berry crumble vs cobbler, but for me, it’s always about the biscuit. A crumble is great, sure, but it’s totally different. This recipe gives you that thick, tender biscuit topping that soaks up the juicy berry filling underneath. When you talk about true Southern style cobbler, you want that slightly chewy, soft biscuit layer hugging the fruit. It’s just divine, especially since it’s way less fussy than making a pie crust!
If you ever need a perfect pairing for a savory meal, I highly recommend checking out our easy cheesy enchiladas—they balance out the sweetness perfectly!
Ingredients for the Best Berry Cobbler
Okay, now for the good stuff—the actual list! Since Ethan is all about intuition and I’m all about not wasting a single berry, we put a ton of work into getting these measurements just right for the perfect berry cobbler. Remember, the key here is clarity, especially when it comes to temperature and how you cut things. Don’t skip the little notes; they make all the difference between good and unforgettable!
For an extra layer of flavor that Ethan insists makes this recipe shine, I always add just a tiny whisper of cinnamon in with the fruit. If you’re a flavor adventurer, feel free to go see what amazing things we’ve cooked up in our crockpot lasagna soup! It uses similar warm spices.
For the Jammy Mixed Berry Cobbler Filling
- 4 cups mixed berries (we love using leftovers for a blackberry raspberry cobbler feel, use whatever you have—fresh or frozen!)
- 1/2 cup granulated sugar (you might use less if your berries are super sweet, taste test!)
- 2 tablespoons cornstarch (this is crucial to thicken the juices)
- 1 tablespoon lemon juice (just brightens everything up)
- 1/4 teaspoon ground cinnamon (Ethan’s flavor tip! It deepens the berry flavor beautifully)
For the Tender Cobbler with Biscuit Topping
This is where we build that amazing, tender, biscuit-like topping. Keep everything cold here—that’s my one non-negotiable research finding for a great result!
- 1 1/2 cups all-purpose flour
- 2 tablespoons granulated sugar
- 1 tablespoon baking powder
- 1/2 teaspoon salt
- 1/2 cup (1 stick) cold unsalted butter, cut into small pieces (I mean *cold*, straight from the fridge!)
- 1/2 cup milk (whole milk gives the best richness)
- 1 large egg, lightly beaten (we brush this on top for that gorgeous golden color)
Step-by-Step Instructions for Your Homemade Cobbler Recipe
Putting together this berry cobbler is incredibly straightforward, but like any good recipe, the steps matter! Ethan actually likes to follow these steps exactly, which tells you they are foolproof. We are going to tackle this in three small sections: getting the fruit ready, mixing the topping, and then baking until it smells absolutely incredible in your whole house! We want that rich, warm feeling only a warm berry dessert coming out of the oven can give you.
Preparing the Berry Filling Base
First things first, get your oven temperature set. We are preheating to 375°F (190°C) right now. While that’s warming up, grab your 8×8 inch baking dish—or whatever 1.5-quart casserole dish you have handy—and give it a light grease. I like using a little cooking spray or butter right now.
Next, focus on the filling. Grab your biggest bowl and carefully toss the 4 cups of mixed berries with the 1/2 cup of sugar, the cornstarch, lemon juice, and that secret dash of cinnamon. Please be gentle here! We love how the berries look when they burst open while baking, but we don’t want them turning into soup before they even hit the oven. Stir just enough until you don’t see any dry white powder hanging around; ensuring that cornstarch is dissolved is key so your filling thickens up gorgeously.
Once everything looks coated and happy, pour that fruity mixture right into your prepared dish. It should settle nicely in the bottom.
Making and Dropping the Cobbler with Biscuit Topping
Now for the part that makes this a true cobbler! Wash your hands or grab a separate bowl for the topping. Whisk the flour, 2 tablespoons of sugar, baking powder, and salt together. We are making a biscuit here, so keep the dry stuff light and airy.
This next part is where I always remind Ethan to slow down. You need to cut that very cold butter into the flour mixture. Use your fingers or a pastry blender—I love using just my fingertips because I can feel when it’s right. You’re aiming for coarse crumbs, and you absolutely must have some pea-sized chunks of butter left over. These chunks turn into steam pockets during baking, giving you that lovely lift!
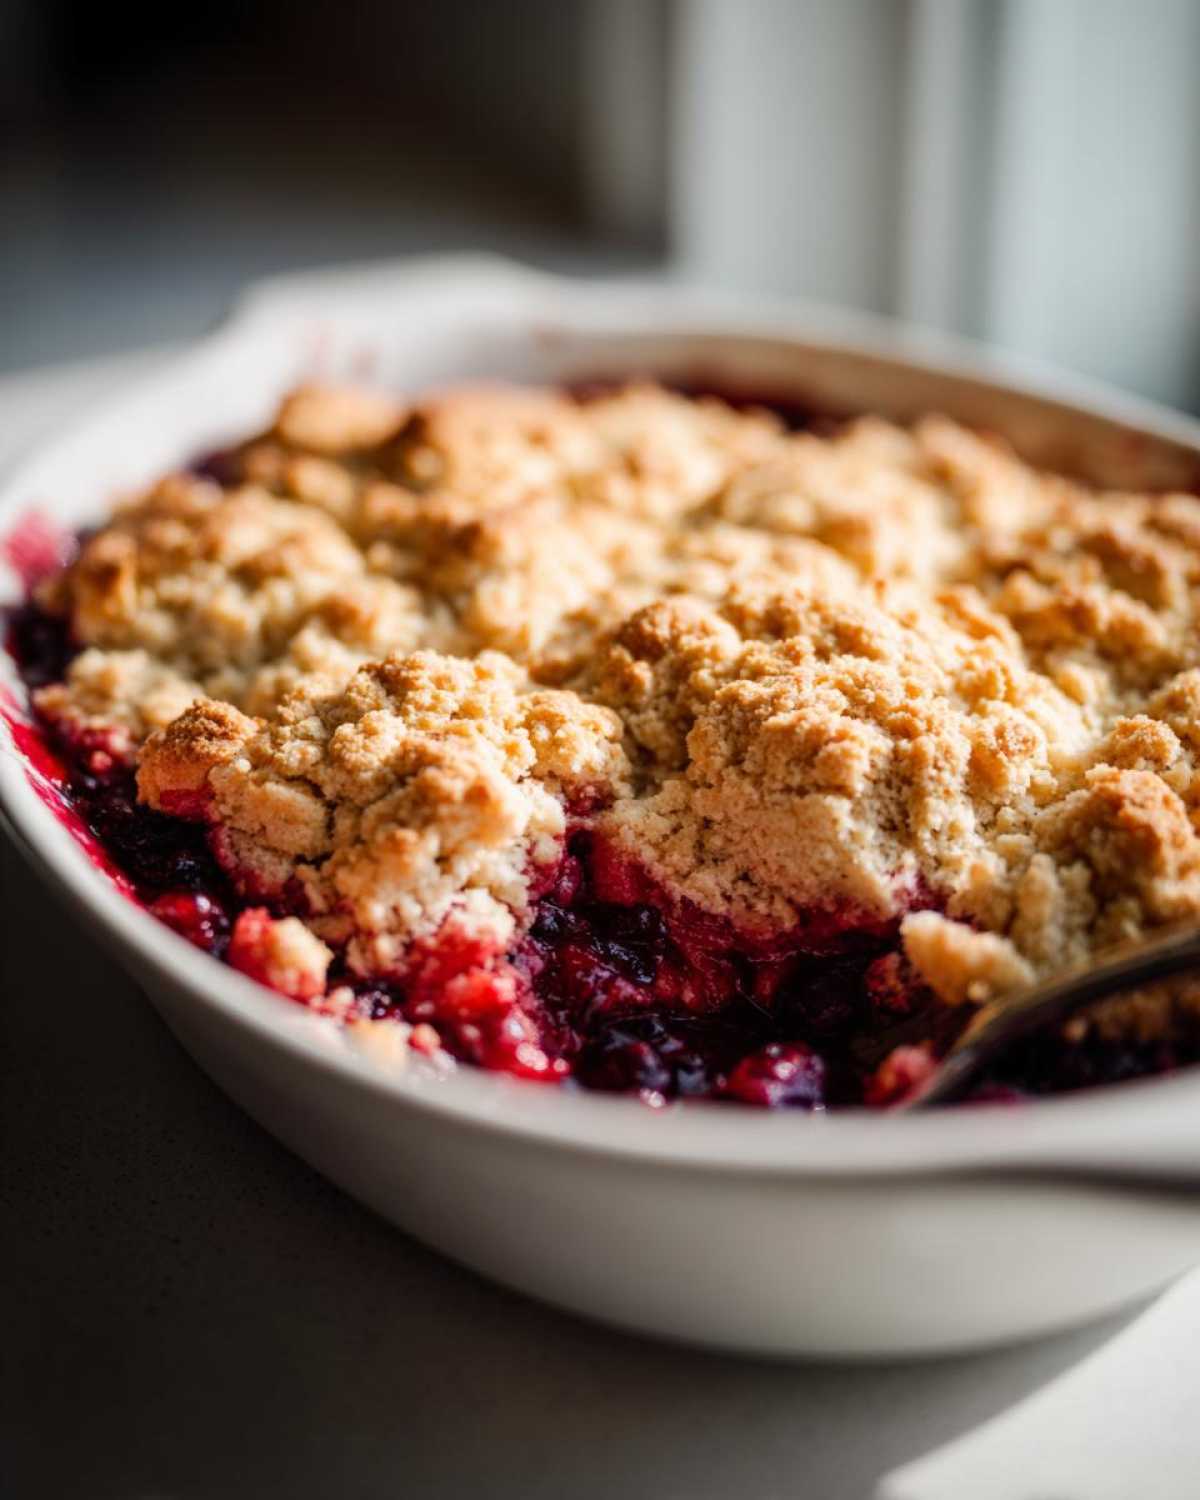
Pour in the milk and mix it—but this is my biggest rule: stop mixing the *second* it comes together into a shaggy, messy dough. If you mix it too much, you’ll have tough biscuits, not fluffy ones! Don’t worry if it looks a little lumpy or uneven; that’s exactly what we want for the cobbler with biscuit topping.
Use a spoon to drop large spoonfuls of this biscuit dough evenly over the berry filling. Trust me, you don’t need to make them pretty, and you don’t need to cover every single inch of fruit. Those gaps are perfect because they let you see that beautiful, jammy filling bubbling up, which is half the fun! Brush the tops lightly with that beaten egg right before it goes in.
If you want to see how we use similar techniques for an amazing apple dapple cake, go check that out after you pull this out of the oven!
Baking Times and Achieving Golden Perfection
Slide that dish into your preheated oven (375°F). You are going to bake this for about 35 to 45 minutes total. How do you know when it’s done? Don’t just trust the timer! You are looking for two big signals: first, the topping has to be deeply golden brown and look crisp on the edges. Second, and this is the most important part for that homemade cobbler recipe magic: the berry filling underneath should be vigorously, joyously bubbling up around the edges. That means it’s piping hot and ready to go.
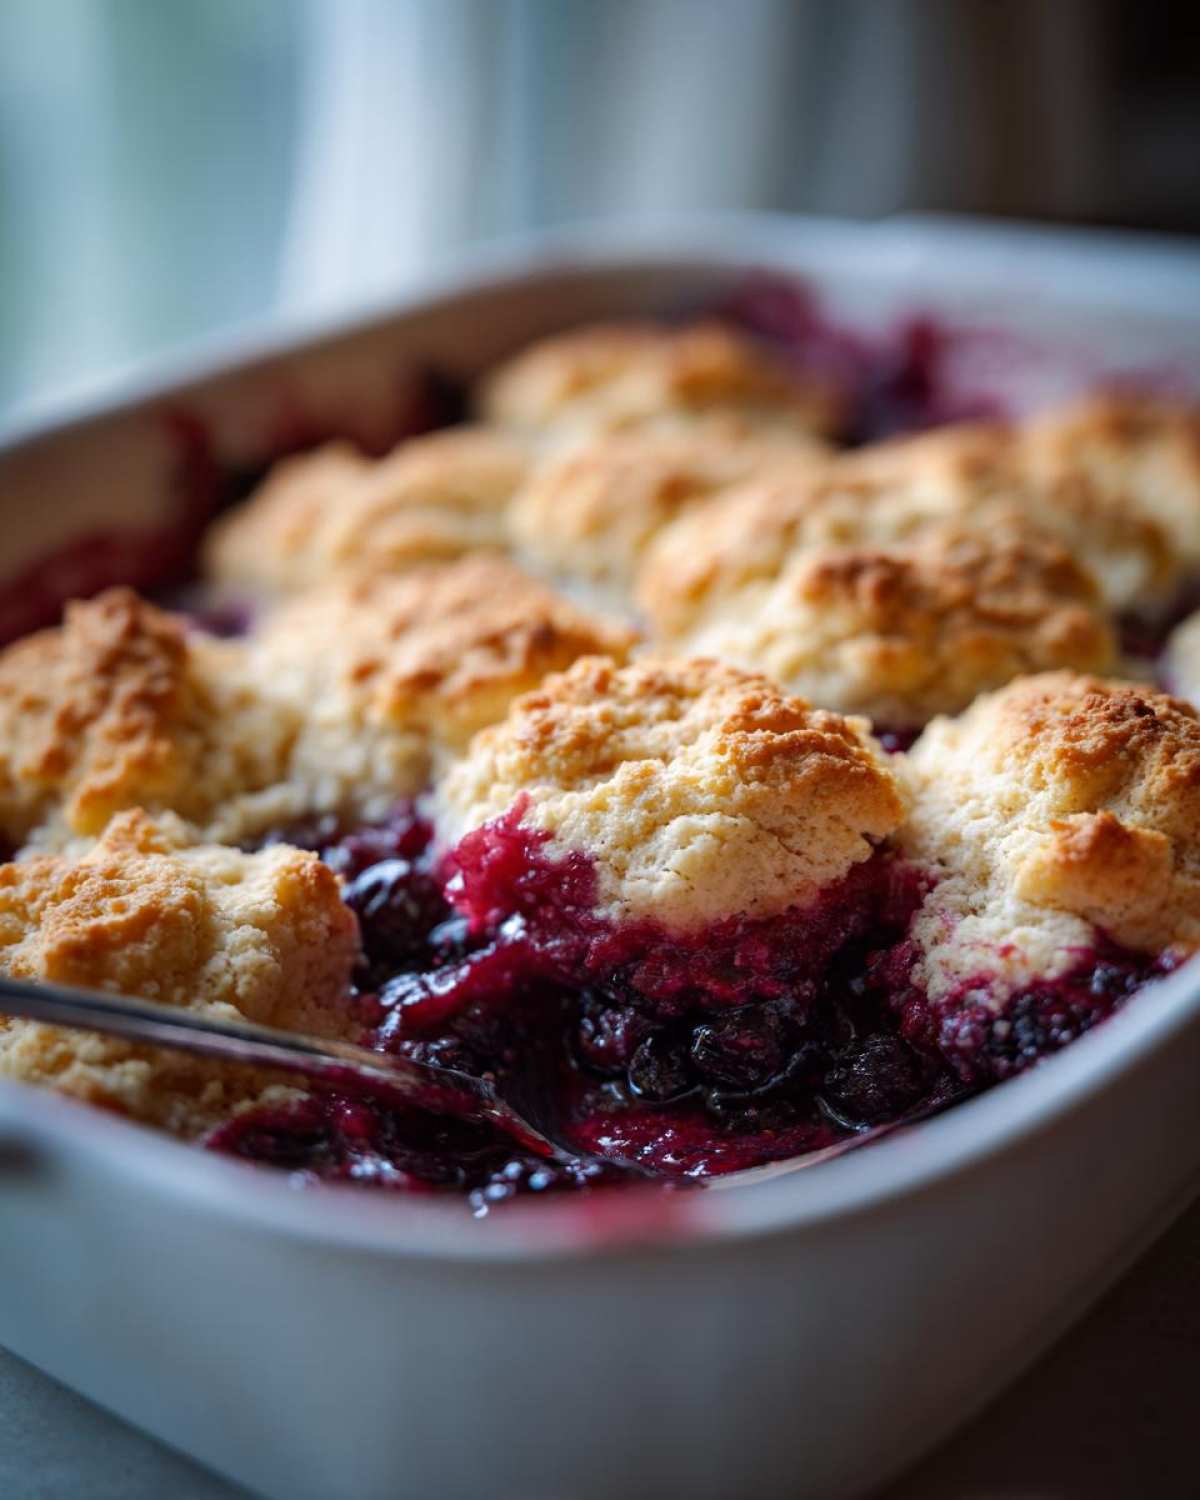
When you pull it out, you absolutely must let it rest! Don’t slice into it right away. Give your berry cobbler at least 15 minutes on the counter. This allows those hot, liquid juices to calm down and thicken up just a bit so they don’t run everywhere when you serve it. It will smell incredible during this waiting time, so distract yourself!
Tips for the Ultimate Fresh Berry Dessert Success
Ethan and I always joke that the difference between a good fresh berry dessert and an unforgettable one isn’t just the ingredients—it’s what you do when things don’t go exactly to plan. These are the little things we learned testing things out, often realizing that shortcuts or flexibility are exactly what we needed!
Before we get into topping adjustments, if you want to see the buttery, gooey disaster that was our first attempt at pecan pie cookies (we learned a lot!), you should definitely read that post. But for this cobbler, we’re focusing on making things easier for you!
Handling Frozen Berry Cobbler Ideas
This is the most common question I get: “What if I don’t have fresh berries?” Honestly, I prefer starting with frozen sometimes because it saves washing and hulling! The absolute most important thing you must do is NOT THAW THEM. If you thaw your berries, they release all the juice right away, and you end up with a watery mess at the bottom of the pan. Just toss them directly into the fruit bowl with the sugar and cornstarch, just as if they were fresh.
Since frozen fruit is colder, it takes a little longer for the whole dish to heat up enough to start bubbling. So, if you are using entirely frozen fruit, just be prepared to bake it for an extra 5 to 10 minutes past the time listed above. Look for that vigorous bubbling—that’s your cue to pull it out, even if the timer says you still have a few minutes left!
When I was researching the best ways to handle frozen fruit, I stumbled across a fantastic recipe that’s great if you have a ton of leftover fruit, too—you should check out this triple berry cobbler inspiration if you’re looking for slight variations on the fruit blend!
Flavor Boosts for Your berry cobbler
While Ethan usually handles the savory side of things, he insists on adding a little something extra to the biscuit topping that balances the sweetness of the fruit filling we make for this berry cobbler. It’s totally optional, but it tastes so much more complex!
In addition to the cinnamon we put with the berries, I always stir in just a tiny, tiny pinch of nutmeg along with the flour and sugar for the biscuit topping. It’s just enough to give it a warm, almost nutty background note that really complements that sugary crust. It complements the citrus from the lemon juice in the filling, too, which I found totally fascinating from a science standpoint!
If you’re looking for other ways to make simple things sing, check out how we use subtle flavor additions in our buttery pecan pie cookies—it’s all about those little touches!
Serving Suggestions for Your Warm Berry Dessert
You’re pulling that gorgeous, bubbly, golden berry cobbler out of the oven, and honestly? Survival instincts kick in. You want to dive right in. But wait! Serving this warm berry dessert correctly is just as important as getting the bake time right. This is where we take it from “really tasty homemade dessert” to “Oh my goodness, what is this magic?”
We talked about letting it rest for 15 minutes above, which helps the filling set up a tiny bit. Now we dress it up! Ethan often jokes that if you don’t top it with something cold, you haven’t truly finished the job.
The Essential Dessert Topped With Ice Cream Finish
If you take only one piece of advice from me today, let it be this: you absolutely must serve this berry cobbler with ice cream. Specifically, good quality vanilla bean ice cream. The contrast between the hot, spicy fruit filling and that melting, cold vanilla creaminess is what makes this whole process worth it. Seeing that scoop melt down into the crevices of the biscuit topping? Perfection!
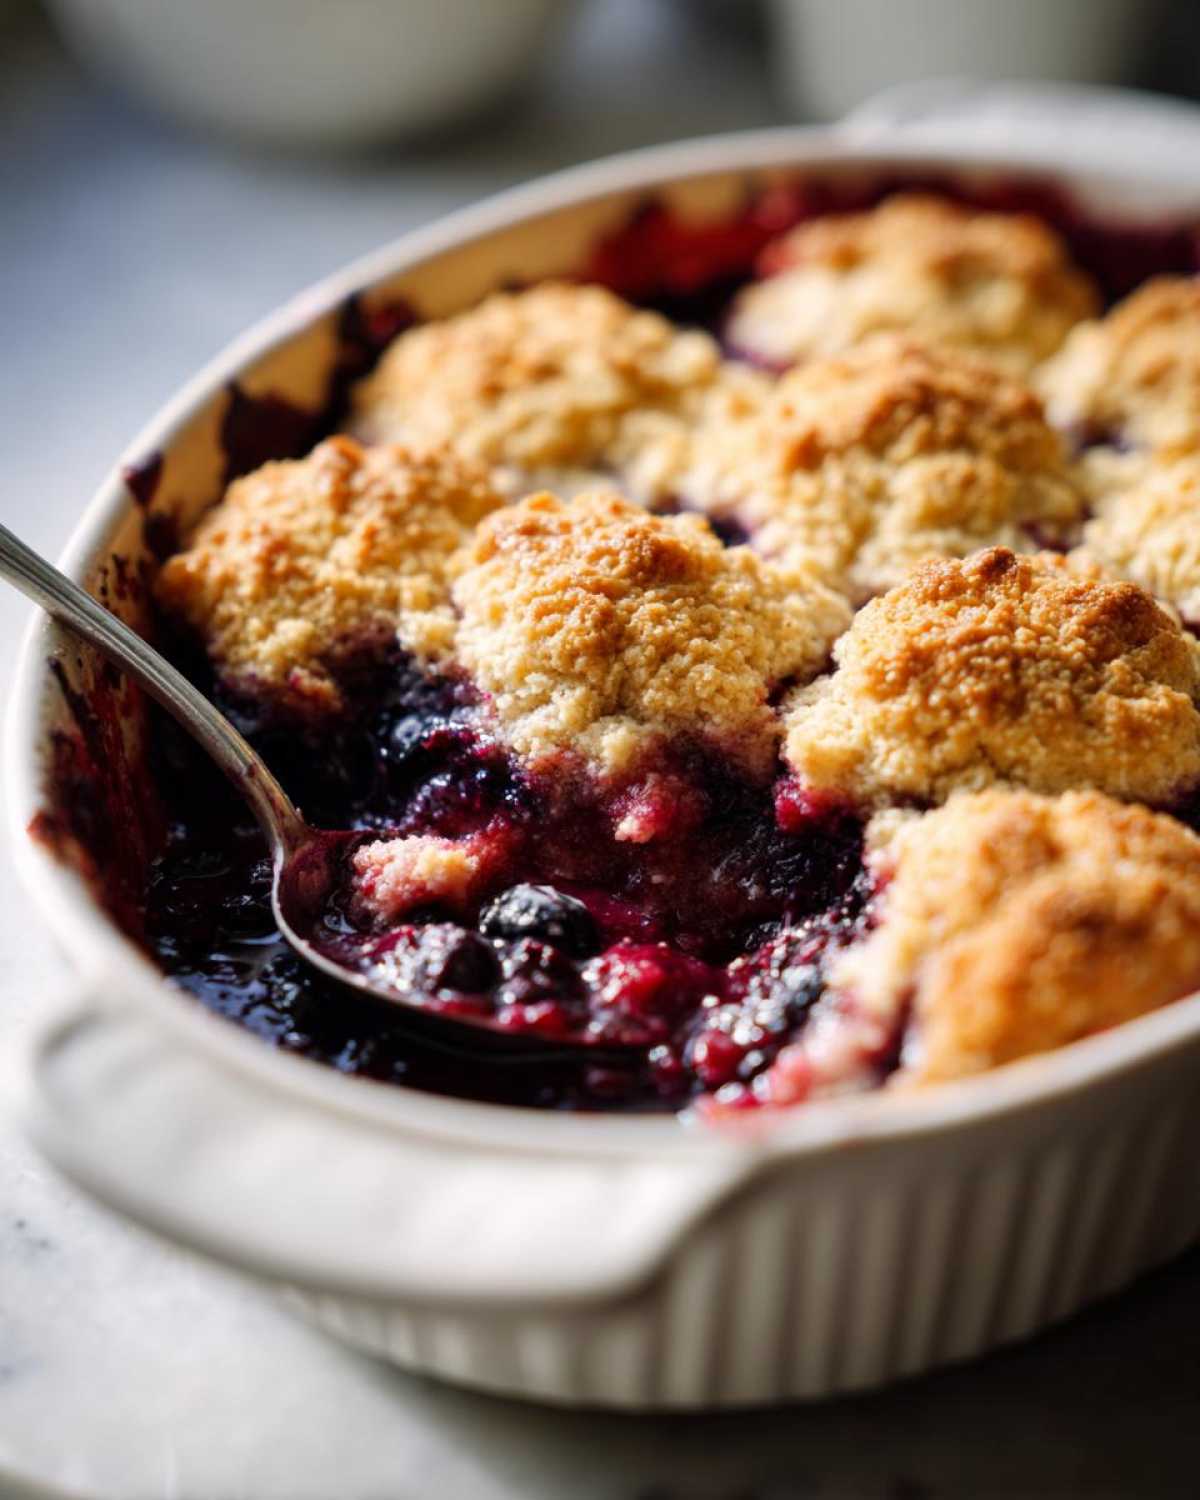
When you scoop the cobbler into bowls, make sure you get a good ratio of biscuit topping to fruit. Then, drop a generous scoop of ice cream right on top. Watch it slowly drizzle down the sides! It’s pure joy. We call this the mandatory dessert topped with ice cream finish.
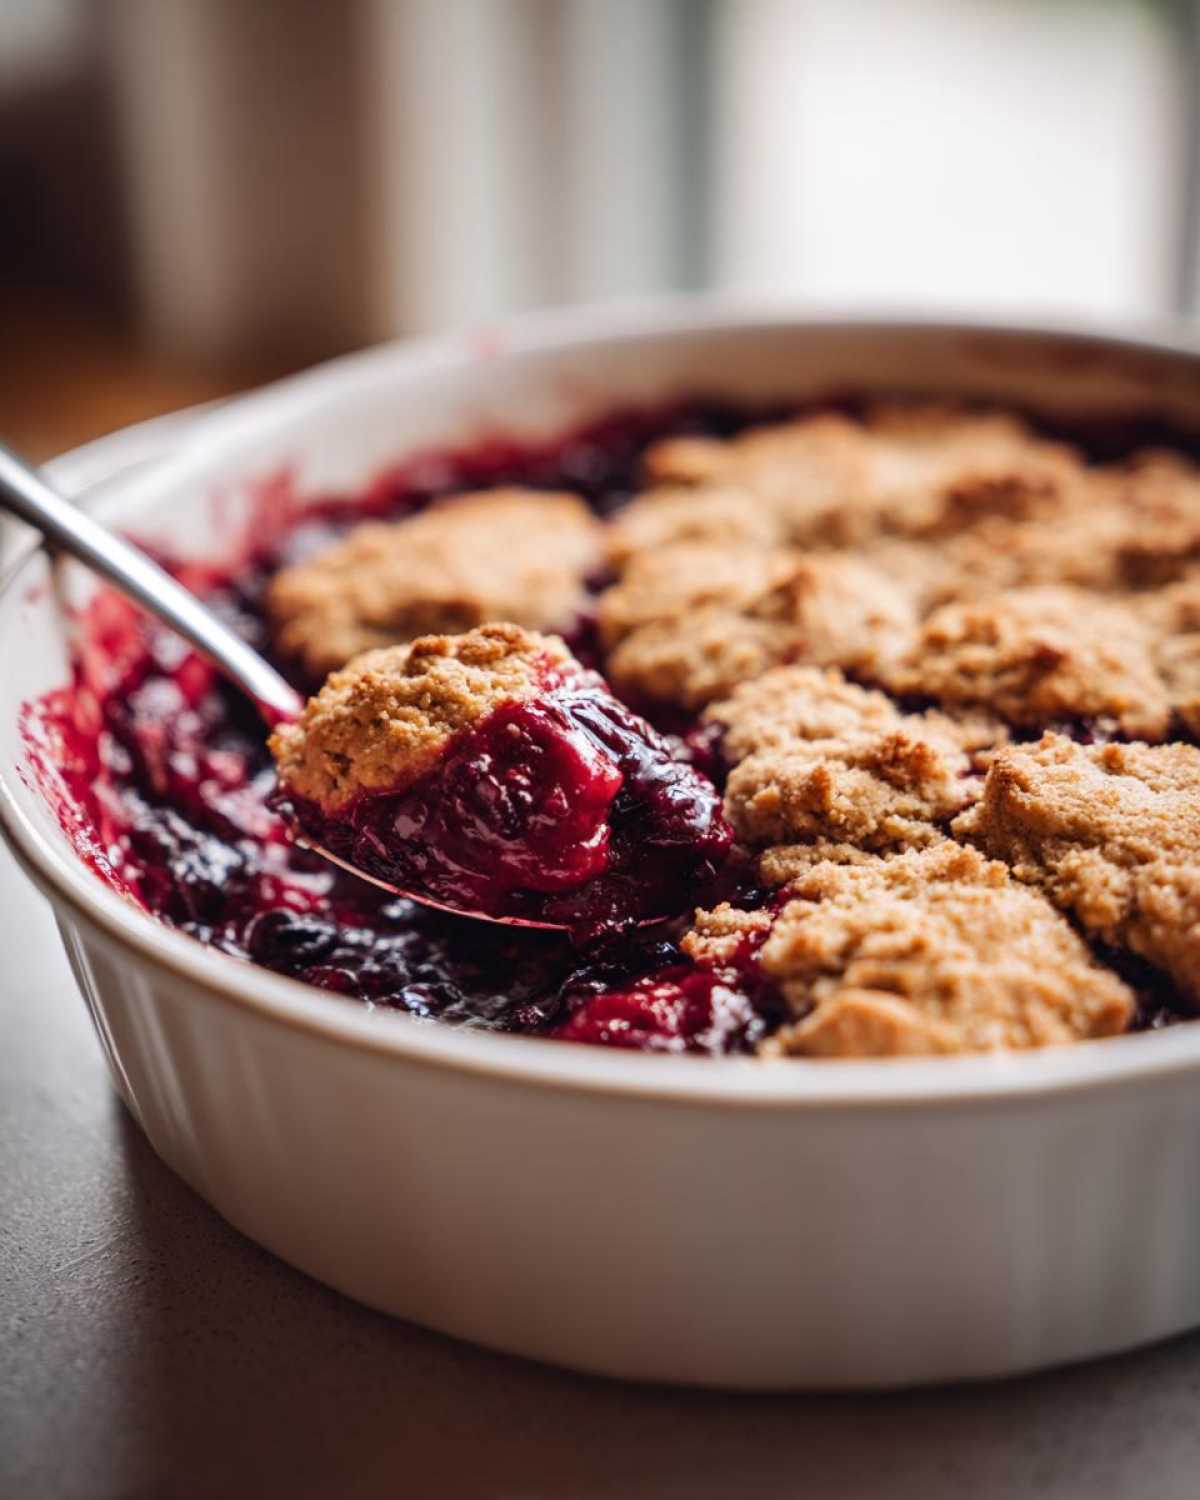
If for some reason you don’t have vanilla on hand, or you’re feeling extra fancy, a dollop of freshly whipped cream works beautifully. Or, if you made a slightly more tart filling (maybe you used extra blackberries?), a scoop of lemon sorbet creates a wonderful, bright counterpoint. But seriously, stick with vanilla for the classic experience. It just never lets you down!
Oh, and if you’re pairing this cozy dessert with a lighter main course, you have to try my creamy lemon pasta recipe. It’s bright enough to contrast the richness!
Storage and Reheating Instructions for berry cobbler
You might be lucky enough to have leftovers of this amazing berry cobbler, but let’s be real—it tastes best fresh out of the oven. Still, if you somehow manage to save any, you need to store it properly to keep that biscuit topping from getting totally squishy. I know Ethan sometimes just tries to eat it cold the next morning straight from the pan, but that’s just not doing this dessert justice!
The basic rule for storage is making sure it cools down completely first. Once it’s room temperature, cover that baking dish tightly with plastic wrap or transfer the leftovers into an airtight container. You can keep it sitting on the counter for about a day, but if you want to save it for more than 24 hours, you absolutely need to put it in the fridge. It stays perfectly good in the refrigerator for up to four days. It might seem a little dense and soggy the next day, but don’t worry, we can fix that!
The secret to reviving that lovely, crumbly texture that makes a great homemade cobbler recipe? The oven, always the oven. Don’t even bother with the microwave unless you enjoy warm berries and a rubbery topping!
To reheat your portion—or the whole dish—preheat your oven again, but just to 350°F this time. Cover the dish loosely with foil. Why foil? Because we want to heat the filling all the way through without scorching the top. Heat it for about 15 minutes, checking on it. Once it’s hot, take the foil off and let it bake, uncovered, for another 5 to 7 minutes. This second burst of dry heat crisps up the biscuit topping right where it got damp sitting overnight.
If you pull it out and it’s looking a little sad sitting in the pan, just scoop out a single serving, put it in an oven-safe ramekin, and reheat that little guy. It heats faster and gets crispier that way! And hey, if you’re looking for a hearty savory dish to enjoy before you get to dessert, you have to try my garlic parmesan chicken creamy skillet recipe. It’s just as comforting!
Frequently Asked Questions About Making berry cobbler
I totally get it—when you’re baking, sometimes a small question stops you in your tracks! We’ve been answering questions about this particular berry cobbler since we first posted it because it’s just that good. Here are the things that come up most often when people are ready to make this amazing mixed berry cobbler. And, if you need a great savory recipe for dinner before you tackle dessert, check out my thoughts on making easy creamy chicken taco soup—it’s a winner!
What is the difference between berry cobbler and berry crumble?
This is such a good question, and it gets right to the structure of things! The difference is all in the top layer. A cobbler, like the one we perfected here, has a thick, biscuit-like topping. You drop spoonfuls of dough over the fruit, and when it bakes, you get this lovely, tender, cakey layer. A crumble, on the other hand, uses a streusel topping made from flour, oats, sugar, and butter rubbed together until it’s crumbly—more like a crisp.
Both are delicious comfort food desserts, but the biscuit topping on our berry cobbler really soaks up those warm berry juices in a way a crumble just can’t match. It’s definitely a matter of personal preference, but I stand firm on the biscuit!
Can I use a cake mix topping instead for a quick fruit dessert?
I know, I know, the internet is full of recipes boasting about using a box of yellow cake mix for a topping—it certainly is a quick fruit dessert shortcut! And look, if that’s what you need in a pinch, go for it. But honestly? Ethan and I found that while the cake mix topping is fast, it doesn’t have the same delicate crumb structure we love here. Our biscuit dough uses real butter and baking powder, which gives you that tender interior we talked about.
If you’re aiming for what I call the best berry cobbler, stick to the simple science of our biscuit recipe. It only adds about four extra minutes of prep time total, and the texture payoff is huge. We want that tender bite, not a layer that tastes too much like a plain cake topper!
How do I make this a Triple Berry Cobbler Recipe if I only have two types of berries?
Don’t you worry about that for a second! That’s the beauty of this berry cobbler recipe—it’s so forgiving. If you only have blackberries and blueberries, or maybe raspberries and strawberries, just use those! Mix them up, measure out 4 cups total, and you are good to go. You don’t need to stress about finding a specific “triple” combination to make it special.
This flexibility is what makes it such a fantastic easy berry cobbler recipe. Use what’s best in the market or what you have hiding in the bottom of the freezer. The lemon juice and the cinnamon really help balance out whatever combination you throw in there!
Estimated Nutritional Data for This berry cobbler
Okay, let’s talk numbers for a second. I’m Maya, the researcher, so I know sometimes you want to see the data behind the deliciousness. Ethan just cares if it tastes good, but I believe in knowing what we’re eating! Here is the estimated nutritional breakdown for one serving of this berry cobbler. Now, please remember, this is just an estimate based on the standard ingredients we listed—if you swap whole milk for skim, or if your berries are sweeter than mine, those numbers will shift slightly.
This data assumes you divide the whole recipe into 6 generous servings, which is perfect when you’re planning a proper meal. Speaking of great meals, you absolutely must try our blackened salmon recipe sometime; it’s a fantastic, lighter main course before this sweet dish!
- Serving Size: 1 serving
- Calories: Roughly 380
- Fat: About 16g (Remember, that’s mostly from the real butter we insist on using!)
- Saturated Fat: Roughly 10g
- Carbohydrates: We’re looking at about 58g
- Fiber: About 4g (Thanks to all those beautiful berries!)
- Sugar: Around 35g (A good amount of natural fruit sugar mixed in there)
- Protein: Approximately 6g
- Sodium: About 250mg
- Cholesterol: Roughly 55mg
It’s a rich, satisfying end to any meal, not something you’d call light, but definitely worth every single bite of that buttery, warm topping and jammy fruit!
Share Your Perfect berry cobbler Experience
Okay, friends, now it’s your turn! This is where the conversation truly begins for Ethan and me. We’ve shared all our research, our testing secrets, and why we are so obsessed with this berry cobbler, especially when served warm with that perfect scoop of vanilla melting on top.
We truly believe the kitchen is better when shared. So, once you’ve made this amazing mixed berry cobbler, I desperately want to hear about it! Did you stick to the exact recipe, or did you add something wild? Did you use all blackberries, or did you go for triple berry?”
Please, please, please leave a rating below! Five stars tells me that we nailed the biscuit-to-berry ratio, and I love knowing that I’ve added another reliable, easy dish to your rotation. And if you took a picture of that gooey, bubbling mess freshly pulled from the oven, tag us! Seeing your beautiful homemade dishes makes all the recipe testing worth it.
If you are already looking ahead to the holidays or just want something creamy and decadent after this, you have to check out Ethan’s favorite—our coquito recipe! It’s a whole different kind of comfort, but just as heartwarming. Happy baking, and let me know how your cobbler turned out!
PrintThe Easiest Mixed Berry Cobbler with Biscuit Topping (Uses Fresh or Frozen Berries)

Make this comforting mixed berry cobbler effortlessly, perfect for using fresh or frozen berries. It features a sweet, jammy filling and a tender, biscuit-like topping. This is a quick fruit dessert ideal for any season.
- Prep Time: 15 min
- Cook Time: 40 min
- Total Time: 55 min
- Yield: 6 servings
- Category: Dessert
- Method: Baking
- Cuisine: American
- Diet: Vegetarian
Ingredients
- 4 cups mixed berries (fresh or frozen, such as blackberries, raspberries, blueberries)
- 1/2 cup granulated sugar (adjust based on berry sweetness)
- 2 tablespoons cornstarch
- 1 tablespoon lemon juice
- 1/4 teaspoon ground cinnamon (Ethan’s flavor tip!)
- 1 1/2 cups all-purpose flour
- 2 tablespoons granulated sugar
- 1 tablespoon baking powder
- 1/2 teaspoon salt
- 1/2 cup (1 stick) cold unsalted butter, cut into small pieces
- 1/2 cup milk (whole or 2%)
- 1 large egg, lightly beaten (for brushing topping)
Instructions
- Preheat your oven to 375°F (190°C). Lightly grease an 8×8 inch baking dish or similar 1.5-quart casserole dish.
- Prepare the berry filling: In a large bowl, gently combine the mixed berries, 1/2 cup sugar, cornstarch, lemon juice, and cinnamon. Stir until the cornstarch is dissolved and the berries are coated. Pour this mixture into your prepared baking dish.
- Prepare the biscuit topping: In a separate medium bowl, whisk together the flour, 2 tablespoons sugar, baking powder, and salt.
- Cut in the cold butter using a pastry blender or your fingertips until the mixture resembles coarse crumbs with some pea-sized pieces of butter remaining. This keeps the topping tender.
- Pour in the milk and stir just until a shaggy dough forms. Do not overmix.
- Drop spoonfuls of the biscuit dough evenly over the berry filling. It does not need to cover the entire surface; gaps are fine.
- Brush the tops of the biscuits lightly with the beaten egg for a golden finish.
- Bake for 35 to 45 minutes, or until the topping is golden brown and the berry filling is bubbly around the edges.
- Let the berry cobbler cool for at least 15 minutes before serving warm, preferably topped with vanilla ice cream.
Notes
- If you use frozen berries, do not thaw them first. You may need to add 5-10 minutes to the baking time.
- For a richer flavor, Ethan suggests adding a tiny pinch of nutmeg to the biscuit topping mixture.
- This recipe works well as a last minute dessert idea since the prep time is short.
Nutrition
- Serving Size: 1 serving
- Calories: 380
- Sugar: 35g
- Sodium: 250mg
- Fat: 16g
- Saturated Fat: 10g
- Unsaturated Fat: 6g
- Trans Fat: 0g
- Carbohydrates: 58g
- Fiber: 4g
- Protein: 6g
- Cholesterol: 55mg