

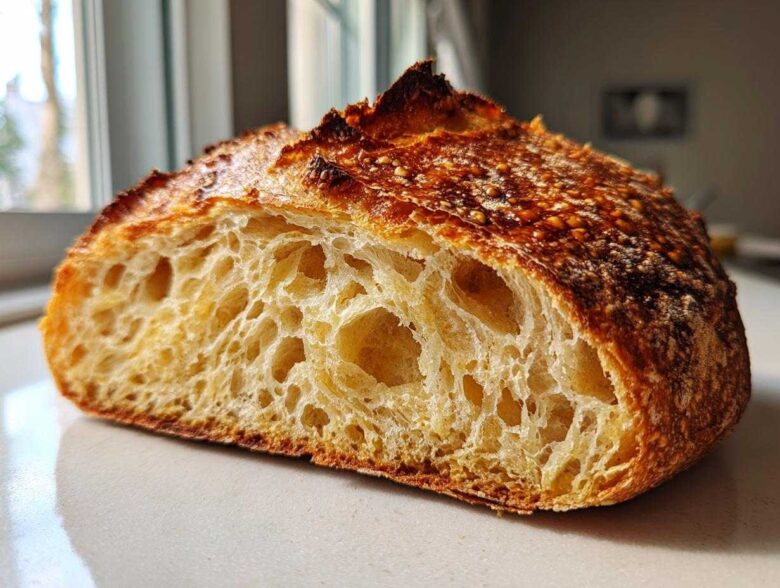
I used to think making real, crusty artisan bread meant waking up at 4 AM to punch down dough and wrestling with that sticky mess until my arms ached. Oh, the struggle! But friends, let me tell you, that era of overworked dough is officially over. If you’ve only kept yourself to store-bought loaves, you are missing out on the sheer joy of making your own. This No Knead Dutch Oven Bread is the game-changer. It’s my absolute favorite, no-fail homemade bread recipe because it takes ten minutes of actual work, and the oven does the rest for you. Seriously, this easy bread recipe creates a loaf that rivals your favorite bakery, no kneading required!
Why This No Knead Bread Recipe Delivers Crusty Artisan Bread
What is the magic behind this method? It’s simple patience married to the power of steam! You mix four basic ingredients, then you leave it alone. That’s it. This style of bread making is perfect for busy folks or anyone who says, "I can’t bake bread." Trust me, you can!
- No Kneading Required: Your work is done after the quick mix.
- Perfect Crust Every Time: That amazing crunch is guaranteed.
- Beginner Bread Baking Friendly: It’s almost impossible to mess up!
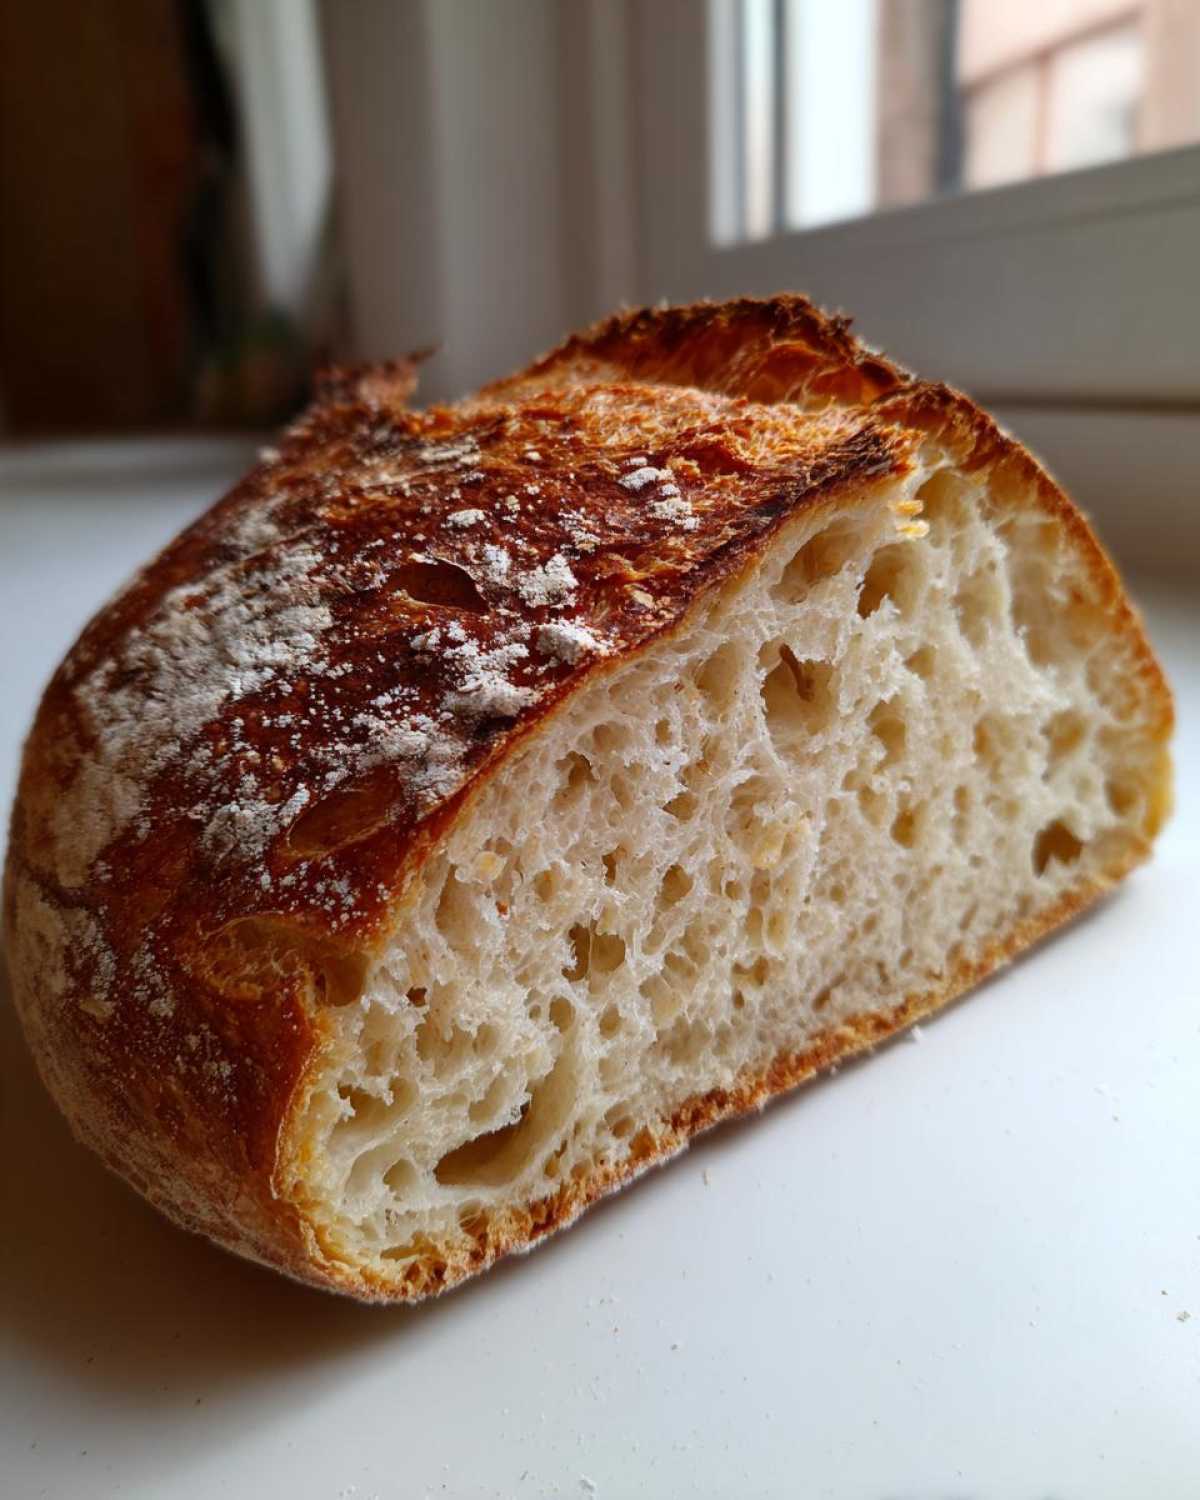
The Dutch oven is the key here; it traps all the moisture released by the dough as it bakes. That steam is what stops the crust from setting too fast, allowing the loaf to expand fully and develop that gorgeous, crackly, artisan crust we all dream about. It really makes this bread stand out!
Expert Tips for Perfect Dutch Oven Baking
Handling a pot that’s reached 450 degrees takes some respect! Always use heavy-duty oven mitts—the ones that go up your forearm are the best defense against burns. Also, don’t skip preheating the pot for the full 20 minutes after the oven hits temperature.
Another trick? Use parchment paper to lower the dough in. It acts like a sling, saving your hands from that initial blast of heat when you drop the dough. You’ll pull that beautiful, golden brown loaf out perfectly intact every single time!
Ingredients for Your Easy Homemade Bread Recipe
Okay, this is the best part: the ingredient list is ridiculously short. I keep all these things stocked at all times because you can whip up a loaf of bread whenever the craving hits! For the basic, amazing loaf, you only need three things, plus water. Simple magic, right?
- 3 cups all-purpose flour (don’t pack it in!)
- 1 1/2 teaspoons salt
- 1/4 teaspoon instant yeast
- 1 1/2 cups cool water
Now, if you want to get fancy and make that savory option—my favorite, the Garlic Herb Bread—you just toss in 1 teaspoon of garlic powder and 1 teaspoon of dried Italian herbs with your dry stuff. It makes the kitchen smell incredible while it proofs!
Ingredient Notes and Substitution Guidance for Great Bread
A quick word on your liquids: make sure that water is cool, not warm. Warm water can jump-start the yeast too fast, and we really want that slow, long flavor development this bread needs. You absolutely need instant yeast here; active dry won’t work well with this super-short mixing process. You can substitute bread flour for all-purpose if you want a slightly chewier final product, but this recipe is truly designed to shine with regular flour.
Step-by-Step Instructions for Making This No Knead Bread
Now we get to the fun part, which is mostly just waiting! Remember, this isn’t a quick 120-minute cinnamon swirl situation; this is slow food, and it’s worth every second of the long proof. You’ll mix it up in about ten minutes, then you walk away for a full day. When I first tried this, I thought I had somehow messed up because the dough looked so strangely wet and inactive, but when I checked it the next morning? Wow! It was just exploding with bubbles and looked totally transformed. That’s the sign you’ve got a real, active yeast bread ready for the oven!
Once that long rest is up, we just gently shape it and get that oven screaming hot. Don’t panic about the fiddly steps, knowing what to look for makes all the difference in achieving this amazing homemade bread.
The Critical Long Fermentation for Flavorful Bread
This long, slow bulk fermentation is where all the flavor develops, which is why you absolutely cannot rush it. You are looking for the dough to at least double, maybe even triple, in volume. It should be riddled with bubbles you can see when you shine a light on the bowl. This slow rise develops complex flavors, giving your resulting loaf that unmistakable, slightly tangy hint of true artisan bread.
Baking Your Crusty Artisan Bread in the Dutch Oven
Preheating that Dutch oven is non-negotiable for great crusty artisan bread! Make sure your oven is cranked up to 450 degrees Fahrenheit, and that pot is scorching hot. Once your dough has rested its second 30 minutes, gently place it (on that parchment sling!) into the hot pot. Cover it and bake for 30 minutes—this traps the steam beautifully. After that, pull the lid off and let that gorgeous bread bake uncovered for another 15 to 20 minutes until it’s that deep, dark, beautiful brown color. Pop over to my baking adventures page if you want to see a video of me pulling a loaf out, it’s spectacular!
Savory Bread Ideas: Variations on This Simple Bread
While this basic recipe makes incredible plain bread, sometimes you just need something bursting with flavor to go alongside soup or pasta. And guess what? Because the mixing is so easy, you can dress this dough up without adding any extra churning time! Think about dipping this into a warm bowl of broccoli cheddar soup—that’s a perfect pairing, which you can find the recipe for right here!
If you are craving that savory experience, use the optional ingredients I mentioned earlier. Mixing in the garlic powder and Italian herbs into your dry ingredients makes a fantastic Italian Herb Bread right from the start. You get that satisfying crust and soft middle, but with a punch of herbs in every slice of bread.
For an even bolder flavor, try brushing the top of the loaf (right after you take the lid off the Dutch oven) with melted butter mixed with fresh rosemary and a pinch of flaky salt. It’s a showstopper! This versatility is why I call it my ultimate simple bread recipe.
Tips for Success When Making No Fail Bread Recipe
Even though this no-fail bread recipe is virtually foolproof, a few tiny hiccups can happen, usually related to handling. If your dough seems unusually sticky during the 30-minute rest, don’t go adding more flour! Just use a little extra dusting on your hands when you shape that loose ball. Remember, this dough is supposed to be wet—that’s why the crust gets so amazing!
If you’re worried about the crust not browning enough, try this super simple trick: ditch the parchment paper for the last 10 minutes of baking. Lift the bread gently out of the pot with tongs (carefully!) and place it directly on the bottom rack for a quick blast of direct heat. That finishes that beautiful golden color on your rustic loaf of bread perfectly. If you have any burning questions after baking, feel free to reach out using my contact page!
Storing and Reheating Your Homemade Bread
Once you finally manage to wait for this loaf to cool down—which, let’s be honest, is the hardest part—you need to store it right. Never, ever put this crusty beauty in a plastic bag or in the fridge! Refrigeration is the enemy of that gorgeous crunch we worked so hard for.
The best way to keep it fresh for two or three days is to simply wrap it loosely in a clean kitchen towel and leave it on the counter. If the crust softens too much, just slice it and pop that slice into a toaster oven for about three minutes. That heat blast brings back 90% of that fresh-out-of-the-oven crackle. It’s magic how well that works!
Frequently Asked Questions About This Yeast Bread Recipe
I always get so many questions when people first try this recipe, and honestly, that’s fantastic! It means you’re excited to bake your own bread, and I’m here to make sure you succeed. Here are some of the things I hear all the time about making this yeast bread work for you.
Can I use active dry yeast instead of instant yeast?
Yes, you can, but you have to wake up the yeast first, which adds a step—so it won’t be quite as ‘no knead easy.’ Active dry yeast needs proofing in about half a cup of warm (not hot!) water with a pinch of sugar first. Once it’s foamy, add it in with the rest of your liquids. If you use active dry yeast, you might only need 16 to 24 hours for the first rise instead of 18, so definitely watch the dough, not the clock.
How long can I let the dough rise the first time?
The beauty of this recipe is its flexibility! While 12 to 18 hours at room temperature is the sweet spot for flavor development in this bread, you can definitely go longer. If you need to wait longer, say 20 or 22 hours, that’s fine. As long as the dough is bubbly and significantly increased, you’re good to go. If you let it go too long, near 24 hours, the texture might get a little bubbly, but it will still bake up as delicious bread!
My dough seems too wet after the long rise, what do I do?
That’s totally normal! If you’re worried, just give your counter a good flour dusting before you scrape the dough out. Do not try to knead or tame it; just gently fold it onto itself maybe three times to create a rough surface tension before putting it on the parchment. That sticky texture is your secret weapon for achieving the craggiest, most incredible crust on your finished bread.
Can I make this recipe in a bread machine?
Since this is a long-fermentation recipe, the bread machine cycle won’t work right because it forces you to rush the rising process. I haven’t developed a faster version for the machine yet, but if you are trying to use one, you’d want to look for a “dough cycle” only, and then use the Dutch Oven method from Step 6 onward. For now, stick to the traditional method for the best loaf of bread!
We truly hope these tips help you master this loaf! If you still have questions, please read our site policies, and don’t hesitate to get in touch!
Estimated Nutritional Data for This Bread
I’ve had a few folks ask about the macros for this satisfying loaf, so here is a general breakdown. Keep in mind that since this is homemade bread, measurements and exact brands can shift these numbers slightly. This data is based on 16 servings per loaf.
- Serving Size: 1 slice
- Calories: 180
- Fat: 0.5g
- Saturated Fat: 0.1g
- Carbohydrates: 38g
- Fiber: 1.5g
- Protein: 6g
- Sugar: 0.5g
- Cholesterol: 0mg
Because we aren’t adding any fats or sugars beyond what is necessary for the yeast activation, it’s a surprisingly lean slice of bread!
Share Your Simple Bread Creations
I absolutely love seeing how everyone’s crust turned out! Once you slice into that amazing homemade bread, snap a photo and tag me so I can see your hard work—or better yet, leave a quick rating and comment right here on the page. Let me know if you added any herbs or if you used the softer butter brush hack!
Estimated Nutritional Data for This Bread
I’ve had a few folks ask about the macros for this satisfying loaf, so here is a general breakdown. Keep in mind that since this is homemade bread, measurements and exact brands can shift these numbers slightly. This data is based on 16 servings per loaf.
- Serving Size: 1 slice
- Calories: 180
- Fat: 0.5g
- Saturated Fat: 0.1g
- Carbohydrates: 38g
- Fiber: 1.5g
- Protein: 6g
- Sugar: 0.5g
- Cholesterol: 0mg
Because we aren’t adding any fats or sugars beyond what is necessary for the yeast activation, it’s a surprisingly lean slice of bread!
Share Your Simple Bread Creations
I absolutely love seeing how everyone’s crust turned out! Once you slice into that amazing homemade bread, snap a photo and tag me so I can see your hard work—or better yet, leave a quick rating and comment right here on the page. Let me know if you added any herbs or if you used the softer butter brush hack! If you need help with anything else, swing by the contact page!
PrintEasy No Knead Dutch Oven Bread
Make crusty artisan bread at home with this simple no-knead recipe using a Dutch oven for a perfect crust and soft interior.
- Prep Time: 10 min
- Cook Time: 50 min
- Total Time: 13 hours 0 minutes
- Yield: 1 loaf
- Category: Baking
- Method: Baking
- Cuisine: American
- Diet: Vegetarian
Ingredients
- 3 cups all-purpose flour
- 1 1/2 teaspoons salt
- 1/4 teaspoon instant yeast
- 1 1/2 cups cool water
- Optional: 2 tablespoons melted butter for brushing
Instructions
- In a large bowl, mix the flour, salt, and yeast together.
- Pour in the cool water and mix with a wooden spoon until a shaggy dough forms. Do not overmix.
- Cover the bowl tightly with plastic wrap and let it rest at room temperature for 12 to 18 hours. The dough will become bubbly and increase in volume.
- After the long rise, lightly flour a work surface. Scrape the dough out onto the surface.
- Gently fold the dough over itself a few times to form a rough ball. Do not knead.
- Place the dough ball onto a piece of parchment paper. Cover loosely with a clean kitchen towel and let it rest for 30 minutes.
- About 20 minutes before the second rest ends, place your Dutch oven (with the lid on) into your oven. Preheat the oven to 450 degrees Fahrenheit (232 degrees Celsius).
- Carefully remove the hot Dutch oven from the oven. Lift the dough using the parchment paper and gently place it inside the hot pot.
- Cover the Dutch oven with the lid and place it back into the oven. Bake for 30 minutes.
- Remove the lid and continue baking for another 15 to 20 minutes, or until the crust is deep golden brown.
- Carefully remove the bread from the Dutch oven and let it cool completely on a wire rack before slicing.
Notes
- For a garlic herb flavor, mix 1 teaspoon garlic powder and 1 teaspoon dried Italian herbs into the dry ingredients before adding water.
- If you prefer a softer crust, brush the top of the loaf with melted butter immediately after removing it from the oven.
- This recipe works best when the dough proofs at room temperature, not in a warm spot.
Nutrition
- Serving Size: 1 slice
- Calories: 180
- Sugar: 0.5
- Sodium: 380
- Fat: 0.5
- Saturated Fat: 0.1
- Unsaturated Fat: 0.4
- Trans Fat: 0
- Carbohydrates: 38
- Fiber: 1.5
- Protein: 6
- Cholesterol: 0