

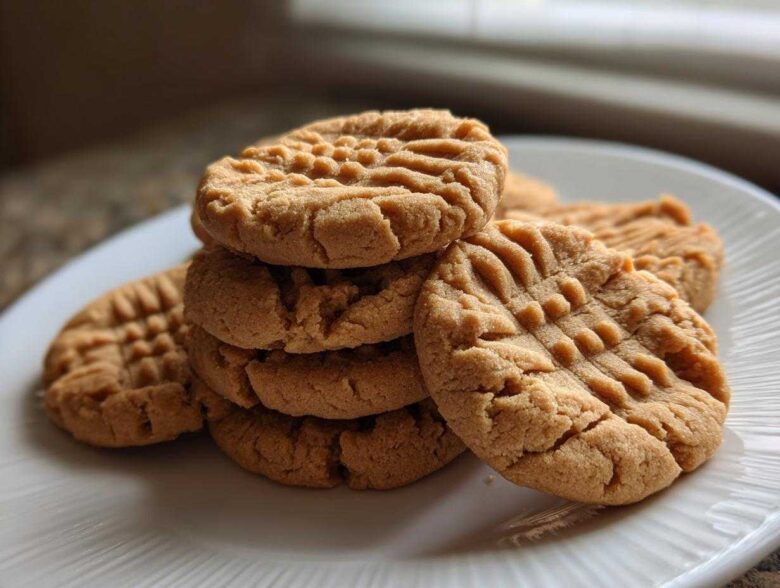
Listen, there are cookies, and then there are peanut butter cookies. For me, they just scream childhood afternoons and scraping the spoon that was definitely too big for me. It’s that perfect sandy-sweet smell that floods the kitchen, right? We are not messing around today. I’ve tested batches until my kitchen looked like a flour bomb went off, all to land on this one thing: the ultimate recipe for soft and chewy classic peanut butter cookies.
The best part? You can be done, cooling rack and all, in under 30 minutes total time. Seriously! I will never go back to those dry, crumbly versions. The first time I got this texture right—that gorgeous edge snap followed by a melt-in-your-mouth center—I practically danced around the kitchen. This is the only Peanut Butter Cookies Recipe you’ll ever need, promise!
You can see more of my favorite baking adventures over at my blog, so feel free to check out what else I’ve been whipping up lately!
Why These Are the Best Soft and Chewy Classic Peanut Butter Cookies
I truly believe these are the ones that will convert anyone who thinks they don’t like peanut butter cookies. We nailed the balance here. They aren’t cakey, and they sure aren’t hard as rocks—they have that beautiful chewiness that makes you grab another one before the first one is even done.
- The Texture Winner: They are soft right out of the oven but hold their shape beautifully as they cool, creating that perfect, slightly dense center.
- Speed Demon: We’re talking minimal chill time, if any! This is one of those truly great Quick Cookie Recipes when that craving hits hard.
- Flavor Depth: Using both granulated and brown sugar means you get sweetness layered with that lovely, subtle molasses note from the brown sugar. It just tastes richer than the plain white sugar variety.
Achieving Perfect Peanut Butter Cookie Texture Tips
Texture is everything, right? You want that melt-in-your-mouth quality. My biggest secret across all my Peanut Butter Cookie Texture Tips is the creaming stage. You MUST beat that butter and both sugars until they look light and fluffy—it builds the foundation for lift without drying them out later!
Also, pay attention when you add the flour mixture. Seriously, stop mixing the second you see the last streak disappear. Overmixing equals tough cookies, and we are trying for tender here!
Gathering Ingredients for Your Classic Peanut Butter Cookies Recipe
The truly wonderful thing about these Easy Peanut Butter Cookies is that you probably have 90% of what you need sitting in your cupboards right now. We aren’t using any wild, hard-to-find items here! This simple ingredient list is what makes it perfect for a last-minute baking session or when you need a quick dessert fix.
If you’re curious about how I use some of these pantry staples in different ways, you should check out my recipe for spiced trail mix—it uses some of the same warming spices!
Here is what you’ll need:
- 1 cup (2 sticks) unsalted butter, softened
- 1 cup granulated sugar
- 1 cup packed brown sugar
- 1 cup creamy peanut butter
- 2 large eggs
- 1 teaspoon vanilla extract
- 2 1/2 cups all-purpose flour
- 1 teaspoon baking soda
- 1/2 teaspoon baking powder
- 1/2 teaspoon salt
Ingredient Notes and Substitutions for Peanut Butter Cookies
Okay, let’s talk specifics because grabbing the wrong peanut butter can change the entire structure of your favorite peanut butter cookies! I always call for creamy. It mixes in smoother and provides that velvety texture we are aiming for.
If you use natural peanut butter, be warned: it separates, and you might need to add an extra tablespoon or two of flour just to bring the dough together. Also, make sure those eggs are at room temperature! Cold eggs hitting that creamed butter mixture can cause it to curdle just a tiny bit, and we want smooth foundations for this recipe.
Step-by-Step Instructions for Easy Peanut Butter Cookies
Alright, the fun part! First things first, get your oven preheated to 350°F (175°C). I always line my baking sheets with parchment paper. It saves me a huge headache later when the bottoms get just a tiny bit golden. Trust me on this one; it makes cleanup a dream!
Grab your stand mixer or your trusty hand mixer for this part. We need to beat that softened butter, the white sugar, and that lovely brown sugar until it’s light and fluffy. This is where we start building the air pockets that avoid dense, flat cookies.
Once that’s looking gorgeous, throw in your full cup of peanut butter and beat it until everything is totally combined. Then, you add the eggs one at a time; don’t rush this step! Let the first egg fully incorporate before adding the second. Finish the wet stuff by beating in the vanilla.
While that’s merrily churning, quickly whisk your flour, baking soda, baking powder, and salt together in a separate bowl. We want those leaveners distributed evenly!
You can check out my favorite mixing tips and tricks for avoiding common baking fails over on my main baking tips page!
Mixing the Wet and Dry Components for Soft Peanut Butter Cookies
When you add the dry ingredients to that beautiful wet mixture, you have to treat it gently! Add the flour mixture in a couple of batches and mix on low speed. This is crucial for those amazing Soft Peanut Butter Cookies texture we’re after. The second you see that last trace of flour vanish, stop the mixer immediately.
If you keep going, you’ll be developing gluten, and that’s what makes cookies tough and cake-like instead of tender. We want them tender! Just barely combined is the goal here, letting the vanilla and butter flavors shine through.
Shaping and Crisscrossing Your Peanut Butter Cookies
Now, get your hands dirty! Roll the dough into nice, even balls, about 1.5 inches across. Place them on your parchment-lined sheets about two inches apart because they will spread a little bit while they bake.
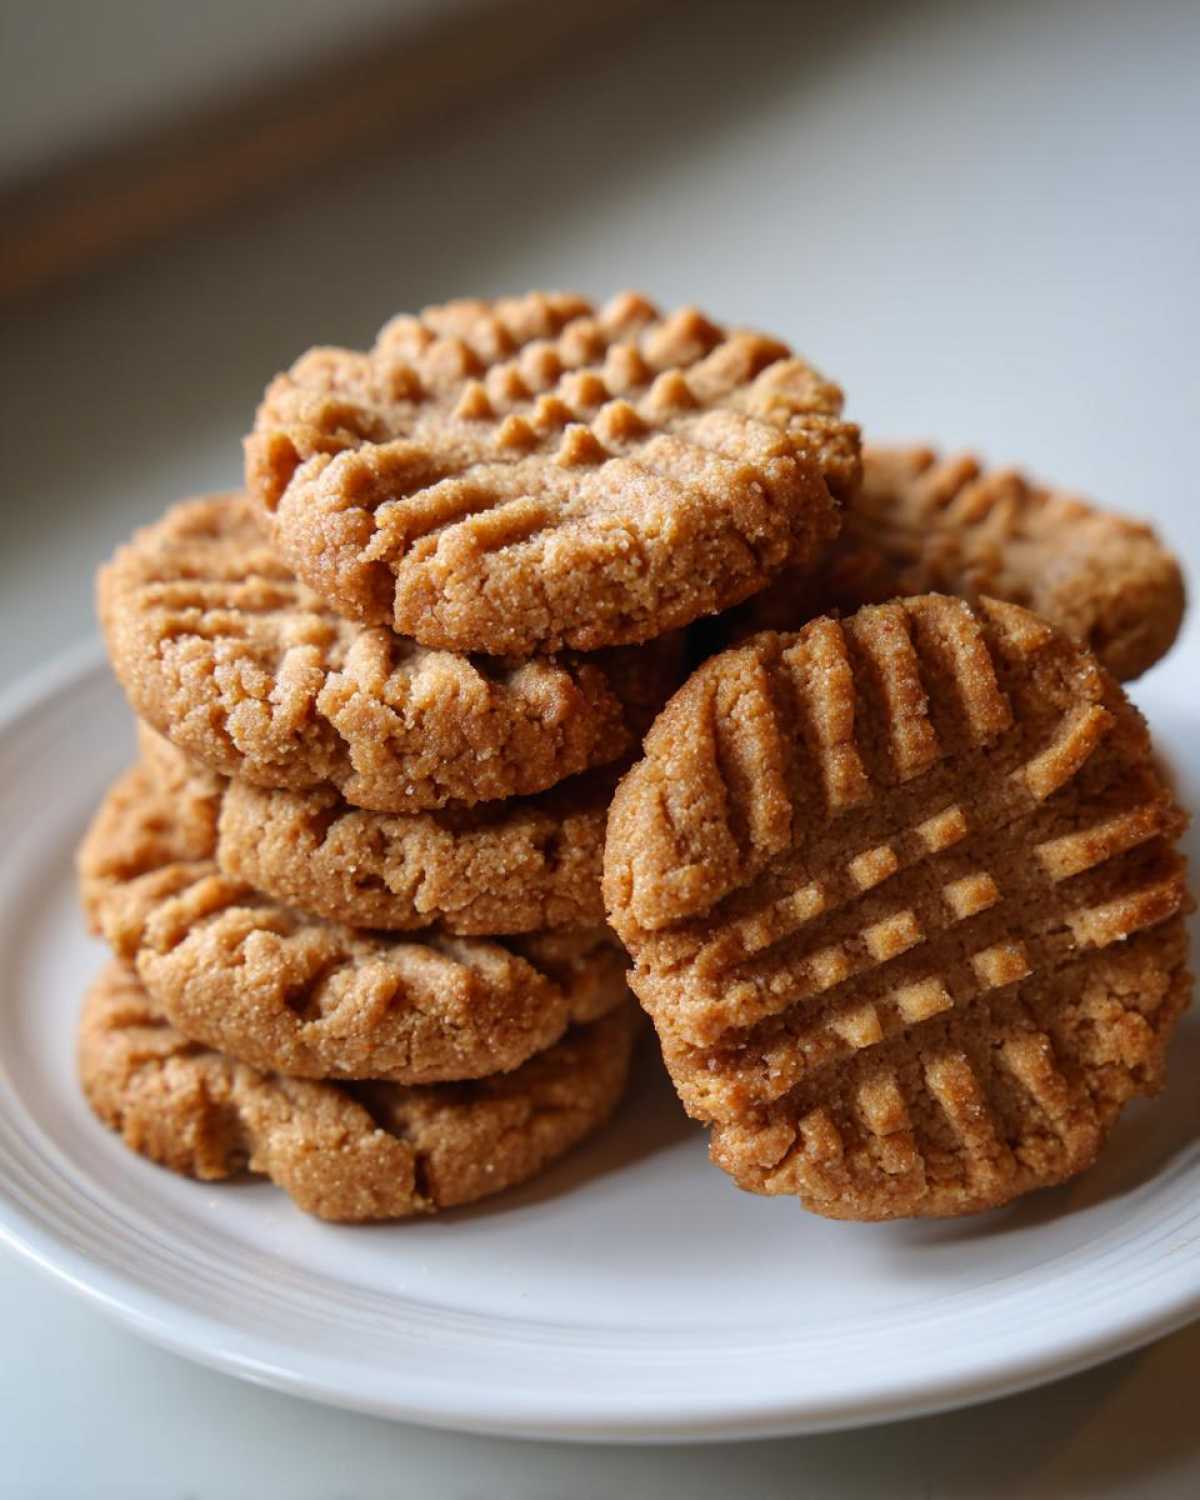
The famous crisscross pattern is next! Grab a fork, lightly dust it with flour if you worry about sticking, and press down gently once to flatten the ball. Then, turn the fork 90 degrees and press again. This fork pressing is key for that authentic, charming look of Classic Peanut Butter Cookies and it helps them bake evenly all the way through!
Baking and Cooling: Keys to Chewy Peanut Butter Cookies
Don’t hover over the oven, but definitely keep one eye open! We are shooting for 350°F (175°C), and the bake time is super fast—only 10 to 12 minutes max for these cookies. They look deceptively underdone when you pull them out, and that’s exactly right!
What you are looking for are edges that are just starting to turn a lovely light gold, but the centers should still look slightly soft and pale. If you wait until the center looks fully baked, you’ve gone too far, trust me. That gooey stage is what locks in the moisture!
Now, here’s the most important step for achieving those perfect Chewy Peanut Butter Cookies: DO NOT move them right away! Leave them sitting right there on that hot baking sheet for a full five minutes. They are super tender when they come out of the oven, and the residual heat on the pan finishes setting up their structure.
After that mandatory 5-minute cooling rest, *then* you can gently slide them onto a wire rack to cool completely. Seriously, don’t skip that rest; it stops them from crumbling into a delicious, sandy mess!
Making Nostalgic Cookies: Variations on Classic Peanut Butter Cookies
One of the best things about having a truly solid base recipe like this one is that you can dress it up in so many ways! If you are looking to add an extra layer of fun or just change things up for the holidays, this dough is incredibly versatile. It’s perfect for making all sorts of Nostalgic Cookies.
If your family loves the classic holiday treat, you can easily turn these into Peanut Butter Blossom Cookies. Right when the cookies come out of the oven (and before the 5-minute cooling rest!), gently press a Hershey’s Kiss right into the center of each warm cookie. The heat makes it melt just slightly so it sticks perfectly. Don’t forget to check out my Pumpkin Snickerdoodles if you want another festive cookie idea!
Now, what if you’re craving something a little more substantial? If you want them to turn out really, really Thick Peanut Butter Cookies—almost puffy—then you need to use one of my favorite tricks from the recipe notes: chill the dough!
Take your dough balls, put them on a plate, cover them, and pop them in the fridge for about 30 minutes before you roll them flat and press them with the fork. This slight chill keeps them from spreading too much in the oven, locking in that thickness. It takes an extra few minutes, but wow, the results are worth it for a completely different, satisfying bite!
Storage and Keeping Your Homemade Peanut Butter Treats Fresh
Okay, you’ve made the best batch of Homemade Peanut Butter Treats ever, so how do we keep them tasting fresh tomorrow? Luckily, these hold up really well at room temperature. Just pop them into an airtight container, and they should stay perfectly soft for about four days. Keeping them in a totally sealed container is key to holding onto that moisture!
If you’re already thinking ahead for next week—and I always am—you can freeze these beauties! You can freeze the baked cookies the same way, just ensure they are fully cooled first, then layer them between sheets of wax paper in a zip-top freezer bag. They last great for up to three months.
My favorite no-fuss method, though? Freeze the dough balls before you roll them flat! Roll them out, line them on a baking sheet, and freeze until solid. Then toss the frozen balls into a bag. When you want cookies, just bake them straight from frozen, maybe adding an extra two minutes to the bake time. So easy!
Frequently Asked Questions About Peanut Butter Cookies Recipe
Now that you have the recipe for what I swear is the best batch of peanut butter cookies you’ll ever make, I really want to hear from you!
Did you manage to get that perfect soft-and-chewy center we were aiming for? Did they come out thick, or did they spread just a tiny bit? Drop a comment below and let me know how many batches you’ve already gone through.
If you made these for your family gathering or just as an emergency after-school snack, please share a picture! I love seeing what everyone comes up with when they are whipping up their own Family Favorite Cookies. And if you ever have questions about measurements or need baking advice, don’t hesitate to reach out via my contact page. Happy baking!
Can I make these 3 Ingredient Peanut Butter Cookies?
You absolutely can make the famous three-ingredient version, but honestly? This recipe is way better! The reason is the flour, baking soda, and baking powder. Those elements, combined with the two types of sugar, give you that incredible soft and chewy texture. The three-ingredient version, typically just peanut butter, egg, and sugar, often ends up a bit more dense and less complex in flavor. We want that perfect texture!
How do I make sure my peanut butter cookies spread less?
Spreading is usually a sign that your butter was too warm or your dough wasn’t chill enough when it hit the oven. For this specific recipe, since we want them to be quick, the main trick is chilling the dough balls for that initial 30 minutes before pressing them. Also, make sure you aren’t using natural peanut butter unless you adjust your flour, because the oil content in natural peanut butter is higher and encourages spreading during Baking Cookies at Home.
Are these considered Quick Cookie Recipes?
They totally are! I promise! When we look at the details, prep time is only 15 minutes, and bake time is just 12 minutes. We skip the long chilling process entirely for the standard method, which means you are looking at less than 30 minutes from start to finish. They fit perfectly into my requirements for Quick Cookie Recipes when you need a homemade treat fast!
Estimated Nutrition for These Classic Peanut Butter Cookies
I always feel a little bit guilty looking at the numbers, but honestly, one of these Classic Peanut Butter Cookies is worth it! Since we are using quality ingredients like real butter and brown sugar, they have a little more substance than those ultra-light, airy cookies out there. Remember, these are just estimates based on using standard measurements of all the ingredients listed.
Here is the breakdown for one cookie:
- Serving Size: 1 cookie
- Calories: 190
- Fat: 10g
- Saturated Fat: 4g
- Cholesterol: 25mg
- Sodium: 110mg
- Carbohydrates: 23g
- Sugar: 14g
- Protein: 5g
- Fiber: 1g
If you’re cutting these down, be mindful of your serving size! They are rich, which is part of what makes them so delicious.
Share Your Favorite Homemade Peanut Butter Treats
Now that you’ve got the recipe for what I swear is the best batch of peanut butter cookies you’ll ever make, I really want to hear from you!
Did you manage to get that perfect soft-and-chewy center we were aiming for? Did they come out thick, or did they spread just a tiny bit? Drop a comment below and let me know how many batches you’ve already gone through.
If you made these for your family gathering or just as an emergency after-school snack, please share a picture! I love seeing what everyone comes up with when they are whipping up their own Family Favorite Cookies. And if you ever have questions about measurements or need baking advice, don’t hesitate to reach out via my contact page. Happy baking!
PrintThe Ultimate Soft & Chewy Classic Peanut Butter Cookies
Make soft and chewy classic peanut butter cookies quickly. This recipe delivers a rich peanut butter flavor and a tender texture.
- Prep Time: 15 min
- Cook Time: 12 min
- Total Time: 27 min
- Yield: 24 cookies
- Category: Dessert
- Method: Baking
- Cuisine: American
- Diet: Vegetarian
Ingredients
- 1 cup (2 sticks) unsalted butter, softened
- 1 cup granulated sugar
- 1 cup packed brown sugar
- 1 cup creamy peanut butter
- 2 large eggs
- 1 teaspoon vanilla extract
- 2 1/2 cups all-purpose flour
- 1 teaspoon baking soda
- 1/2 teaspoon baking powder
- 1/2 teaspoon salt
Instructions
- Preheat your oven to 350°F (175°C). Line baking sheets with parchment paper.
- In a large bowl, beat the softened butter, granulated sugar, and brown sugar together until creamy.
- Add the peanut butter and beat until fully combined.
- Beat in the eggs one at a time, then mix in the vanilla extract.
- In a separate bowl, whisk together the flour, baking soda, baking powder, and salt.
- Gradually add the dry ingredients to the wet ingredients, mixing on low speed until just combined. Do not overmix.
- Roll the dough into 1.5-inch balls and place them 2 inches apart on the prepared baking sheets.
- Use a fork to press down on each ball to create a crisscross pattern.
- Bake for 10 to 12 minutes, or until the edges are lightly golden. The centers will look slightly soft.
- Let the cookies cool on the baking sheet for 5 minutes before moving them to a wire rack to cool completely.
Notes
- For thicker cookies, chill the dough for 30 minutes before rolling and flattening.
- Use creamy peanut butter for the best texture. Natural peanut butter may require slight adjustments to the flour amount.
- If you want a richer flavor, use half creamy and half crunchy peanut butter.
Nutrition
- Serving Size: 1 cookie
- Calories: 190
- Sugar: 14g
- Sodium: 110mg
- Fat: 10g
- Saturated Fat: 4g
- Unsaturated Fat: 6g
- Trans Fat: 0g
- Carbohydrates: 23g
- Fiber: 1g
- Protein: 5g
- Cholesterol: 25mg