

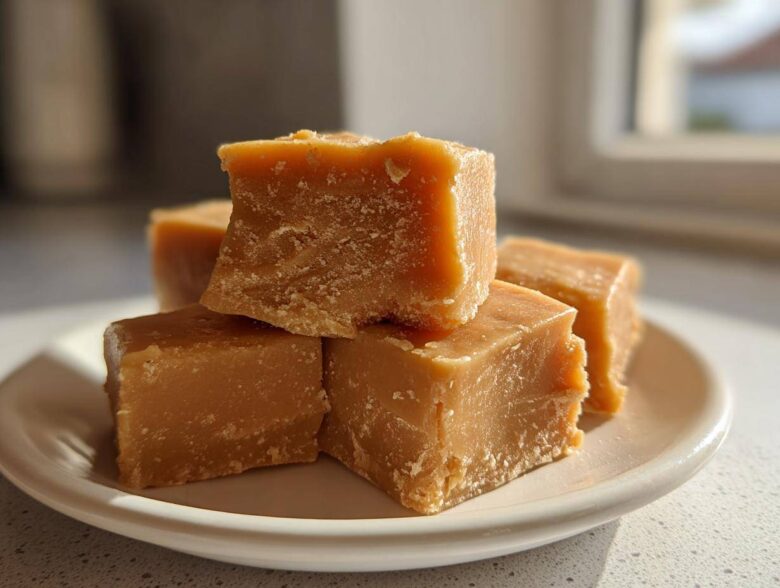
Oh, you HAVE to try this! When I think about my childhood holidays, honestly, it’s the smell of caramelizing sugar that takes me right back. Forget the complicated stuff; this classic **penuche fudge** is the real deal, and I promise you, it’s the easiest and most reliable recipe out there. That rich, deep brown sugar flavor just sings! I used to be terrified of the soft-ball stage, but once you nail that temperature, you’ve unlocked the secret to all the best homemade candy. Trust me, this one is a keeper.
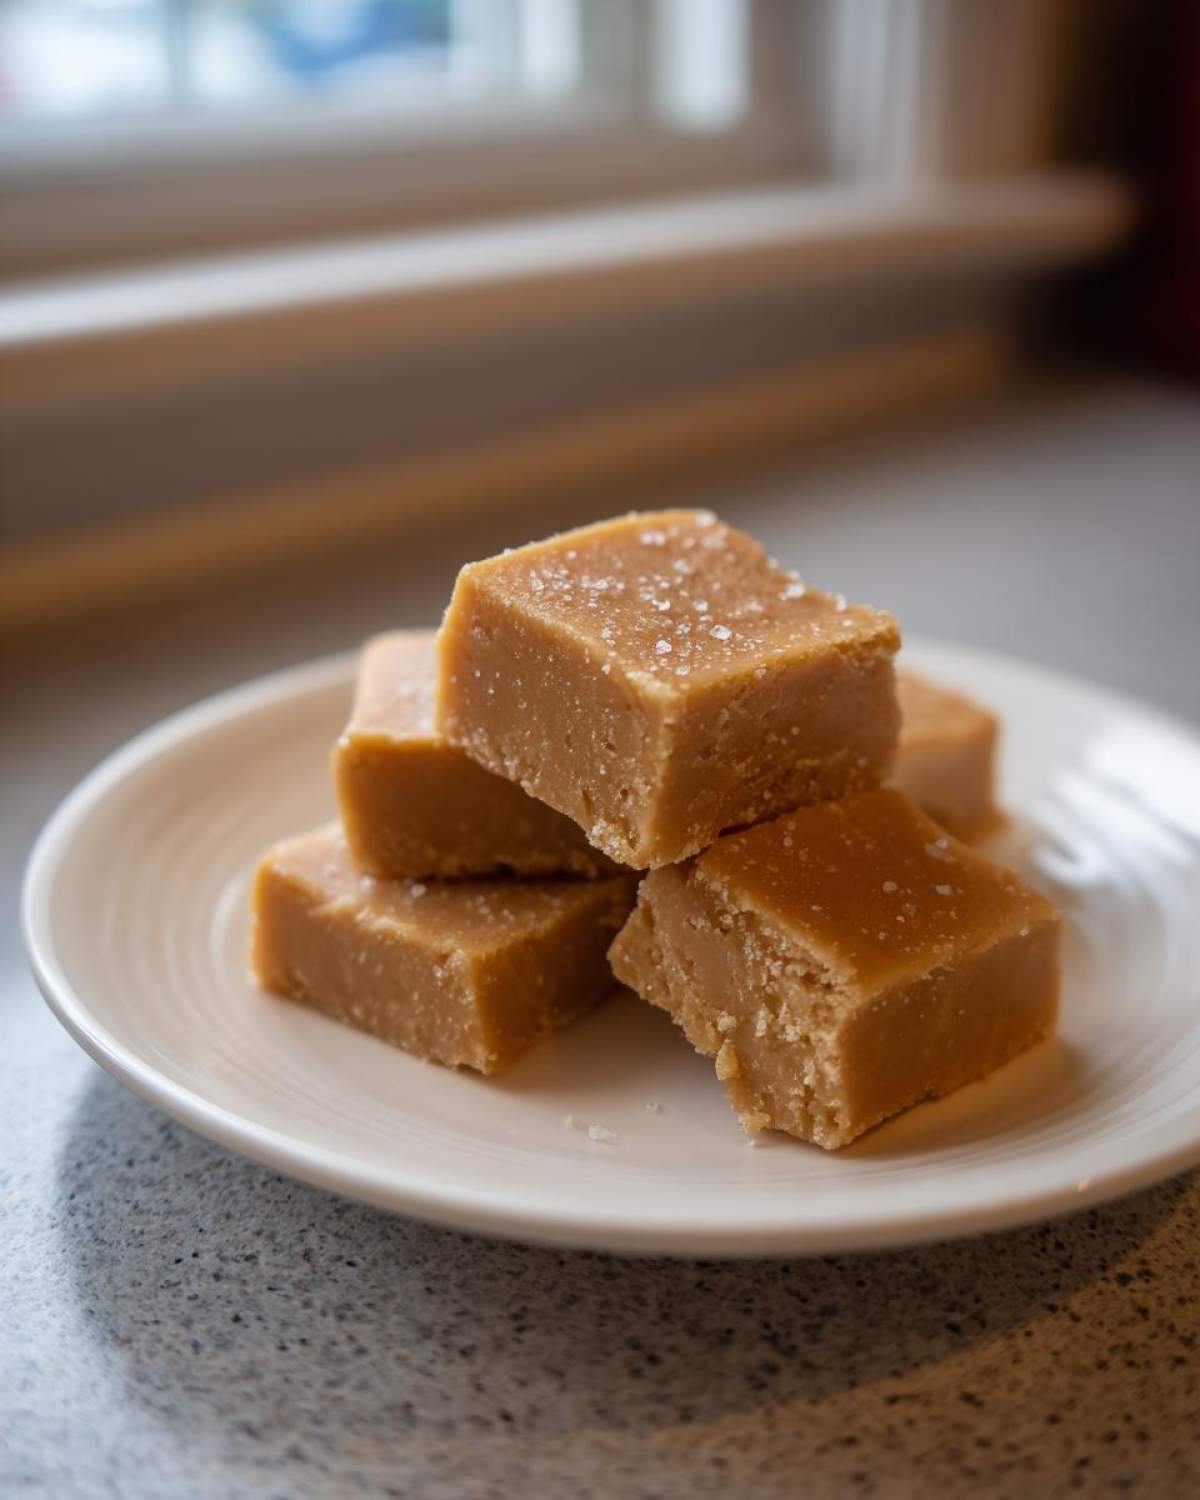
Why This Easy, Old-Fashioned Penuche Fudge Stands Out
There are fudge recipes, and then there’s THIS fudge recipe. I’ve tweaked and messed with batches until I found the perfect combination that keeps coming out flawless. If you’ve been scared off by complex candy-making before, this is your green light to jump right in. Seriously, this is the definition of an **easy fudge recipe** that tastes like it took all day!
Here is why you need to make this **old fashioned fudge** right now:
- It delivers that signature brown sugar warmth—it tastes like spun gold! This is what defines true **penuche fudge**.
- The texture is undeniably **creamy fudge recipe** perfection. It truly is a melt-in-your-mouth candy experience.
- It uses simple pantry ingredients, making it perfect for spur-of-the-moment sweet cravings instead of big holiday baking projects.
I’ve shared this recipe with neighbors who swore they’d never successfully made candy before, and they all came back raving! Check out some other great baking ideas over on my baking blog while the sugar melts!
Ingredients for Perfect Penuche Fudge
Alright, let’s talk about what goes into this magic pot. You’ll be shocked at how few things you need for such a show-stopping bit of **homemade candy**. I always keep these on hand because you never know when a fudge craving will hit! Remember, for the best results in your **creamy fudge recipe**, measure everything out before you even turn the stove on. It moves fast once it starts cooking!
- 2 cups granulated sugar
- 1 cup packed light brown sugar
- 1 cup heavy cream (This is non-negotiable, folks! Don’t try cutting corners with milk, or you won’t get that rich texture.)
- 1 tablespoon butter
- 1 teaspoon vanilla extract
- 1/4 teaspoon salt
- 1/2 cup chopped pecans or walnuts (optional—but highly recommended if you love a good butter pecan fudge!)
Ingredient Notes and Substitutions for Penuche Fudge
The brown sugar is the absolute star here; it gives this **brown sugar fudge** its signature color, moisture, and deep, almost butterscotchy flavor that’s warmer than plain white sugar. And seriously, please use quality heavy cream. The fat content is necessary to help this set up correctly and give you that smooth, **melt in your mouth candy** feeling.
If you aren’t into pecans, go ahead and use walnuts for a great **walnut fudge**. Sometimes, if I’m feeling extra adventurous and making a batch for holiday fudge, I’ll toast the nuts lightly first. That little extra step really brings out their flavor. But keep it simple if you want this to count as an **easy fudge recipe**!
Step-by-Step Instructions: How to Make Penuche
Okay, this is where the fun—and the focus—comes in! Making **penuche** isn’t complicated, but you absolutely must respect the temperature. Grab your heavy-bottomed saucepan. We start by combining both sugars and the heavy cream. Get that over medium heat, and you need to stir continuously until those sugars are fully dissolved. Don’t rush this initial part, or you’ll end up with grainy fudge later!
Once you see it start to boil? Stop stirring immediately. Seriously, put the spoon down! From here on, we watch the thermometer like a hawk. You need that mixture to hit exactly 234 degrees Fahrenheit. That’s your soft-ball stage—the magic number for this **classic confection**.
As soon as that thermometer chirps, yank the pan right off the heat. Quickly stir in the butter, the vanilla, and the salt until that butter melts right in. Now comes the agonizing wait. You have to let this mixture cool down undisturbed until it hits 110 degrees F. If you mess with it too early, you ruin the structure before you even get a chance to beat it into shape.
Once it hits 110°F, brace yourself! This is when we work to get that perfect creamy outcome. You need to beat this mixture vigorously—it sounds intense, but it is totally worth it for that **melt in your mouth candy** perfection.
Achieving the Ideal Texture in Your Penuche Fudge
Why are we beating this stuff until our arms ache? Because this physical action forces the sugar molecules to crystallize just right. This is the secret sauce for any genuine **creamy fudge recipe**! You’re looking for a visible transformation: the glossy, shiny liquid you poured in starts to look dull, opaque, and thick. It thickens up fast, so keep that energy up!
I used to use a sturdy wooden spoon for years, and it works great, but if you have a stand mixer with a paddle attachment, now is the time to use it! Just watch it closely so it doesn’t splatter everywhere. When it starts looking like thick, creamy frosting—that’s when you know you’re done. If you’re adding nuts, fold them in quickly in the last minute of beating.
Quickly pour the fudge into your prepared pan. If you want to see some amazing bar recipes like my maple pecan pie bars, check those out later! For now, spread this gorgeous **brown sugar fudge** evenly and let it sit at room temperature. No peeking in the fridge, we need it to set naturally!
Using Penuche Fudge as a Frosting Recipe
Now, you know how obsessed I am with this **penuche fudge** being a perfect square of candy, but I have another little secret that I’ve discovered over the years, especially when I don’t want to waste a single glorious bite of that brown sugar base. Did you know you can take this exact mixture and turn it into a heavenly **fudge frosting recipe**?
The trick is timing, timing, timing! You cannot let it set into that stiff, gorgeous candy block we just worked so hard to achieve. You need to use it right after that vigorous beating phase—when it’s still thick and creamy, but definitely still pourable and spreadable.
If you are making a cake, like one of my spicy pumpkin ones—you should totally check out my pumpkin spice cake recipe for inspiration—you’ll want this fudge slightly softer than you would for cutting. Think of it like a really thick icing. It needs to flow, but not run off the edges!
I usually stop stirring about a minute earlier than I would for cutting the squares. Once it’s beaten until it loses that high gloss, just immediately scrape it onto your cooled brownies or cake. It sets up beautifully on top, giving you this rich, slightly chewy layer that tastes exactly like authentic **old fashioned fudge** but spreadable. It’s such a great hack for using up that extra bit of batter if you slightly over-made it for the pan!
Tips for Success with Old Fashioned Fudge
If you want this **old fashioned fudge** to turn out like absolute silk every time—that true **melt in your mouth candy** result—you have to be precise with two things: temperature and cooling. Don’t fret if you don’t have a candy thermometer laying around! You can still nail it using the cold water test. Just drop a tiny bit of that boiling syrup into a glass of ice water. If it forms a soft, pliable ball that squishes when you poke it, you’re golden. If it dissolves, keep cooking!
The biggest mistake people make is stirring during the boiling phase or cooling too fast. Remember, after you stir in the butter, you MUST let it cool undisturbed to 110°F. Seriously, don’t touch it! If, for some terrible reason, your fudge mixture seems too hard to beat when it hits that cooling mark, don’t throw it out! Just put the whole pan back on the lowest heat setting for just a few seconds to soften it up again, then pull it off and resume beating immediately.
Storage and Keeping Your Penuche Fudge Fresh
So you’ve made this incredible batch of **penuche fudge**, and now you need to keep it tasting amazing for when you inevitably crave more later. Since this **brown sugar fudge** is so rich and dense, it actually keeps really well, which is great news for holiday baking when you need to make things ahead of time!
The absolute best way to store your **homemade candy** is airtight at room temperature. I usually wrap my squares tightly in plastic wrap, and then I put those wrapped pieces into a sturdy, sealed container. Kept this way, you easily get a good week, maybe even ten days, out of it before the texture starts to change. The kitchen counter is its happy place!
Now, if you made a massive batch—which, let’s be honest, I always do—you can absolutely pop it into the fridge. Just make sure that container is really, truly sealed, because fudge can sometimes absorb other smells in the fridge, and we don’t want our **sweet treat recipe** tasting like last night’s garlic bread!
If you chill it, take it out about 30 minutes before you plan on eating it. That little bit of time on the counter allows it to come back to that perfect, soft consistency. We want that **melt in your mouth candy** feeling, not fudge that requires a workout to bite!
Honestly, I rarely ever reheat fudge, but if you’ve made too much and need to soften it up—maybe you were planning on using it as a **fudge frosting recipe** later but it set too firm—you can gently warm a small portion in the microwave for about 5 to 10 seconds. Just warm it until it’s pliable again, then beat it gently for a few seconds to re-establish that creamy texture we worked so hard for. Keep that **classic confection** tasting its absolute best!
Frequently Asked Questions About Penuche Fudge
I know when you’re trying a new **sweet treat recipe**, especially one that relies on temperature, you always have a few burning questions. Don’t worry, I’ve been there! Once you get this **penuche fudge** recipe down, you won’t want to stop making it. Here are some of the things people ask me most often about getting this **homemade candy** perfect!
Can I make this a no bake fudge recipe?
Oh, I get why you ask! **No bake fudge** sounds so simple, right? But for this specific style of fudge, the answer is a hard no, my friend. For this **brown sugar fudge** to set up with that beautiful, crystalline, melt-in-your-mouth texture, we absolutely have to boil the sugar and cream mixture to that specific 234°F soft-ball stage. That cooking process is what changes the sugar structure. If you skip that, you end up with more of a soft, buttery sauce rather than that perfect sliceable **old fashioned fudge**.
What is the difference between Penuche and regular chocolate fudge?
That’s a great question that gets right to the heart of what makes this **classic confection** unique! The main difference is the sugar base that sets the flavor. Regular fudge relies on chocolate or cocoa powder for its primary flavor and color. Penuche, on the other hand, is completely dependent on that beautiful, molasses-rich light brown sugar. So instead of a deep chocolate taste, you get this warm, caramel, almost butterscotch flavor profile. It’s sweeter and softer in color than its cocoa cousin, but just as addictive!
How do I get my penuche fudge to be extra creamy?
Ah, the quest for maximum creaminess! There are two critical moments here. First, you must let the cooked mixture cool completely and undisturbed down to 110°F. If you try to beat it while it’s too hot, it just won’t crystallize properly and will stay runny. Second, and this is crucial for that “melt in your mouth candy” texture, you have to beat it vigorously! You are aiming for that visual change where the mixture goes from glossy and shiny to dull and thick. When it starts looking like light brown peanut butter, you stop immediately. That hard work is what guarantees that gorgeous, creamy fudge texture!
If you want to learn more about how my family approaches baking and recipes, you can always check out the About Us page!
Estimated Nutritional Data for Penuche Fudge
I always try to keep track of what we’re eating, especially with sweet treats that we tend to make way too fast! Remember, since this is a from-scratch, **homemade candy** recipe, these numbers are just my best estimates based on standard ingredient brands. If you use extra butter or load yours up with walnuts, the numbers will shift a little bit. But for a base idea of what’s in one square of this **easy fudge recipe**, here’s what I usually calculate:
- Serving Size: 1 square
- Calories: 160
- Sugar: 28g (That’s the brown sugar magic shining through!)
- Fat: 4g
- Saturated Fat: 2.5g
- Carbohydrates: 31g
- Protein: 1g
- Sodium: 35mg
It’s a rich little bite of **nostalgic desserts**, for sure! But honestly, for something this delicious and traditional, I think the joy of eating this **classic confection** outweighs the need to count every tiny gram. Enjoy this **sweet treat recipe** guilt-free!
Share Your Nostalgic Desserts Experience
Well, that’s it! You now have the complete guide to making truly incredible, melt-in-your-mouth **penuche fudge**. I honestly can’t wait to hear about your batch!
Making these **nostalgic desserts** connects us, and I love seeing how folks customize their **homemade candy**. Did you go for the walnuts, or did you try adding a touch of maple to turn it into a true **butter pecan fudge** variation? Drop a rating below—did this turn out to be the **creamy fudge recipe** you were hoping for?
Most importantly, leave a comment! Tell me your favorite memory associated with this type of **brown sugar fudge**. These classic recipes are the ones we need to keep celebrating. If you tried this for a special occasion, maybe for your **holiday fudge** plans, let me know how much everyone loved this **sweet treat recipe**!
And hey, if you have questions as you try to master the soft-ball stage or tackle cleaning up the pot, swing by the contact page and send me a note. Happy baking, or I guess I should say, happy candying!
PrintEasy Old-Fashioned Penuche Fudge
Make classic, creamy Penuche fudge using brown sugar. This recipe is simple and yields a melt-in-your-mouth sweet treat.
- Prep Time: 10 min
- Cook Time: 20 min
- Total Time: 30 min
- Yield: 36 small squares
- Category: Dessert
- Method: Stovetop Cooking
- Cuisine: American
- Diet: Vegetarian
Ingredients
- 2 cups granulated sugar
- 1 cup packed light brown sugar
- 1 cup heavy cream
- 1 tablespoon butter
- 1 teaspoon vanilla extract
- 1/4 teaspoon salt
- 1/2 cup chopped pecans or walnuts (optional)
Instructions
- Line an 8×8 inch pan with parchment paper, leaving an overhang on the sides for easy removal. Lightly grease the paper.
- Combine the granulated sugar, brown sugar, and heavy cream in a heavy-bottomed saucepan.
- Stir the mixture over medium heat until the sugars dissolve and the mixture begins to boil. Stop stirring once it boils.
- Cook the mixture without stirring until it reaches 234 degrees F (soft-ball stage) on a candy thermometer. This usually takes 10 to 15 minutes after boiling starts.
- Remove the pan from the heat immediately. Stir in the butter, vanilla extract, and salt until the butter melts completely.
- Let the mixture cool undisturbed until it reaches 110 degrees F. Do not rush this cooling step.
- Once cooled, beat the mixture vigorously with a wooden spoon or an electric mixer until it thickens and loses its glossy shine, becoming dull and creamy. This takes about 5 to 10 minutes.
- If using nuts, quickly fold them into the fudge mixture.
- Pour the fudge into the prepared pan and spread evenly.
- Let the fudge set completely at room temperature for several hours before cutting into squares.
Notes
- For a smoother texture, you can use this fudge as a thick frosting on cakes or brownies once it cools slightly but before it sets hard.
- If you do not have a candy thermometer, drop a small amount of the syrup into cold water; it should form a soft, pliable ball.
- If the fudge becomes too stiff to beat, you can gently reheat it over low heat until it softens slightly, then continue beating.
Nutrition
- Serving Size: 1 square
- Calories: 160
- Sugar: 28g
- Sodium: 35mg
- Fat: 4g
- Saturated Fat: 2.5g
- Unsaturated Fat: 1.5g
- Trans Fat: 0.1g
- Carbohydrates: 31g
- Fiber: 0.2g
- Protein: 1g
- Cholesterol: 15mg