

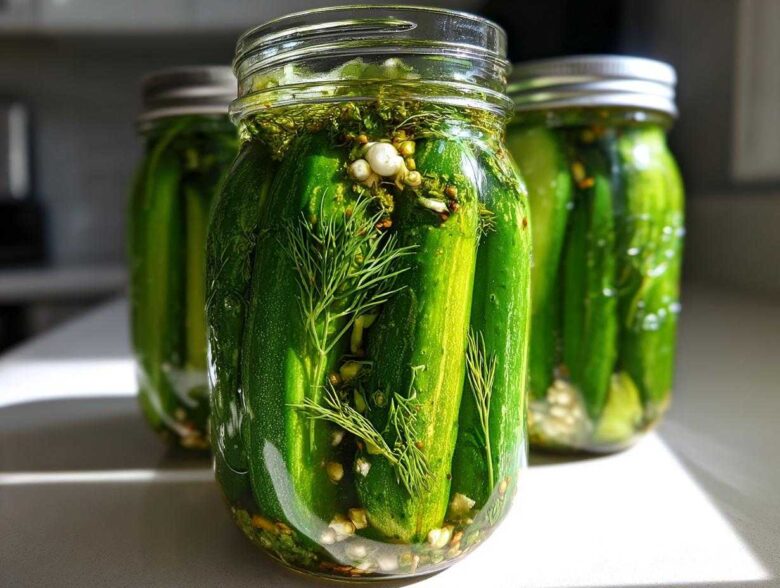
Oh, stop what you’re doing right now! There is nothing—and I mean *nothing*—better than biting into a jar of ice-cold, perfectly crunchy, tangy dill pickles. You know the kind I mean? The ones that actually snap when you chew them? I spent years trying to mimic that amazing texture, and I finally cracked the code for the absolute best refrigerator pickles you’ll ever make at home. Forget lugging out the canner; this is hands-down the fastest, easiest recipe imaginable. We are using a simple hot brine that gets the flavor locked in fast. Trust me, once you try these Easy Homemade Pickles that are ready tomorrow, you’ll never look back. I first perfected this Simple Pickling Recipe when I needed toppers for a summer BBQ, and now it’s a permanent fixture in my fridge! If you want to know more about my kitchen philosophy, check out my journey over at the About Us page!
Why You Will Love These Crispy Refrigerator Pickles
Listen, if you’ve been intimidated by canning or just want pickles *now*, this recipe is your ticket. The sheer joy of making these refrigerator pickles is that they are so straightforward. You’ll have them ready faster than you can run to the grocery store!
- They truly are the Crispy Dill Pickles Fridge version you dream about. That snap is real, folks!
- We hit maximum flavor in just 24 hours. That’s right, these are true 24 Hour Pickles that are ready for your burgers.
- It’s totally hands-off! This is the ultimate No Canning Pickles Recipe—just mix, pour, and chill.
- The garlic and dill combo is classic, making these the Best Refrigerator Dill Pickles for snacking or adding to sandwiches.
- Perfect for beginners! This is such a simple way to get into making your own Easy Homemade Pickles right away. I promise you can’t mess this up. If you loved these quick tips, check out my recipe for Spicy Roasted Chickpeas for another easy snack!
Ingredients for the Best Refrigerator Dill Pickles
When we are making these refrigerator pickles, the quality of what goes into the brine really matters. Since we’re using a hot brine and short pickling time, the fresh flavors really have to pop. I always use a 5% acidity vinegar—don’t try to change that! That acidity level is what makes this a safe, quick pickle. I’ve listed everything you need below so you can lay it all out before you start heating things up. These are simple ingredients, but they work together beautifully to create those Crunchy Homemade Pickles.
Essential Components for Garlic Cucumber Pickles
- About 2 pounds of firm, fresh pickling cucumbers, sliced up into spears or rounds. Make sure they are quality cucumbers!
- 4 cloves of garlic, and you need to give them a good smash. Don’t mince them; just smash them enough to release that great garlic flavor into the brine.
- 1/4 cup of fresh dill sprigs. Don’t even think about using the dried stuff here; fresh dill is non-negotiable for the best flavor.
- 1 1/2 cups of water. Tap water is usually fine, but if yours tastes strongly of chlorine, use filtered.
- 1 1/2 cups of white vinegar—it MUST be 5% acidity. This is important for the quick process, so check that label!
- 2 tablespoons of kosher salt. I prefer kosher because the larger crystal dissolves nicely without making the brine cloudy.
- 1 tablespoon of granulated sugar to balance out that vinegar tang.
- 1 teaspoon of whole black peppercorns rolling around in there with everything else.
If you’re interested in other flavor profiles, swing by my recipe for the Spicy Thai Basil Beef Stir-Fry, though trust me, this pickle recipe doesn’t need much changing!
Step-by-Step Instructions for Quick Refrigerator Pickles
Alright, this is the fun part! Making these refrigerator pickles requires zero fancy equipment—mostly just a saucepan and some jars. I promise you, if you can boil water, you can make these pickles. Just follow the steps exactly, especially regarding that tiny bit on the end of the cucumber. Don’t skip it!
Prepping Cucumbers and Jars
First things first, you need to wash those cucumbers until they are squeaky clean. Now, here’s the expert tip—and this is vital information for those Crunchy Homemade Pickles you want: Trim off the blossom (or flower) end of the cucumber. This little round spot at the bottom holds natural enzymes that actually break down the pectin in the cucumber, making them mushy. We don’t want mush! We want snap!
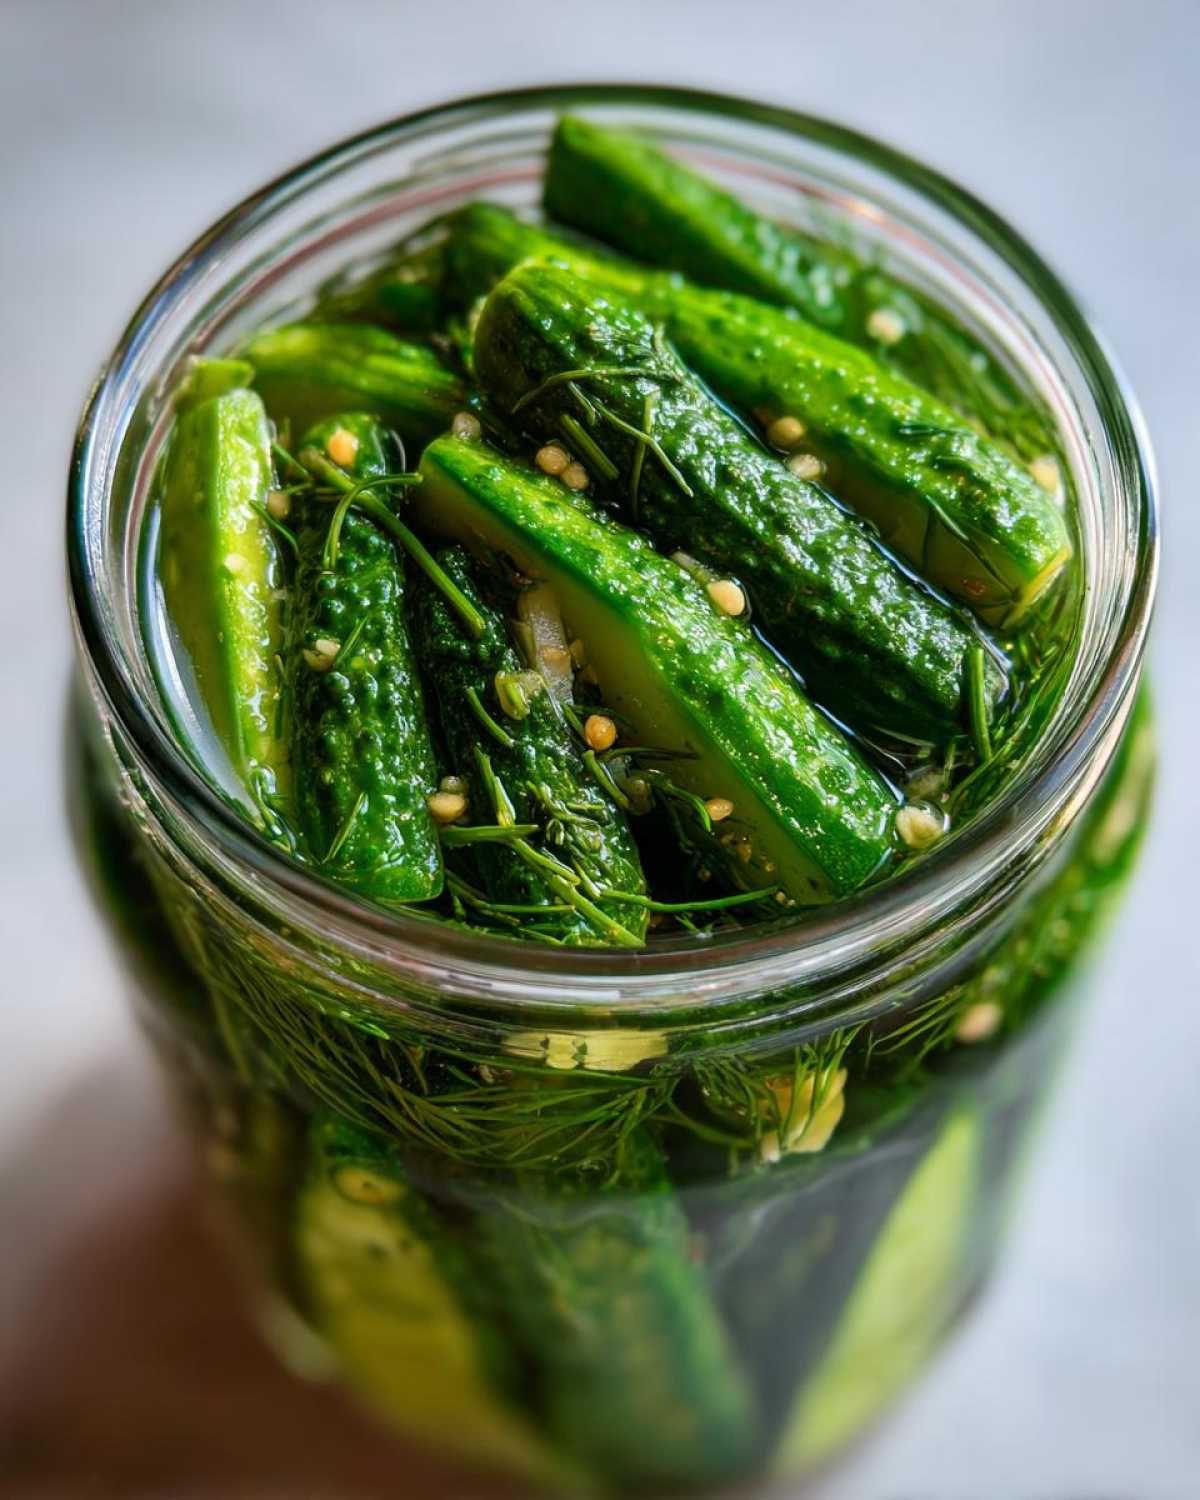
Make sure your jars are clean and ready. I usually use two pint jars for this batch. Pack your cucumber spears or rounds into the jars tightly, making sure to tuck in those smashed garlic cloves and dill sprigs as you go. You need to leave about an inch of space at the very top—that’s called headspace, and everyone needs their space, even your pickles!
Making and Applying the Simple Pickling Recipe Brine
Time to tackle the brine. Grab a medium saucepan—don’t use aluminum if you have it, stainless steel is best. Throw in the water, vinegar, kosher salt, sugar, and those peppercorns. Set it over medium-high heat and stir constantly until everything dissolves. Just keep stirring until it’s crystal clear and comes to a rolling boil. You want that salt and sugar completely gone!
Once it’s boiling, carefully pour that hot liquid—your beautiful brine—over the cucumbers in the jars. Make sure those cucumbers are completely covered by the liquid, but leave about a half-inch gap from the top rim. Give the jars a gentle tap on the counter if you see any big bubbles clinging to the sides. We want them gone! Wipe the rims super clean—no sticky residue allowed—and secure the lids and rings.
Cooling and Refrigerating Your 24 Hour Pickles
These just need a little cooldown time before they head into their chilly vacation. Leave the sealed jars out on your counter to cool down slowly for about an hour. It’s important they don’t go straight from the boiling brine into the ice-cold fridge—that temperature shock can sometimes make the glass crack, or worse, make the pickles soft! Whoops!
Once they are just warm to the touch, take them straight into the refrigerator. Now, here’s the hard part: waiting. You technically could eat them after 6 hours, but for the absolute best flavor saturation and that signature crispness, you have got to wait a full 24 hours. After 24 hours, they transform into amazing 24 Hour Pickles, ready for your next Easy Honey Garlic Chicken dinner!
Tips for Achieving Crunchy Homemade Pickles
I know it feels like we covered everything, but let’s talk one-on-one about the *snap* factor, because everyone asks me how I get these refrigerator pickles to stay firm. My approach is proactive—we address crispness right from the start instead of hoping for the best later! If you want truly exceptional Crunchy Homemade Pickles, you’ve got to be a little particular about what heads into the brine. I’ve learned a few tricks over the years perfecting this technique for my friends and family.
There are little things you can do besides trimming the blossom end that really make a difference in texture. Honestly, if your pickles end up soft, it’s usually because of one of two things: bad cucumbers or not using the secret weapon for crispness!
Ingredient Choices for Maximum Crispness
Okay, first up: the cucumbers. You absolutely must use pickling cucumbers, not the watery slicing cukes you usually grab for salads. They are generally smaller, have thinner skin, and just have a better texture for holding up to the brine. They need to be as fresh as possible—if they are already soft at the store, put them down! They are never going to get crunchy in a jar.
We already talked about trimming that nasty blossom end—that’s step one for keeping the pectin strong. But if you want to go full expert mode, you can add something called pickling crisp, or calcium chloride, right into the jar before the brine. Just a tiny bit—I use about half a teaspoon per pint jar. It helps the cucumber cells stay rigid, and wow, does it work! It’s totally optional, but if you want pickles that feel like they came from the best deli, this is your move.
I often share my favorite cold weather recipes, like my Broccoli Cheddar Soup, but when summer hits, it’s all about fresh things like these pickles!
Storage and Shelf Life for Fresh Pickled Cucumbers
Now that you’ve waited the required 24 hours, you have these incredible, crisp refrigerator pickles ready to eat! The best part about this whole process is that they stay in the fridge, which means no complicated water bath processing or pressure canning needed. It’s the easiest preservation method around for quick flavor.
Since this is a quick pickle, and not a shelf-stable canned item, storage is simple: they live in the cold environment of your fridge. They taste amazing right away, but I’ve found that they actually hit their peak flavor complexity somewhere around day three in the jar. They’re still perfectly crunchy, but the garlic and dill have really infiltrated every crevice by then.
Here’s the important bit regarding texture: these pickles hold up beautifully, but they are not designed to last forever on the shelf like their canned cousins. For the absolute best experience—for that delightful crunch—try to finish up your batch within about three weeks. After that, while they’re usually still safe if kept cold, that amazing texture starts to soften just a tiny bit. We want to enjoy them at their crunchiest, right? They are fantastic toppers for my Mason Jar Taco Salad, by the way!
Just make sure the jars stay sealed and cold the whole time. If you ever smell anything “off” or see any cloudiness that wasn’t there when they cooled down, throw them out immediately—we always follow good food safety practice!
Quick Pickle Variations for Tangy Refrigerator Snacks
Part of the fun of making these pickles without canning is that you have total control over the flavor profile! If you’ve mastered the classic dill and garlic setup, you are totally ready to experiment with some other Quick Pickle Variations. It’s still the exact same process—boil the brine, pour it hot, and chill—but we’re swapping out the aromatics to create something totally new and exciting. These are so fun to make in small batches so you can basically keep your fridge stocked with a whole pickle tasting flight!
The easiest way to mix things up is by playing with the vinegar or the herbs. Maybe you use less vinegar and more lemon juice for an extra bright zing, or maybe you spice up the brine itself. It’s your kitchen, girl, go wild! If you enjoy experimenting with bold flavors, you absolutely have to try my recipe for the Cajun Shrimp Alfredo Pasta; this pickle recipe is just as versatile, I promise!
Here are a few of my favorite swaps that turn these crunchy snacks into something totally different:
- Spicy Sweet: Add 1/4 cup of sliced jalapeños to the jar along with the cucumbers. Then, for the brine, bump the sugar up to 2 tablespoons and throw in a pinch of mustard seeds when you boil the liquid. Talk about a fiery, Tangy Refrigerator Snack!
- Asian Inspired: Swap out the fresh dill for thinly sliced ginger coins. Use rice vinegar instead of white vinegar in the brine (keep the 1 1/2 cup measurement). This gives you a fantastic crunch reminiscent of Japanese quick pickles.
- Herbal Powerhouse: For a deep, earthy flavor, ditch the dill and use fresh thyme and rosemary sprigs instead. Add a bay leaf to the brine as it boils. This works especially well if you use slightly smaller Persian cucumbers.
See? It’s so easy to keep things fresh and exciting just by switching up what you put in the jar!
Serving Suggestions: Perfect Sandwich Topper Pickles
Okay, you’ve checked the jars—it’s officially been 24 hours, and you have the snappiest, garliest, zingiest pickles in the neighborhood. Now what? Well, we use them, of course! These aren’t just for nibbling straight out of the jar (though I totally do that while standing in front of the fridge). These are built to be the ultimate Sandwich Topper Pickles that cut through heavy flavors.
Because these are bright, tangy, and packed with fresh dill, they provide that instant acidic punch that makes any heavy sandwich sing. They provide amazing texture contrast on things that might otherwise feel a bit soft or monotonous. Think about it: a creamy chicken salad or a rich grilled cheese. You need that crunch!
I always have a jar ready when I make my favorite quick lunches. If you haven’t tried loading them onto a sandwich, you are missing out! For a perfect pairing, you should definitely check out my recipe for Chicken Caesar Wraps—add a few pickle spears inside, and WOW, instant upgrade.
Here are a few ways I love to deploy these homemade gems:
- The Burger Upgrade: Slice them thinly lengthwise and stack three or four right on top of your patty before adding the top bun. The heat from the burger warms them just enough, making them extra juicy.
- Chopped for Spreads: Dice up a few spears and mix them straight into tuna salad, egg salad, or even hummus for an instant flavor boost. It’s way better than using jarred relish, trust me!
- Charcuterie Platter Hero: They are brilliant nestled between sharp cheddar or salty prosciutto. That vinegary snap cleanses the palate perfectly between bites of rich cheese.
- Diced into Hot Dogs: If you’re a fan of those gourmet hot dogs with all the toppings, finely dice these and toss them with a little mustard and onion on top.
Seriously, get creative! They wake up everything they touch.
Frequently Asked Questions About Refrigerator Pickles
I know when you start out making refrigerator pickles, you have a million little questions popping up. That’s totally normal! It’s part of the fun of learning this Beginner Pickling Guide, right? Since we aren’t canning, a few steps require extra attention so we ensure maximum crunch and safety. I’ve compiled the questions I get asked most often about this specific recipe.
Can I make these refrigerator pickles using other vegetables?
Absolutely, yes! This simple hot brine method works fantastically on lots of sturdy veggies. Feel free to substitute half the cucumbers with sliced carrots, small button onions, or even trimmed green beans. Just make sure whatever you use packs well into the jar because air gaps are the enemy of a good pickle!
How long do I really need to wait before eating these 24 Hour Pickles?
Technically, because we use a hot brine with high enough vinegar content, they are preserved immediately and are safe to eat after just 6 or 8 hours in the fridge if you’re desperate. However, I really, truly beg you to wait the full 24 hours. The flavor doesn’t really penetrate the cucumber very well before then. If you want that deep, garlicky dill flavor, the full day is required for these 24 Hour Pickles to taste like perfection.
Is it safe to skip boiling the brine for this No Canning Pickles Recipe?
No, please don’t skip boiling the brine! For this whole No Canning Pickles Recipe method to work correctly, you need to bring that water, vinegar, salt, and sugar solution to a full boil. Boiling does two essential things: first, it dissolves all the solids perfectly so the brine isn’t gritty later on. Second, and most importantly, heating the vinegar slightly helps it properly penetrate the cucumber cells faster and helps stabilize the acidity needed for safety, even in the fridge. Boiling is quick—it only takes about five minutes!
If you’re trying to find a great way to use these pickles up, they are amazing chopped up on my recipe for Speedy BBQ Chicken Wraps for a little vinegary kick!
Nutritional Estimate for These Simple Pickling Recipe Servings
I always get asked about the numbers, and while I’m not a nutritionist, I do track things loosely to see how these snacks fit into our busy days. Since these are homemade and loaded with fresh cucumbers, they are impressively light! Remember, these figures are just estimates based on the specific ingredients I use and calculated for one standard serving size of about four pickle slices. Don’t stress too much about the exact milligrams; focus on the fact that these are real food, not something processed!
If you are looking for another great light recipe, my Pumpkin Smoothie is surprisingly low in sugar but packed with flavor. Anyway, here’s the breakdown for enjoying a serving of these fantastic pickles:
- Serving Size: 4 slices
- Calories: 15 (Seriously, 15!)
- Sugar: 2 grams (Mostly from that tiny bit of sugar we add for balance)
- Sodium: 350 mg (Salt is necessary for pickling, so this is something to be aware of if you are watching your intake closely.)
- Fat: 0 grams
- Carbohydrates: 4 grams
- Protein: 0 grams
See? Super light! It’s a perfect tangy side or crunchy snack without weighing you down.
Share Your Best Refrigerator Dill Pickles Experience
Whew! We did it! We made history! You now have the ultimate guide to making the crispiest, most garlicky, easy batch of refrigerator pickles. Honestly, I can’t wait for you to crack open that jar tomorrow and hear that perfect *SNAP* for the first time. That’s the sound of success, my friends!
Now that you’re officially inducted into the quick-pickle club, I really want to hear all about it! Did they turn out as perfectly crisp as mine? Did you add extra red pepper flakes? Did you sneak one before the 24-hour mark? Don’t keep all that deliciousness a secret!
Please hop down to the comments below and let me know how they turned out! Rate the recipe—five stars if you’re obsessed! If you took pictures of your haul, I would absolutely love to see them. Tag me on social media, or just drop a note saying what you’re eating them with first (I’m always looking for new ways to use my Tangy Refrigerator Snacks!).
Making food together, even virtually, is my favorite part of running this kitchen. If you have any last-minute questions that I somehow missed, just drop them in the comments; I personally answer everything! And if you need to get in touch directly for any reason, you can always head over to the Contact page. Happy crunching!
PrintCrispiest 24-Hour Garlic Dill Refrigerator Pickles
Make crunchy, flavorful dill and garlic pickles quickly without canning. These pickles are ready to eat in 24 hours and store in your refrigerator.
- Prep Time: 20 min
- Cook Time: 5 min
- Total Time: 25 min
- Yield: 2 pints
- Category: Snack
- Method: Quick Pickling
- Cuisine: American
- Diet: Vegetarian
Ingredients
- 2 lbs pickling cucumbers, sliced into spears or rounds
- 4 cloves garlic, smashed
- 1/4 cup fresh dill sprigs
- 1 1/2 cups water
- 1 1/2 cups white vinegar (5% acidity)
- 2 tablespoons kosher salt
- 1 tablespoon granulated sugar
- 1 teaspoon black peppercorns
Instructions
- Wash the cucumbers well. Trim off the blossom end of each cucumber; this end contains enzymes that can soften the pickles. Slice the cucumbers into spears or rounds.
- Pack the cucumber slices, smashed garlic cloves, and dill sprigs tightly into two clean pint-sized mason jars, leaving about 1 inch of headspace.
- In a medium saucepan, combine the water, vinegar, kosher salt, sugar, and peppercorns. Bring the mixture to a boil over medium-high heat, stirring until the salt and sugar dissolve completely. This is your brine.
- Carefully pour the hot brine over the cucumbers in the jars, ensuring all cucumbers are submerged. Leave about 1/2 inch of headspace at the top.
- Tap the jars gently on the counter to release any trapped air bubbles. Wipe the rims clean.
- Seal the jars with lids and rings. Let the jars cool on the counter for about 1 hour.
- Transfer the jars to the refrigerator. Allow the pickles to chill for a minimum of 24 hours before eating for the best crispness and flavor.
Notes
- For extra crispness, you can add 1/2 teaspoon of pickling crisp (calcium chloride) to each jar before adding the brine.
- If you prefer a spicier pickle, add 1/2 teaspoon of red pepper flakes to the brine mixture.
- These pickles maintain their best texture for up to 3 weeks when stored continuously in the refrigerator.
Nutrition
- Serving Size: 4 slices
- Calories: 15
- Sugar: 2
- Sodium: 350
- Fat: 0
- Saturated Fat: 0
- Unsaturated Fat: 0
- Trans Fat: 0
- Carbohydrates: 4
- Fiber: 0
- Protein: 0
- Cholesterol: 0