

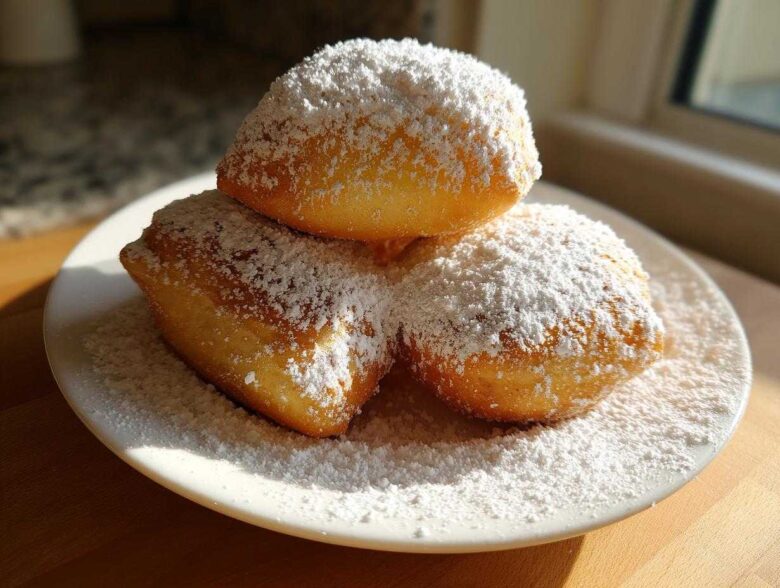
Oh my goodness, there is absolutely nothing in the world that beats the smell of yeast dough hitting hot oil, especially when you know it’s going to turn into one of these glorious, puffy pillows! Seriously, forget those dense, sad fried rings you sometimes get; we are making truly light and airy Vanilla French Beignets today. Trying to nail that perfect cloud-like texture took me ages, I won’t lie—my first few batches were basically fried frisbees! But I finally cracked the code on the yeast and the temperature, and now I can whip up these authentic squares of magic faster than you can brew your coffee. Get ready to fall in love with this incredible breakfast treat!
Why You Will Love These Vanilla French Beignets
I know you have a lot of fried pastry options out there, but trust me, these are special. If you follow my temperature rules, you’re going to get results that rival any trip to New Orleans!
- They Actual Puffy Clouds: Forget dense or heavy—this yeast dough and frying technique guarantees that signature airy interior. If you listen to me about the oil temp, they puff up beautifully!
- Heavenly Vanilla Infusion: We use good vanilla extract (or the seeds if you’re feeling fancy!) which really brightens up the sweet, fried dough. These aren’t just plain doughnuts, nope!
- Incredibly Simple Dough: While they use yeast, the mixing process is straightforward. Once the yeast is happy, the dough does most of the hard work while it proofs.
- Perfect for Brunch: Serving these Vanilla French Beignets on a Sunday morning is the ultimate show-off move. They cook so fast once the oil is ready that you can get them all out right before everyone sits down.
- The Best Powdered Sugar Finish: There is something truly satisfying about shoveling these warm pastries under a mountain of powdered sugar until they are completely white. It’s just pure joy!
Gathering Ingredients for Vanilla French Beignets
Let’s get our supplies ready! Since these pastries rely so much on the quality of the rise, we need accurate measurements here. Don’t skimp, especially on the vanilla—that’s what makes these *vanilla* beignets, after all! You’ll need:
- 1 cup warm milk (needs to be between 105-115°F—just warm to the touch, not hot!)
- 2 1/4 teaspoons active dry yeast
- 1/4 cup granulated sugar
- 1 large egg
- 1 teaspoon vanilla extract
- 1/2 teaspoon salt
- 3 cups all-purpose flour, plus more for dusting surfaces
- Vegetable oil, enough for deep frying (you’ll need 2 to 3 inches worth)
- Powdered sugar for that famous snowy finish
My little expert tip? If you happen to have half a vanilla bean sitting around, scrape those gorgeous seeds right in with the extract. It gives the dough this incredible, rich vanilla aroma that you just can’t get from powder alone. It takes this recipe up a huge notch, especially if you’re planning on serving it alongside my favorite French hot chocolate!
Essential Equipment for Light and Fluffy Fried Dough
Okay, while the dough is forgiving, frying is not. If you want those big, beautiful puffs—the kind that seem to defy gravity—you have to treat your oil right. That means having the right tools on hand before you even start kneading. Don’t wing this part, or you’ll get heavy, greasy squares, and nobody wants that!
Here’s what you absolutely need sitting on your counter before the oil starts heating up:
- A heavy-bottomed pot or Dutch Oven: This is crucial! Thicker metal holds heat way better than thin pots. When you drop cold dough in, you don’t want the temperature to crash instantly, which is what happens in flimsy pans.
- A reliable deep-fry or candy thermometer: I cannot stress this enough. Being off by 10 degrees makes a huge difference when you’re frying dough. You need to hit that 375°F sweet spot exactly.
- A slotted spoon or spider strainer: You need a way to gently place the squares in the oil and smoothly lift them out without splashing hot fat everywhere.
- Plenty of cooling racks: You’ll need space to let these drain properly. Don’t pile them up on paper towels alone if you can help it; air circulation helps them stay crispier!
- A large rolling pin: We need to roll this dough out to a specific thickness, so a decent pin helps immensely in keeping things even across the whole surface.
Authentic Beignet Instructions: Making the Yeast Dough
Alright, let’s get this party started! The most important thing we are doing right now is keeping our yeast awake and happy. Take that warm milk—and check the temperature! It must be cozy, not hot, or you’ll kill the yeast instantly. Sprinkle the dry yeast right on top and let it sit for about five minutes. You want it frothy, like a tiny, bubbly cloud. That foam tells me, “Okay, we’re good to go!”
Once it’s foamy, whisk in your sugar, that gorgeous vanilla extract, the salt, and the egg. Then, we add the flour gradually. Remember what I said? We want this dough to be soft and just a little bit sticky. When I first tried making my Vanilla French Beignets, I panicked over the stickiness and dumped in way too much flour. Oops! That led to bricks later. Instead, just mix until it barely comes together.
Now comes the kneading. You need to work this dough on a lightly floured surface for about five to seven minutes. It should smooth out and get elastic beneath your hands. It’s not quite bread dough smooth, but it needs to feel supple. Honestly, if you love working with dough, you might want to check out my tips for no-knead bread, but these beignets need a little more elbow grease!
Kneading and First Proofing for Vanilla French Beignets
After you knead it, put the dough into a bowl you’ve lightly oiled—give it a quick turn so it’s coated all over. Cover it tightly with plastic wrap. Now, find the warmest spot in your kitchen. I usually put mine in the oven with *just* the light on (never turn the heat on!). You need to let this yeast do its thing for 1 to 1.5 hours. Proper proofing is the absolute key to getting those gorgeous, light and fluffy fried dough results later. If it proofs nicely, your Vanilla French Beignets will be spectacular!
Shaping and Preparing for Deep Frying Your Vanilla French Beignets
Once your dough has doubled—and I mean *doubled*, not just gotten a little puffy—it’s time to gently deflate it. Think of it as giving it a gentle hug, not punching it aggressively! Turn it out onto a surface that has been generously dusted with flour. This is where a lot of people get into trouble trying to make these Vanilla French Beignets.
You must roll this dough out evenly to about 1/4 inch thick. Not half an inch, and definitely not paper thin! If you roll it too thick, the outside burns before the middle cooks through and puffs. If you roll it too thin, it won’t have the necessary structure to balloon up in the oil, and you’ll end up with sad, flat discs.
Take a sharp knife or pastry wheel and cut the dough into rough squares, about 3 inches wide. I don’t measure mine precisely because my grandmother’s were always wonderfully irregular, which just adds to the charm! But watch your flour usage here. If the dough starts sticking to your hands or the rolling pin, resist the urge to pile on more flour! Adding too much extra flour now ruins the whole structure we built during that perfect proofing stage. If it’s a little sticky, just use your bench scraper to gently lift and move it, or lightly dust your hands instead of the whole work surface. You can see a few tips on handling fried batters in my ultimate guide to crispy fried goods if you’re nervous!
I always feel like I’m getting one step closer to the real deal when I see those squares lining up, ready for their quick swim. Since we are aiming for ultra-light pastries, these shapes are far superior to circles. Make sure you have your oil heating up right when you finish cutting, because these squares don’t want to wait around!
Yeast Dough Frying Technique for Puffy Results
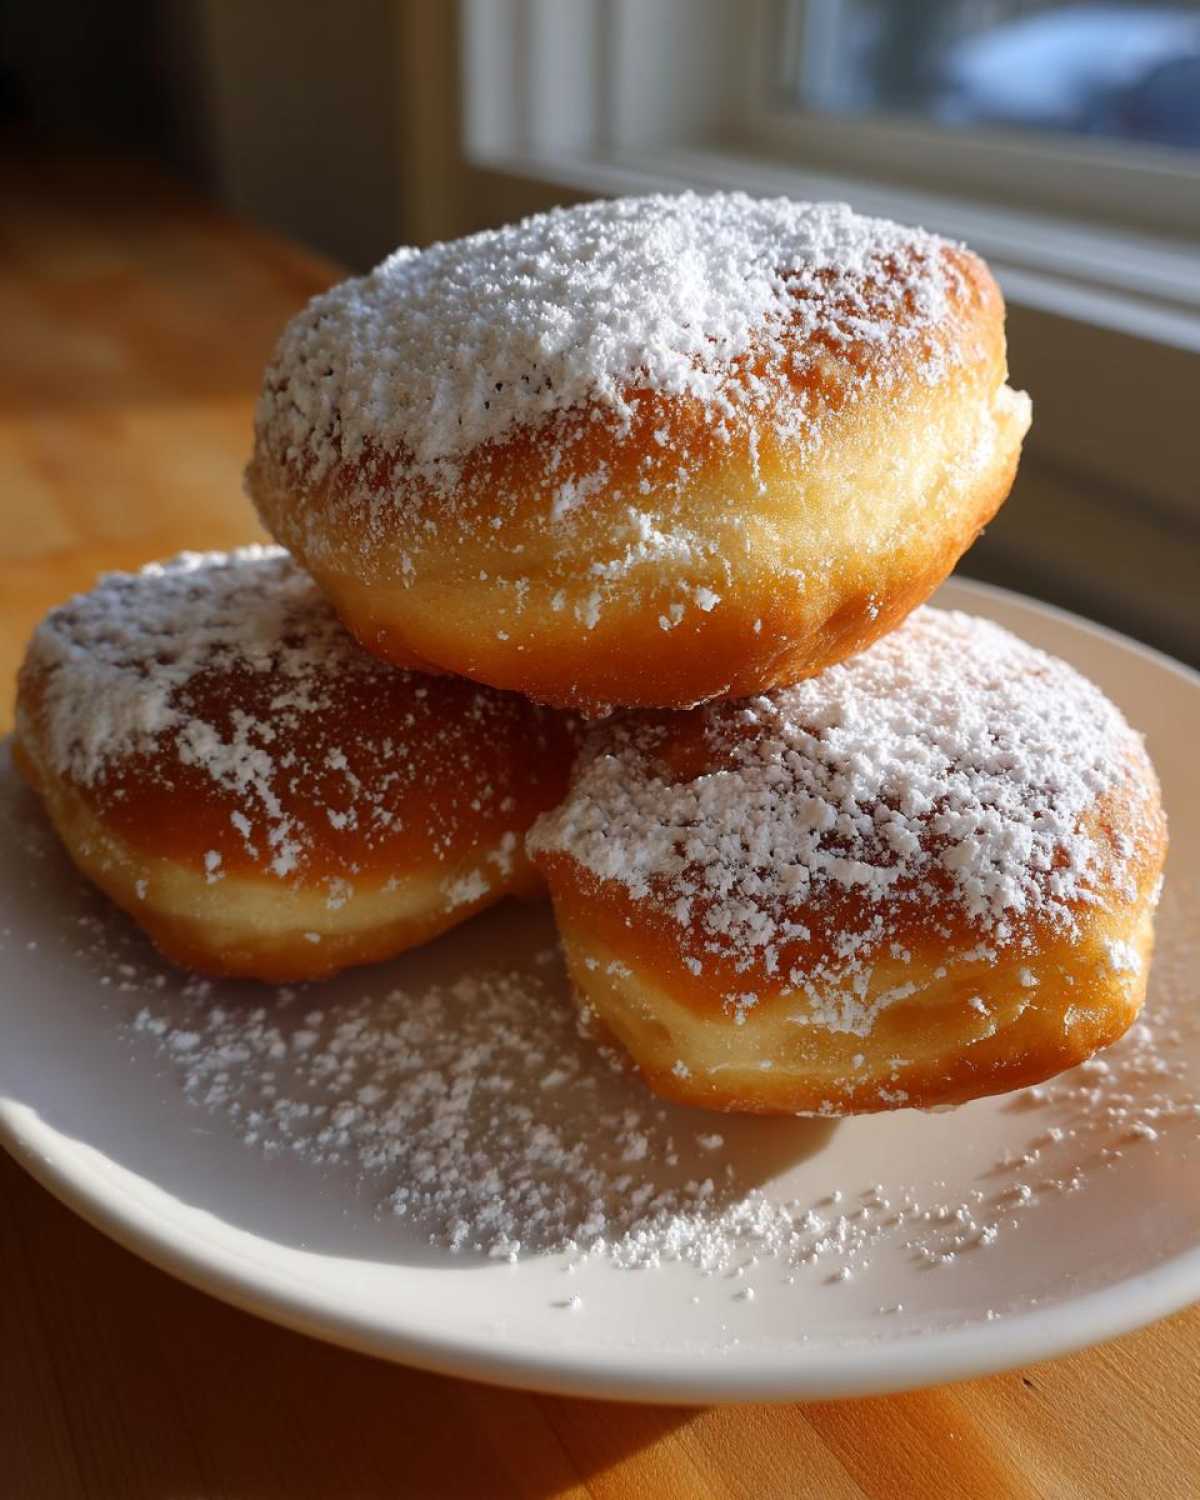
This is the moment of truth, folks! If you nail the oil temperature, I promise you, everything else falls into place. The secret to achieving that airy, cloud-like texture is ruthless temperature control. We absolutely must have 2 to 3 inches of vegetable oil heating in that heavy pot until it hits exactly 375°F (190°C). If you don’t have a thermometer, just don’t even bother—you need one for this.
Why 375°F? If the oil is too cool, the dough just sits there soaking up fat like a sponge, and those squares will end up dense and greasy. Trust me, I’ve made greasy bricks before, and it was soul-crushing! Conversely, if it’s too hot, the outside will burn black before the yeast inside even has time to puff up.
When the oil is ready, carefully drop 3 or maybe 4 dough pieces in. Do not overcrowd the pot! If you put too many in, the oil temperature plummets instantly, and you’re back to square one (the greasy square). Let them sit peacefully for just 1 to 2 minutes per side. You’ll see them swell up beautifully. They should turn a gorgeous, even golden brown. As soon as you see that color, carefully flip them once. Once both sides are golden, pull them out immediately!
Finishing and Dusting Your Classic French Beignet Recipe
The moment they come out of that beautiful hot oil, you have to move fast! They need just a moment to shed the extra grease. Don’t let them sit in a heavy pile on plain paper towels, though, because that traps steam and you lose some of the crispness. Use a slotted spoon to gently transfer your golden pillows onto a wire rack that’s sitting over a layer of paper towels. This lets the air circulate underneath them while the oil drips off.
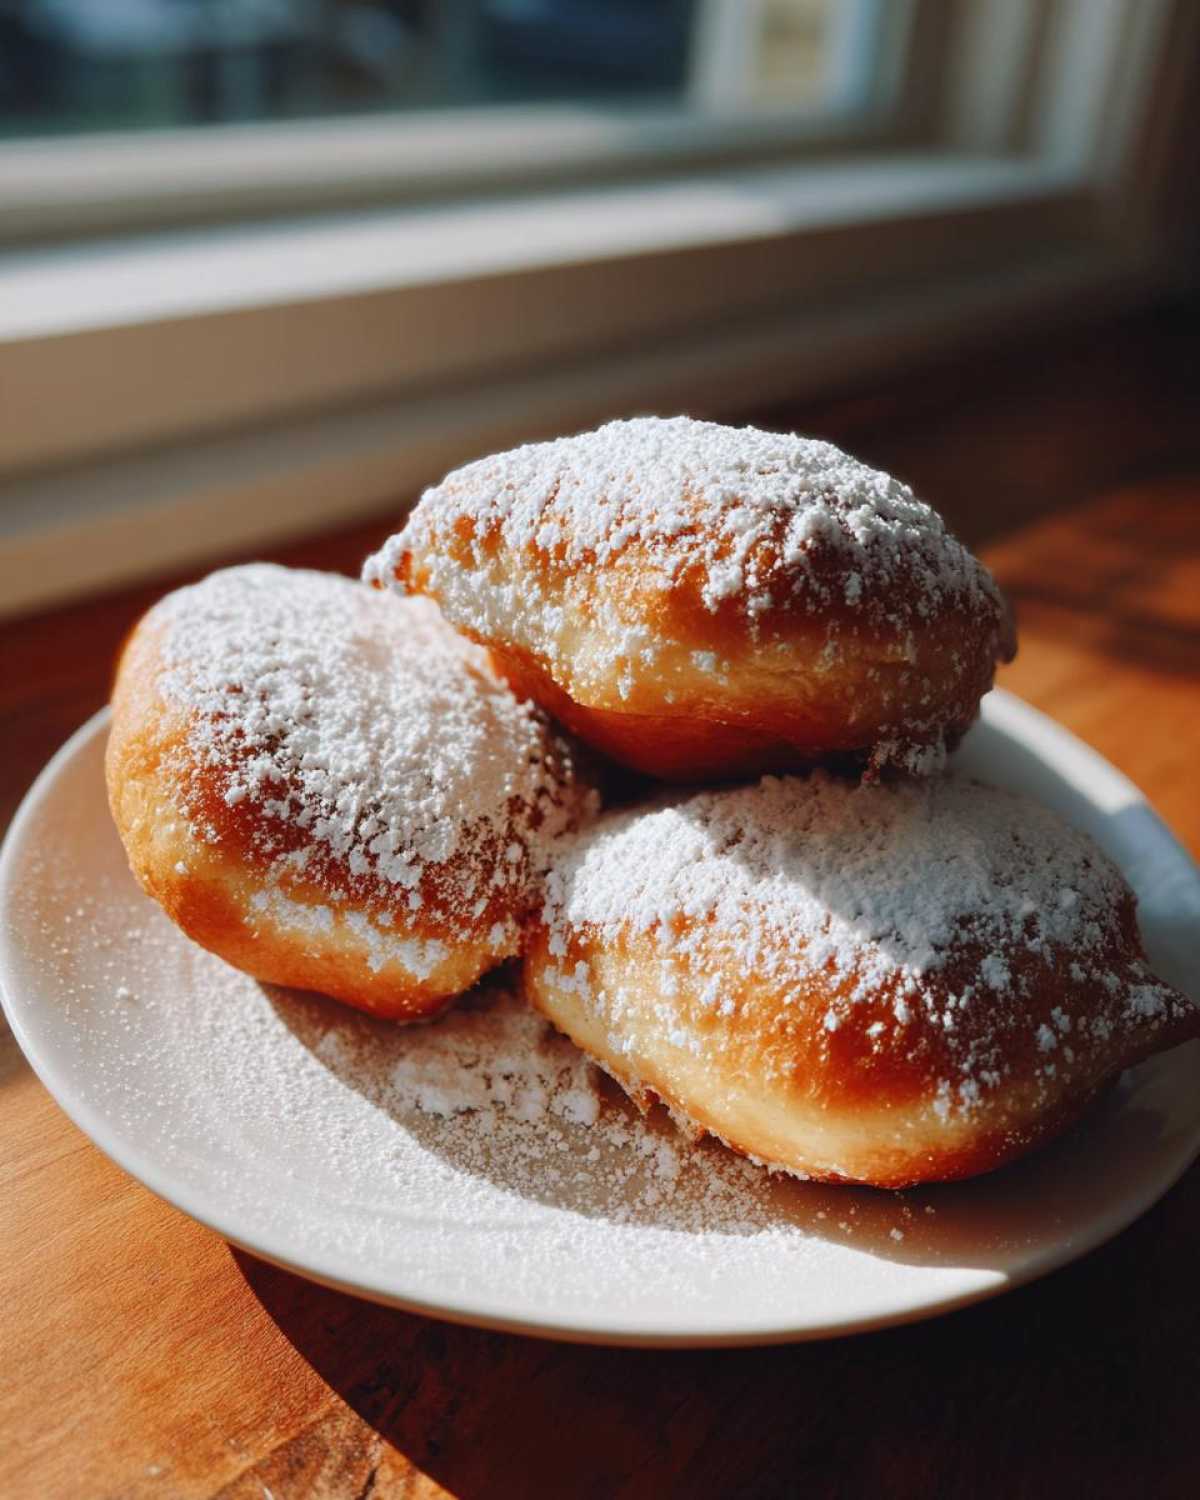
Now, the best part! The absolute best part of making these Vanilla French Beignets is the powdered sugar finale. You have to dust them while they are still warm! If you wait until they cool down completely, the powdered sugar just slides off or sits on top looking sad. If they are warm, the tiniest bit of surface moisture grabs that sugar and holds it tight. I take a fine-mesh sieve—the smaller the holes, the better—and just generously shower them. I mean, cover them! It’s okay if you want to shake up your powdered sugar cookies recipe for a lighter dusting, but for beignets, pile it on high!
Honestly, I usually double-dust them. Once they drain off their first layer of sugar, I flip them over, give them another 30 seconds to cool just slightly, and then hit the other side with another heavy cloud of sugar. Seeing those sweet squares disappear under the white powder is what makes all that rising and frying worth it, and this guarantees you the best results for your Classic French Beignet Recipe. Serve them immediately, preferably with a strong cup of chicory coffee!
Troubleshooting Common **Airy Beignet Recipe** Issues
Even when you follow the steps perfectly, sometimes fried dough can throw you a curveball. Don’t panic, and definitely don’t throw them out! Most issues with beignets come down to one thing: temperature management. If they aren’t puffing up like you see in photos, it’s almost always because the oil isn’t hot enough. If the temperature dips below 360°F when you add the dough, they start absorbing oil before the yeast can push them skyward.
If your beignets are coming out looking pale, soft, and heavy—almost soggy—that’s the same culprit: low oil temperature. They went for a swim, but they didn’t get hot enough to create that instant crust that locks the air in. Be patient, let the oil recover between batches, and always trust that thermometer!
Another common issue I hear about is the dough being impossible to roll out because it keeps snapping back. That means it’s too cold or hasn’t rested enough after the initial knead. If this happens, just cover the dough again and let it sit out at room temperature for another 15 minutes. It needs to relax! Gluten is tough, and you have to treat it nicely.
If you’re having trouble getting through a batch without a mess, sometimes it’s just a matter of technique. If you use too much flour while rolling, the dough becomes tough. If you are struggling or worried about burning yourself, please stop, cool the oil down, and maybe take a breather before proceeding. If you need to reach out for personal help, you can always contact me via my contact page—I’m happy to troubleshoot!
Frequently Asked Questions About Vanilla French Beignets
I get so many questions whenever I post photos of my beignets on social media! It makes total sense, because there are a few little tricks that stop them from being dense and make them puff up just right. Here are some of the things I hear most often when people are trying out this Airy Beignet Recipe for the first time.
Can I make the Vanilla French Beignets dough ahead of time?
You absolutely can manipulate the timeline! Yeast doughs are often better when they take their sweet time. After you knead it and it’s ready for its first rise (Step 5 in the main recipe), instead of letting it sit on the counter for an hour, you can put that oiled bowl in the fridge overnight, covered tight! Then, the next morning, pull it out and let it warm up on the counter for about an hour to finish proofing before you roll it out. You get that slow-rise flavor, but without having to wake up at 5 AM!
What is the difference between these and standard fried dough?
That’s a great question that gets right to the heart of what makes this a Classic French Beignet Recipe! Standard fried dough, like funnel cakes or some quick doughnuts, uses baking powder or soda as the leavening agent. That chemical reaction happens super fast when it hits the heat. These are different because we use yeast. Yeast eats the sugar and creates carbon dioxide gas slowly, which builds up this incredible, light, stretchy gluten structure while it proofs. That structure then traps the steam when it hits the fryer, causing that characteristic puff. Plus, we get that wonderful, deep vanilla flavor throughout the dough, not just on top!
Should I use oil or shortening for frying?
For Vanilla French Beignets, I am a huge advocate for using a neutral vegetable oil, like canola or peanut oil. The reason is simple: stability and clean flavor. Shortening can sometimes leave a slightly heavier mouthfeel, and we are fighting hard against any heaviness here! Vegetable oil gets hot easily and stays clean-tasting, which lets that vanilla and the sugar shine through. You want a nice, clean taste in your Powdered Sugar Doughnuts!
How do I make sure my beignets don’t tear while frying?
Usually, tearing happens for two reasons: either the oil temperature is too high, causing the outside to set too fast before the inside can push it open, or you are handling the cut dough too roughly when transferring it. Use your slotted spoon or spider strainer gently. Don’t drop them in from high up; lower them carefully right into the oil. If you’re gentle, they should stretch slightly and puff, not rip. If you’re having trouble because they are sticking to your hands while cutting, you need just a tiny bit more flour on the board, but try to keep it minimal!
If you have any other questions at all on technique—maybe you want to know about storing leftovers or switching up your sugar dusting—feel free to check out my About Me page to see my philosophy on kitchen experimentation!
PrintVanilla French Beignets

A recipe for making light, airy, and classic French beignets flavored with vanilla, deep-fried, and dusted with powdered sugar.
- Prep Time: 20 min
- Cook Time: 15 min
- Total Time: 1 hour 50 min
- Yield: About 18 beignets
- Category: Dessert
- Method: Deep Frying
- Cuisine: French
- Diet: Vegetarian
Ingredients
- 1 cup warm milk (105-115°F)
- 2 1/4 teaspoons active dry yeast
- 1/4 cup granulated sugar
- 1 large egg
- 1 teaspoon vanilla extract
- 1/2 teaspoon salt
- 3 cups all-purpose flour, plus more for dusting
- Vegetable oil, for frying
- Powdered sugar, for dusting
Instructions
- Combine the warm milk and yeast in a large bowl. Let stand for 5 minutes until foamy.
- Stir in the granulated sugar, egg, vanilla extract, and salt into the yeast mixture.
- Gradually add the flour, mixing until a soft, slightly sticky dough forms.
- Knead the dough on a lightly floured surface for about 5 to 7 minutes until smooth. The dough should be soft but manageable.
- Place the dough in a lightly oiled bowl, turning to coat. Cover the bowl with plastic wrap and let it rise in a warm place for 1 to 1.5 hours, or until doubled in size.
- Gently punch down the risen dough. On a well-floured surface, roll the dough out to about 1/4 inch thickness.
- Cut the dough into 3-inch squares or irregular shapes.
- Heat 2 to 3 inches of vegetable oil in a deep, heavy-bottomed pot or deep fryer to 375°F (190°C). Use a thermometer to maintain this temperature.
- Carefully drop 3 or 4 pieces of dough into the hot oil, being careful not to overcrowd the pot.
- Fry for about 1 to 2 minutes per side, turning once, until they puff up and are golden brown. They should puff significantly if the oil temperature is correct.
- Remove the beignets with a slotted spoon and place them on a wire rack lined with paper towels to drain excess oil.
- While still warm, generously dust the beignets with powdered sugar before serving.
Notes
- For the best puff, ensure your oil temperature stays consistently at 375°F. If the oil is too cool, the beignets will absorb too much oil and become dense.
- If you prefer a stronger vanilla flavor, scrape the seeds from half a vanilla bean and add them to the wet ingredients along with the extract.
- If the dough seems too sticky to handle, add flour one tablespoon at a time during kneading, but avoid adding too much, as this leads to dense beignets.
Nutrition
- Serving Size: 2 beignets
- Calories: 250
- Sugar: 12
- Sodium: 150
- Fat: 10
- Saturated Fat: 3
- Unsaturated Fat: 7
- Trans Fat: 0
- Carbohydrates: 35
- Fiber: 1
- Protein: 5
- Cholesterol: 30