

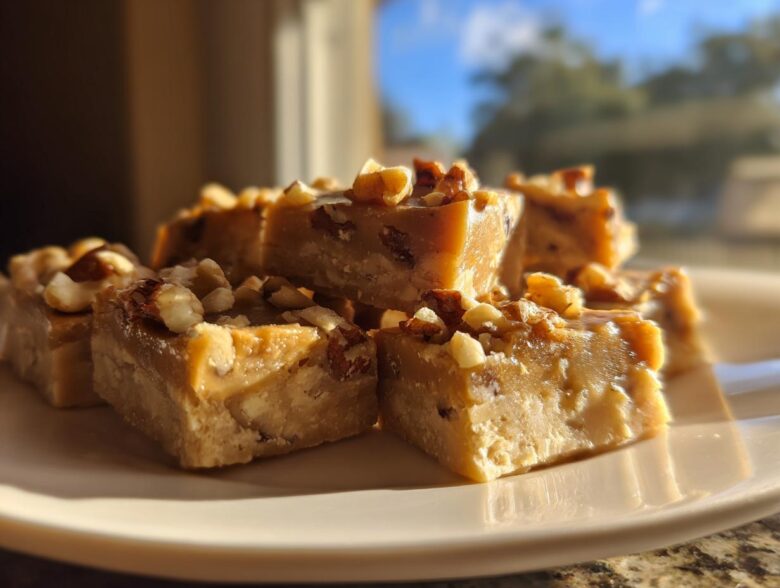
Oh, my heart! When the air gets crisp and you just crave something deep, rich, and cozy, nothing beats that pure taste of the woods. Forget those complicated candy recipes that take all day; I’m talking about a treat that tastes like you spent hours lovingly stirring, but really took maybe fifteen minutes of actual work. This creamy 5-ingredient real maple fudge recipe is my absolute secret weapon. Seriously, last Christmas, my elaborate cookies totally tanked two hours before the party, and this maple fudge saved the day! It sets up perfectly every time, ensuring those decadent squares of sweet confectionery goodness are ready before you even finish cleaning the pot. I think everyone needs this amazing maple fudge in their baking arsenal!
If you want to see how I make other sweet treats that are just as easy, check out my Maple Pecan Pie Bars recipe—it’s another cozy favorite!
Why This Creamy Maple Fudge Recipe Works So Well
Honestly, what’s not to love? This recipe is incredibly kind to busy cooks like me. I can whip this up while the kettle is boiling, and it’s already set by dessert time. It’s all about quality ingredients doing the heavy lifting, you know?
- It’s ready in under 20 minutes of active work.
- You only need five things that are probably already in your pantry.
- It gives you that melt-in-your-mouth feeling without being overly sticky.
Achieving Smooth Fudge Texture with Minimal Effort
The secret to that gorgeous Smooth Fudge Texture is ditching the old-fashioned sugar syrup method. We rely on sweetened condensed milk and white chocolate doing the work! Because the chocolate melts so evenly with the syrup, you don’t need to worry about crystalizing the sugar or hitting weird temperature marks. Just stir until it’s glossy, and you’re golden. It’s truly foolproof candy making!
Ingredients for Decadent Maple Treats
Okay, let’s talk about what goes into these heavenly confections. Since there are so few ingredients, you really have to use the good stuff here. Trust me on this—skimping here means you miss out on that truly luxurious flavor we are aiming for. We are making Real Maple Syrup Desserts that actually taste like real maple!
Here’s what you’ll need for this simple candy recipe:
- One (14 ounce) can of sweetened condensed milk
- One (12 ounce) package of white chocolate chips
- One full cup of pure maple syrup
- One teaspoon of good vanilla extract
- A half cup of chopped walnuts (only if you want that extra crunch!)
It’s so simple it feels like cheating! If you’re looking for other ways to use up those maple vibes, check out my recipe for Maple Candied Pecans—those are incredible on salads or just eaten straight from the jar!
Ingredient Notes and Substitutions for Maple Fudge
Listen up, this is crucial for that amazing result: You *must* use 100% pure maple syrup. I know the grocery store aisle is confusing, but if the label says “pancake syrup” or “flavored syrup,” put it back! Those have corn syrup and artificial goo, and your fudge will set up weirdly and taste super fake. We want that deep, earthy, robust flavor that only the real stuff provides.
Now, about those walnuts—they are completely optional. If you have nut allergies, skip them, and you’ll just get a smoother, purer maple square. If you do add them, make sure they are roughly chopped. If they are too fine, they just disappear into the mix, and I like having those little bursts of crunch mixed into the creamy fudge.
How to Prepare Easy Maple Fudge
Getting this incredible maple fudge ready is a breeze, I promise! We’re whipping this up on the stovetop, and it’s so fast because we aren’t messing around with candy thermometers or fussy crystallization worries. Just melt, stir, and chill—that’s the winning trifecta for perfect holiday fudge. You’ll be amazed at how quickly you can go from ingredients to a sweet confection!
Before we start melting anything, grab an 8×8 baking pan and line it with parchment paper, making sure you leave a nice overhang on those sides. This parchment sling is my favorite trick for lifting the whole block out later! You can check out how I use parchment for easy cleanup on my Maple Pecan Waffles, too; it’s a life-saver.
Step-by-Step Instructions for Quick Dessert Ideas
Grab your medium saucepan and set the heat to medium-low. We’re going to toss in the sweetened condensed milk, the white chocolate chips, and that glorious cup of maple syrup. Now, here comes the most important part of the whole process: you have to stir constantly!
You aren’t trying to boil this at all—and I mean it! If it starts bubbling aggressively, take it off the heat immediately. Boiling concentrates the sugars too much and you’ll end up with a grainy catastrophe instead of that Creamy Fudge we want. Keep stirring gently until everything is completely melted and looks like one smooth, shiny, caramel-colored dream. Once it’s perfectly combined, pull the whole thing right off the burner.
Next up, stir in your vanilla—just a teaspoon is plenty to really make that maple flavor pop. If you decided you needed those walnuts for extra texture, stir them in right now. Don’t overmix once the chocolate is gone; just enough to incorporate everything evenly.
Chilling and Cutting Your Homemade Maple Fudge Recipe
Pour that beautiful mixture into your prepared pan and use a spatula to smooth the top evenly. Don’t worry about smoothing it perfectly flat yet, as it will settle mostly on its own. Now, pop this pan into the refrigerator.
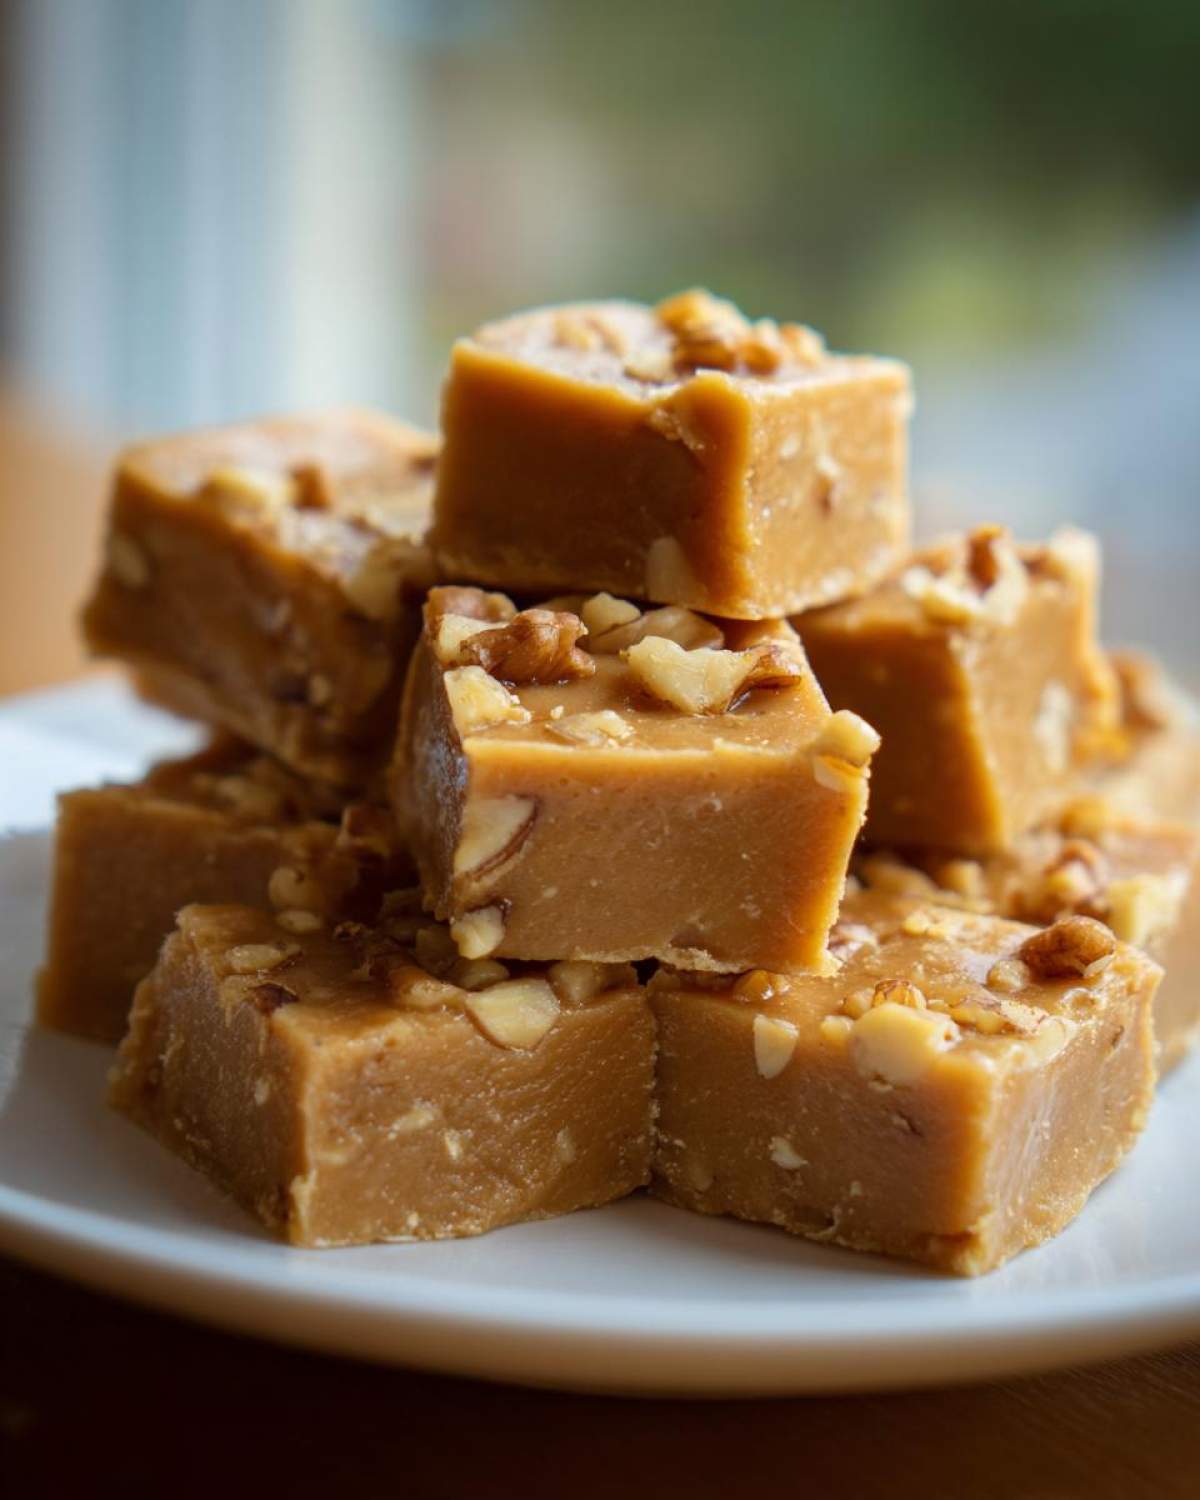
You need to let this chill for at least two hours, but honestly, leaving it longer is even better if you can wait that long! This cold time is what transforms the liquid into a firm block that is ready to slice. When it’s chilled solid, just grab those parchment overhangs and lift the entire block out onto a cutting board. You should easily get about 36 perfect little squares of Melt in Your Mouth Fudge. It’s an amazing yield for such little work!
Tips for Success When Making Maple Walnut Fudge
Even though this is super simple, you still need a couple of little tricks up your sleeve to guarantee that super smooth outcome, especially if you’re adding the nuts and making Maple Walnut Fudge. My biggest tip revolves around the pan preparation. If you really want clean squares, you have to be generous with that parchment paper sling we talked about. Make sure the paper doesn’t touch the inner sides of the pan too much, giving your fudge just a tiny bit of room to settle, which helps when lifting.
When you are stirring on the stovetop, remember what I said about constant movement! You’re essentially just warming the ingredients enough to merge, not cook them down. Once the chocolate is barely liquid, stop stirring almost immediately. Over-agitation can introduce air bubbles that might make the final texture less uniform, and we want perfect, creamy cubes!
Storage & Reheating Instructions for Maple Fudge
Since this is such a simple confection, usually the biggest problem is that it disappears before you even need to store it! But if, by some miracle, you manage to have leftovers, keeping them fresh is really easy. Remember, because we didn’t use any fancy cooking methods, air is the enemy here.
You absolutely need to keep this fudge in the refrigerator. Because it relies on the chilling process to firm up, room temperature will make it go soft way too fast, and that beautiful homemade maple fudge texture will turn into a sticky puddle. Seal it up tight in an airtight container. I like to place a little square of wax paper between layers if I’m stacking them just to make sure they don’t stick together once they’re cold.
This treats stays wonderful for about a week when stored properly in the fridge. If you’re planning ahead for the holidays, this is perfect! The best part? You don’t need to reheat it at all! Just take the container out of the fridge about 10 to 15 minutes before you plan to serve. This short rest time lets it soften just slightly, making those squares taste even richer and more decadent without losing their shape.
Frequently Asked Questions About Maple Fudge
I always get questions when I post this recipe because it seems too good to be true! People often ask about the chocolate or if it really counts as a quick dessert idea. I try to answer everything so you feel totally confident when you make this!
Can I make this maple fudge without white chocolate chips?
That’s a great question! The white chocolate chips are really key for getting that wonderfully Creamy Fudge texture we are aiming for, and they help stabilize it so it sets up nicely in the fridge. If you absolutely can’t use them, I’d suggest substituting with an equal amount of good quality almond bark or a high-quality cocoa butter. Just know that the flavor profile will change a little bit, and you might need to adjust the chilling time since the stabilizers are different.
Is this considered a No Bake Fudge recipe?
It definitely leans heavily toward being a No Bake Fudge recipe! We don’t bake anything, obviously, and the actual time spent on the stove is barely five minutes—just enough to gently melt everything together. We aren’t letting it hard-ball or reach any high cooking temperatures. It sets up completely in the fridge. So yes, for all practical purposes, it’s one of those super satisfying, almost No Bake Fudge delights!
What is the best way to make sure my fudge is smooth?
If you are worried about that Smooth Fudge Texture, remember my golden rule: don’t boil the mixture! Just take it off the heat as soon as the white chocolate is gone. Also, use full-fat sweetened condensed milk—the low-fat versions sometimes don’t blend as smoothly. I also posted some general candy tips over on my blog that might help if you’ve had trouble with other candies before!
Serving Suggestions for This Simple Candy Recipe
Now that you have these unbelievably decadent little cubes of sweetness, you might be wondering how best to serve them up! These Simple Candy Recipes don’t need much dressing up, honestly, because the flavor of the pure maple really shines through all on its own. But sometimes, pairing them with the right beverage just elevates the whole experience, doesn’t it?
My absolute favorite way to enjoy this treat, especially on a chilly evening, is alongside a piping hot mug of coffee. The slight bitterness of a dark roast cuts through the sweetness of the fudge perfectly, making each bite taste even richer. In fact, on those colder days, I sometimes swap the water in my coffee creamer for my Spiced Hot Apple Cider Recipe—the spicy notes of cinnamon and clove are just magic paired with maple!
If you are setting these out for guests, don’t just put them on a plain plate! I like to sprinkle a few extra toasted walnuts around the serving dish just for color and texture variety. You can also alternate the squares with some fresh raspberries or thinly sliced pears. The slight tartness of fruit is a wonderful contrast to this rich confection. These squares are honestly perfect just sitting next to a simple shortbread cookie as part of a larger dessert platter for any impromptu gathering.
Nutritional Estimates for Your Maple Fudge
I know some of you are curious about what you’re diving into when you reach for one of these sweet little squares! While I’m definitely more focused on flavor than counting every little thing, I did pull the general estimates from the recipe breakdown so you know what you’re looking at. Remember, since we are using high-quality pure maple syrup and real white chocolate, these numbers reflect a truly decadent treat—not a health food, even though it feels wholesome!
These figures are based on cutting the batch into 36 even pieces, which is how I divide mine up after chilling. If you cut yours bigger, the numbers will, of course, go up! Don’t stress too much, though; this is homemade goodness, and estimations are just guides.
- Serving Size: 1 square
- Calories: About 130 per square
- Fat: 6g (Be sure to note that 4g of this is saturated fat from the chocolate and milk)
- Carbohydrates: 19g (That wonderful sweetness!)
- Sugar: 18g (This sugar comes mostly from the condensed milk and the natural maple)
- Protein: 2g
- Sodium: A tiny 35mg
- Cholesterol: Around 10mg
You’ll also be glad to know there is zero Trans Fat listed here. So, while it’s a sweet confection, you know exactly what you are putting into your body. Enjoy that little piece of simple candy knowing you made it perfectly!
Share Your Experience Making This Maple Fudge
Now that you’ve seen just how ridiculously easy it is to make this glorious confection, I really, really want to hear about it! Are you as shocked as I was the first time I stirred this together? Did you try the maple walnut fudge version, or did you stick to the pure maple flavor?
Please, don’t be shy! Leave a comment below and tell me how it turned out for you. Did it set up perfectly on the first try? Did your family devour it in five minutes flat? Knowing you succeeded in making this dreamy maple fudge is the best part of sharing my recipes!
If you snap a picture of your beautiful, creamy squares, tag me on social media, too! I love seeing how everyone’s results turn out. And if you’re curious about me and why I love sharing all these sweet treats, you can read a little more over on my About Us page. Happy cooking—or should I say, happy chilling!
PrintCreamy 5-Ingredient Real Maple Fudge
Make smooth, rich maple fudge using only five ingredients and pure maple syrup. This recipe is quick and yields a decadent treat.
- Prep Time: 10 min
- Cook Time: 5 min
- Total Time: 15 min
- Yield: About 36 pieces
- Category: Dessert
- Method: Stovetop
- Cuisine: American
- Diet: Vegetarian
Ingredients
- 1 (14 ounce) can sweetened condensed milk
- 1 (12 ounce) package white chocolate chips
- 1 cup pure maple syrup
- 1 teaspoon vanilla extract
- 1/2 cup chopped walnuts (optional)
Instructions
- Line an 8×8 inch baking pan with parchment paper, leaving an overhang on the sides for easy removal. Lightly grease the paper.
- In a medium saucepan over medium-low heat, combine the sweetened condensed milk, white chocolate chips, and maple syrup.
- Stir constantly until the chocolate is completely melted and the mixture is smooth. Do not let the mixture boil.
- Remove the pan from the heat. Stir in the vanilla extract. If using, stir in the chopped walnuts.
- Pour the fudge mixture into the prepared pan and spread evenly.
- Refrigerate for at least 2 hours, or until firm enough to cut.
- Lift the fudge out of the pan using the parchment overhang. Cut into 1-inch squares before serving.
Notes
- Use only pure maple syrup for the best flavor. Avoid pancake syrup.
- For a very smooth texture, avoid over-stirring once the chocolate is melted.
- Store leftovers in an airtight container in the refrigerator for up to one week.
Nutrition
- Serving Size: 1 square
- Calories: 130
- Sugar: 18g
- Sodium: 35mg
- Fat: 6g
- Saturated Fat: 4g
- Unsaturated Fat: 2g
- Trans Fat: 0g
- Carbohydrates: 19g
- Fiber: 0g
- Protein: 2g
- Cholesterol: 10mg