

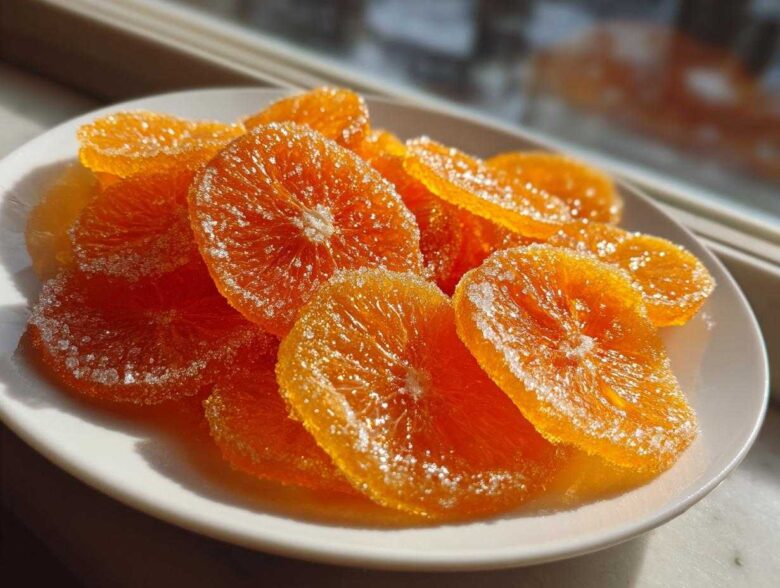
When I tell people I make homemade candy, they sometimes picture complicated pulled sugar or temperamental chocolate work. Nope! My favorite thing to make when I have a carton of beautiful oranges sitting around is simple candied orange slices. Trust me, this is the easiest candied fruit recipe you’ll ever try. We’re talking about turning those bright citrus rounds into the most glossy, tender, chewy treats imaginable. They smell incredible while they simmer, making my whole kitchen smell like Christmas, even in July!
Why This is the Best Candied Orange Slices Recipe
Honestly, I think this method beats out all the others because it’s so straightforward, yet the results look super fancy. You aren’t just sucking the moisture out; you’re replacing it with sugar magic! That’s what makes these the best sweet citrus treat.
- They achieve that perfect chewy texture—not hard like brittle, but yielding and tender.
- The appearance is unbeatable; they come out incredibly glossy.
- It’s genuinely an easy candied fruit recipe, perfect for beginners.
Achieving Perfect Glossy Orange Slices
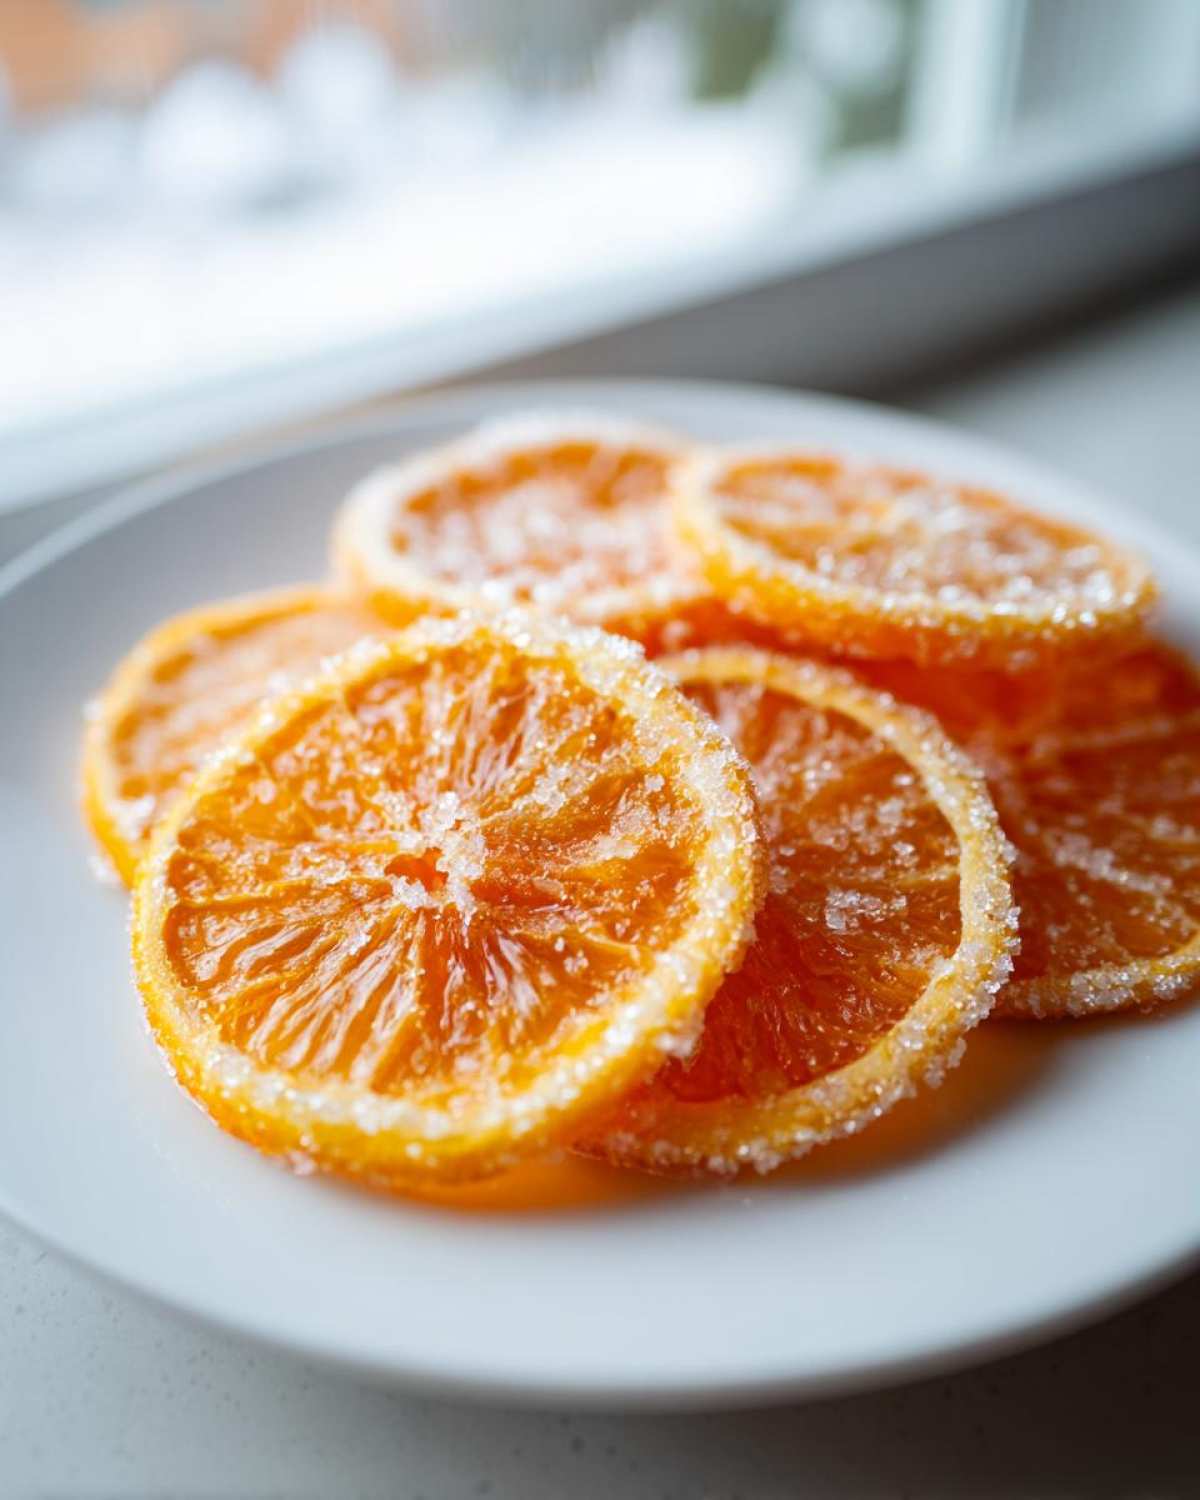
The secret to getting that beautiful shine is all about patience during the simmer. When the fruit cooks low and slow in the thick sugar syrup, the water evaporates and the high concentration of sugar penetrates every tiny cell wall. Once they dry, that concentrated sugar coating catches the light perfectly, giving you those magazine-worthy glossy orange slices without needing any extra coating!
Gathering Ingredients for Homemade Candied Oranges
Okay, let’s talk what you actually need to pull this off. Luckily, for the main dish—our wonderful candied orange slices—it’s just three main players: oranges, water, and sugar. That’s it for the core recipe! I always stress that the oranges need to be top-notch because they are carrying the whole show. You want firm, unblemished fruit. If you are going the extra mile and treating yourself to the chocolate dipped candied oranges variation, you’ll then need some good quality melting chocolate. Don’t skimp here; it really changes the end result when you have that rich dark chocolate meeting that bright citrus.
Ingredient Notes and Substitutions for Candied Orange Slices
When buying your fruit, I absolutely recommend using Navel oranges if you can find them. They have that great balance of sweetness and tartness, and their peel isn’t usually too thick, which is perfect for getting those perfect, tender rounds. For the sugar, stick to plain white granulated sugar for the syrup; that’s what helps everything crystallize nicely into true candied orange slices. You have to use a lot of sugar proportional to the water, so don’t be tempted to cut that back, or they won’t set up correctly!
Now, if you find yourself with grapefruits or lemons on hand, you can totally use them! Just remember that grapefruits will require longer blanching because they are naturally more bitter than oranges. If you choose to use lemons, they will need slightly less time simmering since they are thinner. But honestly, for your first go, just stick to the oranges to master the technique.
Step-by-Step Instructions: How to Make Candied Oranges
Alright, this is where the real magic happens! I know it looks like a lot of steps, but don’t sweat it. This process is designed to turn those bitter rinds into soft, sweet treats. Remember how I mentioned these are great for making other things, like candied nuts? The technique for dissolving sugars is similar!
Preparation and Blanching the Orange Rounds
First things first: we need to wash those oranges like we mean it. Next, grab a sharp knife and slice them thin—I shoot for about 1/8 of an inch thick. You want to see the peel, the white pith, and the fruit flesh all in one round slice, but keep ’em thin so they absorb the syrup well. Now for the crucial bitterness removal step. Put those slices in a pot, cover them completely with plain water, bring it to a rolling boil, and dump the water out right away. You must repeat this whole process—boil and drain—two more times! That’s three boils total. This triple blanching is what makes or breaks the flavor and ensures you don’t end up with something tasting like mouthwash!
Simmering the Orange Slices in Simple Syrup Citrus Recipe
Once they are blanched, we get serious. Put the tender slices back into a clean pot. Add your sugar and just a little bit of fresh water—enough to cover them nicely. Bring this up slowly until the sugar is totally dissolved. This is where you want to lower the heat significantly. We are aiming for a very gentle, lazy simmer, not a rowdy boil! This slow cooking phase takes anywhere from 45 to 60 minutes. Keep an eye on them and turn the slices over gently every 15 minutes or so. You’re watching for them to turn beautifully translucent; that’s your cue that the syrup has totally seeped in and you’ve made perfect candied orange slices.
Drying and Finishing Your Chewy Orange Candy
The syrup is done, fantastic! Now you carefully fish each slice out; I use tongs so I don’t tear them, and lay them flat on a wire rack set over a baking sheet. This part takes patience, and you cannot rush it. They need at least four hours to dry, but seriously, come back after 24 hours if you can. The longer they rest, the less sticky they’ll be. If you want those beautiful sugar coated oranges, toss them lightly in more granulated sugar once they have fully cooled and slightly dried—not while they are wet!
Optional Enhancement: Chocolate Dipped Candied Oranges
Okay, now that we have perfected our tender, chewy beauties, we have to talk about the next level: dipping them in chocolate. Honestly, if you think the candied orange slices are good plain, just wait until you try them half-covered in rich, dark chocolate. They instantly go from a great snack to an elegant dessert topping or fancy holiday treat! This is one of my favorite ways to use up any leftover slices before they disappear.
Melting the chocolate safely is the most important thing here, because nobody wants grainy chocolate! You have two options, and both are fine, but I usually prefer using the microwave for speed if I’m only doing a small batch. If you go microwave route, use low power in 30-second bursts, stirring really well between each one—otherwise, you’ll burn the bottom layers, trust me on this one!
If you are feeling more traditional, the double boiler setup works beautifully. Just use a heat-safe bowl set over a pot of gently simmering water, making sure the water never touches the bottom of the bowl. Stir until it’s perfectly smooth and liquidy.
When it’s time to dip your fully dried candied orange slices, hold them near one end and gently swirl them into the melted chocolate, leaving about half of the slice exposed. Lay them back down on that same wire rack you used for draining. That’s it! Now you just have to let the chocolate set up completely. If you’re impatient like me, stick the whole tray in the fridge for about 15 minutes. Once the chocolate is hard, you’ve got the absolute best chocolate dipped candied oranges!
Tips for Success Making Candied Orange Slices
Making these treats is simple enough, but like any sugar work, a tiny detail can make a huge difference between a perfect piece and a sticky mess! Since we put so much effort into achieving those perfectly translucent, glossy orange slices, let’s make sure we nail the process.
The biggest thing I learned the hard way is managing that simmer heat. When you first add the syrup, it might bubble up a bit, but you have to keep it low—think meditation, not a rolling boil! If it bubbles too hard, the sugar gets agitated, and the slices can break apart easily. I once got distracted on a phone call, came back, and realized I had cooked a few slices way too fast. They ended up hard around the edges and brittle, not chewy at all. Total disaster, but it taught me to give them my full attention during that simmering hour.
Another thing: If you notice your slices starting to stick to the bottom of the pan while simmering, don’t panic or scrape! That usually means the syrup is getting too thick too quickly. Just add about two tablespoons of hot water right to the edge of the pan—don’t pour it directly over the fruit! That bit of extra liquid helps loosen up the sugar just enough. It’s like emergency syrup thinning!
And please, please, please—don’t throw away that amazing leftover liquid! Seriously, this is golden. It’s basically a super-concentrated, bright orange simple syrup. I save mine in a jar in the fridge and use it all the time. It’s incredible mixed into hot tea in the winter, or I pour a little bit over plain yogurt for a lovely breakfast treat. You can even spike your next batch of lemonade with it for an extra zip. You can find more of my favorite recipe reuse ideas over on the blog!
Finally, when you take them out to dry, make sure they aren’t piled on top of each other. If they touch, they will fuse together like citrus superglue! A wire rack is non-negotiable for letting the air circulate underneath so you get that professional, dry finish rather than a gooey puddle.
Serving Suggestions for Your Sweet Citrus Treat
Now that you have these amazing, homemade, glossy orange rounds, the question becomes: what do I do with them all? Because they are so vibrant and flavorful, you can use them in so many ways beyond just grabbing one when you walk by the candy dish. I love making a huge batch around the holidays specifically for garnishing, but they are fantastic year-round.
Here are a few of my favorite ways to deploy these little bites of sunshine:
- As the perfect edible orange garnish! They look stunning perched on top of chocolate cheesecakes or sprinkled over a fancy fruit platter. They add height and color instantly.
- Alongside coffee or tea. Seriously, setting a few of these out when guests come over is way more refined than just offering a cookie. They pair beautifully with a strong black coffee or herbal tea.
- Chopped up and folded into baked goods. Try chopping them finely and stirring them into a shortbread dough or folding them into a cake batter when you’re looking for bright citrus dessert ideas. They bring a wonderful chewiness when baked inside!
- Making beautiful toppings for breakfast items. I often dice them small and sprinkle them over my ricotta pancakes—you can check out my recipe for cinnamon roll pancakes, and use these citrus bits instead of traditional fruit. Wow, what a wake-up call!
Honestly, the best way to enjoy them is figuring out what you like best. Don’t feel pressured to use them all up immediately; they hold their flavor really well!
Storage and Shelf Life for Candied Orange Slices
Now that you’ve gone through all that work to make perfect candied orange slices, you want to make sure they last, right? The great news is that because we boiled them so thoroughly in sugar, they are pretty stable! You don’t need to refrigerate these at all, which is handy. Keep them stored in an airtight container, like a nice glass jar with a tight-fitting lid, right there on your counter at room temperature.
If you dried them well—and I mean *really* well, until they aren’t sticky at all when you touch them—they should stay absolutely wonderful for about two weeks. They taste best in that first week, but they definitely hold their sweet, chewy texture for longer than that. This makes them fantastic for gifting homemade candy!
The only thing that can really ruin them is moisture. If it’s super humid where you live, or if you store them near the stove where steam tends to build up, they can slowly start to weep sugar and get sticky again. If that happens, you can always put them back on the wire rack for a few hours just to dry off a bit. But for the best results, keep that container far away from dishwashers or humid basements!
Frequently Asked Questions About Homemade Orange Candy
I get so many messages about this recipe, especially around the holidays when people start thinking about gifting homemade candy! Here are some of the questions I hear most often about making these bright citrus snacks at home. If you want to reach out about any other questions, feel free to contact me over on my contact page!
Why are my slices still bitter after simmering?
If your candied orange slices still have a noticeable bitter kick after all that cooking, it almost always means you skipped or rushed the blanching step. Remember, that triple boil and drain is essential! The boiling water leaches out the harsh compounds trapped mostly in the white pith layer. If you only boiled them once, go ahead and try boiling those same slices in fresh water two more times. That should fix the flavor issue and leave you with a proper sweet citrus treat.
How long should I let the slices dry before storing?
This is a make-or-break moment for achieving that perfect chewy orange candy texture! You need a minimum of four hours, but honestly, if you can let them sit on the rack overnight—a full 12 to 24 hours—that’s even better. They should not feel sticky when you touch them. If they feel tacky, that means there’s still too much moisture or surface syrup, and they will clump together in the jar. Letting them dry fully ensures you get those gorgeous, separate, glossy orange slices instead of one sticky clump!
Can I use lemons instead of oranges for this easy candied fruit recipe?
Yes, you absolutely can! Lemons, limes, or even thick-skinned grapefruits work great for making candied fruit. Just remember that the natural acidity of lemons means they might need 20 to 30 minutes less simmering time than the oranges. Also, lemon pith can sometimes be a little more bitter than orange pith, so make sure you give those slices a really thorough three-boil blanching treatment.
Can I make candied orange slices ahead of time for gifting homemade candy?
Oh, certainly! This is one of the best advantages of candied orange slices recipe—they are built for advanced prep. If you have dried them completely (remember that key drying step!), they store beautifully at room temperature in a high-quality, airtight container. I usually make my big batch intended for holiday orange candy about a week and a half early, and they are always perfect by the time I package them up for friends. Just keep them out of warm, steamy kitchens!
Estimated Nutritional Data for Candied Orange Slices
Since we are making these amazing homemade orange candies completely from scratch, the nutrition is really based on how much sugar we use, so keep that in mind! The values listed below are estimates based on the standard recipe using 3 large navel oranges and the full amount of sugar required for a perfect set and preserving them.
For a serving size of two slices, here’s what you can generally expect: Calories clock in around 180, and yes, as expected for a candy, the sugar is high at about 45 grams. Carbohydrates sit near 47 grams, with just a tiny bit of fiber coming from the orange flesh and peel itself. You’ll see almost no fat or cholesterol, which is great! These estimations help when you’re planning treats for parties, but remember this is a decadent, bright citrus snack, not an everyday food item, even though it feels like a healthier option than some store-bought delights!
Estimated Nutritional Data for Candied Orange Slices
Since we are making these amazing homemade orange candies completely from scratch, the nutrition is really based on how much sugar we use, so keep that in mind! The values listed below are estimates based on the standard recipe using 3 large navel oranges and the full amount of sugar required for a perfect set and preserving them.
For a serving size of two slices, here’s what you can generally expect:
- Calories clock in around 180
- Sugar is high at about 45 grams
- Carbohydrates sit near 47 grams, with just a tiny bit of fiber coming from the orange flesh and peel itself.
- You’ll see almost no fat or cholesterol, which is great!
- Protein is estimated at 1 gram.
These estimations help when you’re planning treats for parties, but remember this is a decadent, sweet citrus treat, not an everyday food item, even though it feels like a healthier option than some store-bought delights!
PrintEasy Candied Orange Slices

Make glossy, tender candied orange slices using a simple sugar syrup method. These homemade orange candies are great for snacking or garnishing desserts.
- Prep Time: 20 min
- Cook Time: 70 min
- Total Time: 90 min
- Yield: About 30 slices
- Category: Dessert
- Method: Simmering
- Cuisine: American
- Diet: Vegetarian
Ingredients
- 3 large navel oranges
- 4 cups water, divided
- 3 cups granulated sugar, divided
- 1 cup water (for optional chocolate dip)
- 4 ounces semi-sweet chocolate (for optional chocolate dip)
Instructions
- Wash the oranges well. Slice each orange thinly into rounds about 1/8 inch thick. Remove any large seeds.
- Place the orange slices in a medium saucepan. Cover them completely with 4 cups of water. Bring the water to a boil over high heat.
- Drain the water immediately. Repeat this boiling and draining process two more times (three times total) to reduce bitterness.
- Return the blanched orange slices to the clean saucepan. Add 3 cups of sugar and 1 cup of water.
- Bring the mixture to a simmer over medium heat, stirring gently until the sugar dissolves.
- Reduce the heat to low and maintain a gentle simmer. Cook for 45 to 60 minutes, turning the slices occasionally, until they become translucent and tender.
- Carefully remove the slices from the syrup using tongs and place them on a wire rack set over a baking sheet. Let them drain and dry for at least 4 hours, or preferably overnight, until they are no longer sticky.
- If you want to coat them in sugar, toss the dried slices lightly in a small bowl of granulated sugar.
- For chocolate dipping (optional): Melt the chocolate with 1 cup of water in a double boiler or microwave until smooth. Dip half of each dried slice into the melted chocolate. Place them back on the wire rack until the chocolate sets completely.
Notes
- For a chewier texture, allow the slices to dry for a full 24 hours.
- Save the leftover orange syrup; it makes a flavorful addition to cocktails or tea.
- Store finished candied orange slices in an airtight container at room temperature for up to two weeks.
Nutrition
- Serving Size: 2 slices
- Calories: 180
- Sugar: 45g
- Sodium: 2mg
- Fat: 0g
- Saturated Fat: 0g
- Unsaturated Fat: 0g
- Trans Fat: 0g
- Carbohydrates: 47g
- Fiber: 2g
- Protein: 1g
- Cholesterol: 0mg