

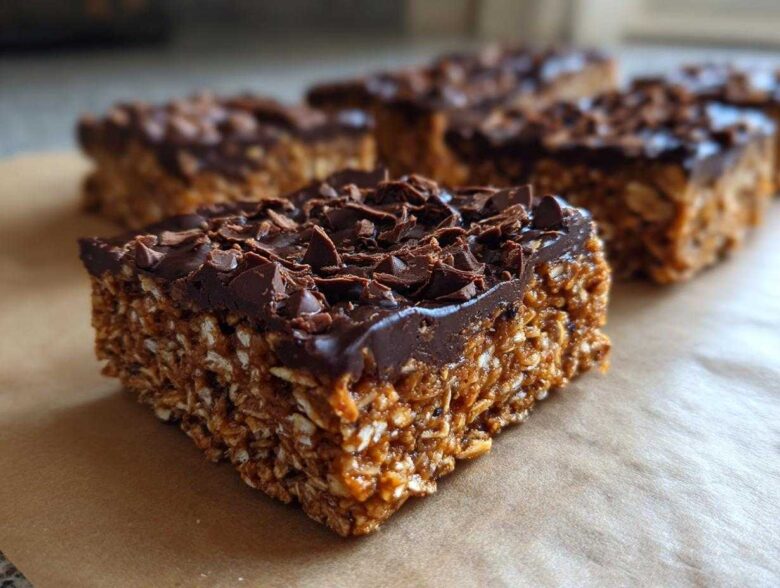
Honestly, navigating the grocery store shelves for decent store-bought protein bars is a nightmare! They’re either chalky messes, loaded with sugar substitutes that taste terrible, or they cost a fortune. I was so tired of falling for those shiny wrappers only to be disappointed.
That’s why I developed this recipe. Trust me when I say this is the easiest, best-tasting batch of homemade protein bars you will ever whip up. I spend most of my week juggling deadlines, so when it comes to fueling up, I need fast, reliable snacks ready to go. This no-bake version takes literally minutes of hands-on time, and they stay perfect for grab-and-go snacking all week long. If you want more quick cooking inspiration, check out all my kitchen experiments right here! You won’t look back, I promise!
Why These Are the Best Homemade Protein Bars You Will Make
Why keep buying those dry, expensive bars when you can make something ten times better? These peanut butter treats solve every problem I had with commercial options. They are truly the definition of easy protein bars.
- They require absolutely NO baking—just mixing and chilling!
- We only use five core ingredients. That’s it!
- They taste like dessert, not like cardboard mixed with protein powder.
Quick Prep for Easy Protein Bars
Seriously, the active prep time is only about 10 minutes. You don’t even need to preheat an oven because these are no bake protein bars recipe perfection. Once they chill for an hour, you are done! It’s the quickest high-protein snack I’ve ever managed to pull together.
Ingredients for 5-Ingredient No-Bake Peanut Butter Protein Bars
The beauty of these bars is how simple the ingredient list is. You probably have most of this stuff lying around already! We are keeping this super streamlined so you can get them made fast. Remember, quality counts here, so use a nice, natural peanut butter if you can find one.
- 1 cup rolled oats (the standard kind works perfectly)
- 1/2 cup natural peanut butter (smooth or crunchy, your call!)
- 1/4 cup honey or maple syrup (we’ll talk about swaps later!)
- 1/2 cup vanilla protein powder (make sure it’s fresh!)
- 1/4 cup dark chocolate chips (for that glorious topping)
That’s it! Five things, and you’ve got 10 amazing little energy boosts ready to go. Don’t you just love how little effort this takes?
Step-by-Step Instructions for Perfect Protein Bars
Okay, now for the fun part—actually bringing these no bake protein bars recipe ingredients together! We aren’t cooking anything, which is why the timing for mixing and chilling is so important for a good texture. Follow my lead closely here, especially when it comes to getting that dough just right. If you are looking for other quick fixes, check out the full list of healthy snacks I’ve been testing!
Preparing the Base for Your Homemade Protein Bars
First things first, line that 8×8 pan with parchment paper, making sure you leave some overhang on the sides. That overhang is your handle later, so be generous! Next, grab a medium bowl. You’ll mix the oats, peanut butter, and honey (or maple syrup) until it looks like crumbly wet sand. Then, dump in that vanilla protein powder.
Here’s the trick for the best homemade protein bars: if your dough seems too crumbly at this stage—and trust me, it happens if your protein powder is extra dry—just add water one teaspoon at a time. You want a thick dough that holds together when you squeeze it. Once it’s ready, press that whole mixture firmly into your lined pan. Really pack it down so you get solid, sturdy bars later on!
Melting Chocolate and Chilling the Protein Bars
While that base is sitting tight, melt your chocolate chips. I just use the microwave, 30 seconds at a time, stirring until it’s glossy smooth. Pour that beautiful layer of melted dark chocolate right over the top of your packed bar base. Use your spatula to spread it edge-to-edge without digging into the oats underneath!
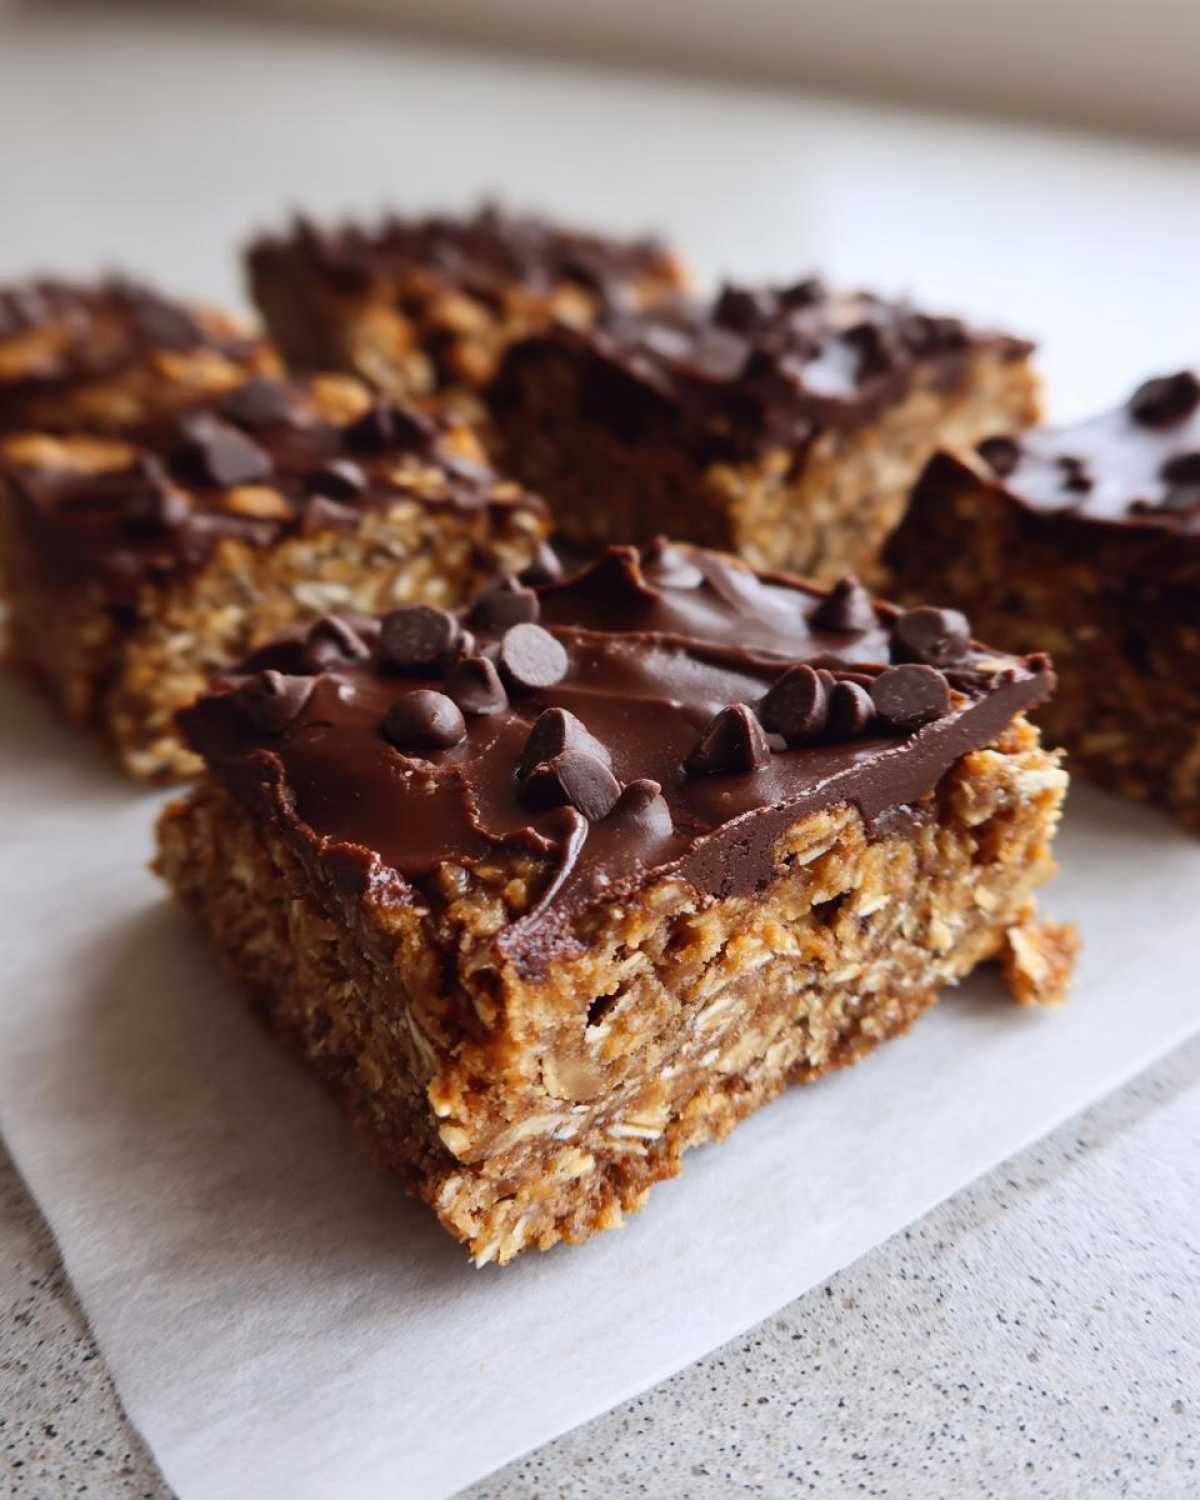
Now comes the hardest part: waiting. You absolutely need to refrigerate these bars for at least one full hour. If you try to cut them before they are firm after chilling, they’ll get messy, and you’ll end up with crumbs instead of those perfect squares of easy protein bars you deserve. Once they are rock solid, just lift the parchment paper right out and slice!
Ingredient Notes and Substitutions for Protein Bars
This recipe is so straightforward, but I know you readers are creative! Since these are homemade protein bars, we can totally play around with the ingredients to suit what’s in your pantry or your dietary needs. The base flavors—oats, peanut butter, and vanilla protein—are strong, so small tweaks totally work.
Don’t panic if you’re out of peanut butter; almond butter or even sunflower seed butter works just as well. They change the nuance of the flavor a bit, but the texture stays satisfyingly firm. It’s all about making these fit *your* life!
Making Vegan Protein Bars
If you are keeping things plant-based, this recipe is already almost there! The only switch you need to worry about is the binder. For vegan protein bars, you absolutely must swap out the honey and use maple syrup instead. Maple syrup does the clinging job perfectly well, and it keeps the bars fully vegetarian.
Just make sure you’re using a vegan-friendly protein powder, too! Most whey powders aren’t vegan, obviously, so check your label. When you use maple syrup here, it just makes these bars that much more delicious for everyone.
Tips for Making the Best Tasting Protein Bars
Okay, if you want these to truly live up to being the best tasting protein bars on the block, we need to talk quality control, especially concerning that protein powder. It’s the main flavor driver here, and frankly, old powder tastes dusty!
I learned this the hard way last month when I tried to use up an ancient tub of vanilla powder. The resulting bars were dry, flavorless, and I actually ended up feeding half the batch to the trash. Ugh! Since then, I always check the date. Fresh powder mixes way smoother and gives you that satisfying flavor you expect in a great high protein snack idea.
Also, don’t use low-fat peanut butter; the oil content is what helps bind everything beautifully since we aren’t baking things hard. You need that richness! If you want to sneak in some extra goodness, try adding a teaspoon of vanilla extract right when you mix the wet ingredients. It really wakes up the vanilla protein flavor. If you need more quick meal ideas, browse my breakfast roundup for more fuel ideas!
Storage and Meal Prep Protein Bars
One of the greatest things about these no bake protein bars recipe is how perfect they are for meal prep. Life gets crazy, right? I always make a full batch on Sunday evening, and they cover my need for high protein snack ideas until Thursday morning, easily.
Because we skip the baking step entirely, these bars need a little chill time to stay firm and sliceable. You absolutely have to store them in an airtight container in the refrigerator. They hold up beautifully in there for about a week. Seriously, just one hour in the cold makes them hold their shape perfectly for later grabs. If you’re looking for other make-ahead recipes, you have to try my pumpkin spice chia pudding next!
Frequently Asked Questions About Protein Bars
I get so many messages asking me about these simple peanut butter bars, so I pulled together the most common things folks want to know before they even mix their first batch!
Can I make these keto protein bars recipe?
Oh, that’s a tricky one! Since this recipe relies heavily on rolled oats and honey (or maple syrup), it’s not naturally keto-friendly. If you wanted to try to adapt it for a keto protein bars recipe, you would have to swap the oats for a mix of almond flour and coconut flour and use a zero-calorie sweetener like erythritol instead of the honey. It would turn into a completely different recipe, really, so I’d stick to the original if you want that chewy oat texture!
How do I prevent them from crumbling?
This usually happens for one of two reasons when making no bake protein bars recipe. First, check your binder: if your peanut butter is really dry or natural (the kind that separates), it won’t hold well. Second, you must pack the base down *really* tight into the pan before chilling. Use the bottom of a glass or a sturdy spatula and press until your arm hurts a little bit! That dense packing is what keeps them from crumbling when you cut them.
Can I skip the chocolate topping on these protein bars?
Absolutely! The chocolate is delicious, but it’s completely optional. If you prefer a low sugar protein bars version, just skip the chocolate chips entirely. Alternatively, you can melt a tablespoon of coconut oil into the base mixture instead of pouring chocolate over the top. That adds a nice little richness without adding sugar, making them perfect as simple energy bars.
Estimated Nutritional Data for These Protein Bars
I pulled the numbers from my testing, so remember that exact counts will shift depending on the brand of protein powder or if you used honey versus maple syrup. These are just good guidelines for your meal prep protein bars!
- Calories: 210
- Protein: 15g
- Total Fat: 11g
- Carbohydrates: 20g
- Sugar: 8g
This is a really solid little powerhouse for just 210 calories! Just keep in mind that these figures are estimates based on the standard ingredients listed. For precise dieting, you’ll want to check the labels on your specific ingredients. See my full disclaimer here for more info on all my recipe calculations.
Share Your Homemade Protein Bars Creations
Now that you’ve got these amazing, easy protein bars made, I really want to know what you think! Did you stick to the peanut butter classic, or did my substitution notes inspire you to try almond butter or maybe even a dash of cocoa powder in there?
Please pop down to the comments below and leave me a rating! Five stars if you love them enough to throw out those gross store-bought ones—which I bet you will! I thrive on hearing from you folks, and seeing your kitchen successes keeps me motivated to test up more quick recipes.
If you snapped a picture of your perfectly chilled squares (especially if you made a cool pattern with the chocolate!), please share it around so others can see how simple these no bake protein bars recipe treats really are. You can always tag me on social media, or if you have a specific question that wasn’t covered, feel free to drop me a line using my contact page!
Happy snacking, everyone!
PrintEasy 5-Ingredient No-Bake Peanut Butter Protein Bars
Make simple, no-bake peanut butter protein bars using only five ingredients. These bars are quick to prepare and great for meal prepping.
- Prep Time: 10 min
- Cook Time: 0 min
- Total Time: 70 min
- Yield: 10 servings
- Category: Snack
- Method: No-Bake
- Cuisine: American
- Diet: Vegetarian
Ingredients
- 1 cup rolled oats
- 1/2 cup natural peanut butter
- 1/4 cup honey or maple syrup
- 1/2 cup vanilla protein powder
- 1/4 cup dark chocolate chips (for topping)
Instructions
- Line an 8×8 inch baking pan with parchment paper, leaving an overhang for easy removal.
- In a medium bowl, combine the rolled oats, peanut butter, and honey or maple syrup. Mix until fully incorporated.
- Stir in the protein powder until a thick dough forms. If the mixture is too dry, add one teaspoon of water at a time until it holds together.
- Press the mixture evenly into the prepared pan. Use the back of a spatula to flatten the surface.
- Melt the chocolate chips in a microwave-safe bowl in 30-second intervals, stirring in between until smooth.
- Pour the melted chocolate over the pressed base and spread evenly.
- Refrigerate the bars for at least 1 hour, or until firm.
- Lift the bars out using the parchment paper overhang and cut them into 10 even squares.
Notes
- For a vegan option, use maple syrup instead of honey.
- If you prefer a different flavor, swap peanut butter for almond butter or sunflower seed butter.
- Store the finished bars in an airtight container in the refrigerator for up to one week.
Nutrition
- Serving Size: 1 bar
- Calories: 210
- Sugar: 8
- Sodium: 75
- Fat: 11
- Saturated Fat: 3
- Unsaturated Fat: 8
- Trans Fat: 0
- Carbohydrates: 20
- Fiber: 2
- Protein: 15
- Cholesterol: 0