

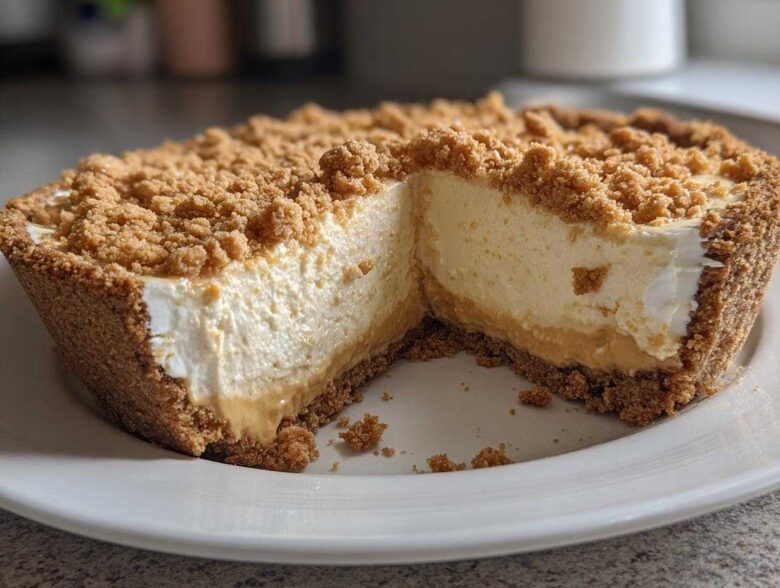
When the dessert craving hits hard, or especially when you realize Thanksgiving is tomorrow and your menu needs one last showstopper? What do you do? Panic? Absolutely not! You whip up this Easy No-Bake Creamy Peanut Butter Pie. Trust me, this is the recipe that saved our kitchen peace more times than I can count. Maya, my research-loving other half, spent weeks testing the exact ratios until the filling set perfectly, while I just kept saying, “Yep, but can we add more salt?” It’s the perfect blend of science and instinct. The blueprint for how Maya and I finally found our kitchen rhythm is over on our About Us page. This pie is rich, ridiculously creamy, and requires zero oven time, making it the ultimate indulgence for any gathering you have planned.
Why This Easy Peanut Butter Pie Recipe Is Your New Go-To Dessert
Look, sometimes you just need a showstopper that doesn’t rely on your oven cooperating, especially when you realize the party starts in two hours and your menu needs one last impressive item. This peanut butter pie isn’t just *a* recipe; it’s your secret weapon for looking like a dessert genius with minimal effort. Ethan always pushes for intense flavor, and I make sure the structure is sound. That collaboration shines through here!
- It’s wonderfully rich and unbelievably creamy peanut butter pie filling that just melts in your mouth. Seriously, you need to taste this texture.
- It’s incredibly fast. We are talking about roughly 20 minutes of active work time! That’s why we cherish this specific Easy Peanut Butter Pie Recipe.
- It’s an ideal candidate for a Quick Peanut Butter Dessert; you can have the filling ready before the main course is even cleared.
The Magic of No Bake Peanut Butter Pie
When I say no bake, I mean ZERO oven time. This screams No Oven Desserts, which is a massive relief during the summer months or when the oven is already packed hosting the turkey. We clocked the active prep time at right around 20 minutes, which makes this the perfect timing for any busy weeknight.
Crowd Pleaser Dessert Status
No matter if it’s for a casual family BBQ or a formal gathering, this pie wins every single time. It hits that perfect sweet and salty note that everyone just loves. When you bring this out, it immediately earns its stripes as a major Crowd Pleaser Dessert. If you need something for Thanksgiving that isn’t heavy pie, this is your answer for Simple Thanksgiving Desserts.
Gathering Ingredients for Your Creamy Peanut Butter Pie
Okay, now for the fun part—gathering the supplies! Since this is a no bake peanut butter pie, Maya loves that the ingredient list is straightforward, but we need to be precise on preparing a few items so the structure is perfect. Ethan always says if the ingredients are high quality, even a five-minute recipe tastes like it took all day. We want that rich flavor profile everyone expects from a truly indulgent peanut butter dessert, so don’t skimp on the good peanut butter!
For the Graham Cracker Crust Pie
This crust is the foundation, so make sure it’s ready to go before you start mixing the filling. Remember, we are heading straight into the freezer once this is mixed!
- 1 1/2 cups graham cracker crumbs (If you buy them pre-crushed, even better for speed!)
- 1/4 cup granulated sugar
- 6 tablespoons unsalted butter, melted (Make sure it’s fully melted, nice and smooth.)
When you mix these three, the goal is that perfect “wet sand” texture. Don’t be shy about pressing it firmly into that 9-inch pie plate—that’s how you prevent that sad crumbly bottom when you slice it later.
For the Rich Dessert Pie Filling
This is where the magic of the creamy filling comes together. Pay attention to the word “softened” on that cream cheese; it’s non-negotiable for a smooth filling!
- 1 (8 ounce) package cream cheese, softened
- 1 cup creamy peanut butter (Ethan prefers the standard processed kind for smoothness, not the natural runny stuff here!)
- 1 (14 ounce) can sweetened condensed milk
- 1 teaspoon vanilla extract
- 1 cup heavy whipping cream
- 1/4 cup powdered sugar (This goes into the heavy cream later to make the stabilized whipped topping.)
We also have the optional toppings listed out separately, but the chocolate drizzle or mini peanut butter cups instantly elevate this simple pie to legendary status. A little extra drizzle goes a long way!
Step-by-Step Instructions for the Best Peanut Butter Pie
Alright, now that we have our perfectly portioned ingredients ready to go, it’s time to assemble this beauty! Because this is a peanut butter pie masterpiece and not some complicated baked good, we can cruise through this pretty quickly. I’m talking about finishing all the hands-on work in about 20 minutes, tops. Maya insists on following the timing precisely so the structure holds up, especially when folding in that whipped cream. Follow these steps, and you’ll nail this amazing dessert every single time. If you are looking for a different kind of easy assembly, check out our guide on Easy Creamy Chicken Enchiladas—we tackle structure and flavor balancing in both!
Creating the Graham Cracker Crust Pie Base
Step one is all about that base! Grab your bowl with the graham cracker crumbs, the 1/4 cup of sugar, and the melted butter. You need to mix this until every last crumb is coated—it should look exactly like wet sand, just like when you try to make a sandcastle, but this time, it’s for dessert!
Take your 9-inch pie plate and press that buttery mixture firmly and evenly across the bottom and sneaking it up the sides a little bit. Ethan always tries to rush this step, but press hard! A loose crust means a messy slice later, and we are making an Indulgent Peanut Butter Dessert, not just any pie. Pop that crust straight into the freezer while you move on to the filling. That cold helps it firm up fast!
Mixing the Creamy Peanut Butter Pie Filling
Next, we tackle the filling, which is where the ultra-creamy texture comes from. First, take your softened cream cheese—and I mean *softened*, not melted—in a big bowl. Beat it until it’s silky smooth. If you see any lumps, take a breath, keep mixing, Maya will forgive you!
Now, add your creamy peanut butter. Beat that together until it’s completely combined. Then, and this is important: pour in the entire can of sweetened condensed milk and the teaspoon of vanilla extract. I always tell Ethan to mix this low and slow with the mixer. You just want it combined; if you overbeat this part, it can get too stiff too fast.
Folding in the Whipped Topping for Lightness
This step is crucial science! We need that airy, light texture, not a dense block of peanut butter. In a totally separate, clean bowl, whip your heavy whipping cream with that 1/4 cup of powdered sugar until you get what we call stiff peaks. You know they’re ready when you lift the whisk and the peaks stand straight up without flopping over.
Now, here’s the gentle part. Take about a third of that whipped cream and stir it right into your peanut butter base. This is called ‘lightening’ the base. It loosens everything up so you don’t deflate the remaining cream when you add it. After that first bit is stirred in, gently fold in the rest of the whipped cream until you don’t see any more white streaks. You have to be patient here; treat it like folding egg whites!
Setting and Serving Your Indulgent Peanut Butter Dessert
With the filling light and fluffy, spoon it carefully into your chilled graham cracker crust. Make sure you smooth out that top nicely—this is what shows when you serve it!
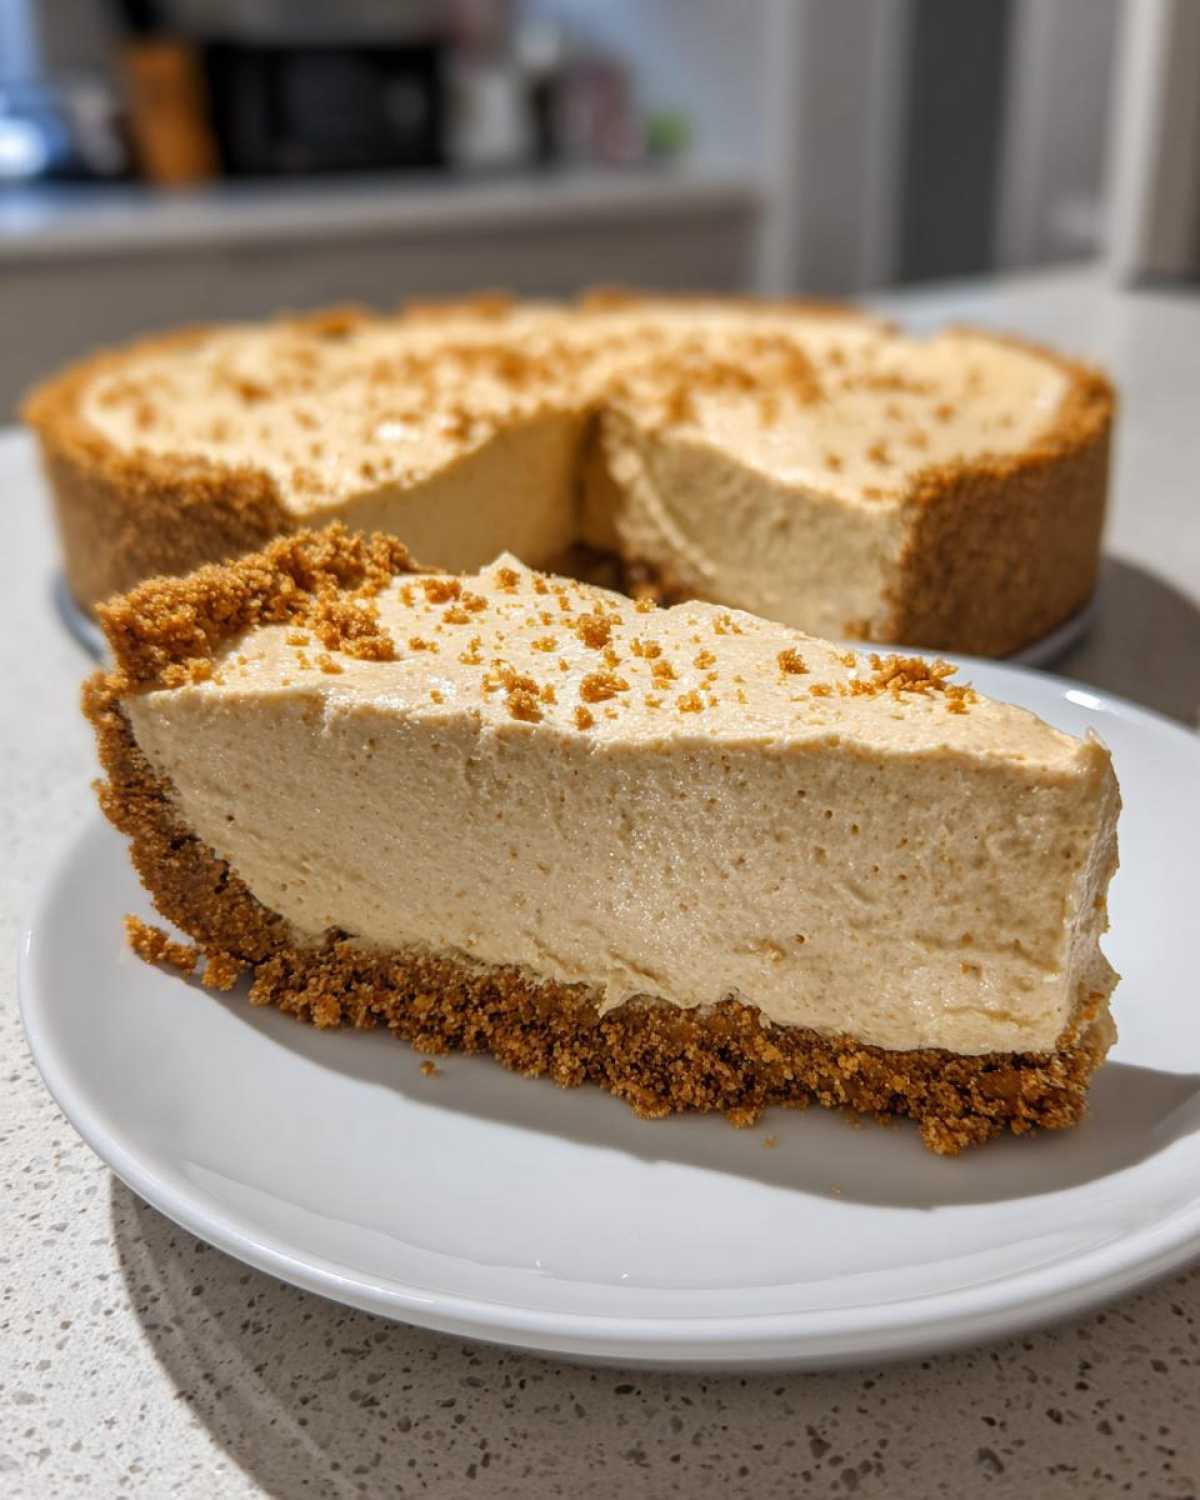
Now for the hardest part: waiting! This Creamy Peanut Butter Pie filling needs time to set up completely. You absolutely must chill it for a minimum of 4 hours, but seriously, if you can hold off until the next day, you will get the cleanest, most beautiful slices. Don’t forget Step 8 when you finally serve it: drizzle that chocolate or scatter those chopped peanut butter cups over the top just before serving!
Tips for Success with Your Homemade Peanut Butter Pie
So, you’ve got the main structure down, but Maya and I know that the difference between a good peanut butter pie and an unforgettable one is all in the little details. We have spent years testing shortcuts and finding tweaks that genuinely improve texture and flavor without adding complication. Building on the basic blueprint, these next steps will ensure you achieve that truly authoritative, rich dessert status the next time you serve it up!
Crust Variations: Graham Cracker Crust Pie vs. Oreo Crust Peanut Butter Pie
The standard recipe uses the buttery graham cracker crust, which is classic and perfect. But what if you’re feeling a little moodier, or you just ran out of graham crackers? We have a swap for you! If you want to venture into Oreo Crust Peanut Butter Pie territory, it’s super easy.
Just swap out the 1 1/2 cups of graham cracker crumbs for 1 1/2 cups of finely crushed Oreo cookie crumbs. You might need to add just a teaspoon or two more of that melted butter because the Oreos soak up fat quickly, but honestly, that chocolate crust is heavenly with that creamy peanut butter center. Also, Ethan highly recommends using salted butter in the crust, especially if you use standard sweet peanut butter. That little bit of salt cuts through the richness and makes the whole pie taste more complex—it’s a flavor trick we learned early on!
Achieving the Perfect Creamy Peanut Butter Pie Texture
Texture is everything when you are aiming for Creamy Peanut Butter Pie perfection. The primary spots where people can trip up are with the cream cheese and the folding.
First, about that cream cheese: It has to be room temperature, completely soft. If you try to beat stiff, cold cream cheese, you end up with little cream cheese pebbles in your filling, and no amount of mixing will fix that once the cold milk solids hit. Be patient and let it sit out!
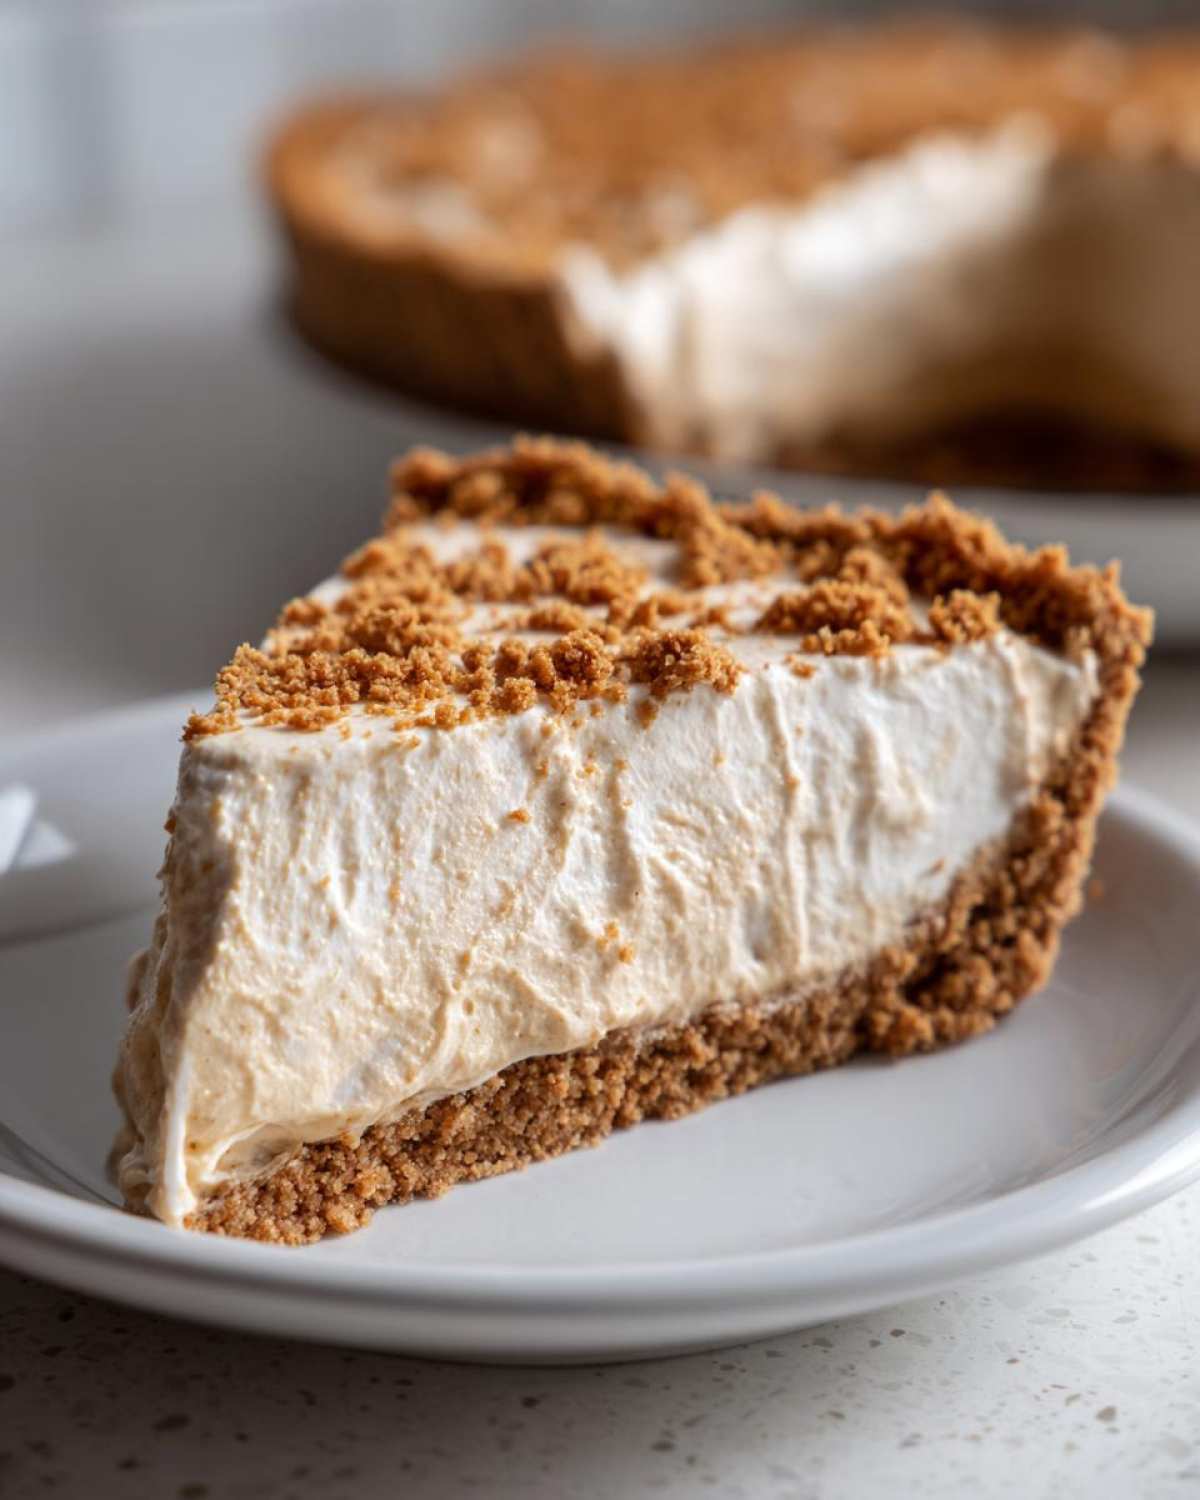
Second, remember the folding technique we talked about in the instructions? That is the difference between a fluffy pie and one that sinks in the middle. You must lighten the peanut butter base with that first scoop of whipped cream. Once that’s mixed in, fold the rest in gently. I mean *gently*. You want to keep every single tiny air bubble you worked hard to create with the mixer. That is the secret to amazing lift and that melt-in-your-mouth sensation!
For more deep dives into why our flavor combinations work so well, check out the rest of our baking adventures over at the main Tasty Tipster Blog. If you’re looking for flavor inspiration outside of pie, you might want to see what the food critics say about some of the recipes we’ve been testing lately, like the fantastic results over at Handle the Heat!
Make Ahead Dessert Recipes and Storage for Your Peanut Butter Pie
This is one of my favorite things about this specific peanut butter pie recipe—it plays perfectly into planning ahead! Whether you’re trying to organize a huge potluck or just don’t want to stress on the day of a big family meal, knowing you can check a dessert off the list early is a lifesaver. Maya keeps telling everyone that this is one of the absolute best make ahead dessert recipes for that very reason.
The great news is that chilling isn’t just recommended; it’s necessary for structure, and it means you can make it way ahead of time. According to the notes from our countless tests, this pie holds up beautifully in the refrigerator. We’ve found that if you cover it tightly with plastic wrap (try to put a small piece of plastic directly onto the surface if you aren’t using toppings, just to be safe), it stays wonderfully fresh.
You can safely keep this pie refrigerated for up to three days. Seriously! That means you could make it on Tuesday and it would still taste like pure heaven on Friday. This makes it such a fantastic stress reliever when planning for holidays like Thanksgiving, where everything else feels like it takes forever. Just keep an eye on any exposed crust edges; sometimes, if they sit too long, they can get a *tiny* bit soft, but honestly, the filling stays firm and utterly delicious the whole time.
If you are traveling with it or prepping for a huge buffet, wrapping the whole pie tightly and keeping it chilled right up until serving time is the key. Want more ideas on desserts that save you time during the week? We’ve got a whole section dedicated to great make ahead dessert recipes on the site!
Peanut Butter Pie Toppings and Serving Suggestions
When you finally pull that perfectly set, firm, and chilled peanut butter pie out of the fridge, it can feel a little plain, right? It’s begging for a finishing touch! Even though the filling is already incredible, Ethan insists that the toppings are non-negotiable. This is where you get to show off your personal flair and turn a simple slice into an over-the-top sweet and salty pie experience.
We listed the basics in the ingredient rundown, but let’s talk execution. If you’re going for that classic, irresistible look, a simple chocolate drizzle works wonders. You don’t need complicated ganache; just take some semi-sweet chocolate chips, melt them down with a tiny splash of milk or butter until they are smooth and runny, and use a fork or a zip-top bag with the corner snipped off to zigzag it all over the top surface.
Chocolate and Peanut Butter Cup Perfection
Our top choice, and the one that gets the most ‘oohs’ and ‘aahs’ at family dinners, involves chopped peanut butter cups. Seriously, it’s cheating, but who cares? Take your favorite mini peanut butter cups—the ones with the crinkled paper around them—and chop them roughly. Don’t make them too fine; you want those discernible chunks of chocolate and peanut butter.
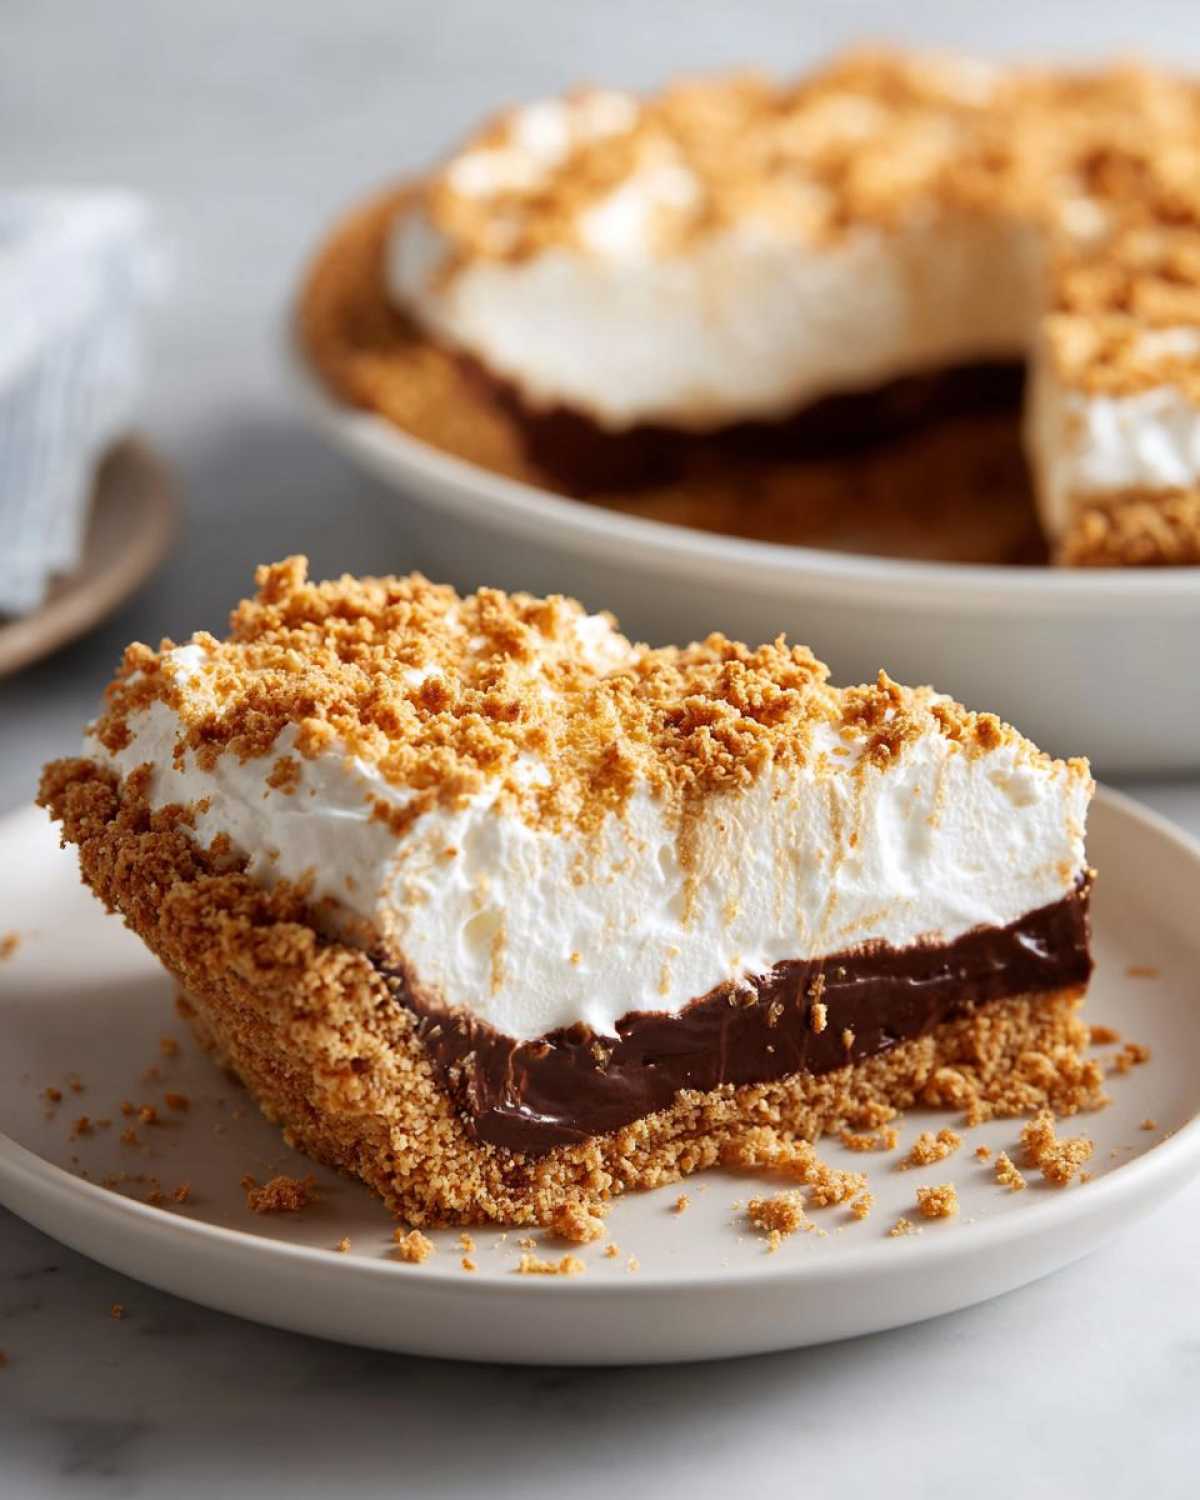
Sprinkle those right before you serve. That combination of the cold, smooth pie and the slightly softer crushed candy on top? Wow. It hits every texture you want in an indulgent peanut butter dessert. If you’re feeling extra fancy, a light sprinkle of coarse sea salt right over the chocolate adds that extra ‘pop’ that Ethan is always looking for.
Beyond Chocolate: Other Topping Pairings
While chocolate is the reigning champ, don’t get stuck in a rut! The beauty of a no bake peanut butter pie is that it’s a perfect canvas for so many flavors. Salted caramel sauce is phenomenal here. The deep, slightly burnt sugar notes of caramel marry beautifully with the roasted peanut flavor—it’s a sophisticated combination that works great for adult gatherings.
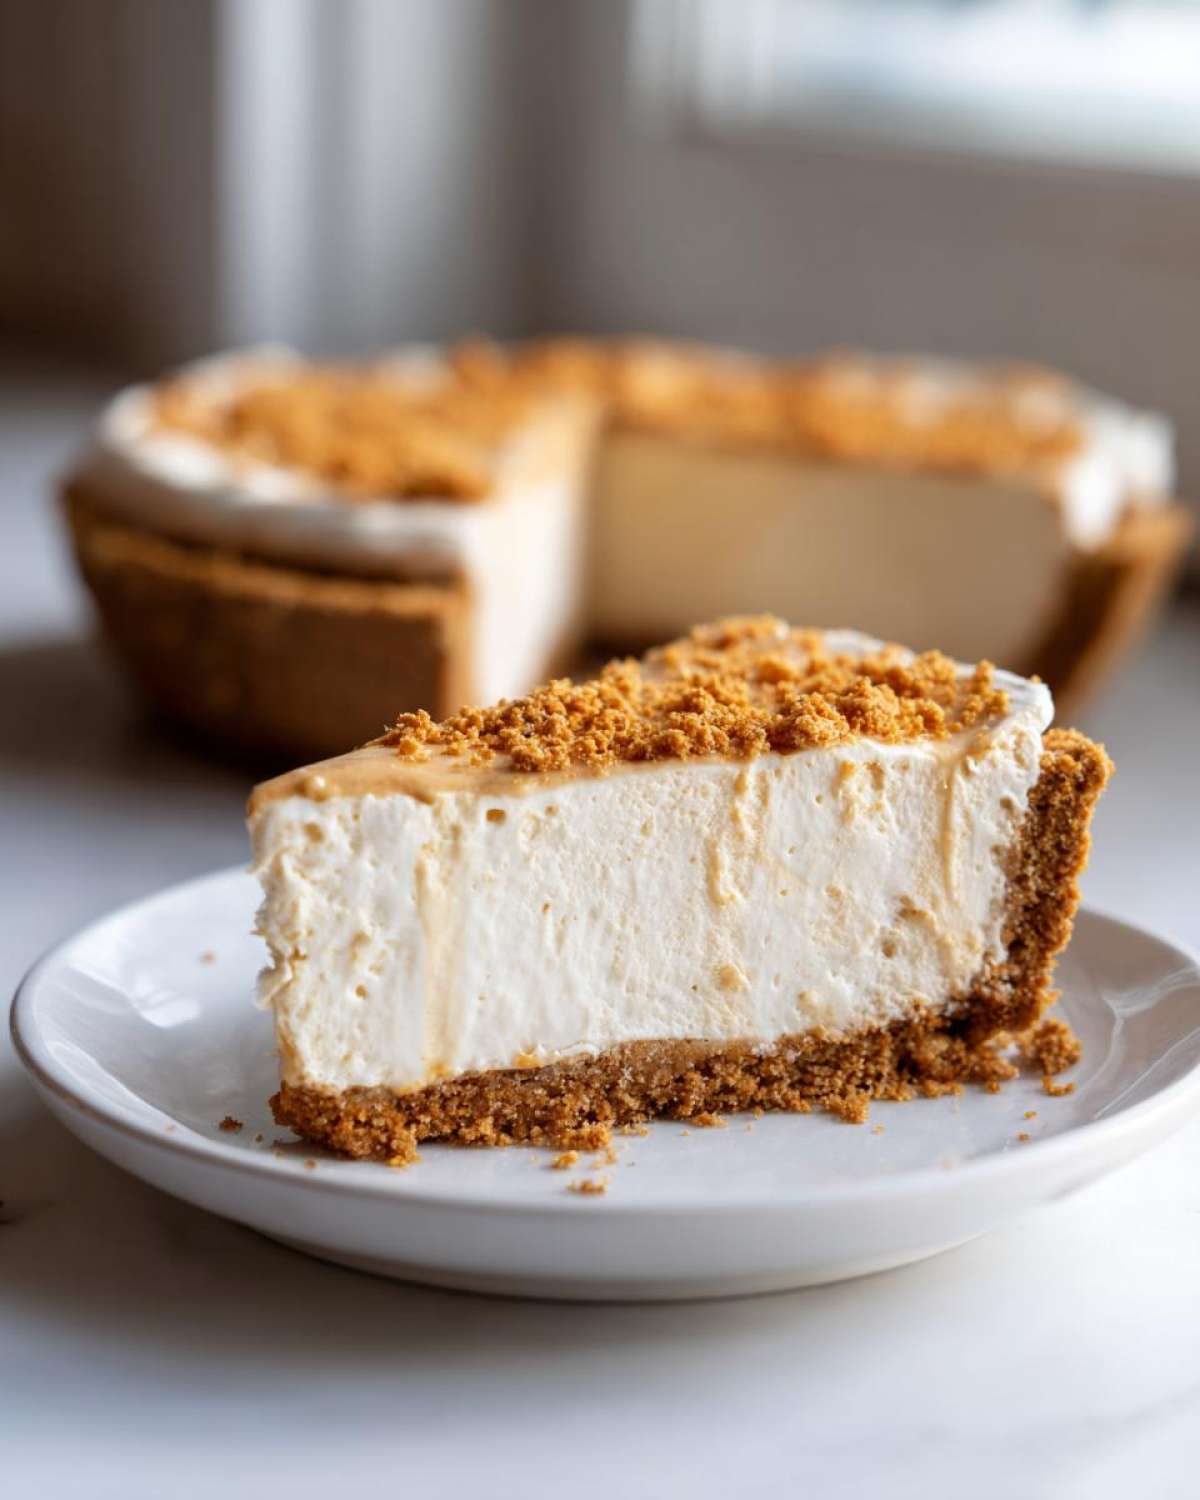
Another thing we sometimes do, especially if we want to lighten up the look a little, is a simple dusting of powdered sugar or finely crushed pretzels. Yes, pretzels! If you crush them finely, they behave a lot like graham crumbs, but they bring a salty crunch that Maya loves contrasting with the sweet filling. It really emphasizes that sweet and salty dynamic!
Ultimately, once you have that perfectly set, creamy peanut butter pie filling, you can’t go wrong. It pairs perfectly with a cup of strong black coffee, by the way—the bitterness cleanses the palate between rich bites!
Frequently Asked Questions About No Oven Desserts
I know when you’re looking for an Easy Peanut Butter Pie Recipe, you aren’t just looking for ingredients; you’re looking for reassurance! I get so many messages after people try this pie, and I figured answering the most common worries right here would help everyone feel confident serving up this amazing dessert. When we make these No Bake Peanut Butter Pies, the main concern is always texture and setting time. Don’t sweat it; we’ve figured out all the tricky parts so you don’t have to!
Can I use whipped topping instead of heavy cream for this peanut butter pie?
That’s a great question about substitutions! Listen, I totally get it; sometimes you just don’t keep heavy cream on hand, or maybe you just prefer the stability of the shelf-stable whipped topping. The short answer is yes, you absolutely can substitute stabilized whipped topping for the heavy cream and powdered sugar mixture we use to make our homemade whipped cream. If you do this, use about 1 1/2 cups of the thawed whipped topping in place of the 1 cup of heavy cream we whip.
However, there’s a little trade-off. The cream we whip adds a certain richness and structure that stabilizers just can’t fully replicate. So, while your pie will still be delicious and creamy—it remains a superior No Bake Peanut Butter Pie—it might be just a tiny bit less rich. If you use it, make sure the whipped topping is cold and fold it in super gently at the very end so you don’t crush those incorporated air pockets.
How long does this pie need to chill before slicing?
This is probably the question I get asked the most, and honestly, rushing the chill time is the number one way to ruin a perfect Creamy Peanut Butter Pie! Because we aren’t baking it to set the structure, we are relying entirely on cold temperature to firm up that sweetened condensed milk and fat mixture. You must chill it for a minimum of 4 hours. If you cut it before then, you’re going to end up with a delicious, soupy mess rather than a proper slice.
My pro tip, which Ethan refuses to do because he lacks patience? Chill it overnight! When you leave this Rich Dessert Pie in the fridge for 8 to 12 hours, the filling is totally solid, yielding the cleanest, most beautiful slices you can imagine. It’s the perfect strategy for a Friday night when you bake it Thursday night—hello, Make Ahead Dessert Recipes!
Can I use crunchy peanut butter in this recipe?
This is where our kitchen heads clash! I prefer the silky smooth texture of using creamy peanut butter for a true Peanut Butter Cream Pie, where the mouthfeel is consistent in every bite. Ethan, on the other hand, loves having those little pockets of crunch!
If you’re like Ethan and prefer texture, using crunchy peanut butter won’t technically ruin the recipe. Just know that it changes the final consistency significantly. Instead of that ultra-smooth, cloud-like filling, you’ll have small, noticeable chunks of peanuts throughout. If you are aiming for a recipe that’s advertised as the absolute Best Peanut Butter Pie for its pure creaminess, stick to creamy. If you want textural contrast in your Homemade Peanut Butter Pie, go for crunchy—you know what you like best!
Nutritional Estimates for Your Slice of Pie
Okay, just because this peanut butter pie tastes like pure, unadulterated fun doesn’t mean we can completely ignore what’s going on inside! Maya, being the researcher that she is, ran the numbers based on the ingredients we used here. Now, you have to remember that these are just estimates, alright? We used specific brands of peanut butter and condensed milk, and if you swap out the graham cracker crust for an Oreo Crust Peanut Butter Pie, these numbers will jump around a little bit. This is just our ballpark figure for one serving of this glorious, rich treat.
If you’re keeping track, here is what we are estimating for one single slice of this amazing no bake dessert:
- Serving Size: 1 slice
- Calories: 450
- Sugar: 35g
- Sodium: 250mg
- Total Fat: 28g
- Saturated Fat: 10g
- Carbohydrates: 42g
- Protein: 10g
See? Totally worth it! It’s high in sugar and fat because, let’s be honest, it’s an indulgent peanut butter dessert designed to satisfy, not replace your daily greens. Don’t worry about the details too much; just enjoy that amazing creamy peanut butter pie filling. If you need to lighten it up, the best way is always by being lighter on the chocolate drizzle topping when you serve it!
Share Your Easy Peanut Butter Pie Experience
And there you have it! This entire masterpiece—the crust, the creamy, dreamy filling, the set time—all done without ever having to preheat the oven! I really hope you give this Easy Peanut Butter Pie Recipe a try soon. When Maya and I first started cooking together, making something this impressive but this low-fuss felt impossible, but now it’s our absolute favorite thing to whip up when guests are coming.
We really, truly want to know what you think! Once you’ve tried this no bake peanut butter pie, stop by and leave us a rating using our famous five-star system—you know, the one Maya developed after researching the perfect algorithm for happiness? Or, even better, snap a picture!
We absolutely love seeing your creations when you share them on social media. Tag us so we can see how your pie turned out! Honestly, I’m dying to know which way you went: Did you stick with the classic chocolate syrup, or did you go totally rogue with salted caramel or maybe even crumbled bacon (Ethan suggested that, naturally)? Let us know in the comments below!
If you have any lingering questions about the setting time or how to keep that crust crisp, don’t hesitate to reach out through our Contact Page. We’re always here to help you troubleshoot and make sure your next slice of this crowd pleaser dessert is perfect!
PrintEasy No-Bake Creamy Peanut Butter Pie
Make this irresistible, no-bake peanut butter pie for your next gathering. It features a rich, creamy filling and a buttery graham cracker crust, requiring no oven time.
- Prep Time: 20 min
- Cook Time: 0 min
- Total Time: 4 hr 20 min
- Yield: 8 servings
- Category: Dessert
- Method: No-Bake
- Cuisine: American
- Diet: Vegetarian
Ingredients
- 1 1/2 cups graham cracker crumbs
- 1/4 cup granulated sugar
- 6 tablespoons unsalted butter, melted
- 1 (8 ounce) package cream cheese, softened
- 1 cup creamy peanut butter
- 1 (14 ounce) can sweetened condensed milk
- 1 teaspoon vanilla extract
- 1 cup heavy whipping cream
- 1/4 cup powdered sugar
- Optional Topping: Chocolate syrup or mini peanut butter cups
Instructions
- Prepare the crust: In a medium bowl, mix the graham cracker crumbs, 1/4 cup granulated sugar, and melted butter until the mixture resembles wet sand. Press the mixture firmly and evenly into the bottom and up the sides of a 9-inch pie plate. Place the crust in the freezer while you prepare the filling.
- Make the filling base: In a large bowl, beat the softened cream cheese with an electric mixer until smooth. Add the creamy peanut butter and beat until fully combined.
- Pour in the sweetened condensed milk and vanilla extract. Mix on low speed until just combined, scraping down the sides of the bowl as needed. Do not overmix.
- Prepare the whipped topping: In a separate, clean bowl, beat the heavy whipping cream and 1/4 cup powdered sugar until stiff peaks form.
- Gently fold about one-third of the whipped cream into the peanut butter mixture to lighten it. Then, fold in the remaining whipped cream until no white streaks remain. This keeps the filling light and airy.
- Spoon the creamy peanut butter filling into the chilled graham cracker crust. Smooth the top with a spatula.
- Chill the pie for at least 4 hours, or preferably overnight, to allow it to set completely.
- Before serving, top with chocolate syrup or chopped peanut butter cups, if desired. Slice and serve this crowd pleaser dessert.
Notes
- For an Oreo crust peanut butter pie, substitute 1 1/2 cups of finely crushed Oreo cookie crumbs for the graham cracker crumbs.
- If you want a slightly saltier contrast to the sweetness, use salted butter in the crust.
- This is a great make ahead dessert recipe; it holds up well in the refrigerator for up to three days.
Nutrition
- Serving Size: 1 slice
- Calories: 450
- Sugar: 35
- Sodium: 250
- Fat: 28
- Saturated Fat: 10
- Unsaturated Fat: 18
- Trans Fat: 0
- Carbohydrates: 42
- Fiber: 2
- Protein: 10
- Cholesterol: 45