

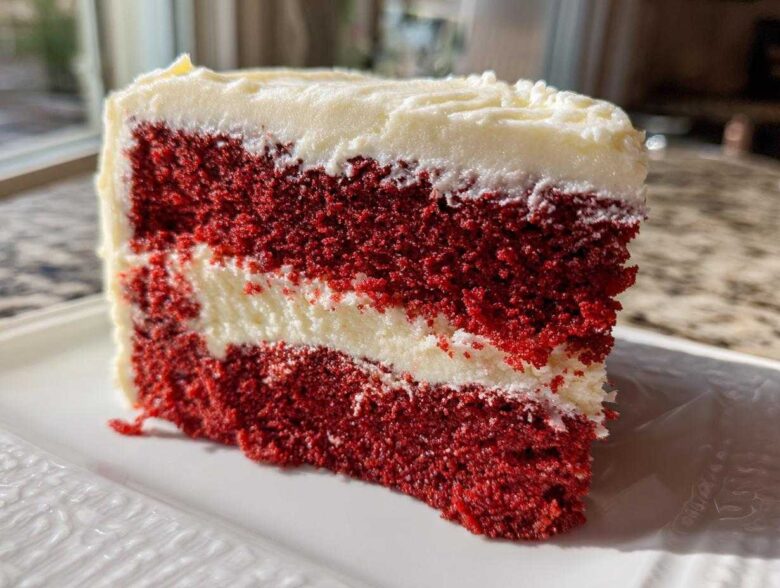
If there’s one cake that demands attention at any celebration—whether it’s a huge birthday or just a Tuesday that needs cheering up—it’s the classic red velvet cake. Ethan’s family always made it, but honestly, the first few attempts we made together were… red, but not much else! We struggled to get that signature soft homemade cake texture. But now? We’ve cracked the code. I’m so excited to share what we landed on: The Best Southern Style Moist Red Velvet Cake From Scratch with Classic Cream Cheese Frosting. This version nails that barely-there cocoa hint, the perfect tang, and unbelievably moist layers. Trust me, once you try this, you won’t look back. Don’t forget to check out our apple dapple cake next!
Why This is the Best Moist Red Velvet Cake Recipe
I know everyone claims their recipe is the best, but you guys, this one is special. Ethan was skeptical at first, but after we nailed the technique, he agreed. This isn’t just some chocolate cake pretending to be fancy; this is an authentic southern red velvet experience. It is the ultimate moist red velvet cake recipe because we use buttermilk, which keeps everything perfectly tender.
- It truly is an easy red velvet cake to make from scratch.
- The flavor is balanced—just enough cocoa to say hello, but the tang steals the show.
- We achieve that amazing soft homemade cake feel every single time.
- It’s quick enough to whip up for a last-minute gathering, making it one of our favorite easy baking recipes.
The Secret to a Fluffy Red Velvet Cake Crumb
This is where the science comes in, and I love it! The buttermilk brings the acid, and when you add the white vinegar right before mixing, you get this fantastic, fizzy reaction with the baking soda. That immediate reaction is critical. It’s what gives our cake that light, beautifully fluffy red velvet cake crumb structure. It’s gentle lift, not heavy rising, which keeps the texture velvety smooth!
Gathering Ingredients for Your Red Velvet Cake from Scratch
Okay, gathering supplies is my favorite part because it feels like collecting treasure before a big project. For this red velvet cake to really sing, the quality and preparation of the ingredients matter a lot, especially for the frosting! Ethan always reminds me that if the ingredients aren’t ready, the cake won’t be happy. We need things softened just right, or the texture gets wrecked. Here are exactly what you—and I—need for this Southern classic.
If you want to look at other great recipes while you gather these, maybe check out my tips for making a gorgeous moist apple bundt cake!
For the Authentic Southern Red Velvet Cake Layers
Remember, accuracy counts in baking! Make sure your butter is truly softened—not melted—and get that real buttermilk ready. That’s non-negotiable for true Southern flavor.
- 2 1/2 cups all-purpose flour
- 1 teaspoon baking soda
- 1 teaspoon salt
- 1 tablespoon unsweetened cocoa powder
- 1 cup unsalted butter, softened
- 1 1/2 cups granulated sugar
- 2 large eggs (room temperature is best, if you can remember!)
- 1 teaspoon vanilla extract
- 1 cup buttermilk
- 1 teaspoon white vinegar
- 1 bottle (1 ounce) red food coloring (Yes, the whole bottle! This gives us that truly vibrant red velvet cake hue.)
For the Best Cream Cheese Frosting Recipe
This is where Ethan intervenes because he insists on making a huge batch of frosting. He says too much frosting is impossible. More seriously, the butter and cream cheese MUST be softened to room temperature for this to come together without lumps. If they are even slightly cold, you’ll end up beating forever.
- 1 cup cream cheese, softened
- 1/2 cup unsalted butter, softened
- 4 cups powdered sugar, sifted (Sifting is Maya’s research rule—it saves so much heartbreak!)
- 1 teaspoon vanilla extract
- 1/4 teaspoon salt
Step-by-Step: How to Make an Easy Red Velvet Cake
Doesn’t it feel great when an intimidating classic turns out to be such an easy red velvet cake? This process flows really smoothly once you get organized. First things first: Preheat your oven to 350°F (175°C) and get those two 9-inch round cake pans ready by greasing and flouring them well. We want zero sticking! Make sure you have your dry mixture (flour, cocoa, salt, soda) ready in one bowl and your colored buttermilk mixture ready in another. That organization keeps us stress-free!
Mixing the Red Velvet Cake Batter
We start by creaming that softened butter and sugar until it’s genuinely light and fluffy—this is where you build the air for a fluffy red velvet cake texture. Then, eggs one at a time, then vanilla. Now for the alternating additions! Add about a third of your dry ingredients, mix just until you see it disappear, then pour in half of your red buttermilk mixture. Repeat with the next third of dry ingredients, the rest of the wet, and finish with the last of the dry. Here’s Ethan’s tip: Stop the mixer the second it looks combined. If you keep going until it’s perfectly uniform, you’ll overwork the gluten. Give it a quick sniff; if you smell a nice balance of sugar and tang, you’re good to go! This mixing technique is vital for a moist red velvet cake recipe.
Baking and Cooling the Red Velvet Layer Cake
Spoon that gorgeous red batter evenly into your pans and slide them into the oven for about 30 to 35 minutes. How do you check? The old-fashioned way: a wooden pick right in the center should come out clean, maybe with a few moist crumbs clinging to it—that’s perfect! Let them cool in the pans for 10 minutes. Seriously, don’t rush this part! Then, flip them out onto a wire rack and let them cool completely. If you try to frost them even slightly warm, that beautiful cream cheese frosting melts into a runny mess, and nobody wants that heartbreak on their easy baking recipes day.
Whipping Up the Classic Cream Cheese Frosting
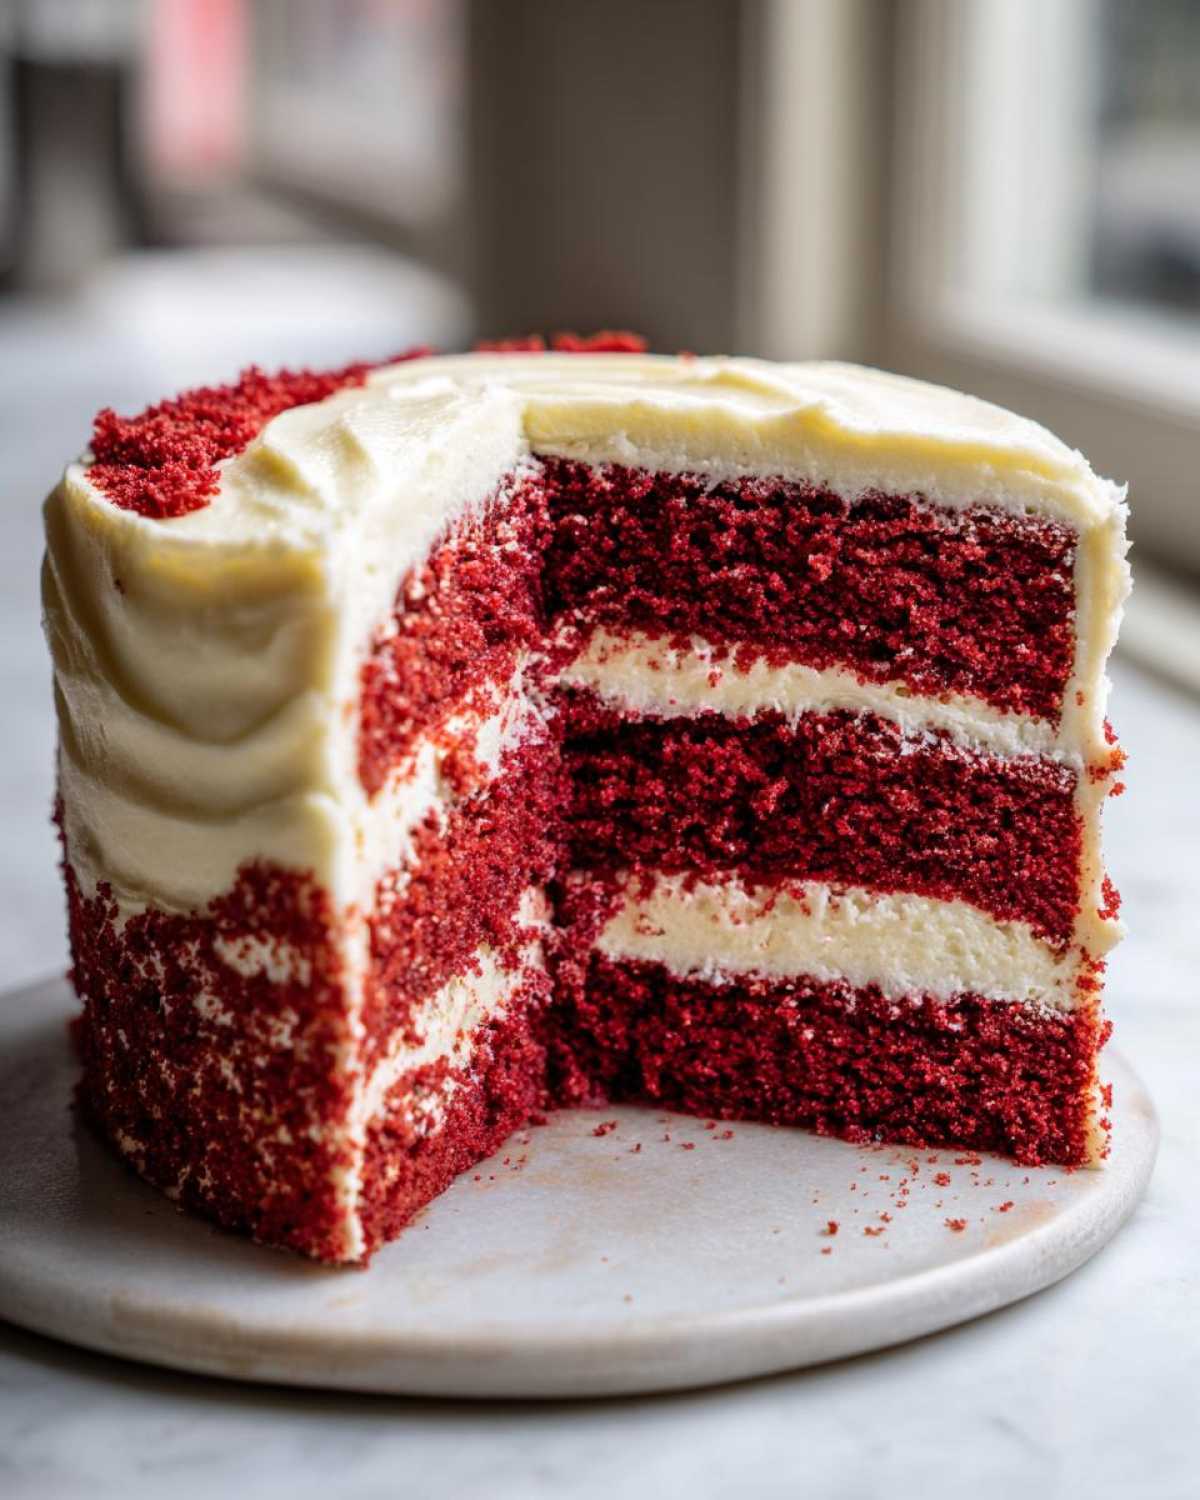
While those cakes cool, we make the star of the show! Make sure your 1 cup of cream cheese and 1/2 cup of butter are soft! Beat them together until they are super smooth—this is where my research always stresses beating out all the lumps first. Then, I slowly add the sifted powdered sugar, a cup at a time, mixing on low speed so it doesn’t fly everywhere (watch out for sugar clouds!). When it’s all in, whip it fast until it’s cloud-like, adding your vanilla and salt. If it seems stiff, just splash a tiny bit of milk in until it’s perfectly spreadable for your red velvet layer cake.
Tips for a Vibrant Red Velvet Cake Tutorial
Getting that intense, beautiful red color that makes this cake a showstopper takes a little finesse. We’re not just dumping food coloring in; we’re aiming for that perfect, deep hue that contrasts so brilliantly with the stark white frosting. This entire process, from the flavor base to the final polish as a red velvet layer cake, is what makes a truly amazing vibrant red velvet cake tutorial.
Buttermilk Cake Recipes: The Flavor Foundation
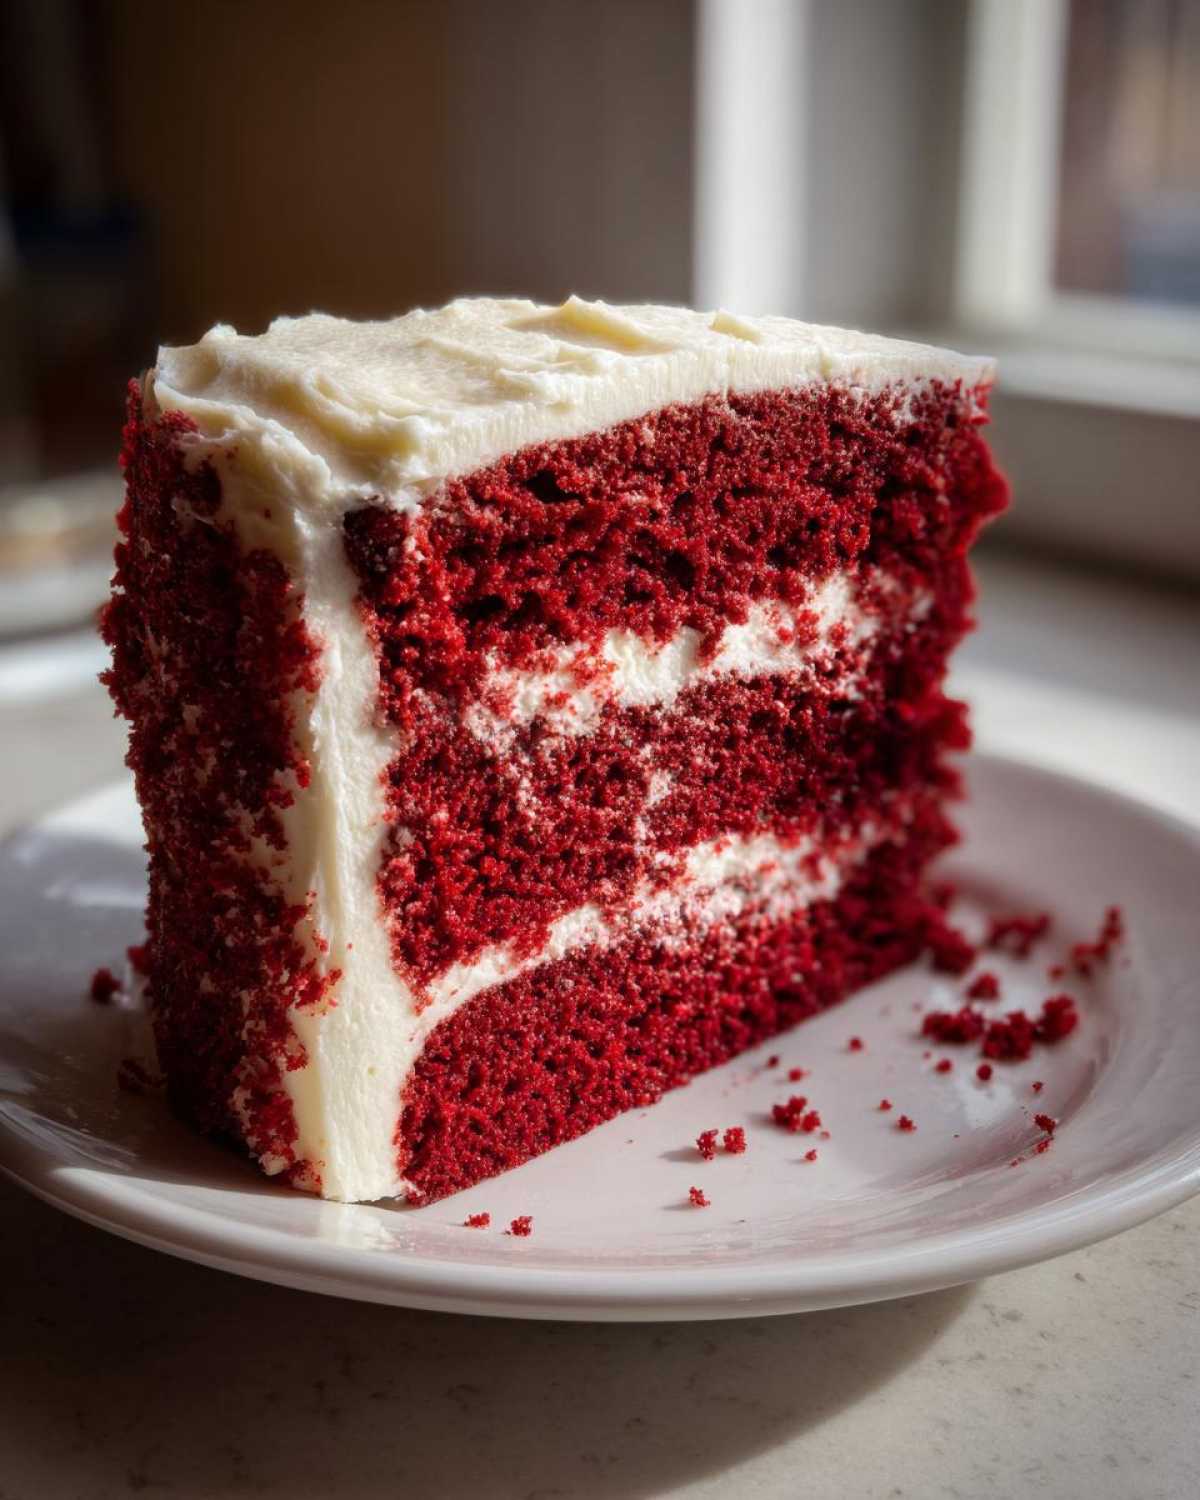
When you look at the ingredient list for a true authentic southern red velvet, you’ll notice just 1 tablespoon of cocoa powder. That’s it! If your cake tastes too chocolatey, you’ve accidentally made a mild chocolate cake, not red velvet. The small amount of cocoa is there primarily to chemically react with the buttermilk and vinegar to help bring out that gorgeous red tone when the coloring is added.
The buttermilk and vinegar combo isn’t just for color, though. It keeps this cake incredibly moist, almost like a traditional buttermilk cake recipe. It tenderizes the flour proteins, resulting in a crumb that feels light yet dense when you bite into it. If you skipped the vinegar, the reaction wouldn’t be as strong, and your texture would suffer significantly. Don’t try to shortcut that chemistry! If you want to explore more of our kitchen adventures, check out the main blog page!
Assembling Your Showstopping Red Velvet Layer Cake
So, your cakes are cool, and the frosting is fluffy—now for the assembly! First, if your layers domed slightly in the oven, grab a long serrated knife and gently slice off the dome to make them perfectly flat surfaces. I know, it feels wrong cutting off any cake, but trust me, it makes stacking so much cleaner. You need a flat foundation for a showstopping dessert!
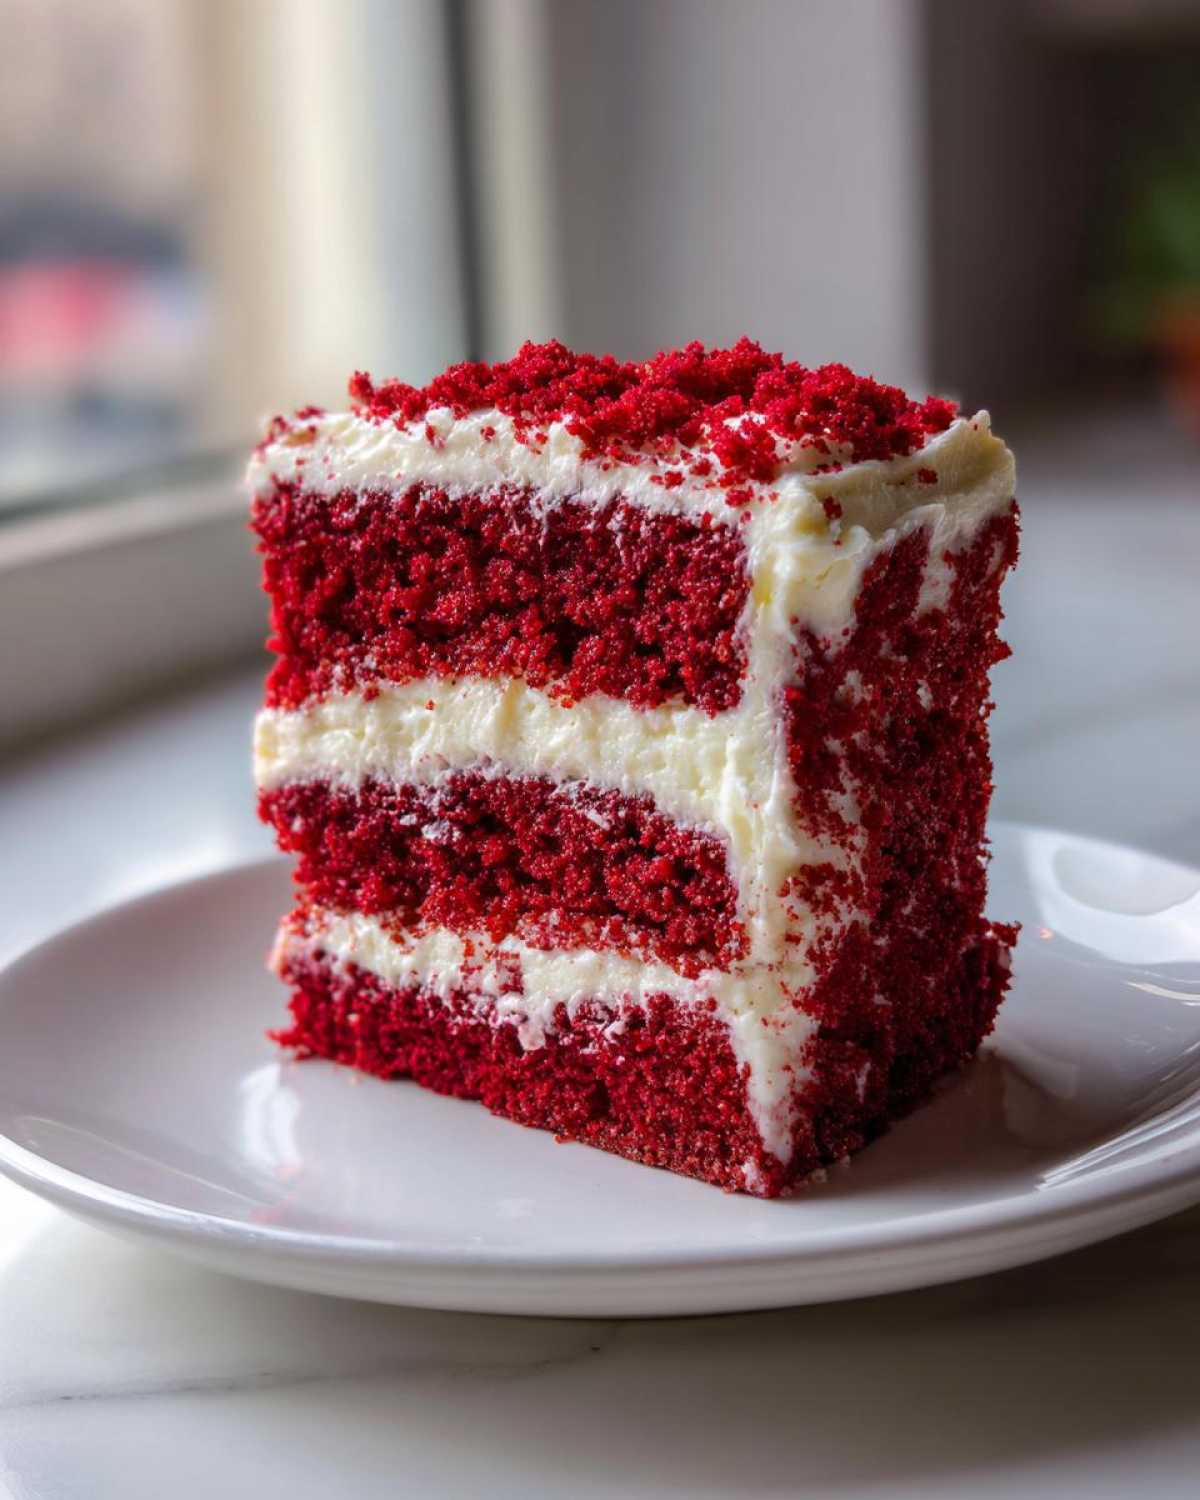
When you apply the first layer of frosting between the two cakes, use an offset spatula to spread it evenly to the edge. Then, for the crumb coat (which seals in all those loose crumbs), use a thin layer around the entire outside. Pop the whole thing in the fridge for about 15 minutes to firm up that layer. Once that’s set, you can go back with your remaining frosting for the final, beautiful coat. For those gorgeous tall layers, look at this great tutorial for getting that professional look!
Making This Red Velvet Cake Perfect for Special Occasions
This red velvet cake isn’t just a recipe; it’s tradition waiting to happen. It’s the cake everyone hopes to see pop up for Christmas dessert tables or when Valentine’s Day rolls around. Honestly, this moist red velvet cake recipe is my go-to birthday cake idea because it feels so classic and celebratory. Because the texture stays so soft even after refrigeration, it’s perfect for making ahead of time. You can mix up the layers a day early, store them wrapped tight, and you’re ready to frost the morning of your big party. It truly is one of the best holiday cake recipes we have!
Storage and Keeping Your Red Velvet Cake Fresh
You’ve made this beautiful, vibrant red velvet cake, and now you need to keep it perfect until the big reveal! This rich cake, thanks to the cream cheese frosting, has a little different set of storage rules than your average sheet cake. Ethan always wants to sneak a slice immediately, but patience pays off here.
For short-term enjoyment—say, you plan to serve it within a day or two—you can definitely leave your finished red velvet layer cake right out on the counter. Just cover it loosely with a cake dome or set it in the sealed cake carrier we talked about for our refrigerator cake experiments. Room temperature is best for serving because that cream cheese frosting gets perfectly soft and spreadable again. Don’t let it sit out longer than two days, though, especially if your kitchen is warm.
If you need to stash it away for longer, maybe you’re planning ahead for the holidays, you’ll want the fridge. Wrap the whole frosted cake tightly in plastic wrap first, then maybe slide it into a container. The cold solidifies the frosting, which minimizes any sticking risk. When you pull it out to serve, give it at least an hour, maybe even two, on the counter to come back up to room temperature. That warming period wakes up the flavor and brings back that incredibly moist red velvet cake recipe texture we worked so hard for!
Frequently Asked Questions About Red Velvet Cake
I get so many messages asking about tweaks and troubleshooting for this cake—which I love! Keep those questions coming to our contact page! When you’re trying to achieve that perfect Southern style, sometimes you need a few extra pointers. Here are the most common things people ask me when trying this red velvet cake from scratch recipe for the first time.
Can I make a red velvet cake without buttermilk?
Oh, the age-old question! Look, if you absolutely must substitute, you can! Remember that tip I shared in the notes? Mix 1 tablespoon of white vinegar or lemon juice into 1 cup of regular milk and let it sit for about five minutes until it curdles slightly. That creates a decent substitute for using in your **moist red velvet cake recipe**. However, I have to be honest with you: nothing beats real, cultured buttermilk for that authentic tang and the absolute best tender crumb. If you want the *best* result, grab the real stuff!
Why does my red velvet cake taste like chocolate?
This is a common stumble because it’s confusing! True **authentic southern red velvet** only has a tiny bit of cocoa powder—usually just a tablespoon or two. It’s there mostly for chemistry, reacting with the buttermilk to help achieve that subtle red hue (even with the added food coloring). If yours tastes strongly like chocolate, you might accidentally be using a standard **cocoa powder cake** ratio, or perhaps you used dark cocoa. We want a hint of complexity, not a full chocolate overlay. Keep that cocoa measurement low, and you’ll get the perfect slight earthiness this cake needs.
How do I get the most vibrant red velvet cake color?
This is the visual trickiest part! Everyone wants that picture-perfect red. My biggest advice, which I stressed earlier, is to ditch the liquid drops if you can manage it and use a high-quality gel coloring instead. Gel colors are concentrated, so you need less volume, which means less liquid being added to your batter. Also, remember that acid (that wonderful buttermilk and vinegar!) naturally fights the red dye just a tiny bit. So, you often need more coloring than you think you should add to get that truly **vibrant red velvet cake** pop! Don’t be shy with the food coloring here!
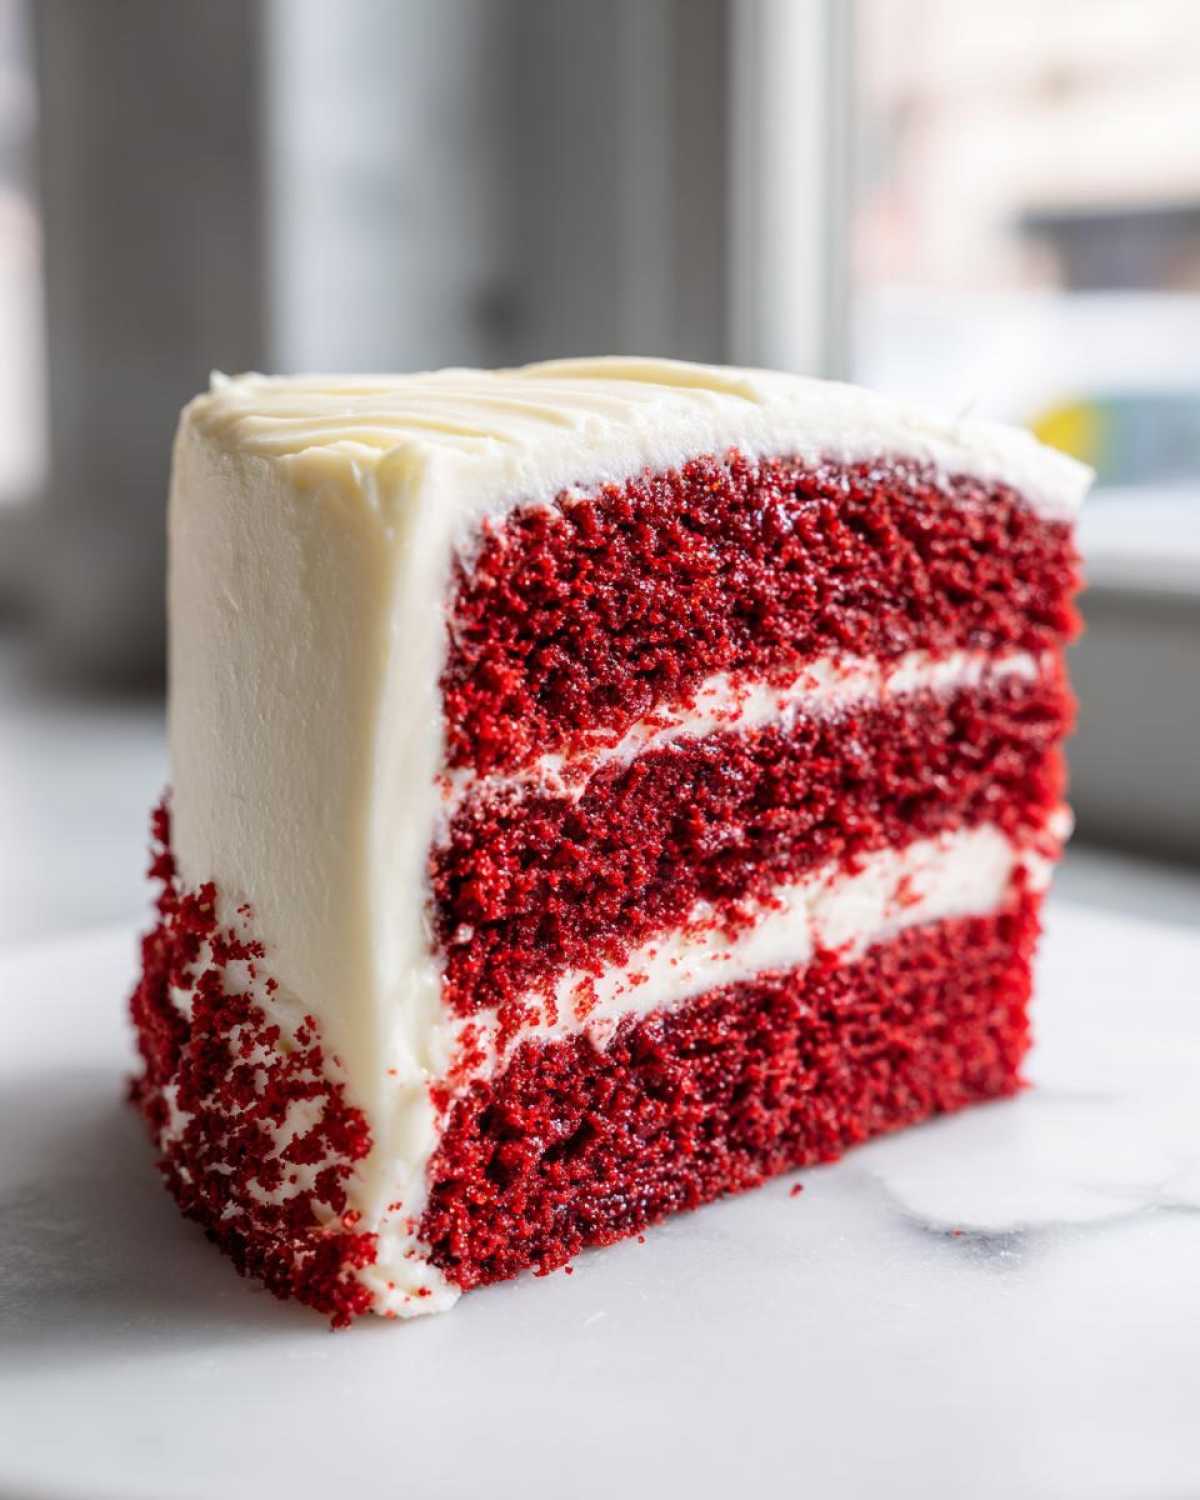
Estimated Nutritional Data for This Red Velvet Cake
Ethan jokes that looking at this section is why we run on the treadmill before baking! Seriously though, understanding the nutrition helps when you’re planning for the whole party. Since this is a rich, decadent dessert, we expect the numbers to be a bit high, especially with that gorgeous cream cheese frosting slathered on top. These figures are just estimates based on the ingredients listed for a single serving slice when the entire cake is divided into 12 pieces. Because we tweaked ingredients like the sugar source or butter amount occasionally, treat this as a helpful guide, not something to stress over!
- Serving Size: 1 slice
- Calories: 450
- Fat: 24g (with 14g saturated fat)
- Carbohydrates: 60g (including about 55g of sugar)
- Protein: 4g
- Sodium: 350mg
- Cholesterol: 85mg
This is why we call it a showstopping dessert—it’s rich in flavor and calories! Remember that this red velvet cake from scratch uses real butter and cream cheese, which contributes to that incredible texture, so we’ll save the lighter treats for another day!
Share Your Best Cream Cheese Frosting Creations
Well, that’s it! You’ve armed yourself with the ultimate moist red velvet cake recipe, you’ve beaten that luscious cream cheese frosting until it’s perfectly smooth, and now you have a stunning red velvet layer cake ready to go. I really, truly hope you loved the process as much as Ethan and I do when we test these recipes together.
Now comes the fun part—I want to see what you made! Head down to the comments below and tell me how it went. Did you manage to get that perfect vibrant red velvet cake color? Did your family notice the difference when you used real buttermilk? Don’t be shy; tell me your absolute favorite part of eating this dessert now that it’s done.
More importantly, did you come up with a fantastic “tasty tip” of your own while making this? Maybe you found a trick for leveling the layers, or perhaps you experimented with adding a hint of lemon zest to the frosting (Ethan tried that once!). We thrive on sharing those little kitchen secrets that make baking easier and more fun. If you’re feeling inspired to bake something else sweet and gooey next, you absolutely have to try our recipe for pecan pie cookies!
Please leave a rating for this recipe right below—it really helps other home bakers trust that this easy red velvet cake will turn out amazing for them too. Happy baking, everyone!
PrintThe Best Southern Style Moist Red Velvet Cake From Scratch with Classic Cream Cheese Frosting
Bake the ultimate showstopper! This recipe delivers a perfectly moist and soft red velvet layer cake with that iconic vibrant red color, balanced with just a hint of cocoa. We pair it with a rich, homemade cream cheese frosting for a truly authentic Southern dessert.
- Prep Time: 25 min
- Cook Time: 35 min
- Total Time: 60 min
- Yield: 12 servings
- Category: Dessert
- Method: Baking
- Cuisine: American
- Diet: Vegetarian
Ingredients
- 2 1/2 cups all-purpose flour
- 1 teaspoon baking soda
- 1 teaspoon salt
- 1 tablespoon unsweetened cocoa powder
- 1 cup unsalted butter, softened
- 1 1/2 cups granulated sugar
- 2 large eggs
- 1 teaspoon vanilla extract
- 1 cup buttermilk
- 1 teaspoon white vinegar
- 1 bottle (1 ounce) red food coloring (for vibrant red velvet cake)
- 1 cup cream cheese, softened
- 1/2 cup unsalted butter, softened
- 4 cups powdered sugar, sifted
- 1 teaspoon vanilla extract
- 1/4 teaspoon salt
Instructions
- Preheat your oven to 350°F (175°C). Grease and flour two 9-inch round cake pans.
- In a medium bowl, whisk together the flour, baking soda, salt, and cocoa powder. Set this dry mixture aside.
- In a large bowl, use an electric mixer to beat the 1 cup of butter and 1 1/2 cups of sugar until the mixture is light and fluffy. This step helps create a soft homemade cake texture.
- Beat in the eggs one at a time, mixing well after each addition. Stir in the vanilla extract.
- In a separate small bowl, whisk together the buttermilk, vinegar, and red food coloring until the color is uniform and vibrant.
- Alternate adding the dry ingredients and the buttermilk mixture to the butter mixture, beginning and ending with the dry ingredients. Mix only until just combined; do not overmix.
- Divide the batter evenly between the prepared cake pans.
- Bake for 30 to 35 minutes, or until a wooden pick inserted into the center comes out clean. Let the cakes cool in the pans for 10 minutes before inverting them onto a wire rack to cool completely.
- Prepare the cream cheese frosting: In a large bowl, beat the softened cream cheese and 1/2 cup butter until smooth.
- Gradually add the sifted powdered sugar, mixing on low speed until incorporated, then increase speed to medium-high. Beat until fluffy.
- Mix in the vanilla extract and salt. If the frosting is too thick, add a teaspoon of milk until you reach a spreadable consistency for your red velvet layer cake.
- Once the cakes are completely cool, frost and stack them to create your showstopping dessert.
Notes
- For the most vibrant red velvet cake color, use a high-quality gel food coloring instead of liquid drops.
- Buttermilk is key for the authentic Southern flavor and tender crumb; do not skip it in this easy red velvet cake recipe.
- To make a quick buttermilk substitute, add 1 tablespoon of white vinegar or lemon juice to 1 cup of regular milk and let it sit for 5 minutes before using.
Nutrition
- Serving Size: 1 slice
- Calories: 450
- Sugar: 55g
- Sodium: 350mg
- Fat: 24g
- Saturated Fat: 14g
- Unsaturated Fat: 10g
- Trans Fat: 0.5g
- Carbohydrates: 60g
- Fiber: 1g
- Protein: 4g
- Cholesterol: 85mg