

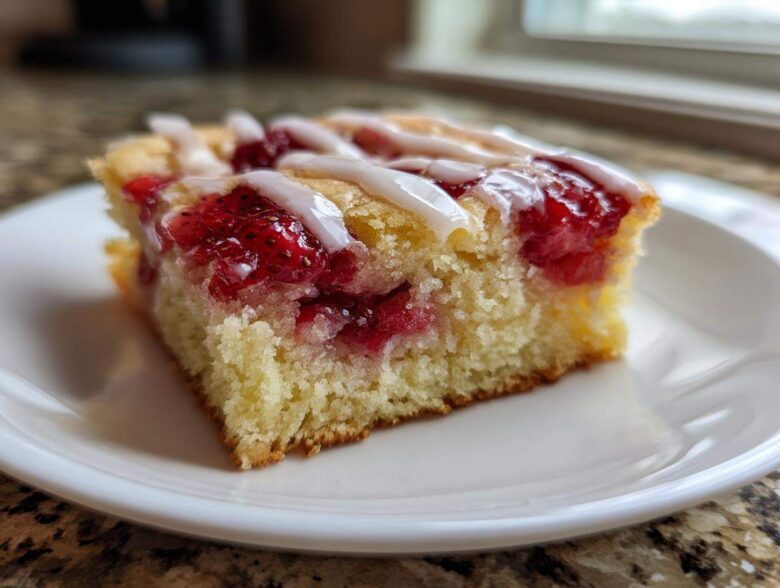
Look, I adore classic strawberry shortcake—who doesn’t love those fluffy biscuits piled high with cream and berries? But honestly, serving them at a garden party or potluck is just asking for a mountain of messy, collapsing servings. That’s why I perfected these Strawberry Shortcake Bars. Forget the fuss! This recipe gives you the exact buttery flavor and incredible strawberry tang you crave, locked into a sturdy, sliceable shortbread base.
Trust me on this one; once you try these baked bars, you’ll never go back. I’ve tested the ratios on the crumble and the filling about a dozen times to make sure they come out perfectly every single time, no matter how jam-packed your summer schedule is. They slice beautifully, they travel like a dream, and they taste like pure sunshine!
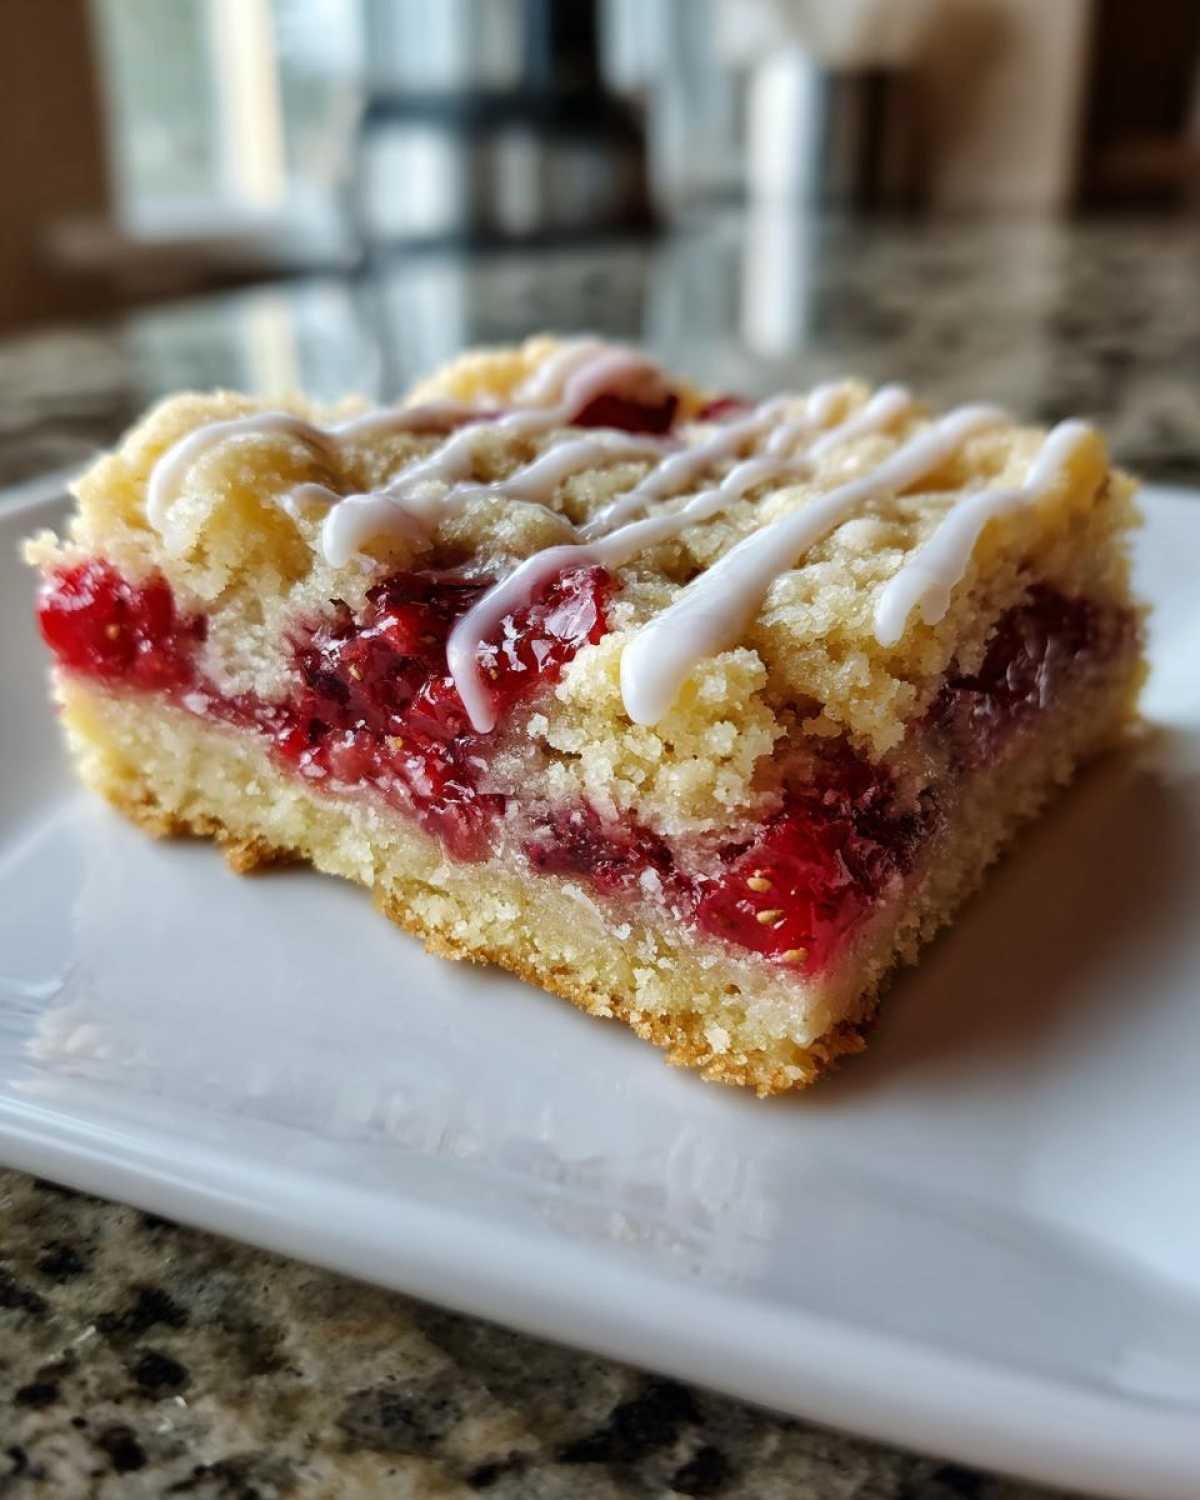
Why These Strawberry Shortcake Bars Are Your New Favorite Summer Dessert
You need these bars in your life this summer, seriously! They cut down on all the stress traditional shortcake brings. Because we’re making them in one pan, they are super sturdy and just perfect for packing up. Here’s why you’ll love them:
- These are truly Easy Strawberry Bars; the mixing is fast, and everything bakes together.
- They are incredibly Picnic Friendly Strawberry Desserts—no need to worry about sticky whipped cream melting everywhere!
- The contrast between the sweet, buttery crust and the slightly tangy berries is just divine.
- They look gorgeous when sliced, making them a stunning (and easy!) addition to any gathering. Seriously, check out more tips on baking beautiful desserts over on my main blog page!
Gathering Ingredients for Perfect Strawberry Shortcake Bars
Okay, let’s talk about what you need to grab from the pantry. The secret to a great tart, one-pan dessert almost always comes down to using fresh ingredients where it counts, especially those beautiful summer berries. For these Shortbread Strawberry Dessert Bars, we are sticking to the basics, but we need precision!
You’ll need three separate groups of things: the sturdy base, the gooey fruit layer, and the final drizzle. Don’t skimp on the butter for that crust—it’s what makes it taste like real shortcake! If you want to see how I get my shortbread bases super sturdy (I use a similar trick for my favorite sugar cookies), check out some tips I shared here.
For the Buttery Shortbread Crust and Crumble
Remember, we need the butter softened perfectly for mixing this dough—not melted, just soft enough to press a fingerprint into easily.
- 1 cup unsalted butter, softened
- 1/2 cup granulated sugar
- 2 cups all-purpose flour
- 1/4 teaspoon salt
For the Sweet Strawberry Filling
This is where the flavor pops! The cornstarch is your best friend here. It might seem small, but that little bit of starch is crucial for thickening the juices; otherwise, you end up with a soupy mess instead of a clean sliceable bar.
- 4 cups fresh strawberries, hulled and sliced
- 1/2 cup granulated sugar (for strawberries)
- 2 tablespoons cornstarch
- 1 tablespoon lemon juice
For the Simple Lemon Glaze Topping
We keep this super simple so it doesn’t mask the berry flavor. You only need two things!
- 1/2 cup powdered sugar
- 2 tablespoons milk or water
Step-by-Step Guide to Making Baked Strawberry Dessert Bars
Alright, here is the moment of truth! Making these Baked Strawberry Dessert Bars feels like magic because the layers bake right on top of each other. Just stick close to the timing, and you won’t have any issues. If you’ve ever struggled with cake layers sliding around, you’ll appreciate how this all stays put in one pan—it’s why I love this recipe so much. For more structured baking like this, I always recommend reading my guide on making that amazing apple dapple cake, which has some neat tips.
Preparing the Pan and Shortbread Base
First things first: get that oven preheated to 350°F (that’s 175°C). Grab your 9×13 pan and line it completely with parchment paper so that the edges hang over the sides. Trust me, this overhang is how you lift the whole thing out later in one piece—it’s cheating, but in the best way!
Now, mix up that crust dough till it looks crumbly, then press about two-thirds of it firmly into the bottom of your lined pan. Pop that into the oven for a quick 15-minute pre-bake. This sets the base so it doesn’t get soggy when the berries go on top.
Assembling the Strawberry Shortcake Bars Filling
While that crust is setting, move fast on the filling! Gently toss those fresh, sliced strawberries together in a bowl with the sugar, the cornstarch, and that splash of lemon juice. Let that mixture sit for just five minutes while the crust finishes its bake. You’ll see the juices starting to release, which is perfect. Once the crust is ready, pour that beautiful, juicy strawberry mixture right over the top.
Adding the Crumble Topping and Final Bake
Take the final one-third of your shortbread dough—this is going to be our streusel top! Just crumble it evenly over the berry layer. Don’t try to press it down; let it stay loose and crumbly. Bake the whole thing now for about 35 to 40 minutes. You’re looking for a topping that’s golden brown and for the edges of the strawberry filling to look bubbly and thick.
Cooling and Glazing Your Homemade Strawberry Slices
Seriously, this is the hardest part: you have to wait! Once they come out, they need to cool completely in that pan on a wire rack. If you try to cut into these Homemade Strawberry Slices too soon, they will definitely fall apart. Once they are totally cooled—I mean room temperature—it’s glaze time. Whisk your powdered sugar and milk until it’s smooth and drizzle it all over. Wait for that glaze to firm up before you pull them out using those parchment overhangs and slice them into squares!
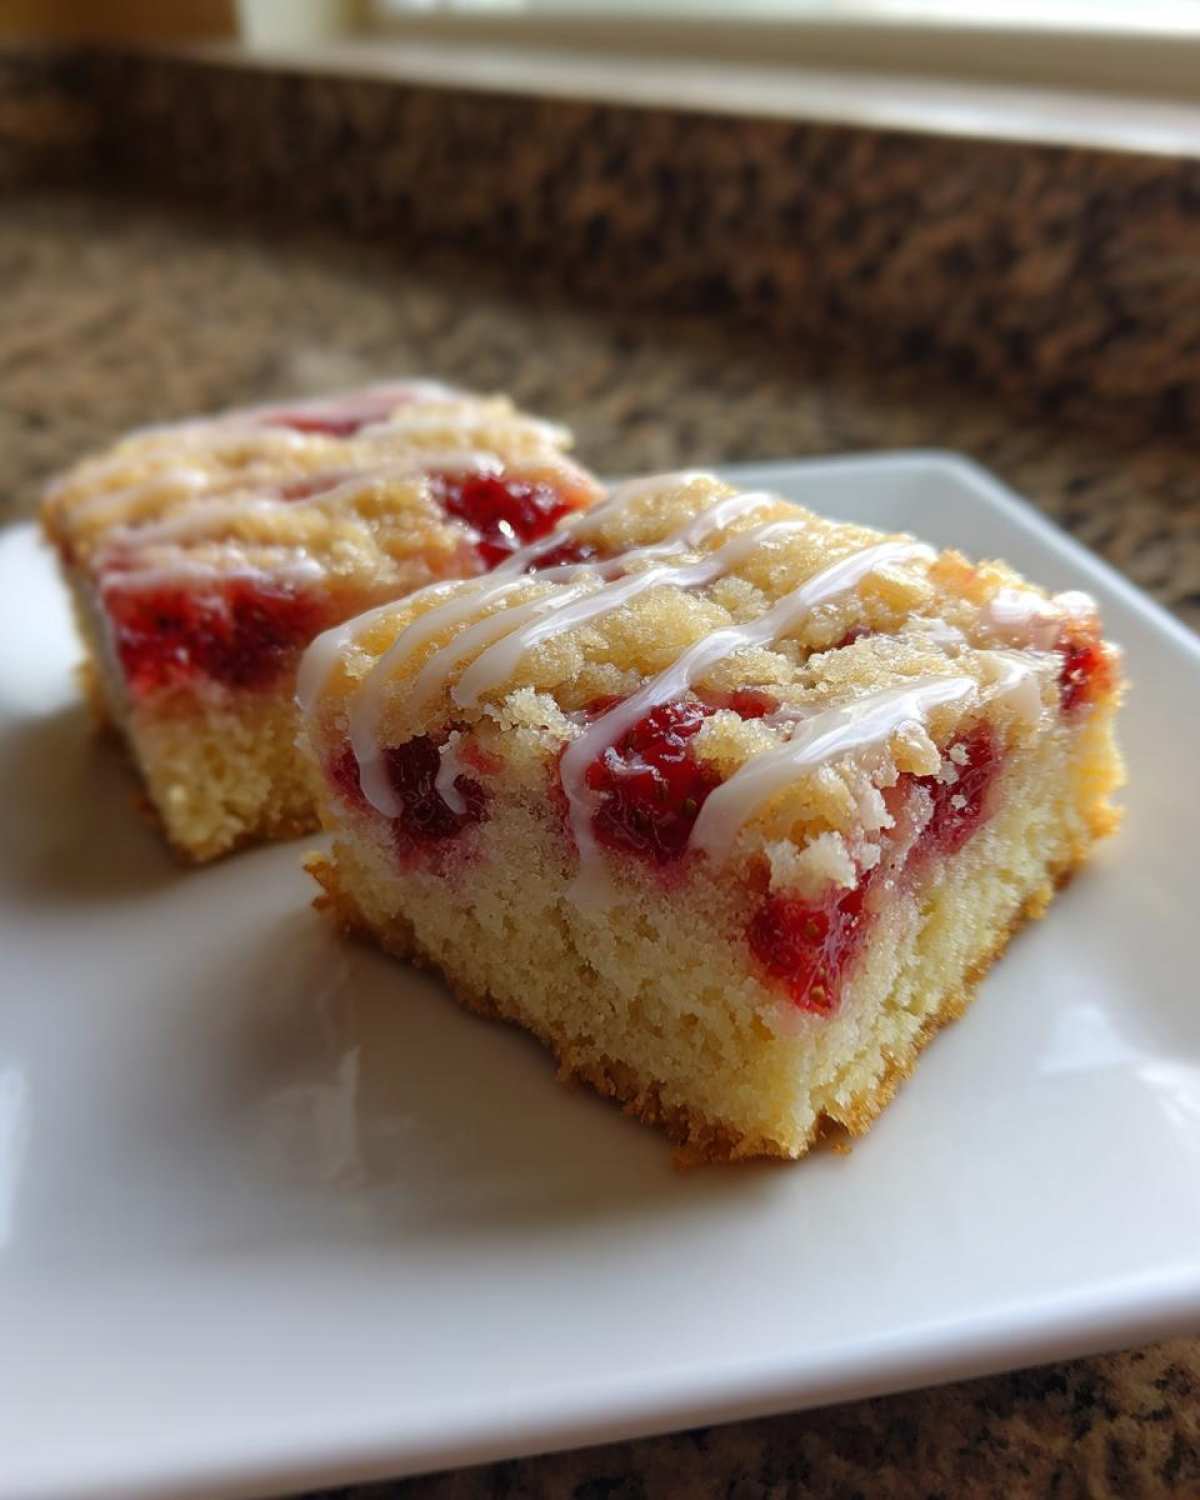
Tips for Success with Your Strawberry Shortcake Bars
Even though this is one of my most reliable recipes for Summer Strawberry Bar Recipe, I’ve picked up a few small tricks over the years that make these Strawberry Shortcake Bars foolproof. A little preparation goes a long way, especially when dealing with juicy fruit and a buttery shortbread base. I love making a batch of these when I’ve been practicing my zesty lemon cake because using those fresh citrus notes really boosts the berries!
- If you like a really, really firm crust that won’t budge, try chilling that two-thirds portion of dough for about 15 minutes before you press it into the pan. It seems like an extra step, but it helps lock that buttery flavor in place.
- Don’t be tempted to skip the lemon juice in the filling! It doesn’t make the bars taste tart, but it brightens up the sweetness of the strawberries wonderfully.
- When it comes to the crumble topping, remember to keep it loose. If you pack that top layer down, you won’t get that desirable, crumbly texture we want in these bars.
- If you happen to be baking in the middle of winter and can’t get great fresh berries, that’s totally fine! Just use frozen ones, but make sure you don’t thaw them first. Toss them straight from the freezer into the sugar mixture, and bump that cornstarch up to 3 tablespoons just to handle the extra moisture.
Ingredient Notes and Substitutions for Layered Strawberry Shortcake Dessert
Let’s pause for a second on the ingredients, especially the fruit, because that’s the heart of these Layered Strawberry Shortcake Dessert bars. I am adamant about using fresh strawberries here if you can get them. They just have a brighter flavor after baking, and you get that wonderful juiciness without excess liquid.
However, I know life happens, and sometimes the freezer stash is calling! If you’re relying on frozen berries, don’t sweat it too much. Just remember what I mentioned in my tips: toss them in straight from the freezer and plan on adding that extra tablespoon of cornstarch. That little bit of thickening power keeps everything perfect.
Also, when tackling any buttery dessert like this, quality matters. I always use unsalted butter so I can control the salt level myself. For more proof on why quality ingredients make all the difference in baking, you should really check out the precision I use when I make my famous chocolate babka—it’s all about respecting the core components!
Storage and Make Ahead Strawberry Bars
The best part about these Make Ahead Strawberry Bars is that they are sturdy enough to bake in advance! You absolutely can bake these a day before your party, let them cool completely, and then store them covered on the counter overnight. If you’re looking past next-day service, though, they really need to chill out in the fridge—that keeps the strawberry base from breaking down.
If you’re worried about that glaze getting sticky, just wait! Bake them fully, cool them, and wrap the whole thing tightly. Then, the next day, pull them out, glaze them, let that set up, and slice. It’s perfect for planning ahead. For more great ideas on no-fuss, make-ahead desserts, you can look at my recipe for refrigerator cake slices!
Serving Suggestions for Your Sweet Strawberry Treats
So you’ve got these perfect, shimmering Sweet Strawberry Treats sitting on the cooling rack, sliced just beautifully thanks to all that patience! Now, how do you serve them up? While grabbing a square straight from the pan is totally acceptable (I do it all the time!), sometimes you want to dress nature’s candy up a little bit.
If you are serving these straight after they’ve cooled, a simple dusting of powdered sugar over the glaze you already added takes them up a notch visually. But to truly honor the “shortcake” name, you have to hit those creamy notes!
My personal favorite way to serve these—especially if they are still slightly cool from the fridge—is topping each bar with a modest dollop of lightly sweetened whipped cream. It instantly brings back that classic shortcake mouthfeel while keeping the bar structure intact. Vanilla bean ice cream is an equally fantastic choice, letting the warm spice notes from the crust mingle with the cold creaminess. Honestly, whatever you pair it with, these bars are rich enough to stand on their own, but who are we kidding, who doesn’t love a little ice cream on the side? For some other ideas on pairing flavors, sometimes I get inspired by the brightness I use in my creamy lemon pasta recipe, which you can see right here!
Frequently Asked Questions About Strawberry Shortcake Bars
You know I love hearing your baking questions! It helps us all get better at conquering that crumb structure. Getting these Easy Strawberry Bars just right takes a tiny bit of know-how, but it’s totally manageable. Here are the things people ask me most often when they are trying this recipe for the first time. For more ways to minimize baking stress, you can check out my simple chocolate mousse recipe!
Can I use frozen strawberries in these bars?
Oh absolutely, you can! We talked about this a bit, but let me tell you the trick again. If you use frozen berries, don’t thaw them first—toss them straight into the sugar mixture. You just need to increase the cornstarch slightly, bumping it up to 3 tablespoons total. That little boost helps absorb the extra liquid released by the frozen fruit!
How do I get clean cuts when slicing the bars?
This is my number one tip for perfect presentation! You must, must, *must* let these cool completely. I mean, rock solid cool after they come out of the oven. Then, apply the glaze, let that set up (usually another 30 minutes), and *then* lift the entire slab out using those parchment paper handles before you slice. Trying to cut them warm guarantees a sticky, messy disaster!
What is the best way to store leftover Shortbread Strawberry Dessert Bars?
If you happen to have any leftovers—which I doubt, because these disappear fast!—the best place for them is the refrigerator. Keeping your Shortbread Strawberry Dessert Bars covered in the fridge keeps that berry layer firm and fresh for several days. I usually find even the leftovers taste great the next morning with a cup of coffee.
Estimated Nutritional Data for One Serving
Now, I always feel a little weird putting numbers on homemade treats because my ingredients vary slightly depending on the strawberries I grab, but I know you curious folks like to know the baseline! This data is based on recipe yields cut into 24 perfect squares. Remember, these are just estimates; if you use less sugar or switch to almond flour in the crust, those numbers will shift!
For anyone who wants to check out the full nutritional breakdown guidelines I follow for all my recipes, you can always review my official statement over at the disclaimer page. It gives you a good idea of how I keep things transparent around here!
- Serving Size: 1 bar
- Calories: 220
- Sugar: 18g
- Sodium: 50mg
- Fat: 12g
- Saturated Fat: 7g
- Unsaturated Fat: 5g
- Trans Fat: 0g
- Carbohydrates: 28g
- Fiber: 1g
- Protein: 2g
- Cholesterol: 25mg
Strawberry Shortcake Bars
Make sturdy, sliceable strawberry shortcake bars featuring a buttery shortbread base, a sweet strawberry filling, and a simple glaze topping.
- Prep Time: 20 min
- Cook Time: 55 min
- Total Time: 75 min
- Yield: 24 servings
- Category: Dessert
- Method: Baking
- Cuisine: American
- Diet: Vegetarian
Ingredients
- 1 cup unsalted butter, softened
- 1/2 cup granulated sugar
- 2 cups all-purpose flour
- 1/4 teaspoon salt
- 4 cups fresh strawberries, hulled and sliced
- 1/2 cup granulated sugar (for strawberries)
- 2 tablespoons cornstarch
- 1 tablespoon lemon juice
- 1/2 cup powdered sugar (for glaze)
- 2 tablespoons milk or water (for glaze)
Instructions
- Preheat your oven to 350°F (175°C). Line a 9×13 inch baking pan with parchment paper, leaving an overhang for easy removal.
- Prepare the crust: In a medium bowl, cream together the softened butter and 1/2 cup sugar until light. Mix in the flour and salt until a crumbly dough forms.
- Press two-thirds of the dough evenly into the bottom of the prepared pan to form the crust. Bake for 15 minutes.
- Prepare the filling: While the crust bakes, gently toss the sliced strawberries with 1/2 cup sugar, cornstarch, and lemon juice in a separate bowl. Let this sit for 5 minutes.
- Pour the strawberry mixture evenly over the partially baked crust.
- Crumble the remaining one-third of the dough over the strawberry layer.
- Bake for 35 to 40 minutes, or until the topping is golden brown and the filling is bubbly.
- Let the bars cool completely in the pan on a wire rack. This is important for clean slicing.
- Prepare the glaze: Whisk together the powdered sugar and milk until smooth. Drizzle the glaze over the cooled bars.
- Once the glaze sets, use the parchment overhang to lift the bars out and cut them into squares.
Notes
- For a firmer crust, chill the dough for 15 minutes before pressing it into the pan.
- If using frozen strawberries, do not thaw them first; increase the cornstarch slightly to 3 tablespoons.
- These bars are best stored covered in the refrigerator if not serving the same day.
Nutrition
- Serving Size: 1 bar
- Calories: 220
- Sugar: 18g
- Sodium: 50mg
- Fat: 12g
- Saturated Fat: 7g
- Unsaturated Fat: 5g
- Trans Fat: 0g
- Carbohydrates: 28g
- Fiber: 1g
- Protein: 2g
- Cholesterol: 25mg