

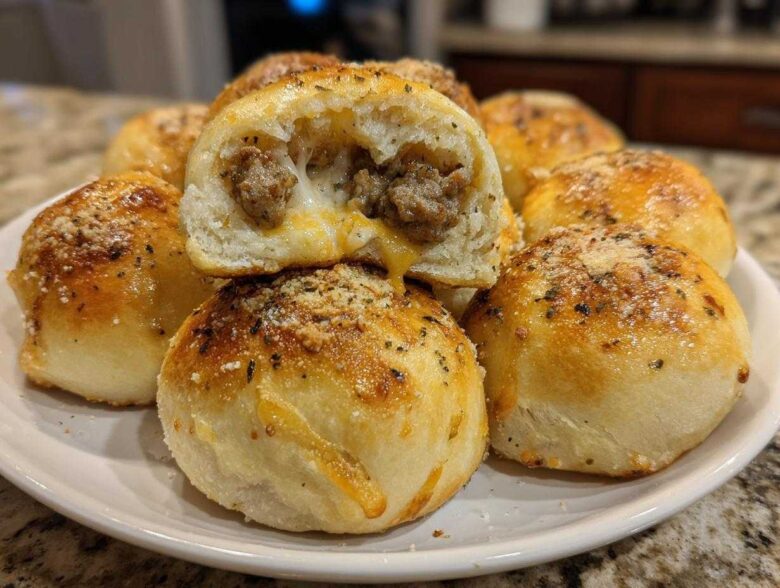
If you’re anything like me, whenever big game day rolls around, or you suddenly realize you need a party appetizer five minutes ago, your brain just freezes up. Traditional appetizers take *forever*, right? Well, stop stressing! I want to introduce you to the absolute easiest, cheesiest **pizza bombs** you will ever make. Seriously, these are lifesavers. Last weekend, my brother showed up unexpectedly, and I needed game day snacks fast. I whipped up a batch of these little dough pockets using nothing but refrigerated biscuit dough and some pantry staples, and everyone went wild!
They bake up golden, they’re perfectly sized for dipping, and the bubbling cheese inside is just pure magic. Trust me on this one; these quick savory snacks are about to become your new go-to. You can find the full details over at my main recipe index, but let’s talk about why they work so perfectly!
Why You Will Make These Easy Pizza Bombs Recipe
Honestly, I’d make these even if I wasn’t in a hurry because they are just that good! When you need a fantastic appetizer fast, nothing beats the payoff of these little stuffed bites. You just need to check out why I keep coming back to this **homemade pizza bombs recipe** all the time:
- They are unbelievably fast! Prep time is seriously under 20 minutes if you’re moving. I throw them in the oven right after the preheating finishes.
- We are using refrigerated biscuit dough. Yes, you read that right! No yeast rising drama here, which is half the battle won when you’re craving pizza flavors ASAP.
- The cheese pull factor is just insane. We use mozzarella, and when it melts out slightly from the seams? Perfection. They are the ultimate **cheesy dough balls recipe**!
- They freeze really well, which means I can make a huge batch ahead of time for impromptu parties. That’s maximum efficiency!
- They taste exactly like your favorite takeout pizza, just miniaturized and stuffed inside fluffy, golden pockets. Who can resist that?
- This is a highly adaptable recipe. You can customize the fillings endlessly, making them perfect for picky eaters or whatever leftovers you have lying around. Check out all my appetizer ideas over at my snack category!
Essential Ingredients for Perfect Pizza Bombs
The best part about these cheesy dough balls is that they use things you probably already have in your fridge, making them a fantastic option when you realize you’re hosting people in an hour! We aren’t messing around with complicated yeast doughs here; we are going straight for that fantastic canned biscuit dough. That’s our shortcut straight to deliciousness. But you need to use quality fillings so the flavor shines through the bread.
Here is what you need to grab before you get started. If you want to compare this to my garlic butter breadsticks to see what other quick bakes I love, check out that recipe here!
- One whole can of refrigerated biscuit dough (the standard size, usually 10 biscuits). Don’t grab the flaky kind; we need the fluffy ones for sealing!
- About ½ cup of your favorite pizza sauce. You don’t need much, just a teaspoon per bomb.
- One cup of shredded mozzarella cheese. Make sure it’s low-moisture, full-fat stuff for the best melt.
- About ¼ cup of cooked Italian sausage or mini pepperoni—crumbled up small is best!
- Parmesan cheese for sprinkling on top – the grated kind works perfectly.
- Garlic powder, because everything pizza-flavored needs a little extra kick.
- One egg mixed with a tiny bit of water for an egg wash to get that beautiful golden color.
How to Prepare Your Supreme Pizza Bomb Variations
Okay, this is where we earn our stripes, folks! The secret to turning a simple dough circle into a perfect, leak-proof pizza bomb is all about restraint and sealing. If you overstuff these, the cheese is going to bubble out while baking, and you’ll end up with sad, flat pizza crackers instead of glorious, stuffed dough balls. We want plump, puffy spheres of joy, not pizza lava spills!
This recipe is great for using up little bits of things. I often toss in finely chopped peppers or black olives if I’m making supreme pizza bomb variations, but the rule stays the same: less is more inside! Get your fillings ready, keep everything cold, and let’s get wrapping. If you love quick, handheld pizza action, you might also want to check out my pizza quesadilla recipe for more portable fun.
Dough Prep and Filling Placement for Pizza Bombs
First things first: separate your 10 biscuits and lay them on a lightly floured surface. Now, gently use your fingers or a rolling pin—I just use my palm—to flatten each one into a rough circle, maybe 4 or 5 inches wide. Don’t mangle them, though; we need the edges intact for sealing. Place just one small teaspoon of pizza sauce right in the center. Seriously, just one! Then you sprinkle your mozzarella and meat over the sauce, making sure none of the filling touches the outer inch of the dough. That clean edge is crucial for a good seal!
The Critical Step: Sealing Your Cheesy Dough Balls Recipe
This is the make-or-break moment for your amazing **cheesy dough balls recipe**. You need to gather all the dough edges up over the filling, like you’re closing a little money bag. Pinch those seams together *hard*. I mean, squeeze them until you feel them fuse. If you’re nervous about leakage, you can even gently roll that newly sealed ball between your palms for a few seconds to smooth out any weak spots. Once they are sealed tight—seam side down, always—place them on your prepared baking sheet. They should look like perfect, little golf balls ready for the oven!
Cooking Methods for the Best Pizza Bombs
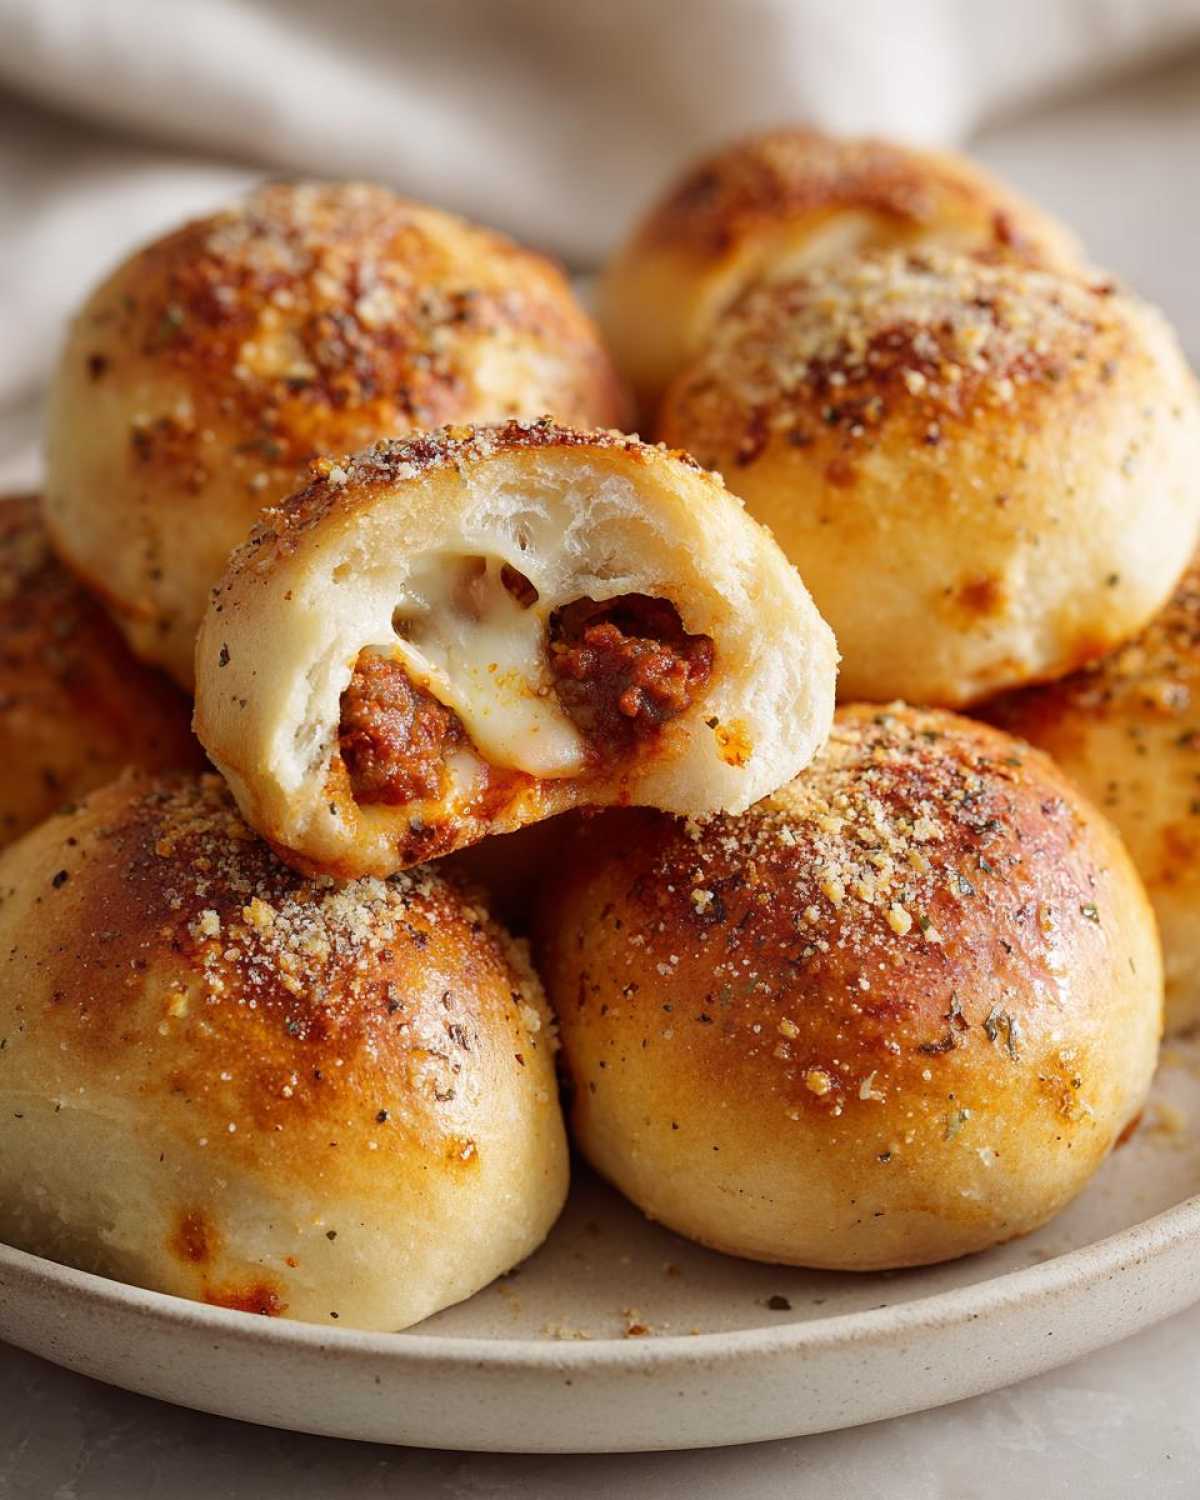
So, you’ve got your little dough pockets sealed up tight, looking beautiful! Now comes the fun part: cooking them. I usually stick to the oven because I can make a huge batch all at once, which is handy when everyone piles in wanting a snack. But if you’re only making a small batch or just really want that super crispy texture, the air fryer is your best friend. Don’t worry if you don’t have one, though; the oven turns out fantastic, golden results too!
For the oven, we’re baking them at 375°F. That temperature gives the dough just enough heat to puff up beautifully and cook through without burning the outside before the center melts. You’re looking at about 12 to 15 minutes. Make sure you use that egg wash we talked about; it’s what gives them that gorgeous, glossy, restaurant-style finish. If you happen to have leftover melted garlic butter from another recipe, feel free to skip the egg wash and brush them generously with butter instead for maximum flavor!
If you’re heading over to your air fryer, you’ll want to turn the temperature down a bit because those things cook fast and hot! I find 350°F works best for these little guys. For my full guide on air frying, you can check out my air fryer shrimp recipe, but the pizza bombs only need about 8 to 10 minutes.
Air Fryer Pizza Bombs Instructions for Crispiness
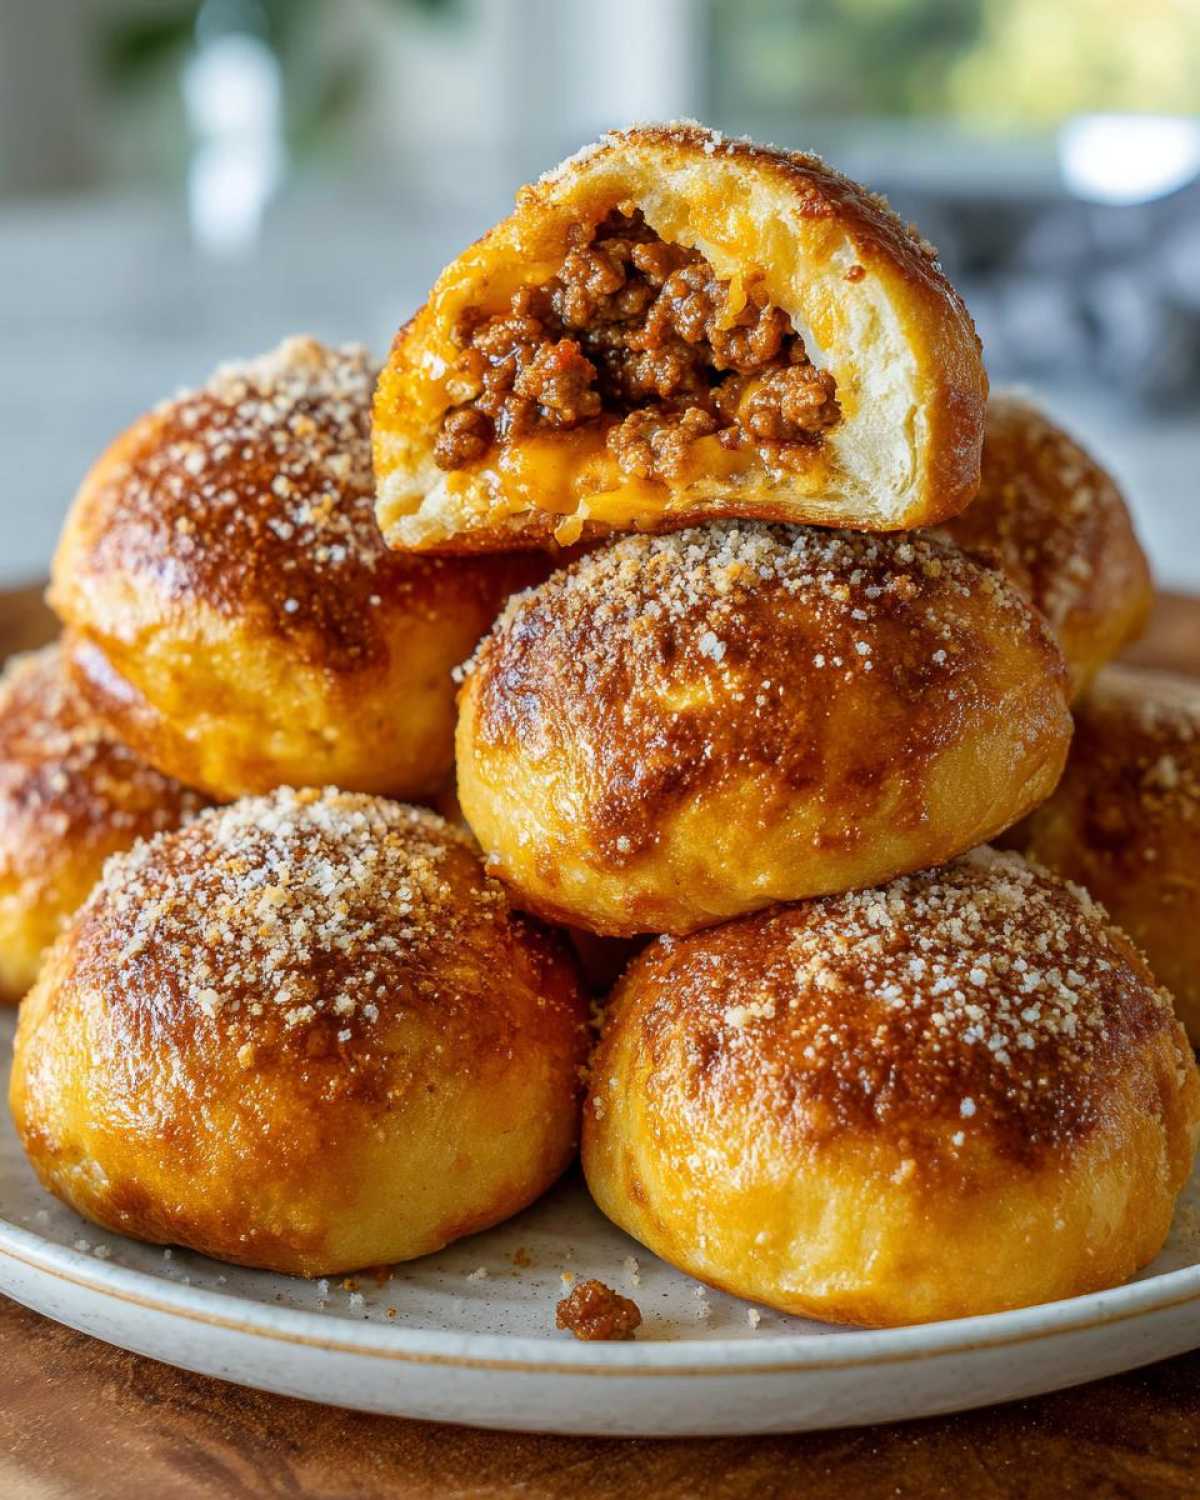
When using the air fryer for these **stuffed pizza dough bites**, you must keep an eye on them. Because the heat circulates so aggressively, they can go from golden brown to burnt charcoal surprisingly quickly! Place them in a single layer in the basket—you’ll definitely have to cook in batches unless you have a giant model. After about 6 minutes, give the basket a gentle shake or flip them over. You want them deeply golden and totally cooked through, which usually happens around the 9-minute mark. They come out so crispy, it’s almost addictive!
Ingredient Notes and Substitutions for Homemade Pizza Bombs Recipe
Now, most of you are following along with my biscuit dough shortcut because it’s the quickest way to get these cheesy delights on the table. But I know some of you serious bakers out there have homemade pizza dough just waiting to be used! If you go that route, you’ll want to let your dough proof a little longer, and you’ll need to roll it out much thinner than the canned biscuits because the homemade stuff tends to puff up more dramatically. Just make sure you still trim the dough circles down to about 4 inches.
And what about those fillings? If you want to make true **Supreme pizza bomb variations**, throw in finely chopped onions, green peppers, and mushrooms, but remember the golden rule: drain all watery veggies thoroughly first! Soggy fillings mean wet dough, and we cannot have leaks. If you’re trying out different kinds of dough, like crescent rolls, they work in a pinch but they are thinner, so you have to be extra careful sealing them up. I’ve even found ways to make these work for school lunches using my pizza lunchables guide, so these flavors are versatile!
Serving Suggestions and Best Dipping Sauces for Pizza Bombs
Once those little guys come out of the oven looking perfectly browned and puffed—and honestly, trying to wait the five minutes for them to cool down is the hardest part of this whole recipe—you need the perfect accompaniment. These pizza bombs aren’t just for parties; they are fantastic **game day snacks**, movie night fare, or even a super quick, fun family dinner idea when you’re low on energy.
We all know the classic choice is warm pizza sauce for dipping. It’s nostalgic, and it works! But why stop there when you’ve already done the hard work of making these incredible stuffed bites?
I always prepare at least two different dipping options because people go crazy for them. My absolute favorite is a creamy, zesty ranch—it cuts through the richness of the cheese perfectly. A close second is a really good garlic butter. If you want something truly different that cuts through the richness, you *have* to try this recipe for my Cilantro Lime Sauce; it’s surprisingly amazing with the savory sausage and pepperoni!
Other must-haves at my house include:
- Marinara Sauce (spiked with a tiny bit of red pepper flake if you like heat!)
- Whipped Ricotta mixed with Italian seasoning.
- Simple Sour Cream seasoned with onion powder and a dash of Worcestershire sauce.
Seriously, have fun with it! The dough is just the perfect vessel for soaking up whatever delicious sauce you put in front of it.
Storage and Reheating Instructions for Leftover Pizza Bombs
If you manage to have any of these leftover after a party—which, let’s be honest, is rare in my house—don’t fret! They are still pretty tasty the next day, but they lose that perfect fresh-out-of-the-oven fluff unless you reheat them properly. Storing the pizza bombs correctly makes reheating so much better later on.
You can keep them in an airtight container in the refrigerator for up to three days. I’ve found that if you just leave them on the counter, the dough gets a little chewy and tough, and nobody wants that for their **quick savory snack** the next morning!
For bringing them back to their former glory, you absolutely need to use dry heat. Microwaving them is a last resort because it makes the bread soft and spongy in a bad way. If you check out some of my other freezer-friendly recipes, like these make-ahead breakfast sandwiches, you’ll see I always recommend oven or air fryer reheating!
To reheat in the oven, just place them on a baking sheet at about 350°F for about five to seven minutes, or until they are warmed through and the cheese is soft again. If you’re using the air fryer, which is my preferred method for leftovers, drop the temperature to 325°F and only cook them for about four minutes. That little burst of hot air crisps the exterior right back up without overheating the cheesy center too much. They’ll taste almost as good as fresh!
Frequently Asked Questions About Making Pizza Bombs
I’ve learned so much perfecting this recipe over the years, mostly through trial and error—and by error, I mean eating the cheesy failures that leaked out onto the baking sheet! But seriously, I get asked the same few questions about these **pizza bombs** all the time, so I figured I’d put the most common ones right here for you. Hopefully, this clears up any last doubts before you dive into making these! If you have more questions, feel free to reach out to me through my contact page!
How do I consistently stop my pizza bombs from leaking?
Ah, the eternal struggle! Leaking almost always happens because you overfilled the dough, or you didn’t seal the edges tightly enough. Remember what I said about keeping the fillings away from the perimeter of the dough circle? That’s key! Also, make sure that when you pinch the seams together, you are really squeezing hard to fuse the dough closed. A gentle pinch won’t hold against that hot, gooey mozzarella!
Can I use crescent roll dough instead of biscuit dough for these cheesy dough balls?
You definitely can! Crescent roll dough is much thinner, so you need to be more gentle when flattening it out, and you might need to use slightly less filling. Since crescent dough is already cut into triangles, you technically have to wrap them more like a burrito than just pinching the top shut. They’re still great, but for the fluffiest result, I stick to the regular canned biscuits we used in the main **homemade pizza bombs recipe**.
What is the absolute best cheese blend for these appetizers using biscuit dough?
Mozzarella is non-negotiable because of that famous stretch, but to add a little flavor punch, try mixing your mozzarella with a quarter cup of shredded provolone or Monterey Jack. Provolone melts beautifully and adds a little tiny bit of tanginess that is just wonderful. You can even grate a little fresh Parmesan right into the filling mix, not just on top, for an extra salty kick!
Are there any good vegetarian options for supreme pizza bomb variations?
Absolutely! If you skip the sausage or pepperoni, you’ve got a great vegetarian-friendly appetizer on your hands, which I noted in the nutrition section. Besides cheese, try adding sautéed and drained mushrooms, finely chopped black olives, or some caramelized onions. If you want a savory, meaty flavor without the meat, a tablespoon of finely chopped sun-dried tomatoes works wonders!
Estimated Nutritional Data for This Quick Savory Snack
Now, I want to be super clear about this! Because these wonderful **pizza bombs** are made with store-bought dough and we can all customize what goes inside—are you using pepperoni, sausage, or going veggie?—the exact nutritional information is going to wiggle around a bit. This isn’t the kind of thing I spend hours calculating for every single variation, because frankly, they disappear too fast!
However, based on the standard recipe using biscuit dough and a small amount of meat, I’ve put together an estimate for one single bomb so you have a general idea. This is just a starting point, so take it with a grain of salt, especially if you load yours up with extra cheese! If you’re interested in other easy snacks with solid stats, check out my guide to 5-Ingredient Protein Bars.
This calculation is based on one bomb serving:
- Calories: Roughly 180
- Total Fat: Around 9 grams
- Carbohydrates: About 18 grams
- Protein: A solid 7 grams coming from all that cheesy goodness!
You’ll notice the sodium is a bit high, which is expected since we are using canned dough and cured meats, so keep that in mind if you’re tracking sodium closely. But for a fun, quick party snack, these are incredibly satisfying!
PrintEasy Homemade Pizza Bombs Recipe

Make these simple, cheesy pizza bombs using refrigerated biscuit dough for a quick appetizer or snack.
- Prep Time: 15 min
- Cook Time: 15 min
- Total Time: 30 min
- Yield: 10 servings
- Category: Appetizer
- Method: Baking
- Cuisine: American
- Diet: Vegetarian
Ingredients
- 1 (16 ounce) can refrigerated biscuit dough
- 1/2 cup pizza sauce
- 1 cup shredded mozzarella cheese
- 1/4 cup cooked, crumbled Italian sausage or pepperoni, chopped
- 1 tablespoon grated Parmesan cheese
- 1 teaspoon garlic powder
- 1 egg, beaten (for egg wash)
- 1 teaspoon water (for egg wash)
Instructions
- Preheat your oven to 375 degrees Fahrenheit. Lightly grease a baking sheet.
- Separate the biscuit dough into individual biscuits. Flatten each biscuit slightly with your fingers or a rolling pin to create a thin circle.
- Place about 1 teaspoon of pizza sauce in the center of each flattened biscuit.
- Top the sauce with a small amount of mozzarella cheese and your chosen meat topping. Do not overfill.
- Fold the edges of the dough up and over the filling, pinching the seams together tightly to seal the dough completely into a ball. Roll gently between your palms if needed to smooth the seams.
- Place the sealed dough balls seam-side down on the prepared baking sheet.
- In a small bowl, whisk together the beaten egg and water to create an egg wash. Brush the tops of the pizza bombs lightly with the egg wash.
- Sprinkle the tops with Parmesan cheese and garlic powder.
- Bake for 12 to 15 minutes, or until the dough is golden brown and cooked through.
- Remove from the oven and let cool for a few minutes before serving.
Notes
- For an air fryer method, cook at 350 degrees Fahrenheit for 8 to 10 minutes, checking frequently to prevent burning.
- If you want a crispier crust, brush the tops with melted butter instead of the egg wash.
- Serve immediately with extra pizza sauce or ranch dressing for dipping.
Nutrition
- Serving Size: 1 bomb
- Calories: 180
- Sugar: 2
- Sodium: 450
- Fat: 9
- Saturated Fat: 4
- Unsaturated Fat: 5
- Trans Fat: 0
- Carbohydrates: 18
- Fiber: 1
- Protein: 7
- Cholesterol: 20